Speed Skating and the Exposure Triangle
For fun I took my Panasonic Lumix GX85 to the Olympics. It’s a small mirrorless camera that’s surprisingly affordable and a lot of fun to use. I brought the 12–35mm kit lens to the short-track speed skating — not an ideal sports lens for distant action, but an interesting challenge. Speed skaters move incredibly fast, so I knew from the start that shutter speed would be the first thing I’d have to think about.
That leads into the exposure triangle: the three settings that control how bright or dark your image is — ISO, shutter speed, and aperture. Each changes exposure, but each also changes something else that affects the final image. Higher ISO brightens the image but adds grain. Faster shutter speed freezes motion but reduces the light hitting the sensor (making the image darker). Wider aperture (a larger hole) brightens the image and gives a shallower depth of field. Balancing these three is the whole point.
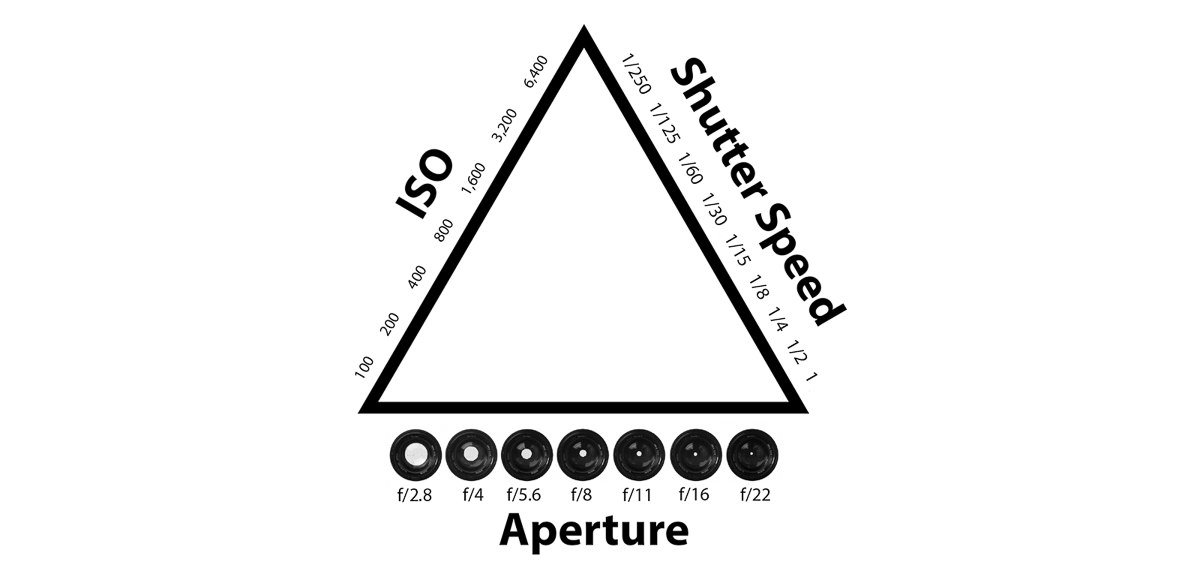
For speed skating I generally want a fast shutter speed to freeze the action and avoid motion blur. But a fast shutter makes the image darker, so I have to decide where the extra light will come from: raise ISO and risk more grain, or open the aperture and accept a shallower depth of field.
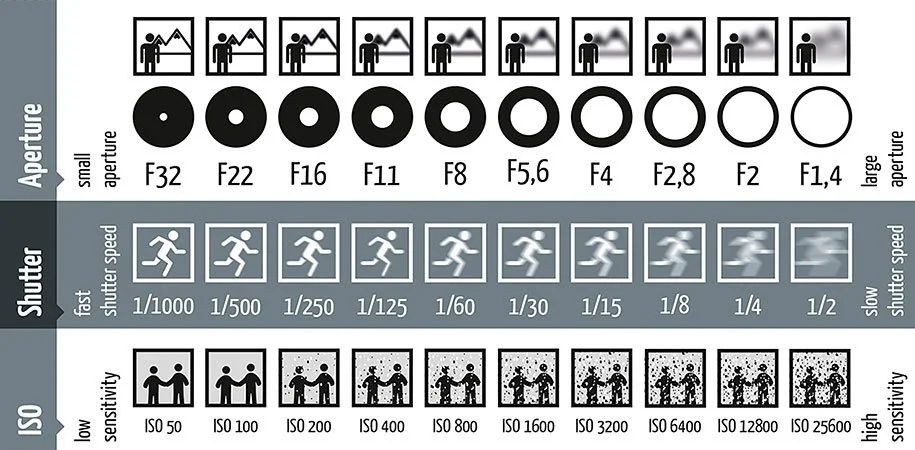
Different cameras and lenses handle high ISO differently — Lightroom’s denoise tools help, but they aren’t a perfect substitute for good exposure. If you can keep ISO as low as practical, that’s usually best, though sometimes a touch of grain can be stylistically pleasing.
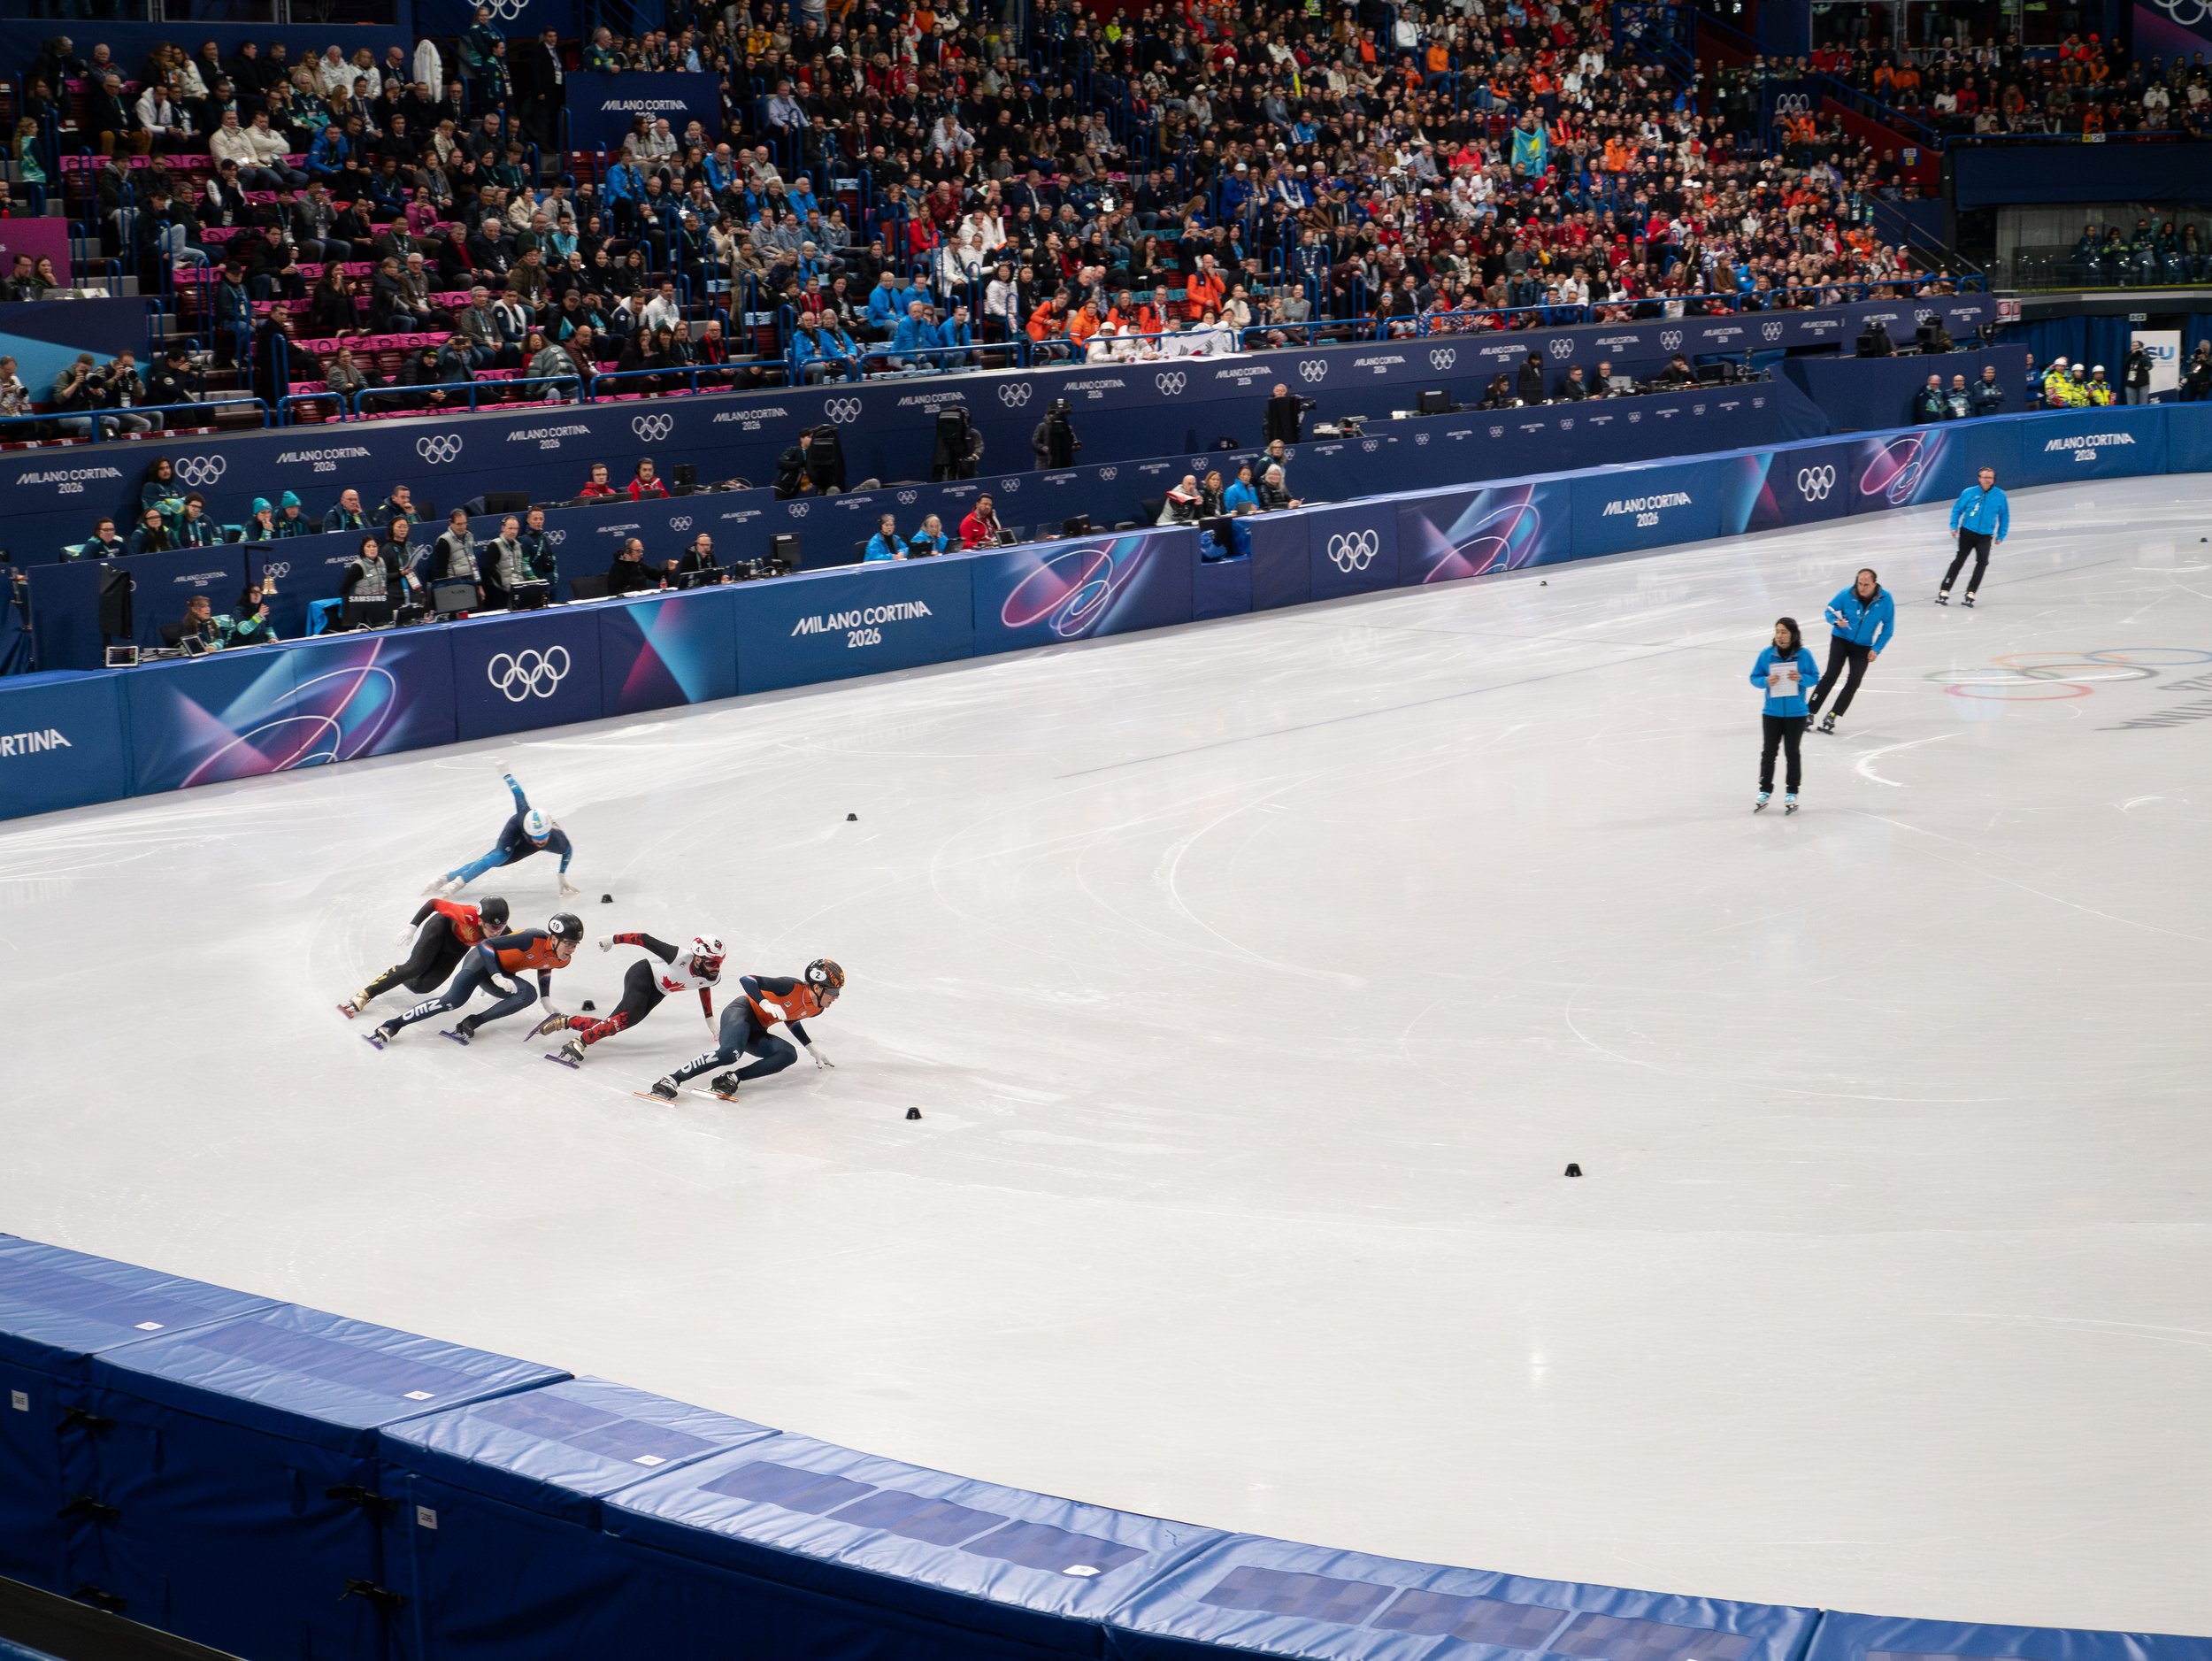
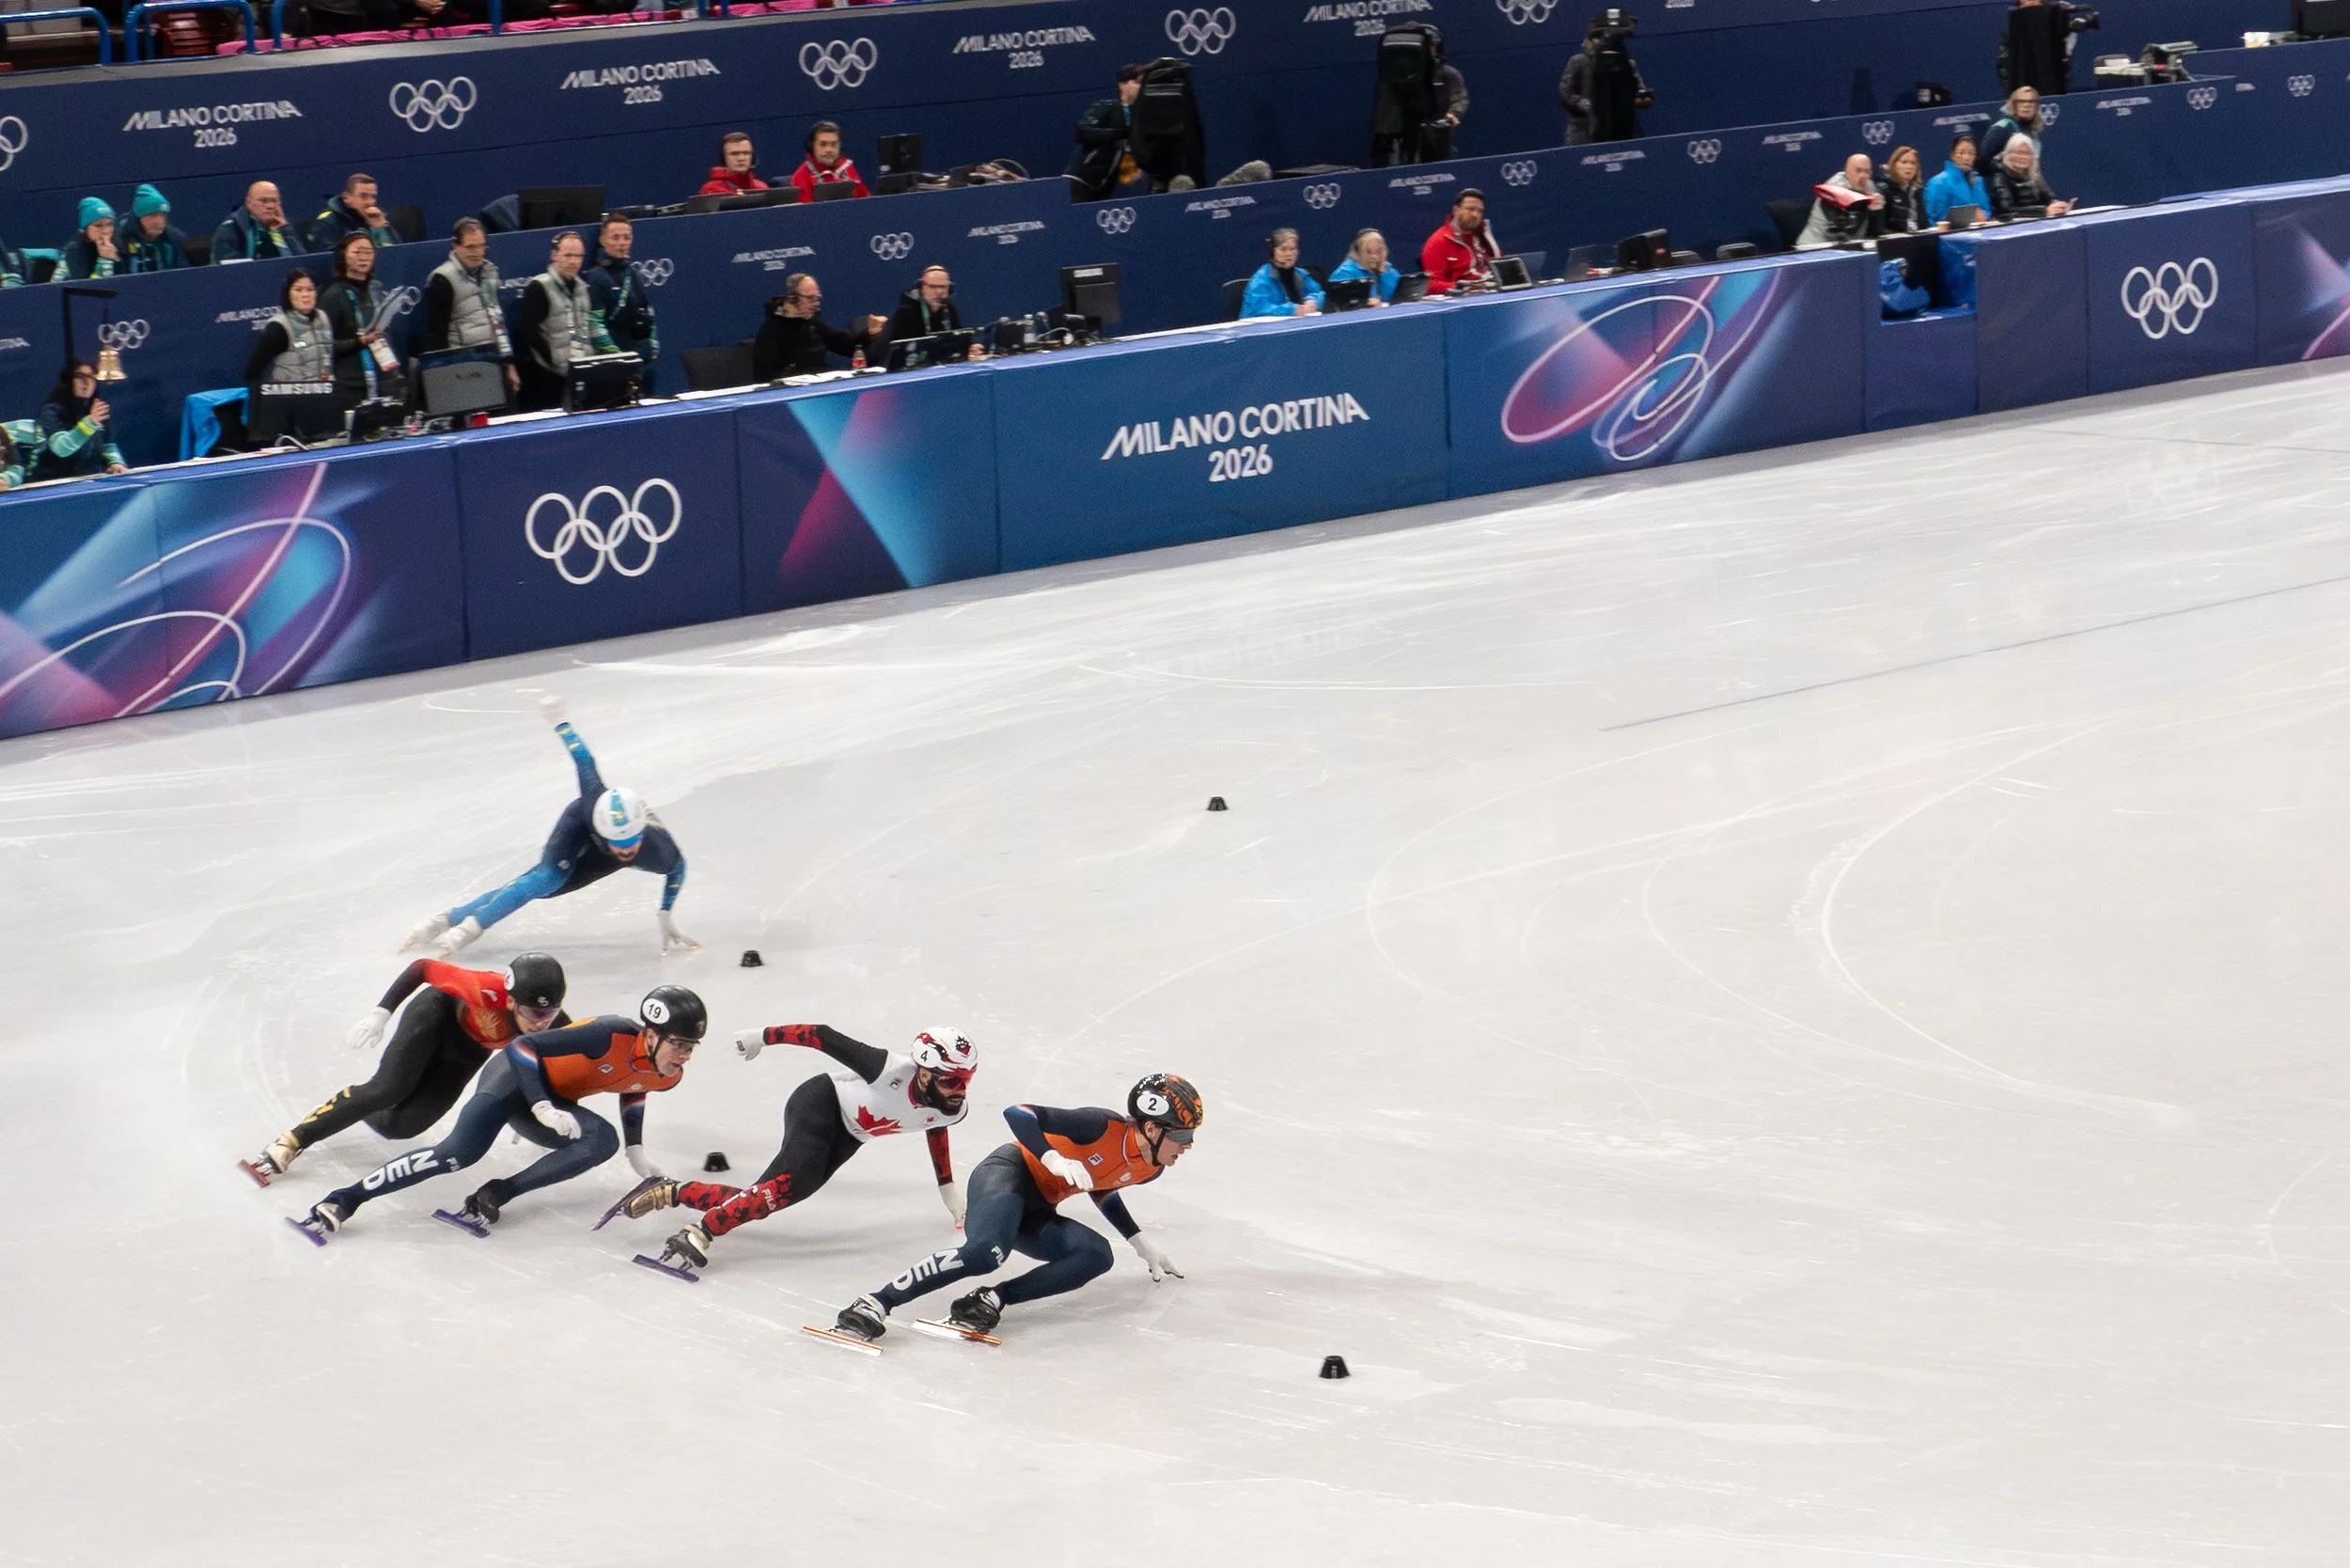
Above is the unedited image. The Settings: ISO 3200, Shutter Speed 500/sec, Aperature 5.6 and I’m shooting at 30mm (which caused problems in and of itself)
Going above 3200 ISO you’re going to get a grainy image. I was surprised that even only at 500/sec shutter speed the skaters are in focus on the turn.
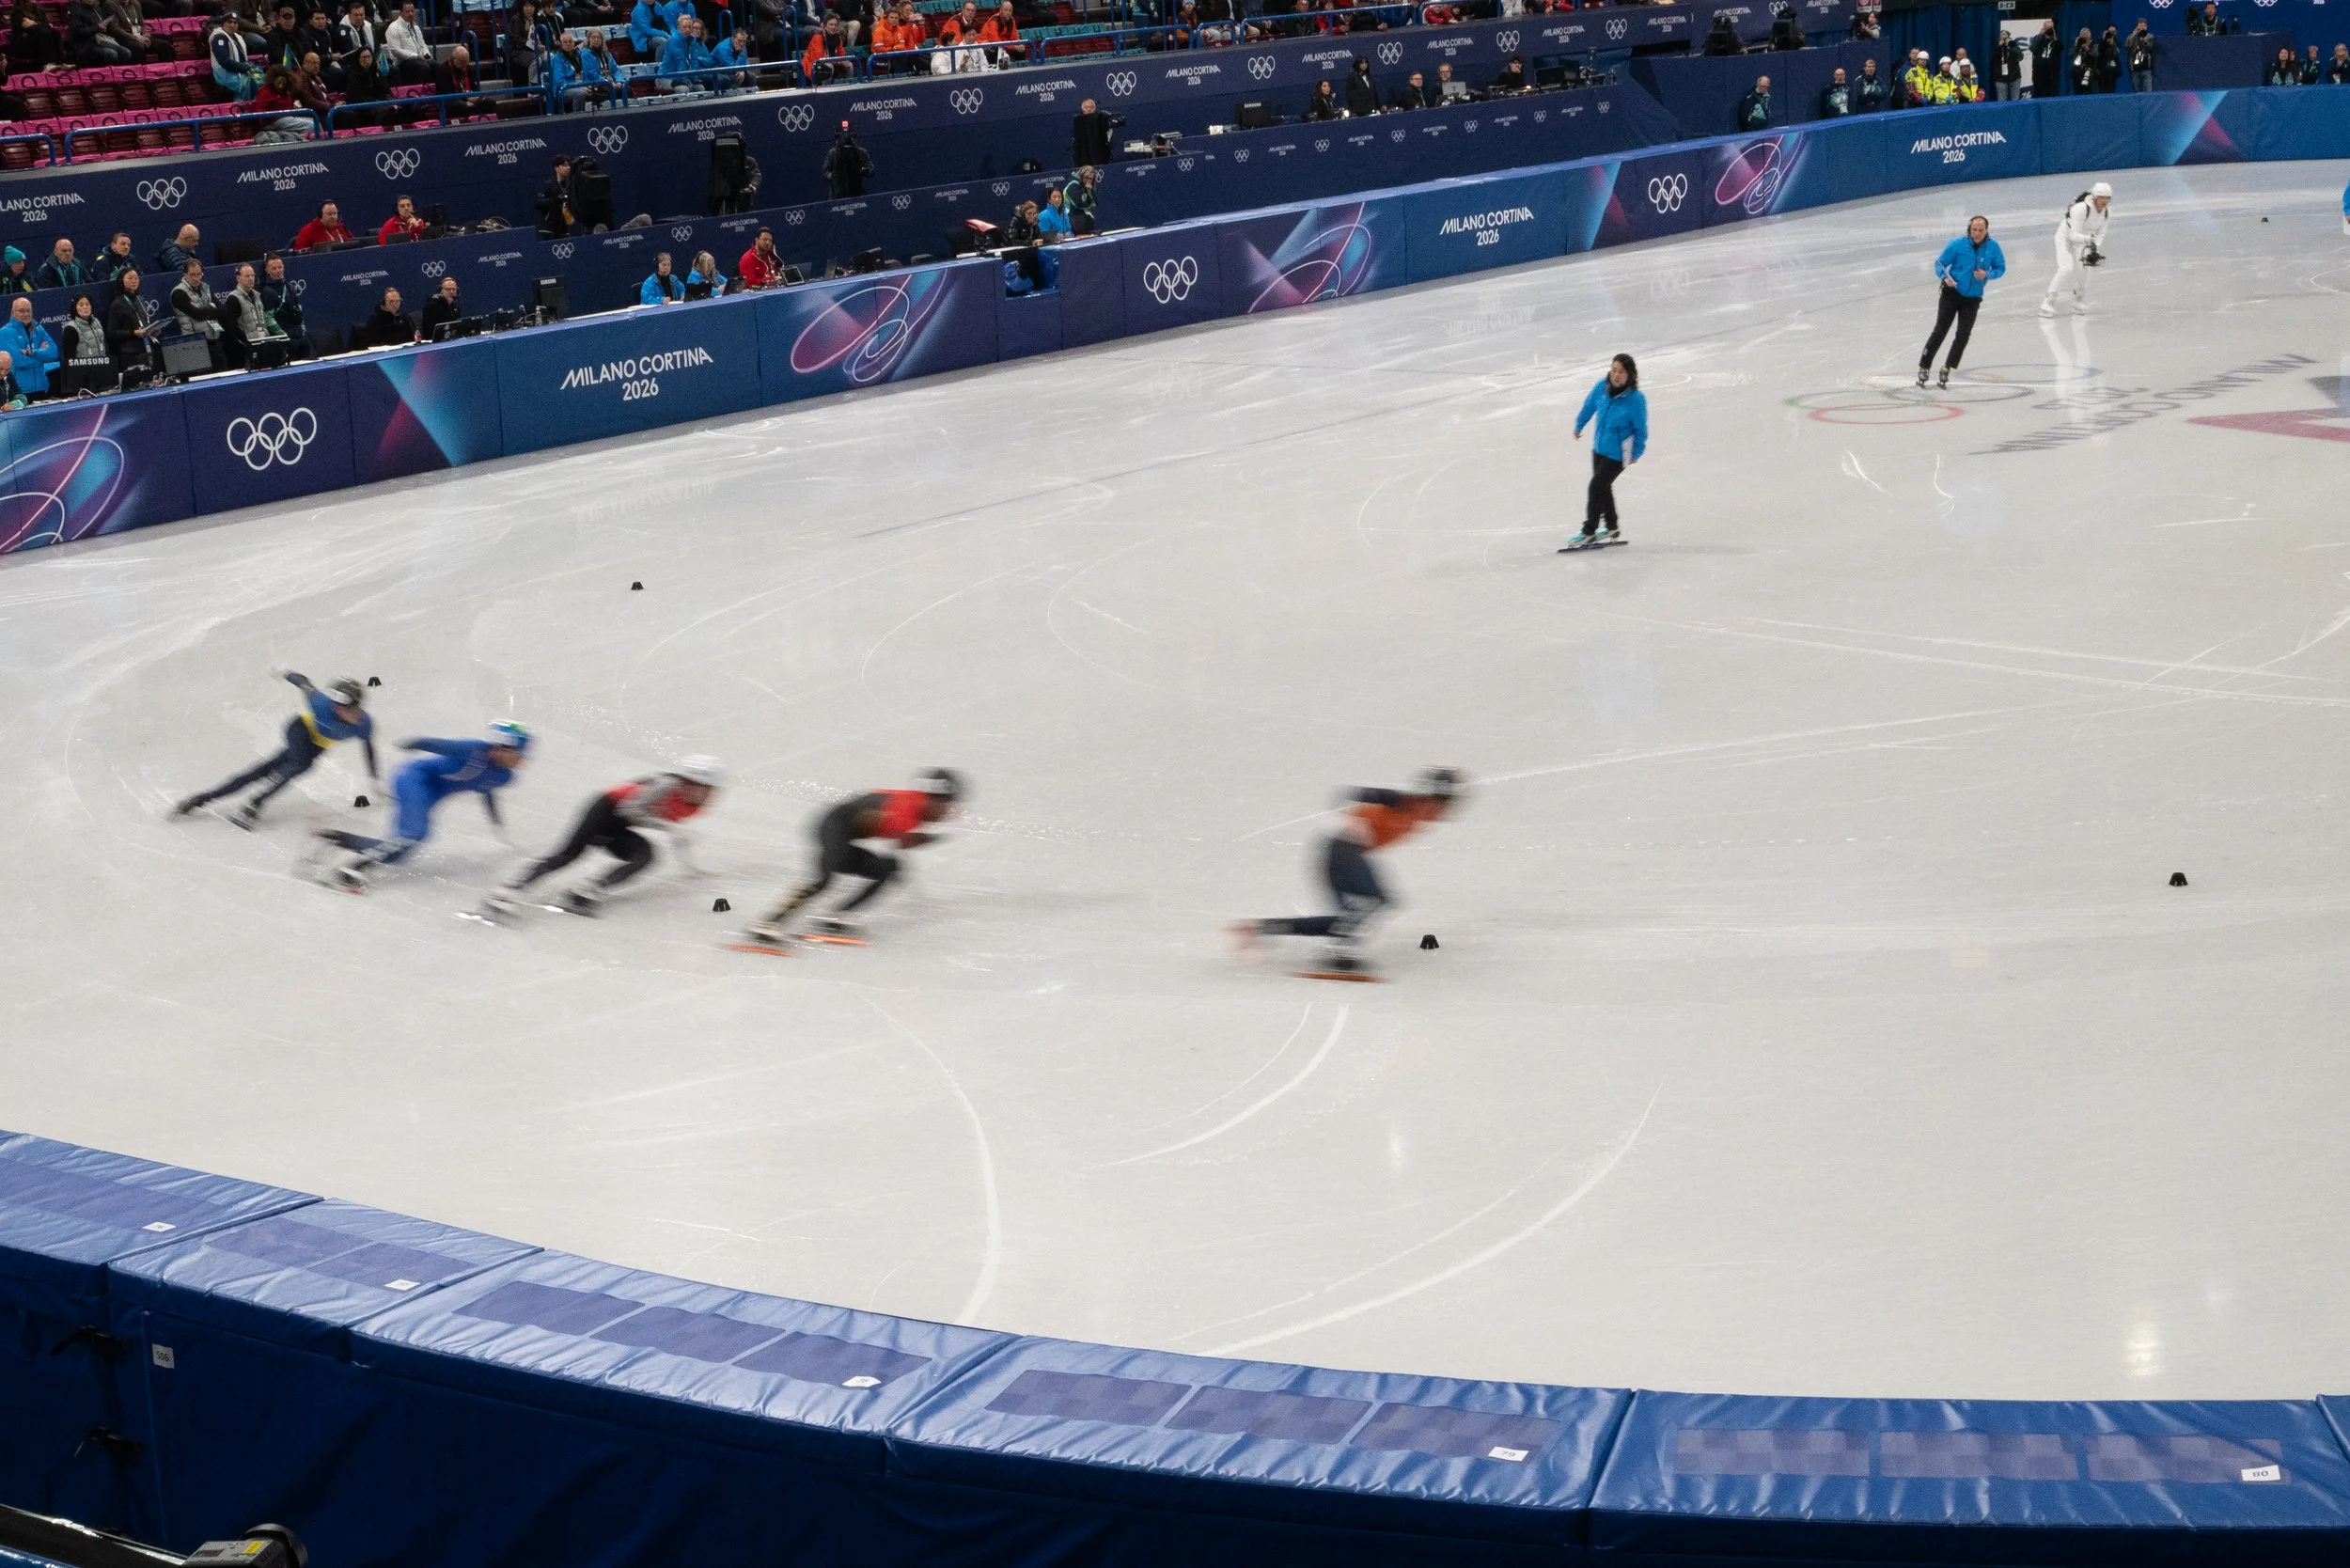
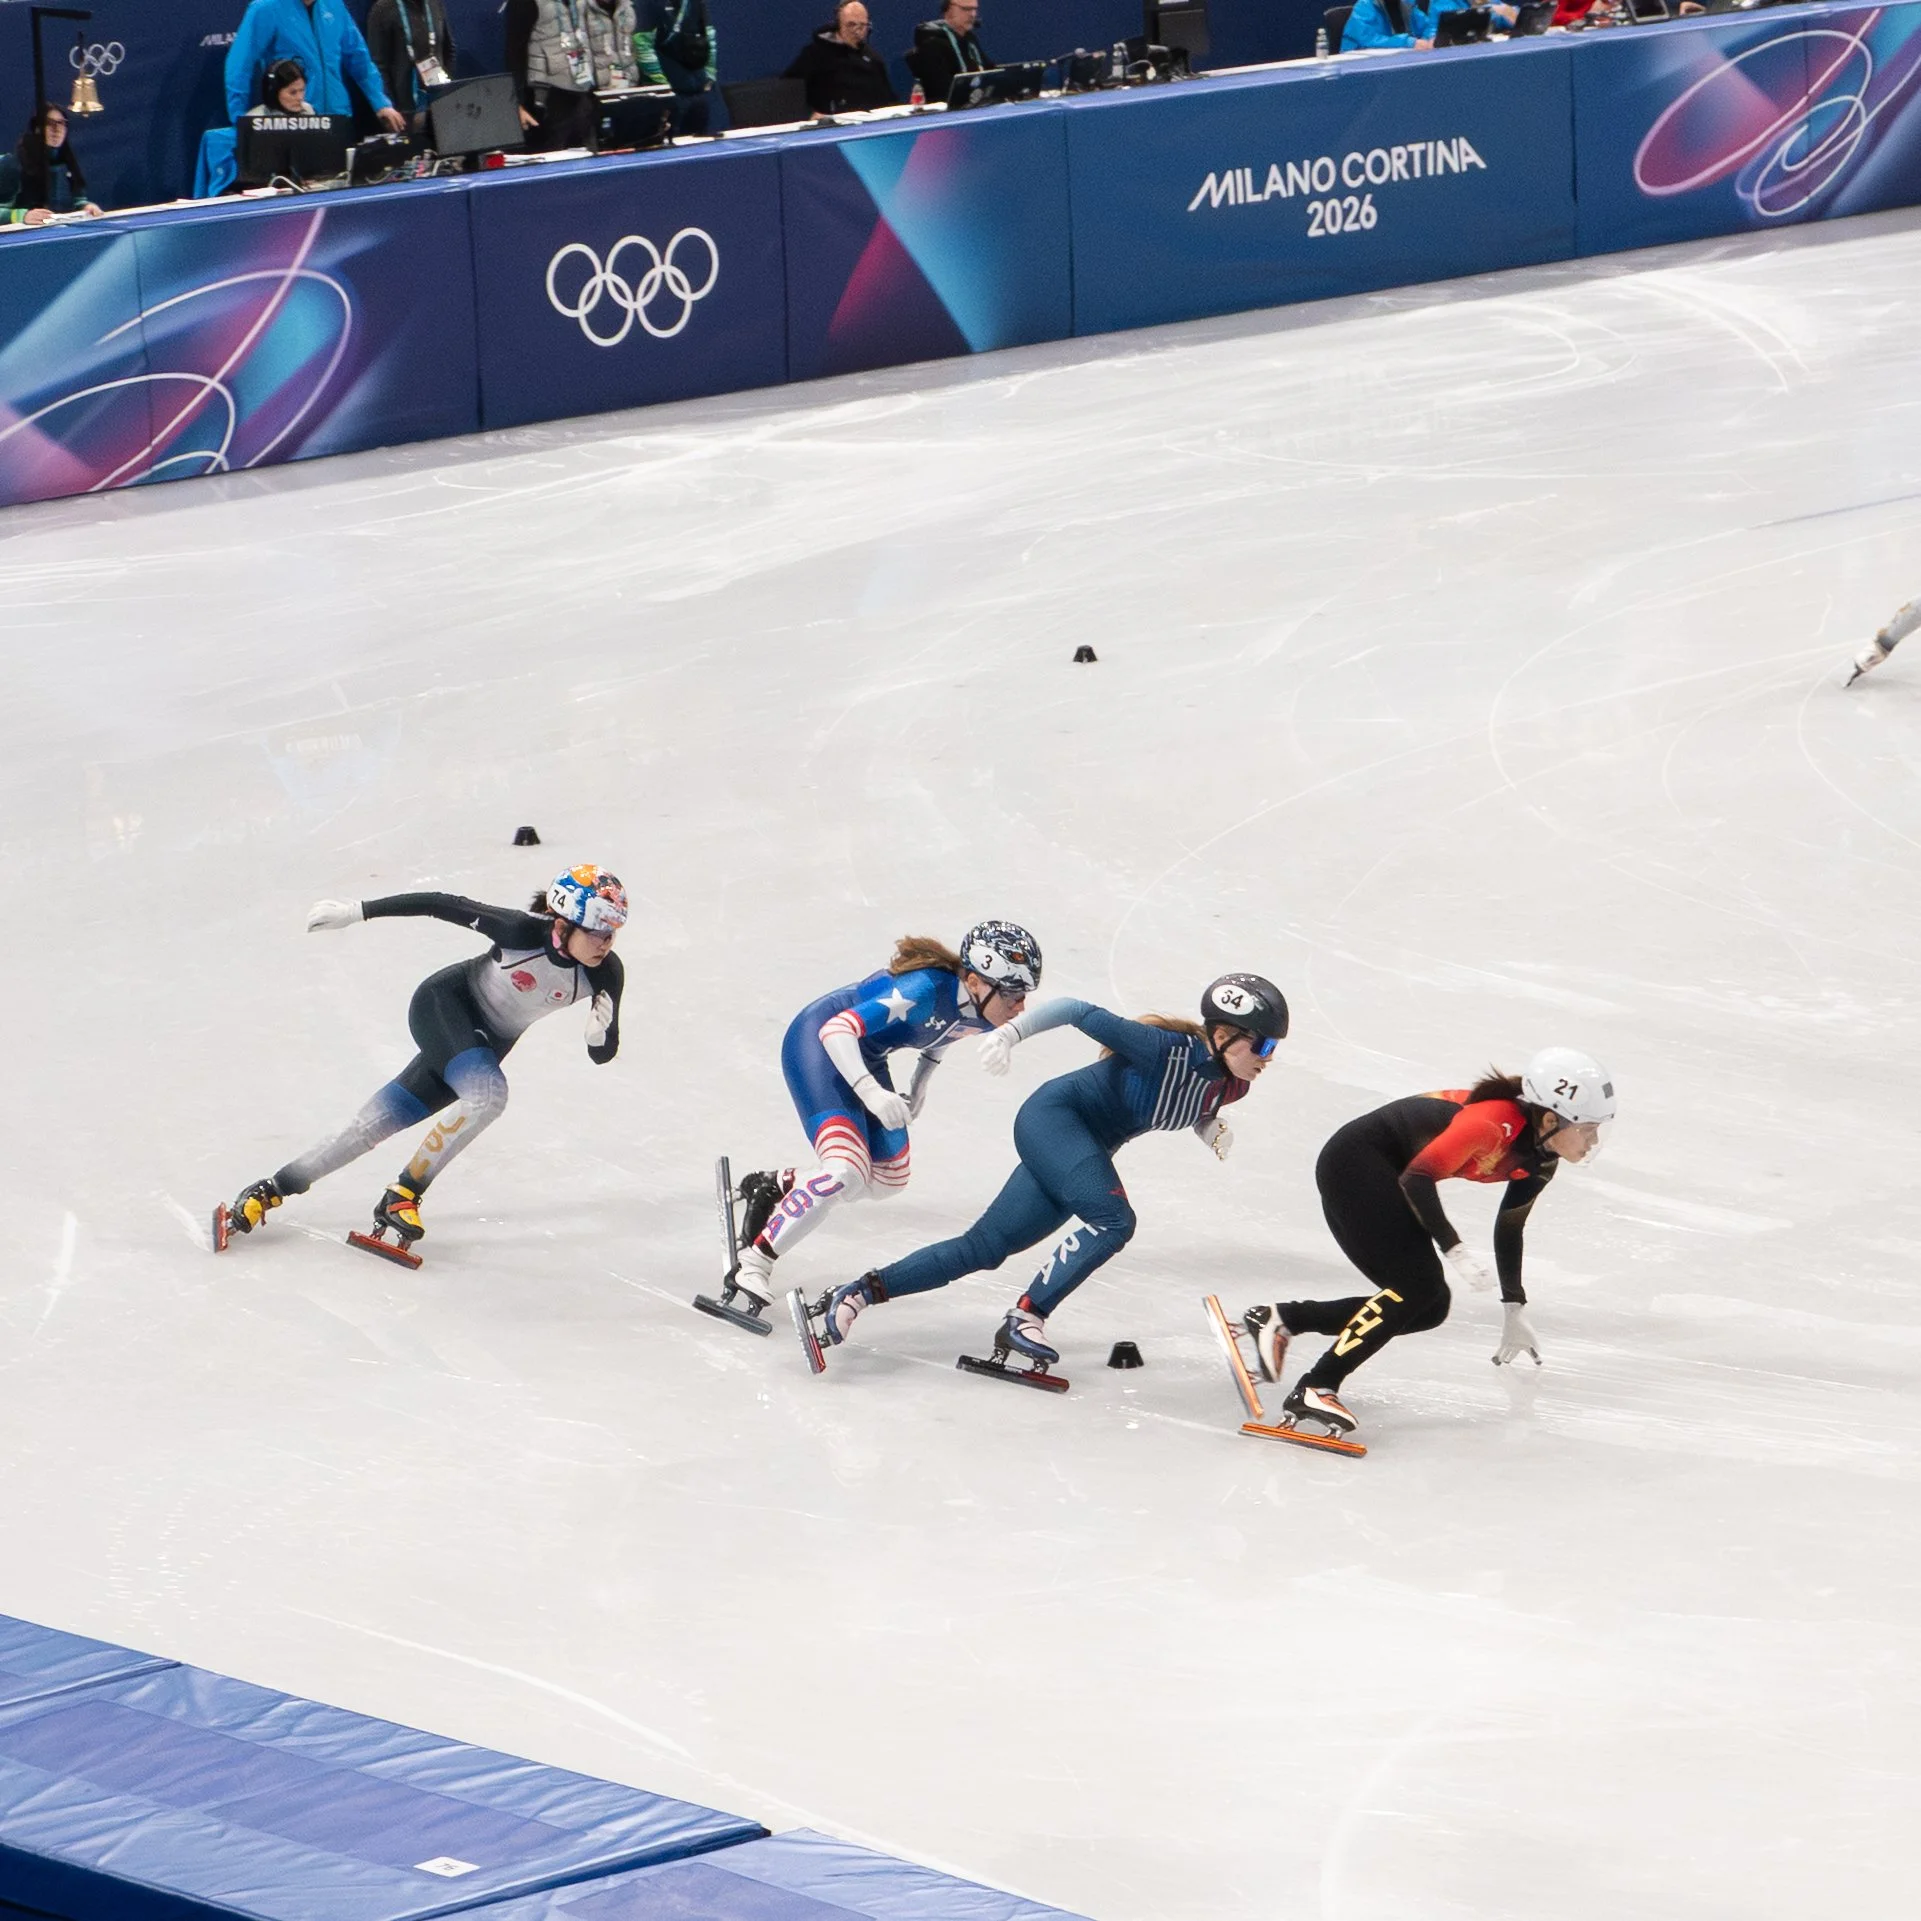
Above is the unedited image. The Settings: ISO 1600, Shutter Speed 60/sec, Aperture F11.
So above is an example where I shot with only 60/sec shutter speed and you can clearly see the motion blur. This got my thinking, what if I tried to get a cool artistic blur - so I played around. Noting that I didn’t have a lot of time to figure out the right settings because these games went incredibly fast.
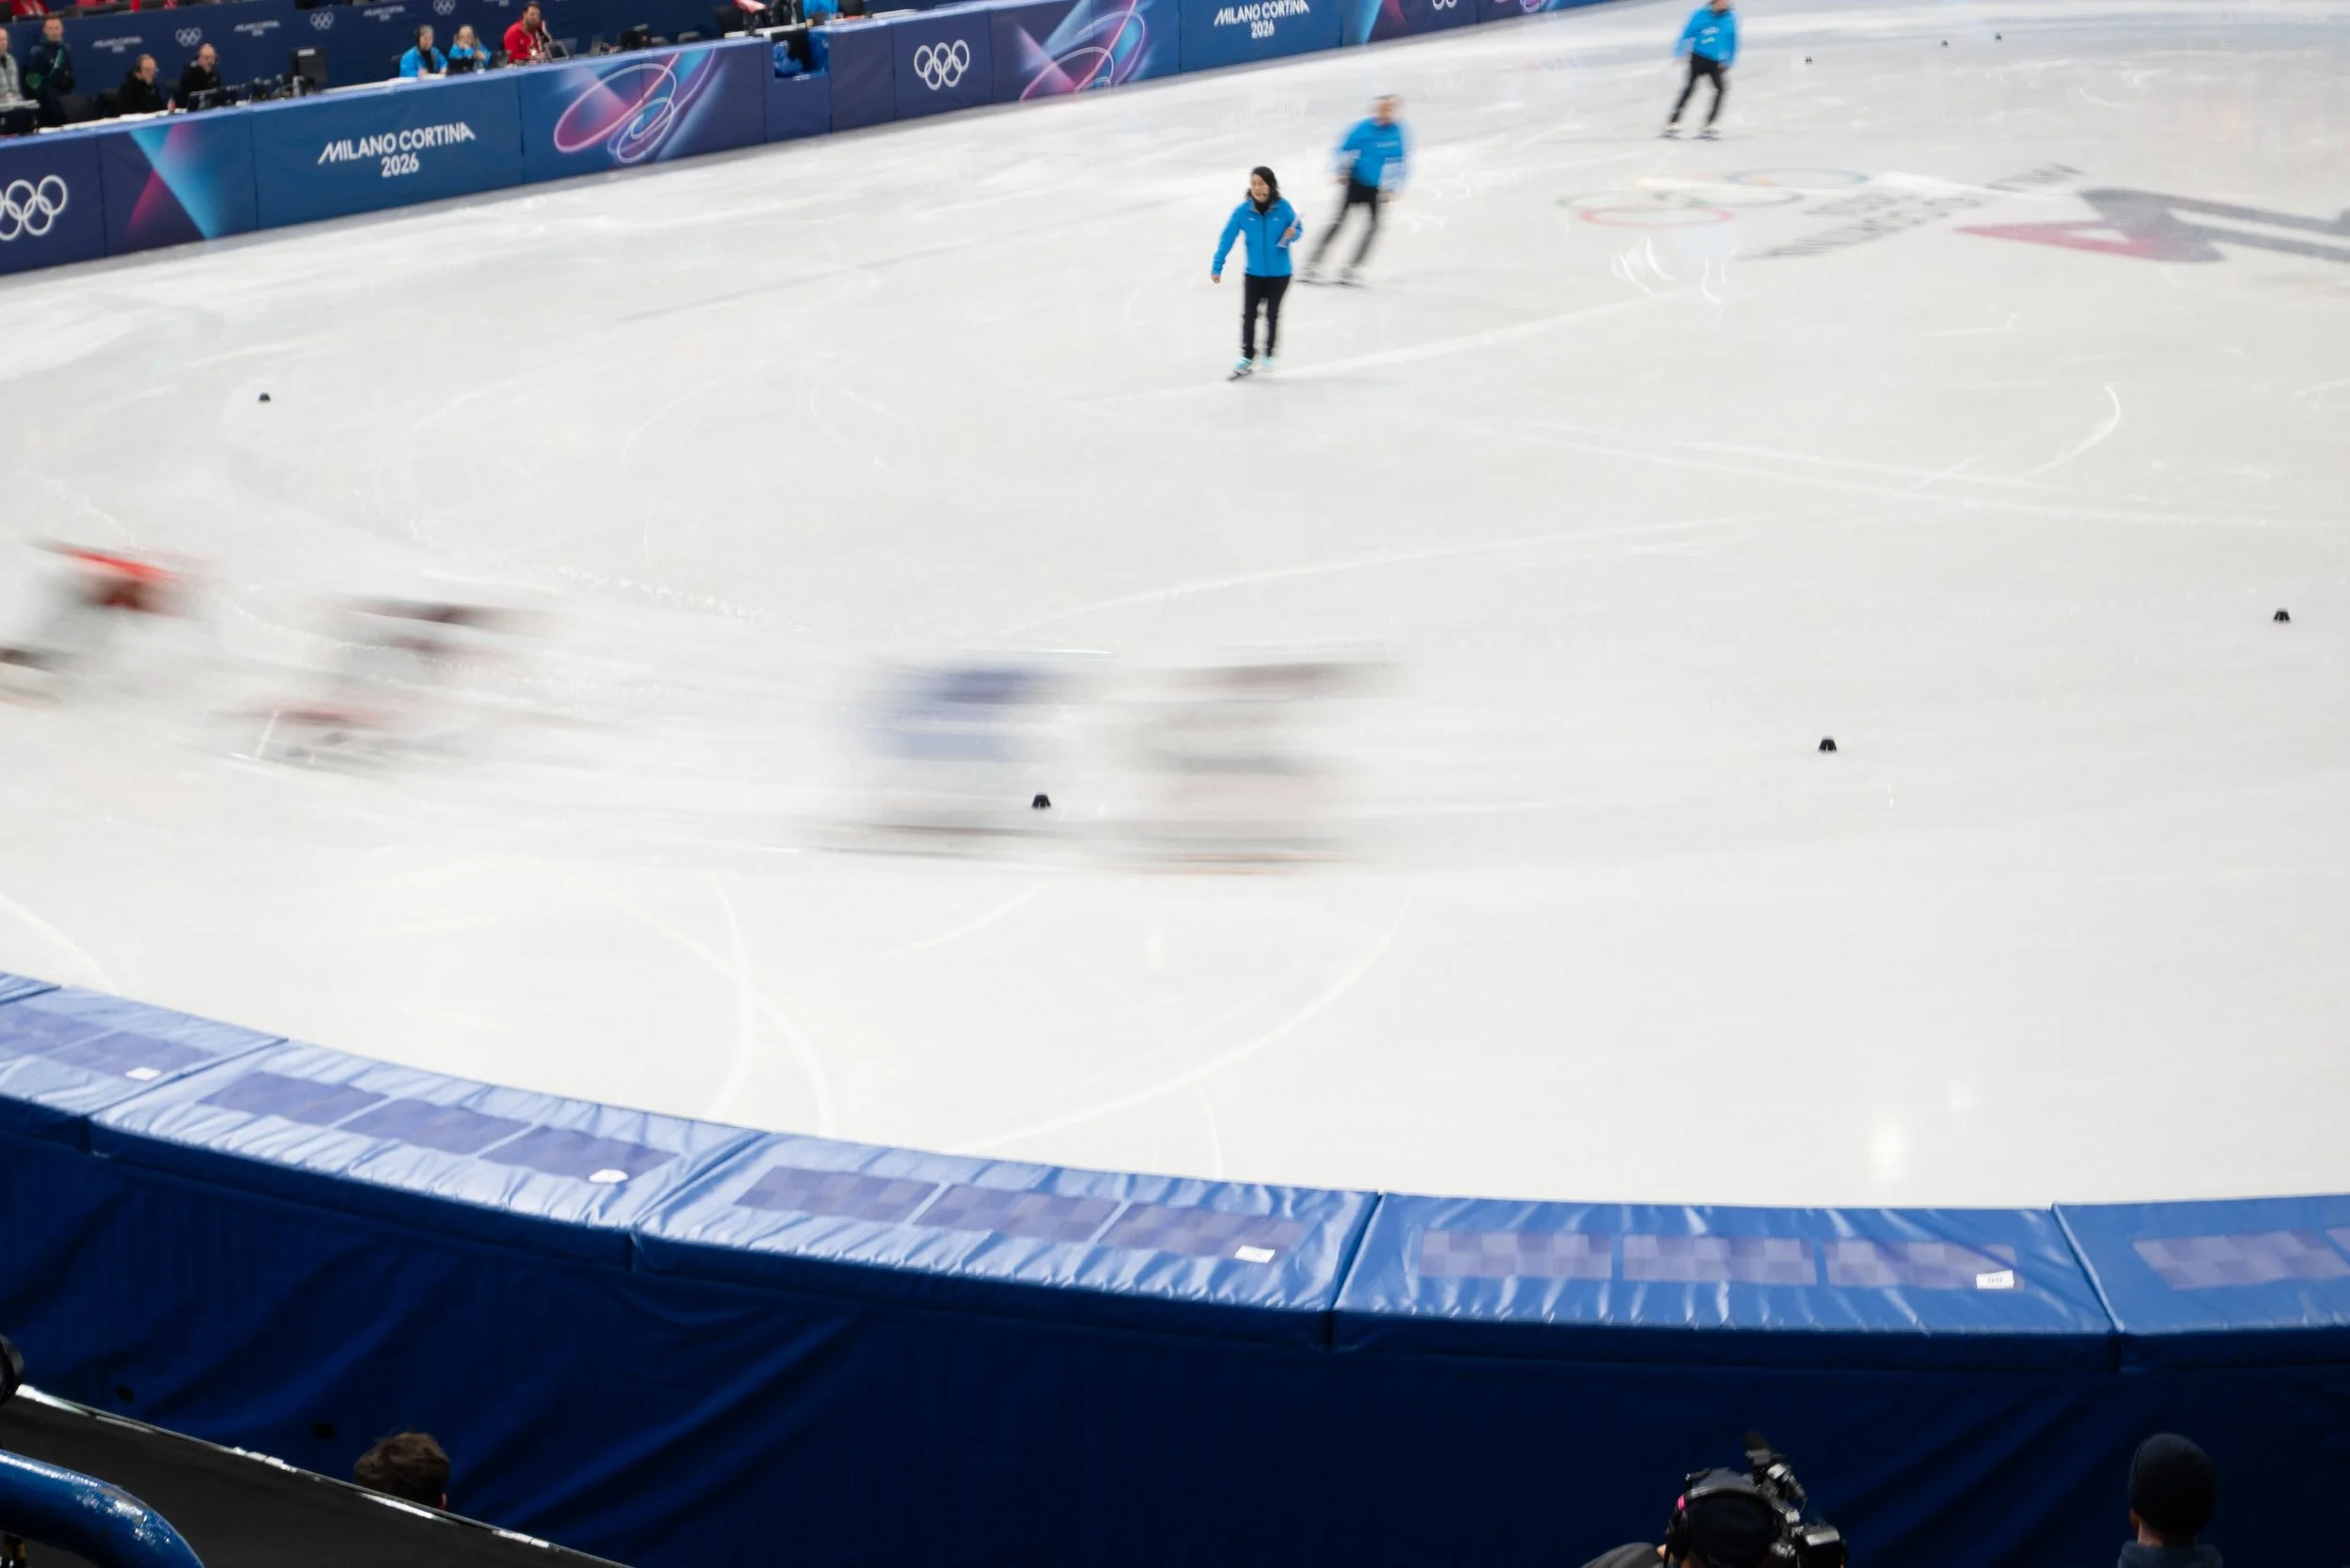
ISO 200, F/6.3, Shutter Speed 1/15sec
Here you can see a good deal of blur, that’s because we are shooting with 1/15 sec shutter speed - super slow shutter speed. The problem, I wasn’t shooting with a tripod - therefore even the blur of camera shake causes even people and objects not moving to be blurry. So I basically hated this shot.
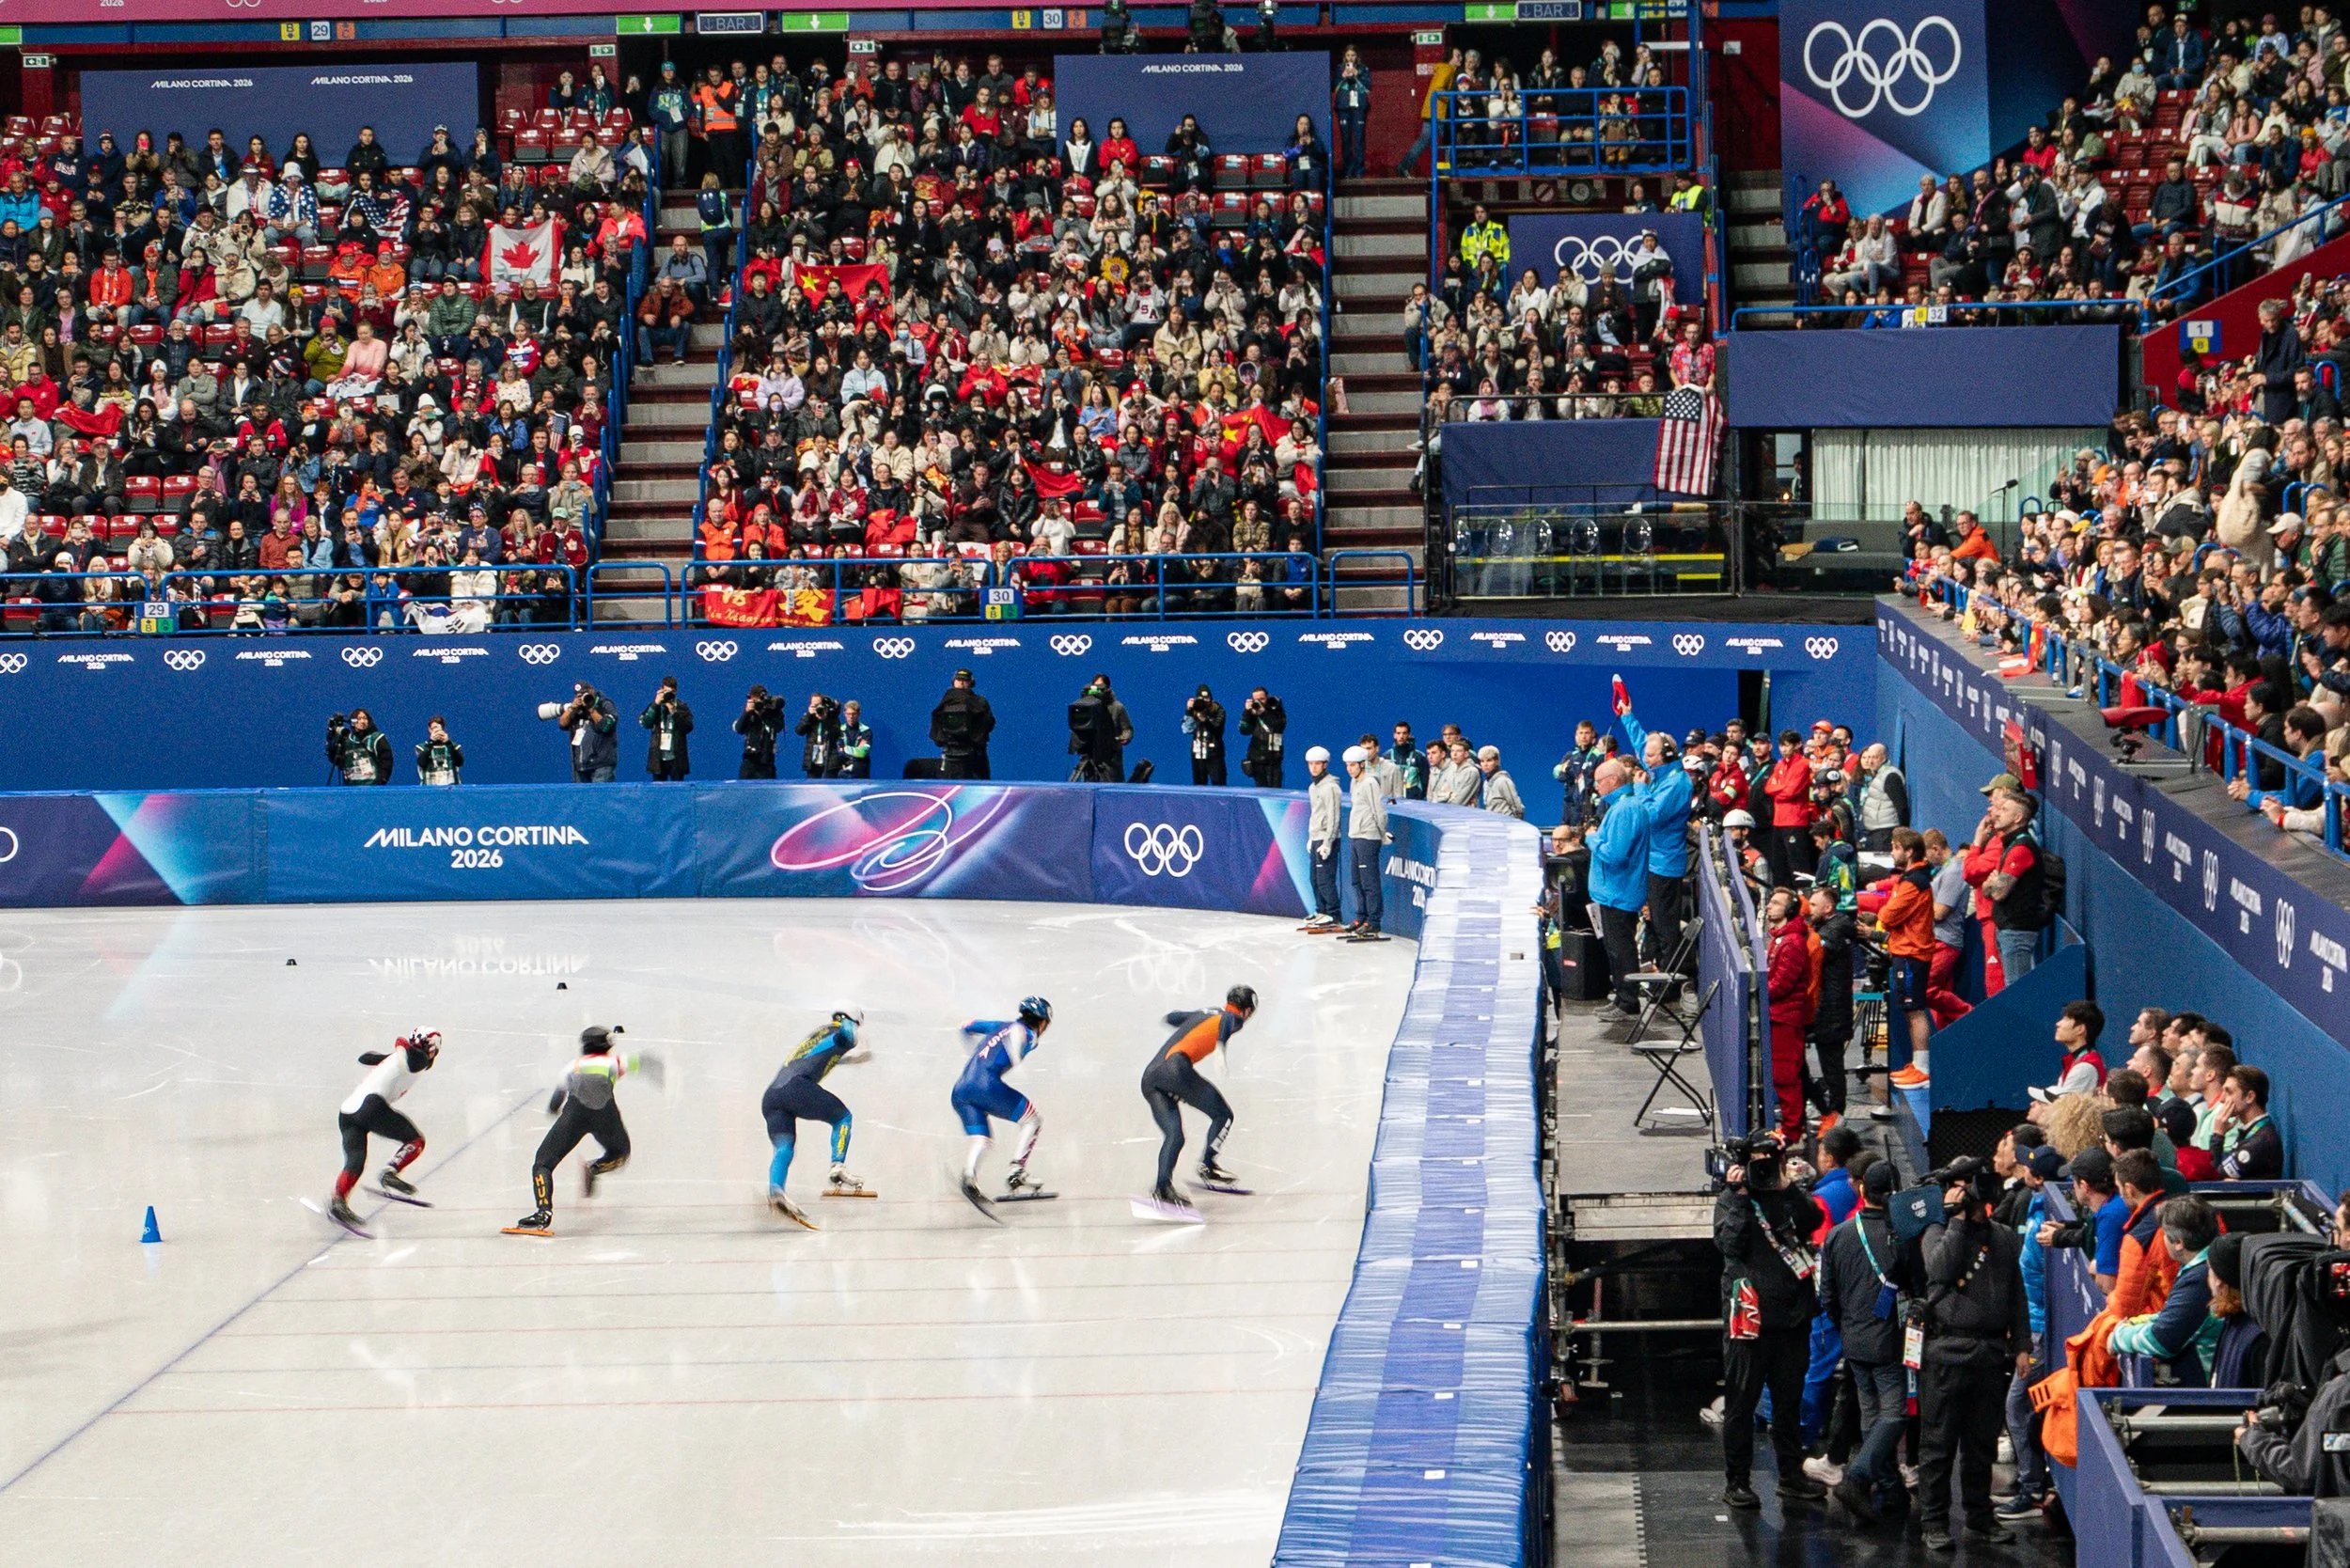
So which shots did I end up sharing? From this shoot, just two. I took the unedited first photo from the top of this post, cropped tighter, and used the denoise to get the above image. Am I amazed - no, but it wasn’t bad considering I just brought by little LUMIX in hopes of getting something.
I also shared this image, similar to one above, where I used donoise and got it about as good as you can.
This was shot at 1/40th a second and I liked the little touch of motion blur in their feed.
I also tried to use creative motion blur while touring the city - by trying to get creative motion blur on their trains.
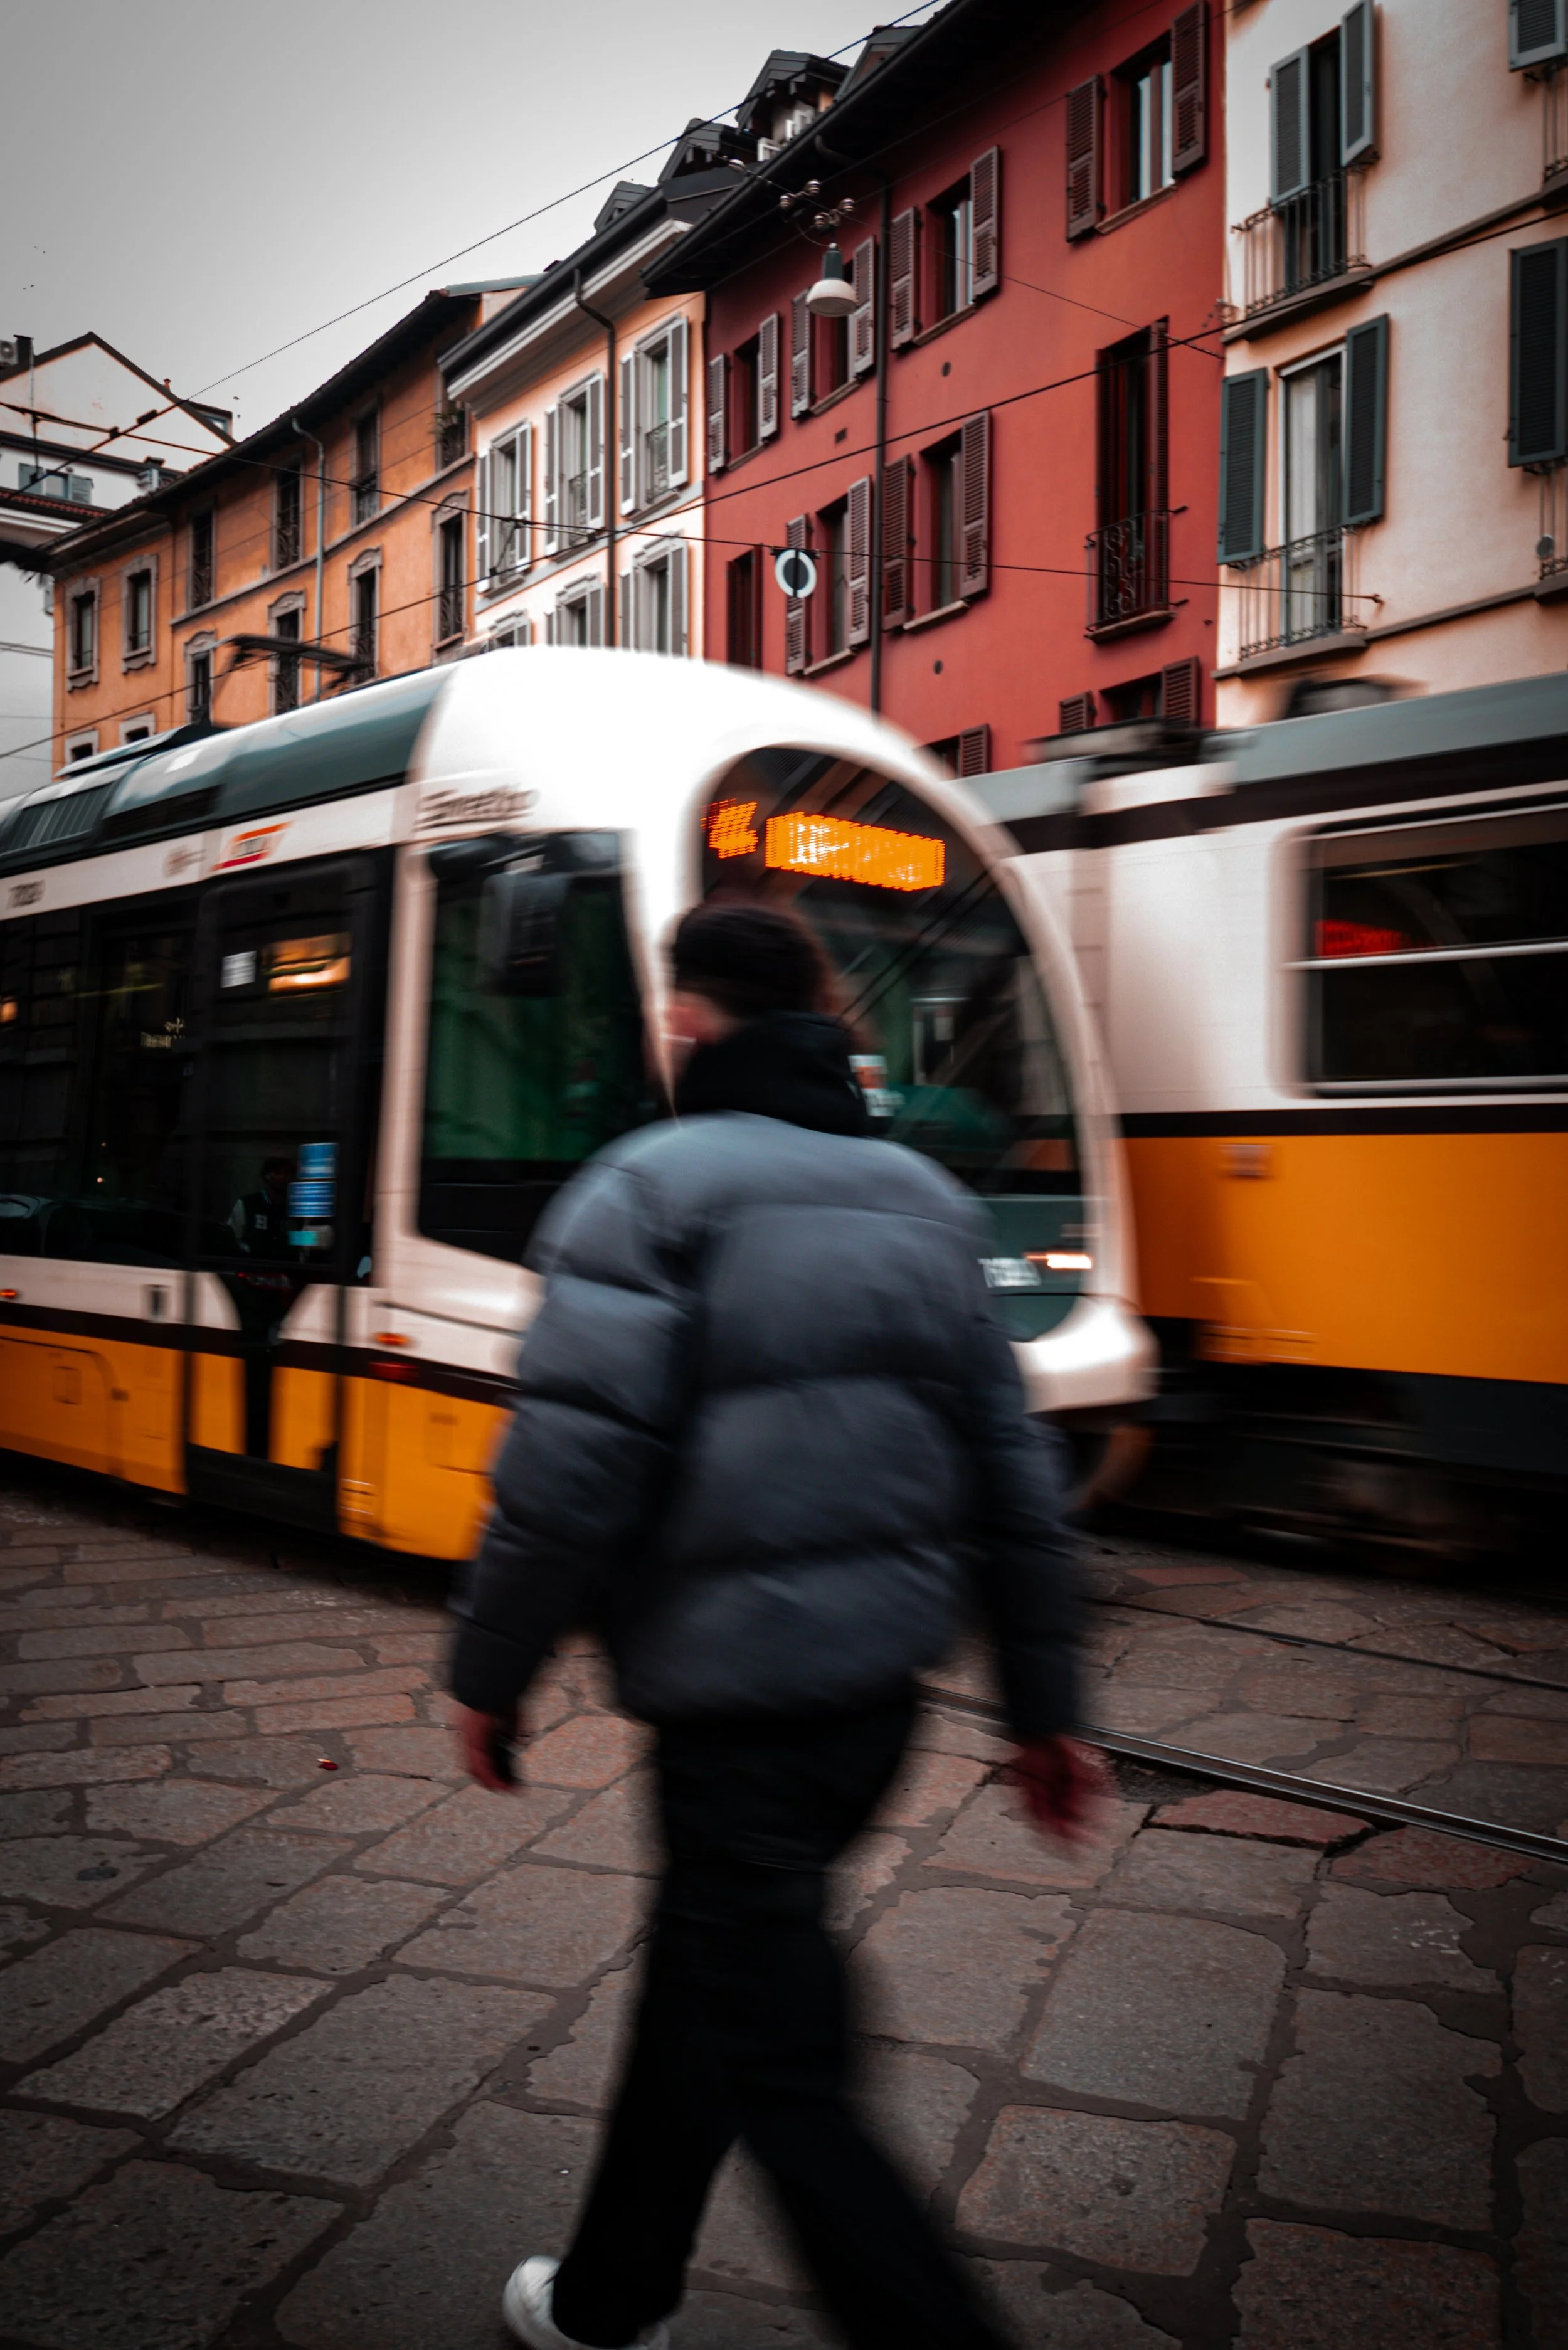
Focal Length 16mm, Shutter Speed 1/30sec, Aperture F 4.0, ISO 400
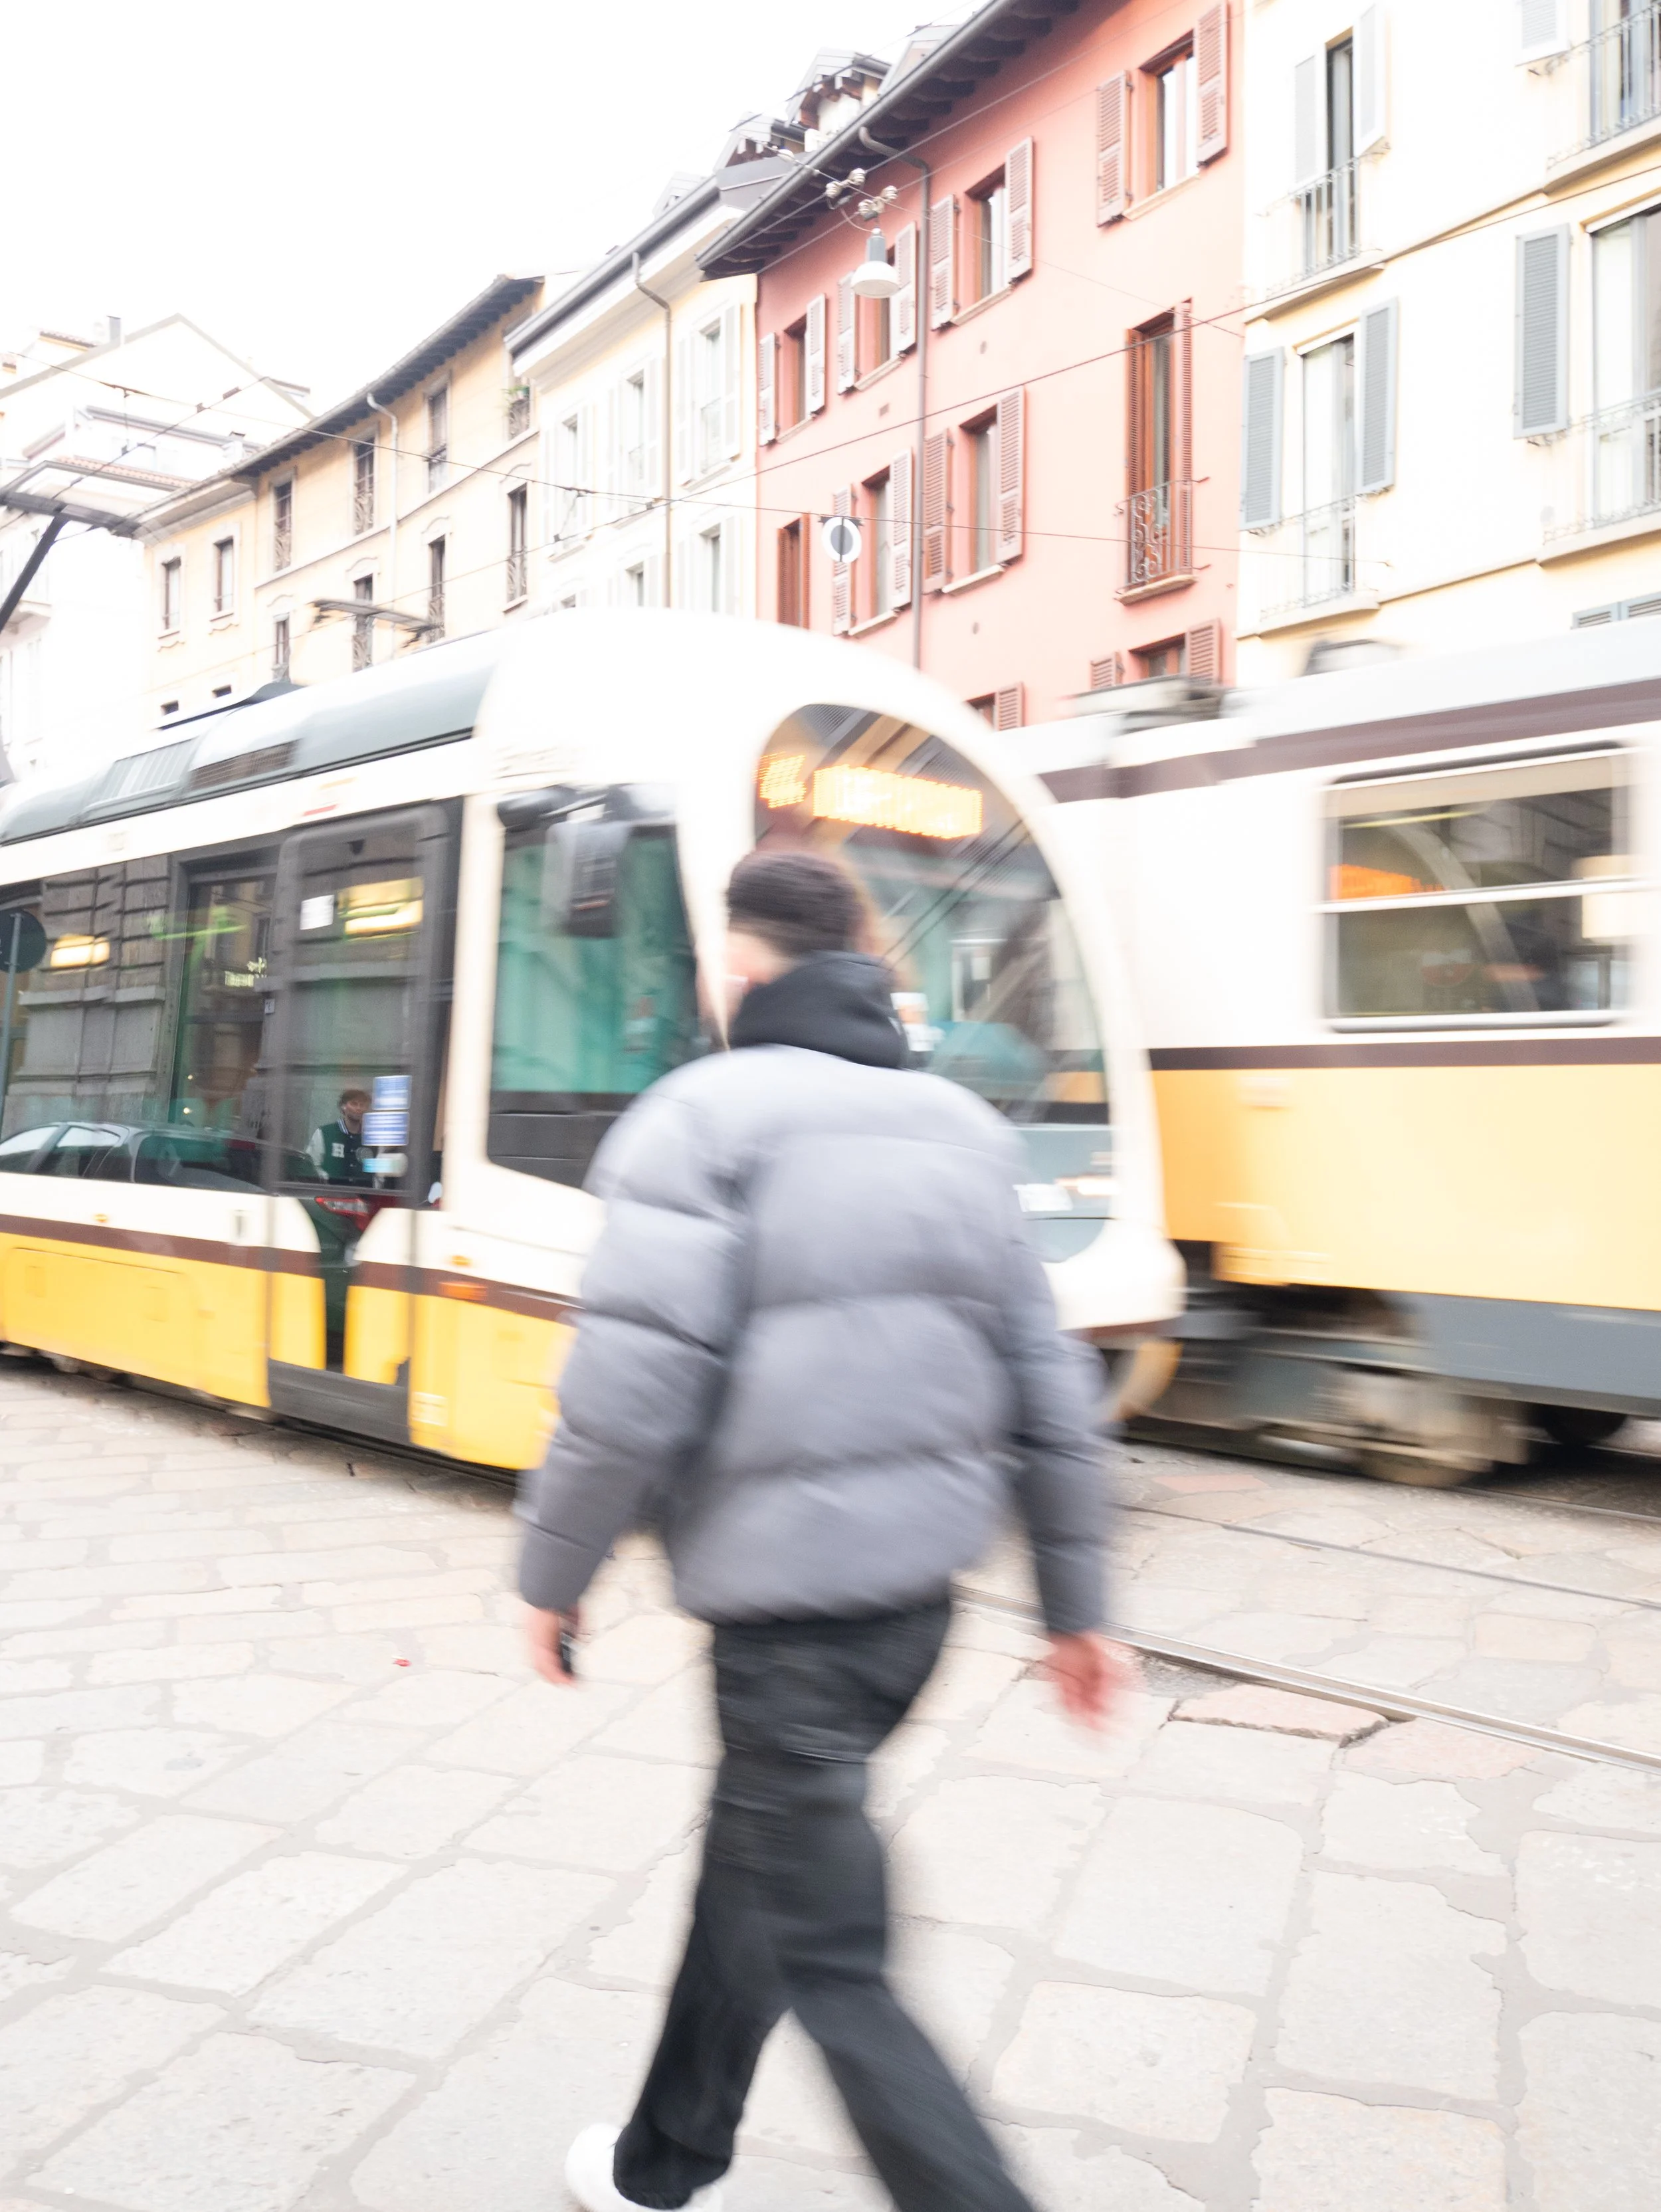
Now dear reader, this is the edited version. I was walking, this moment was happening and I didn’t get time to get the exposure in camera right below is the original image. You can see I didn’t balance the need for a lower shutter speed by adjusting one of the other triangle elements.
So there you have it, shooting in manual on the fly, especially while trying for intentional blur is a difficult activity, especially when traveling with a group that isn’t a photography group. But each shoot is a learning experience!