Making the World Tiny: My Experiments with Tilt-Shift Photography
I’ve been having fun lately experimenting with tilt-shift focus to give photos that miniature, toy-like look. In case you’re new to it: tilt-shift in practice is any image with a strong horizontal band of sharp focus and pronounced blur toward the top and bottom (or blur radiating around the subject). That selective blur tricks the eye into reading the scene as a small scale model.
What I tried
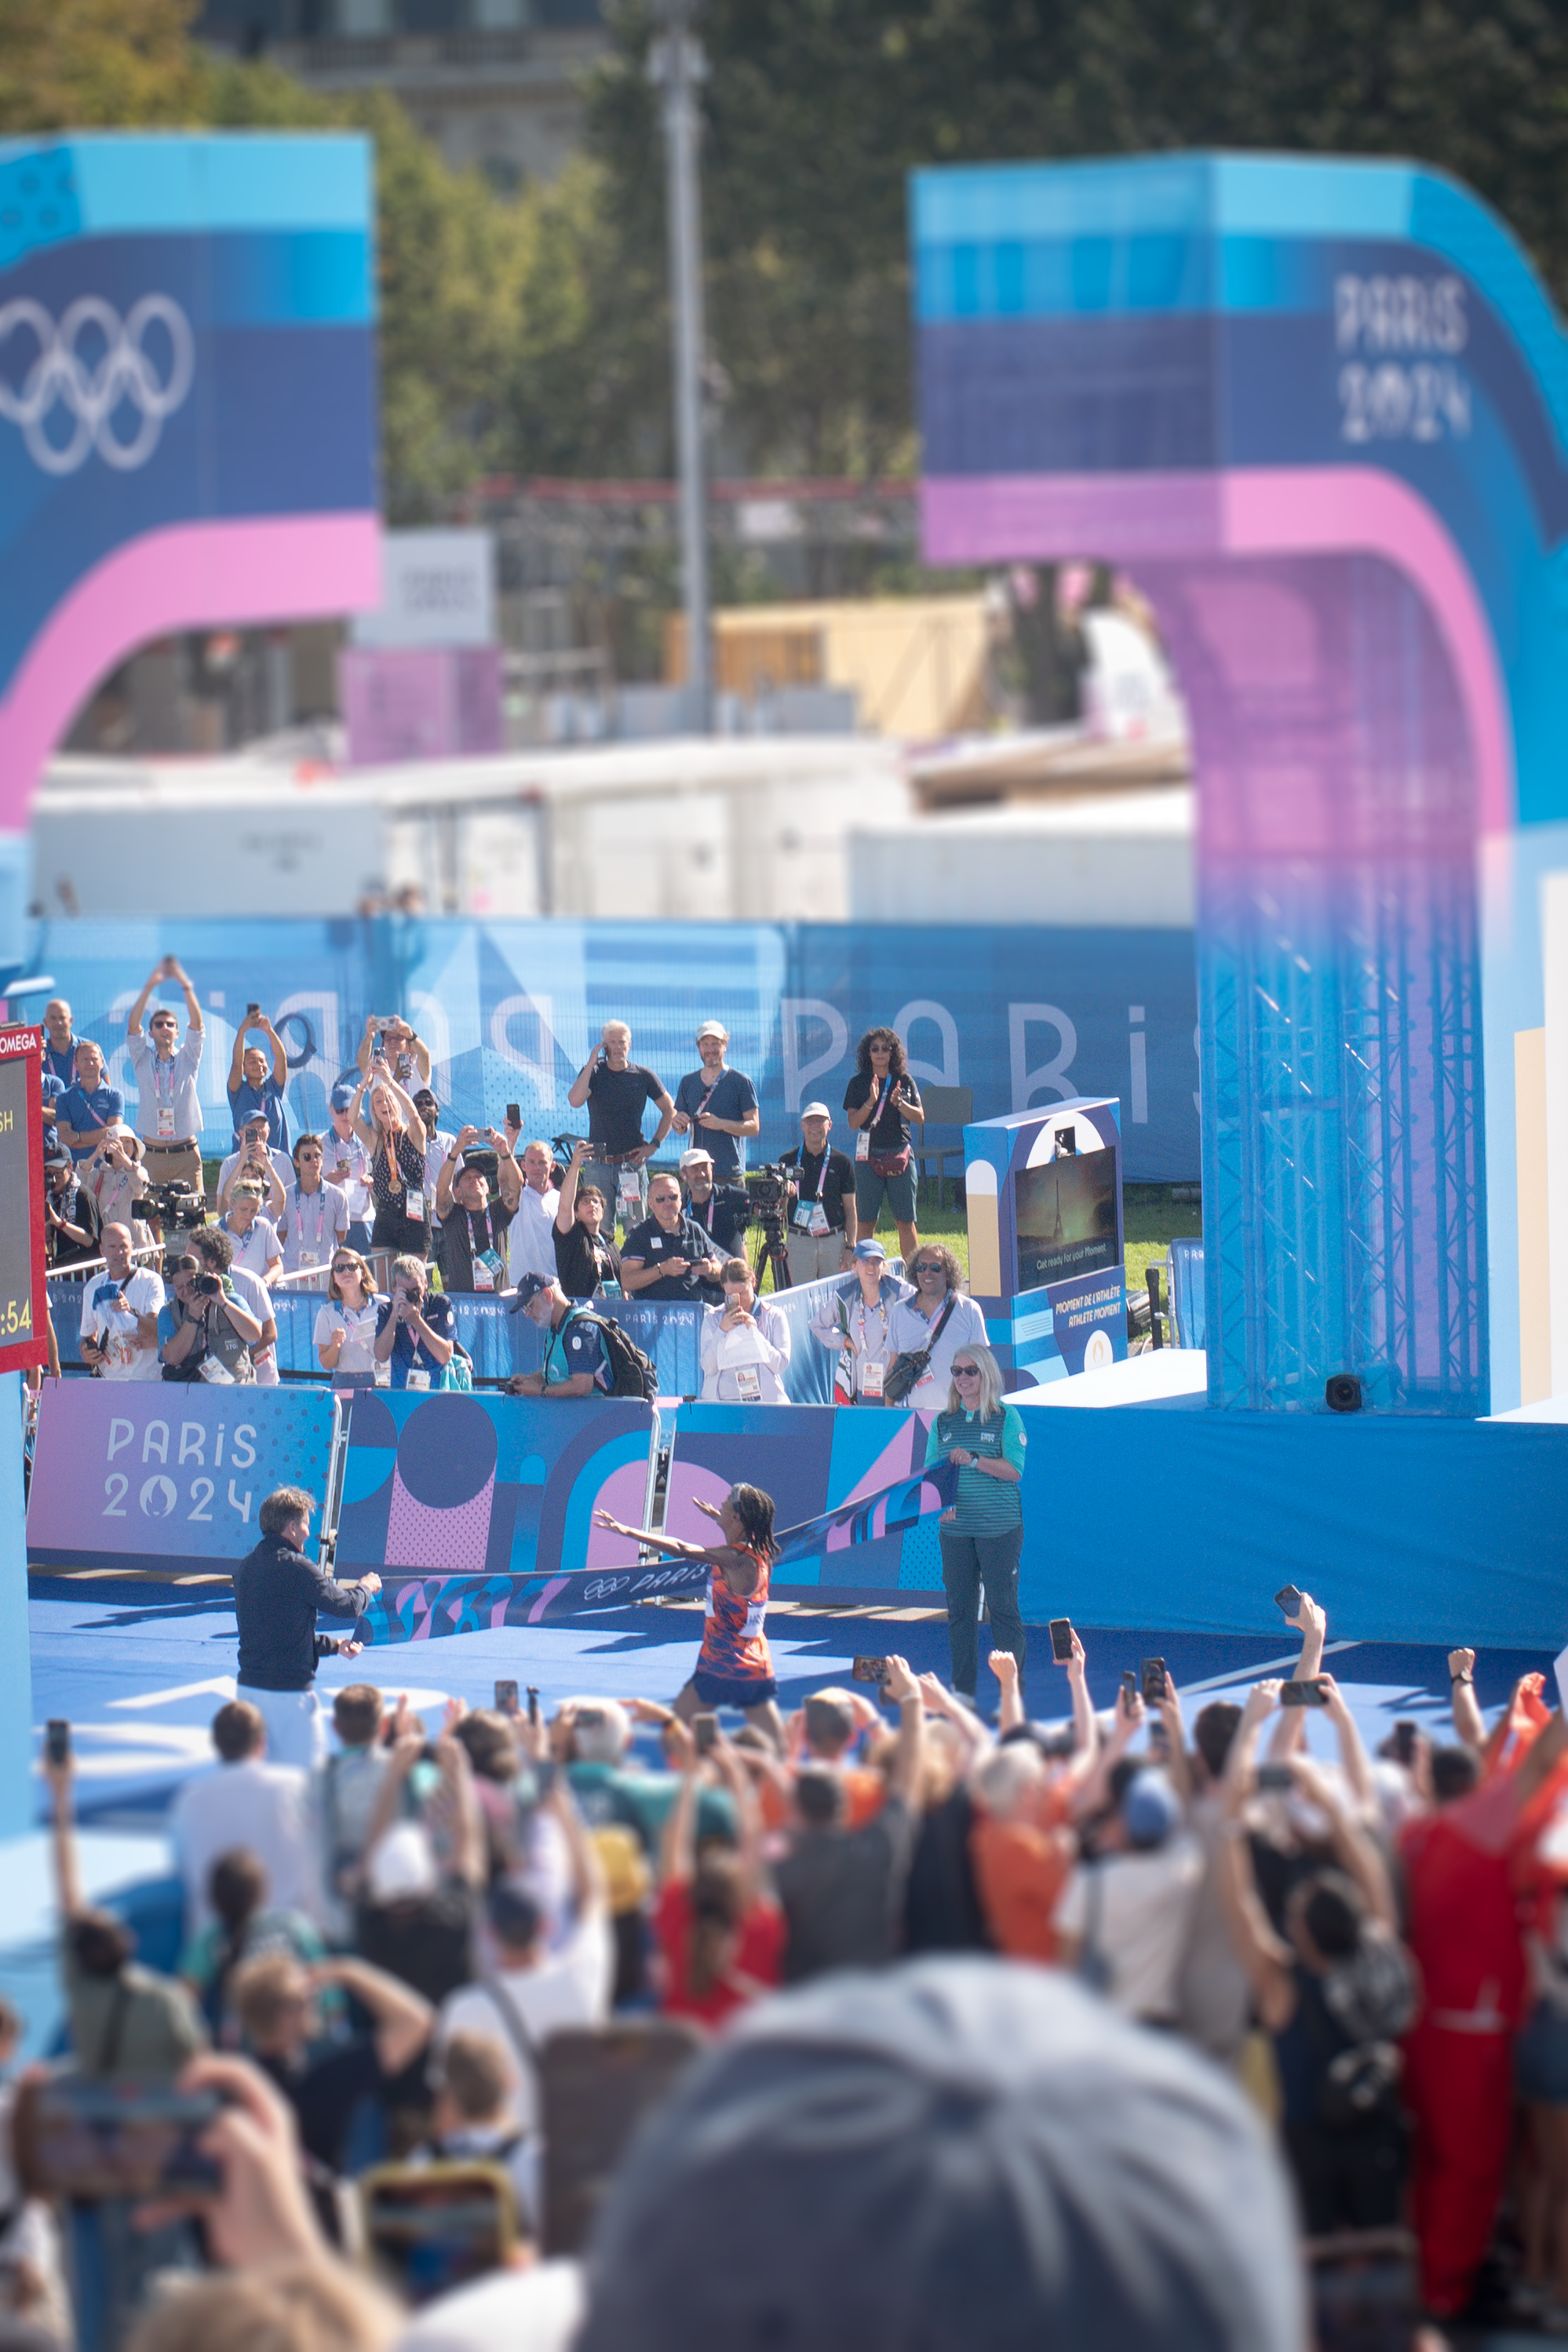
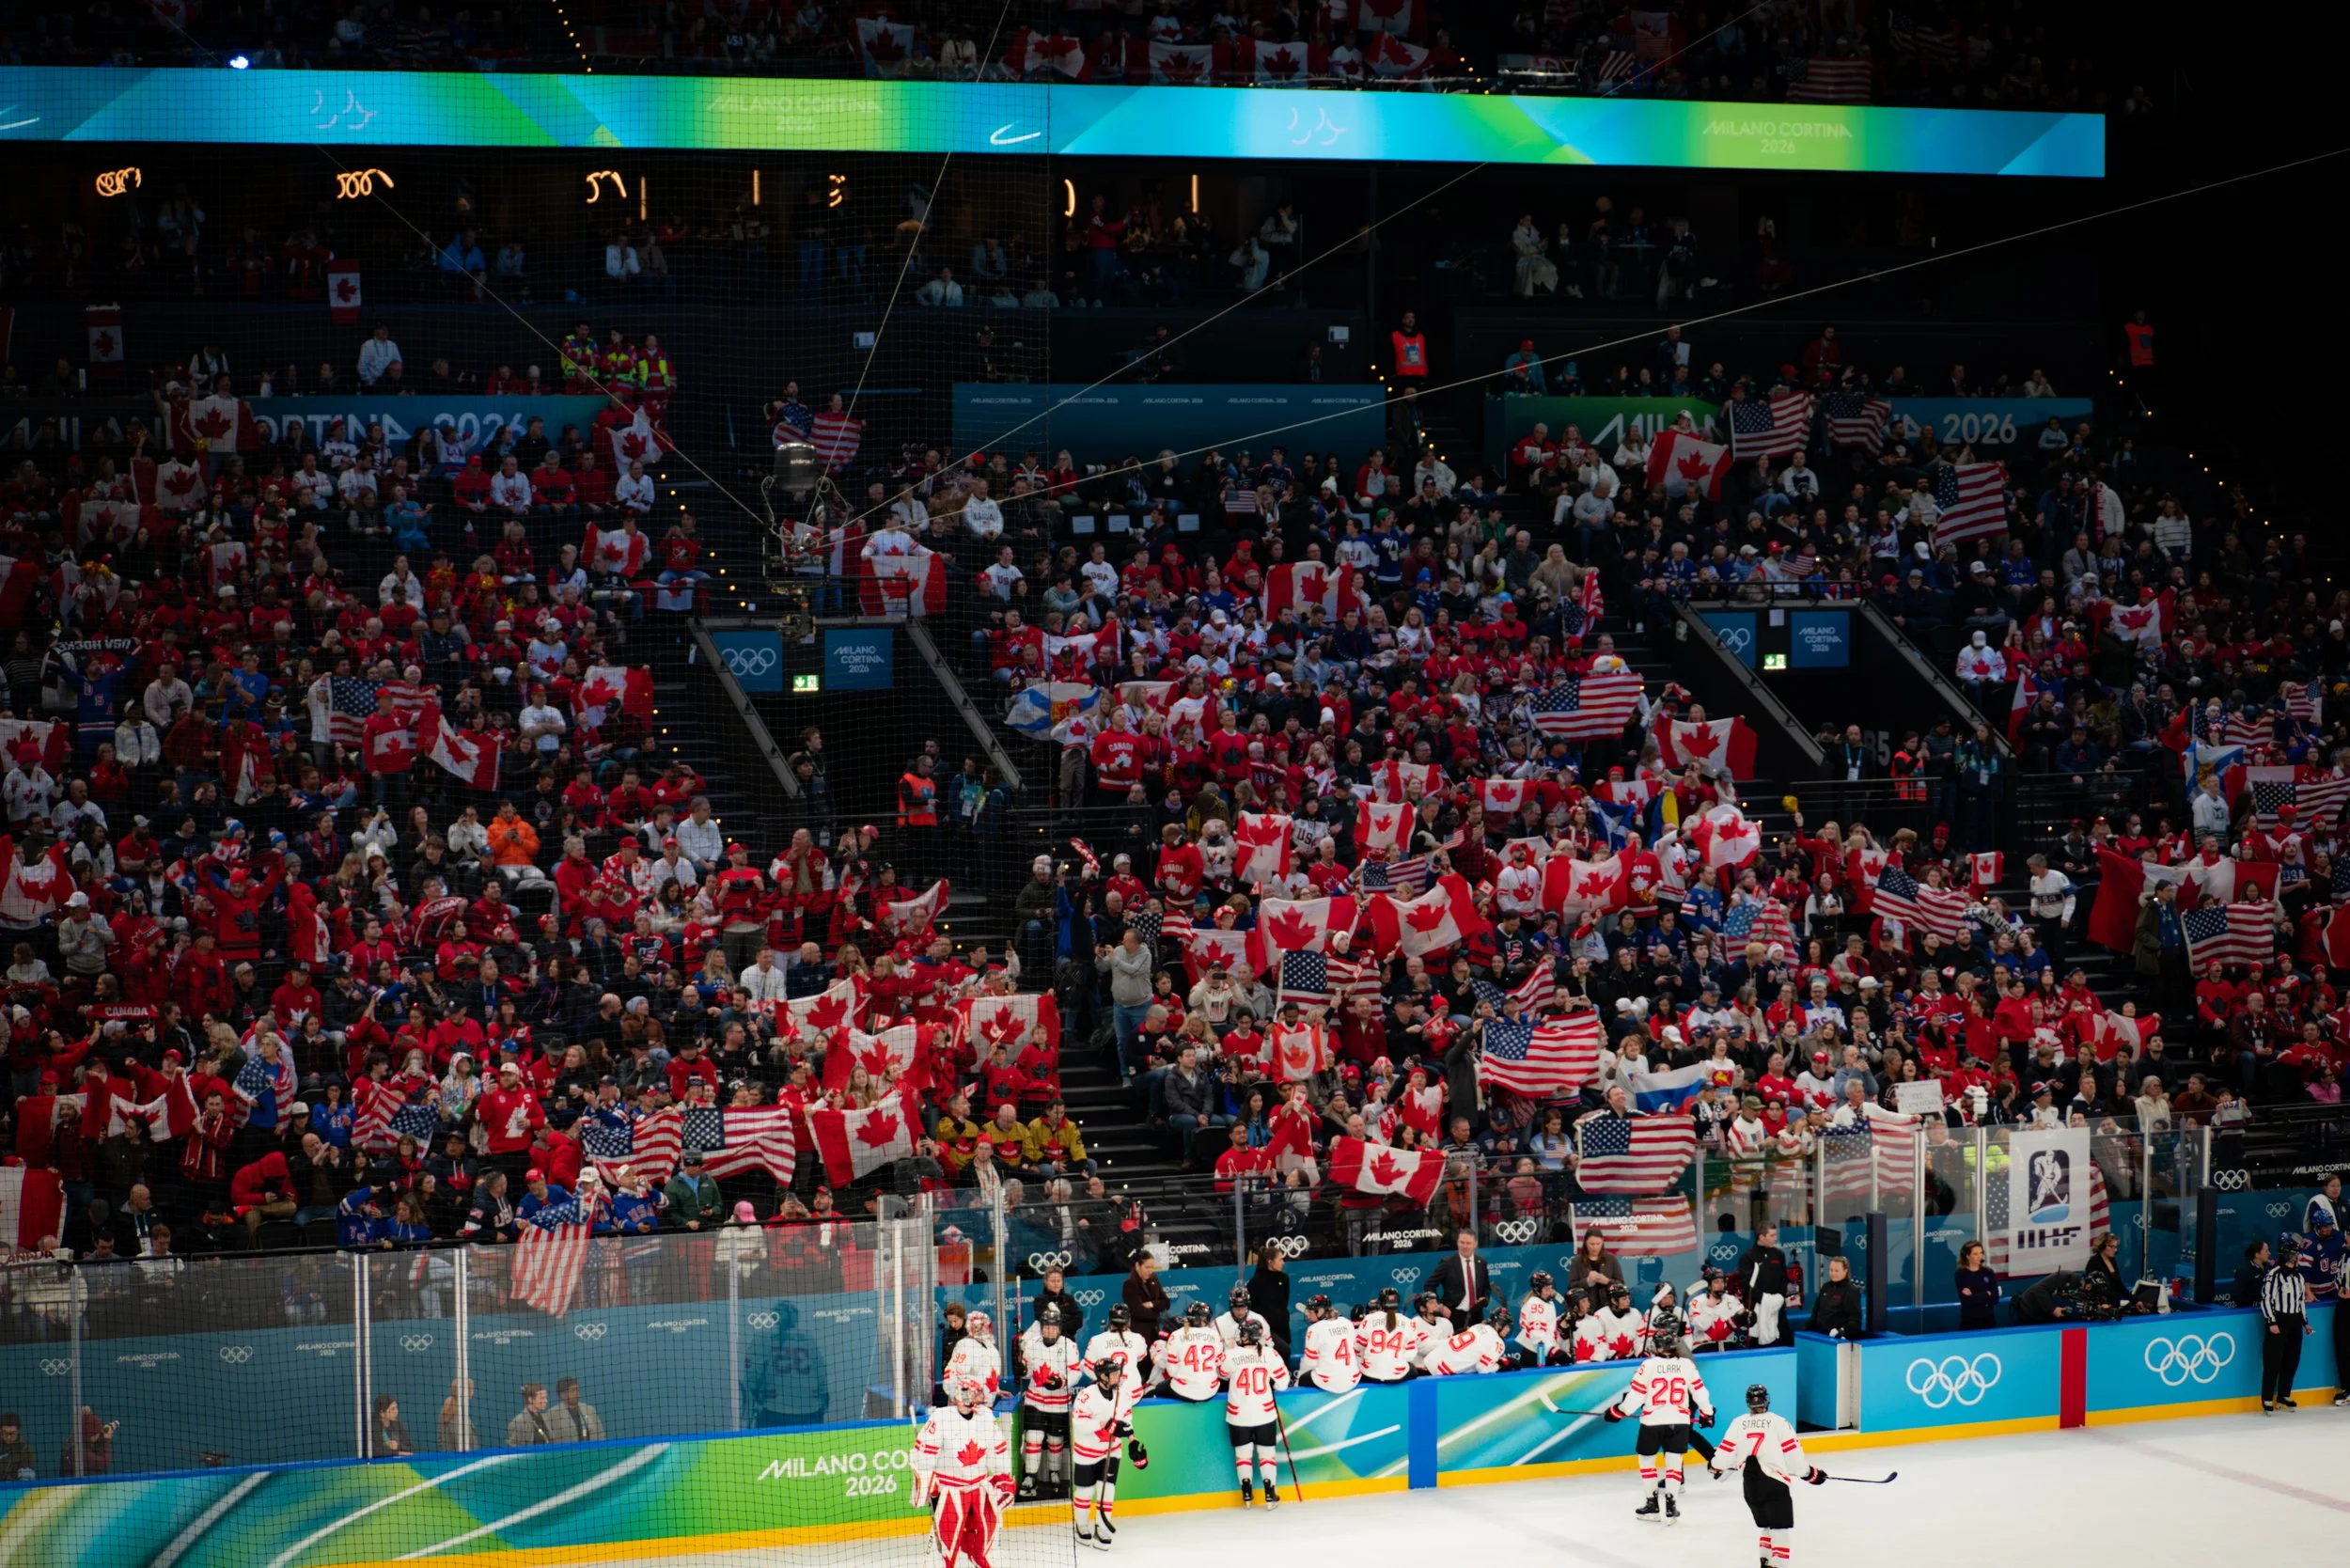
Olympic photos — These were my favorite result. The tilt-shift effect cut through busy, distracting details and made the scene feel like a carefully arranged diorama.

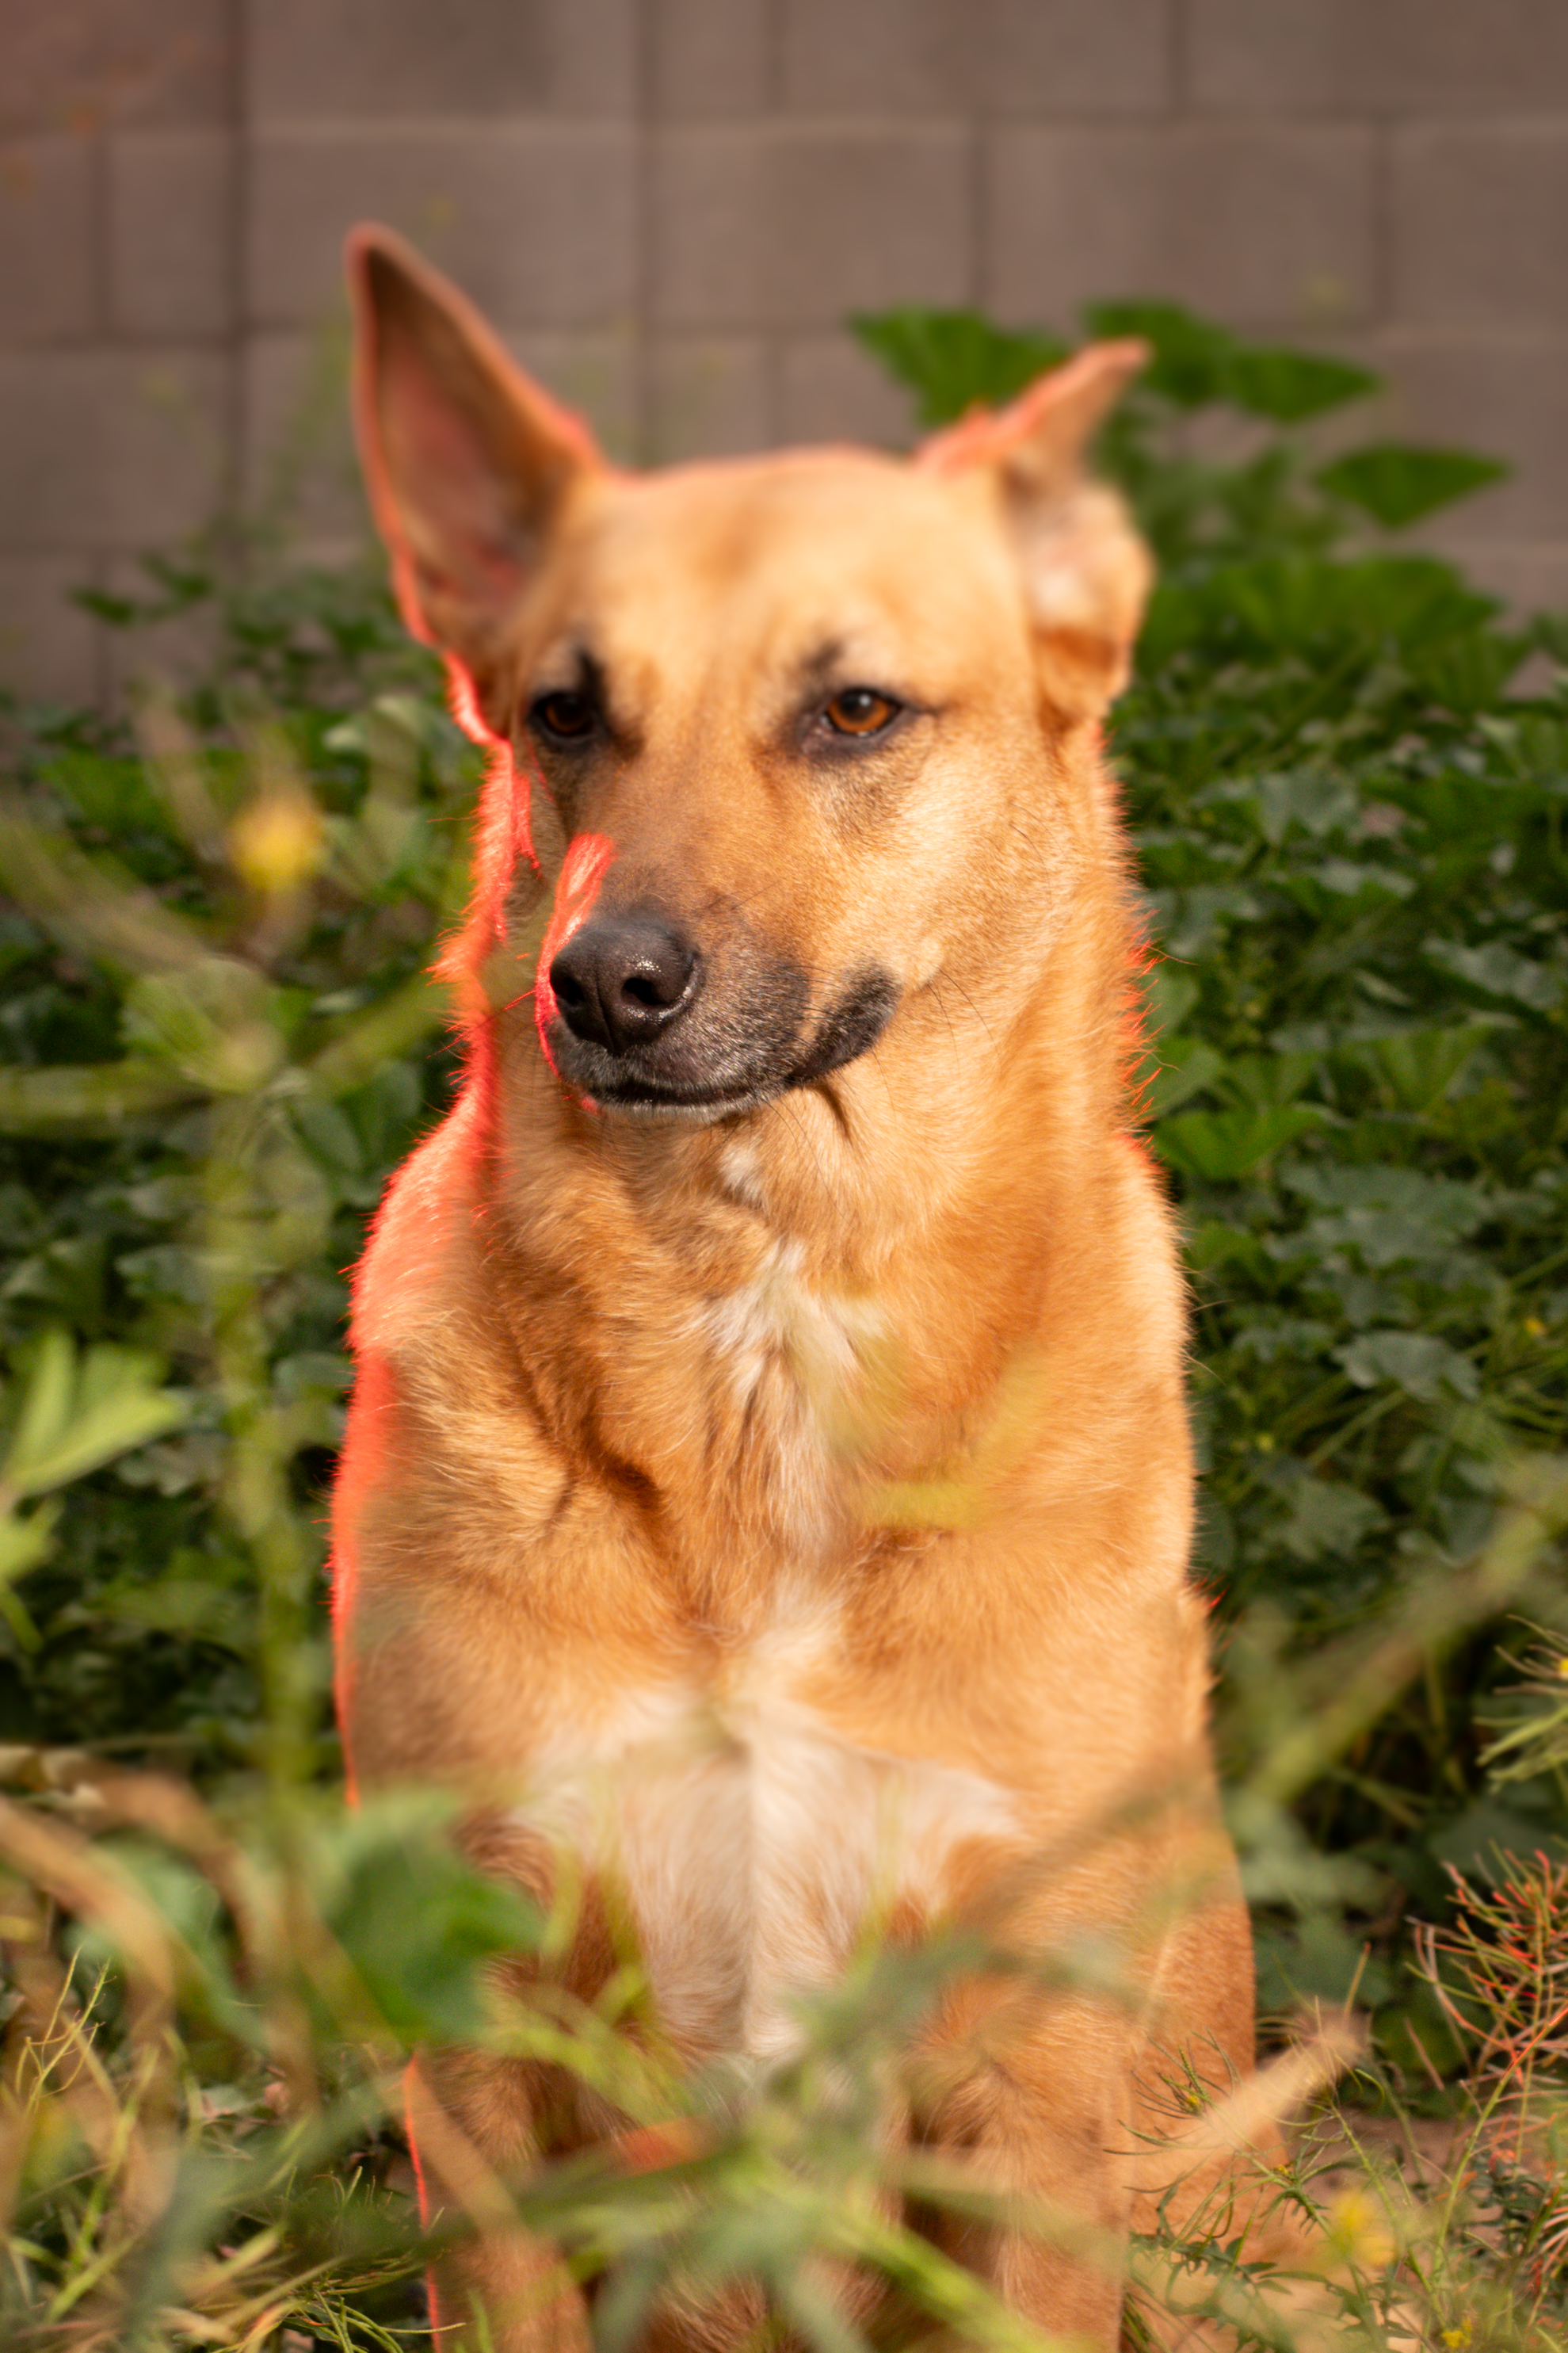
My dog Lucinda This one was tougher. Portraits of pets don’t always read as miniatures because of scale cues (texture, fur detail, familiar proportions). Lucinda didn’t convincingly look small, but it was a useful experiment.
American flag shots — My most recent flag images worked surprisingly well. The shapes and repetitive patterns are ideal for the toy-like look, and the tilt-shift made them feel like small crafted banners.

With Tilt-Shift

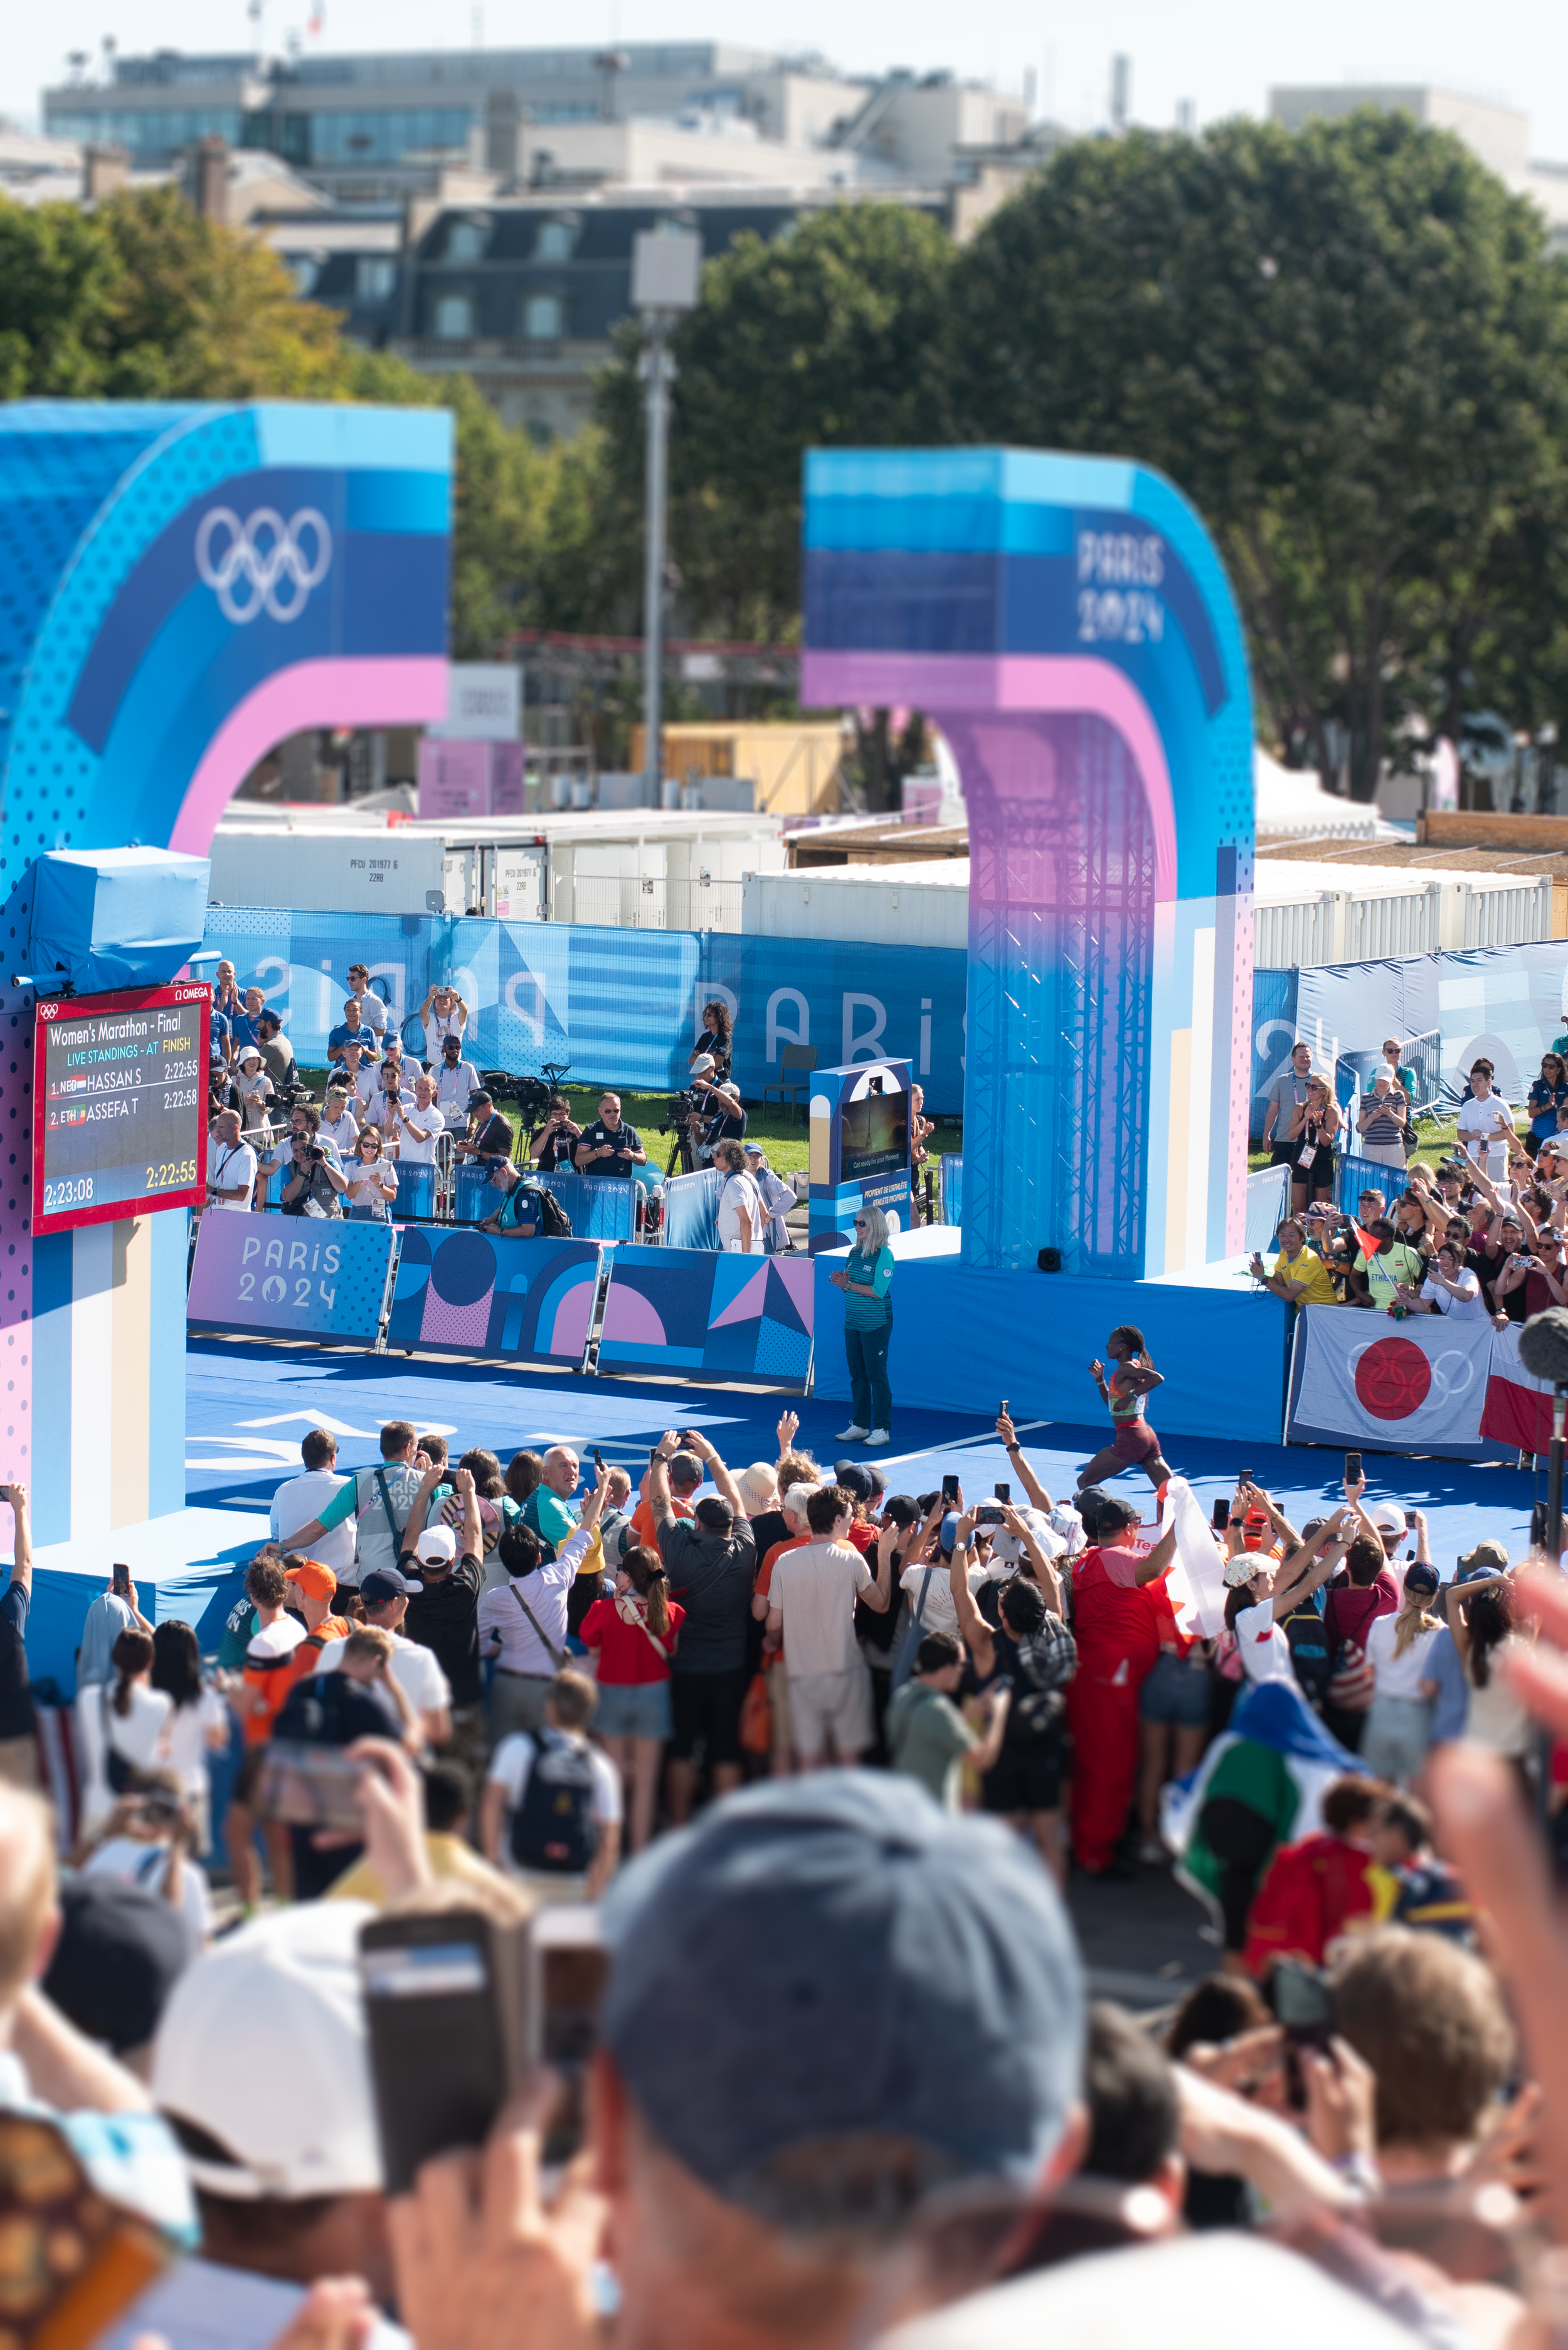
without tilt-shift
Why it works Tilt-shift simulates the shallow depth-of-field you get with macro photography. Our brains associate that depth-of-field with close-up shots of small objects, so applying it to larger scenes can create the illusion of scale reduction. Strong contrast, repetitive patterns, and elevated vantage points tend to sell the effect best.
Here Tilt-Shift took a very distracting photo and kind of gave it focus.
Quick tips (Photoshop)
Use Filter > Blur Gallery > Tilt-Shift.
Place the focused band where you want attention; rotate and adjust the size to match your scene’s perspective.
Increase the blur and adjust the transition (fade) to make the effect more pronounced — subtle transitions look more natural, strong transitions read more toy-like.
Boost saturation and contrast slightly; miniatures often feel like painted models.
Avoid applying tilt-shift to close portraits or scenes with obvious life-sized cues (detailed faces, familiar textures) unless you’re experimenting intentionally.
Final thoughts Tilt-shift is an easy, playful tool to add to your editing kit. Some subjects — like architectural scenes, crowds, or patterned objects — work great. Others, like close-up pet portraits, may resist the illusion but still offer interesting results. I’ll definitely keep using tilt-shift intentionally when the scene suits the effect.

I Take Back All the Mean Things I’ve Said About Grain in Images
Sony AX 7 105mm, 1/160 sec F 4.0, ISO 5000 - just enough motion blur to feel the energy behind the captured moment.
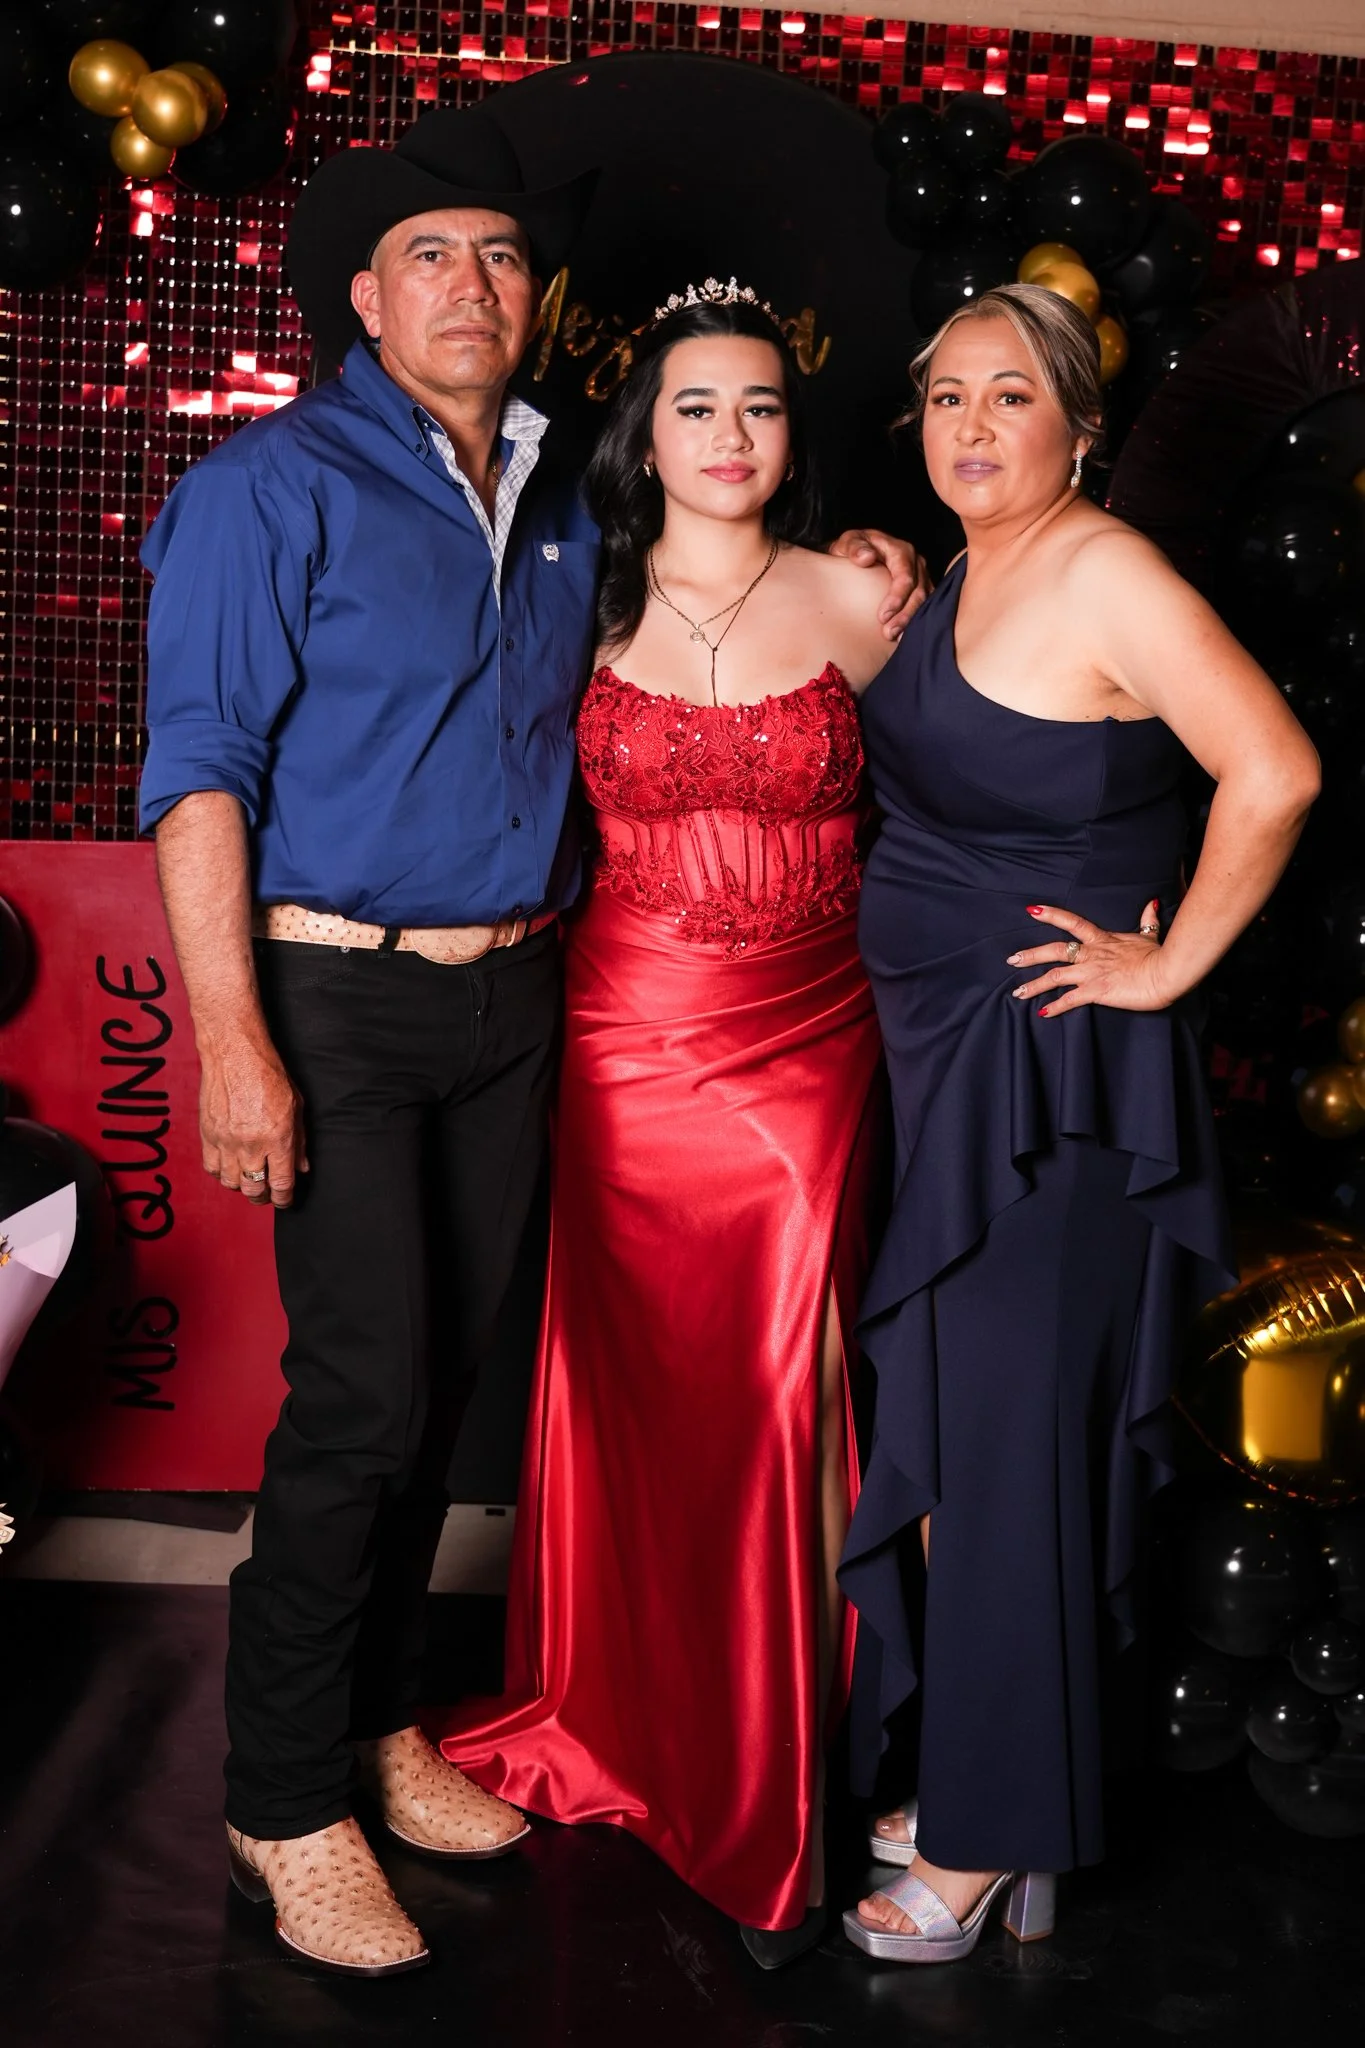
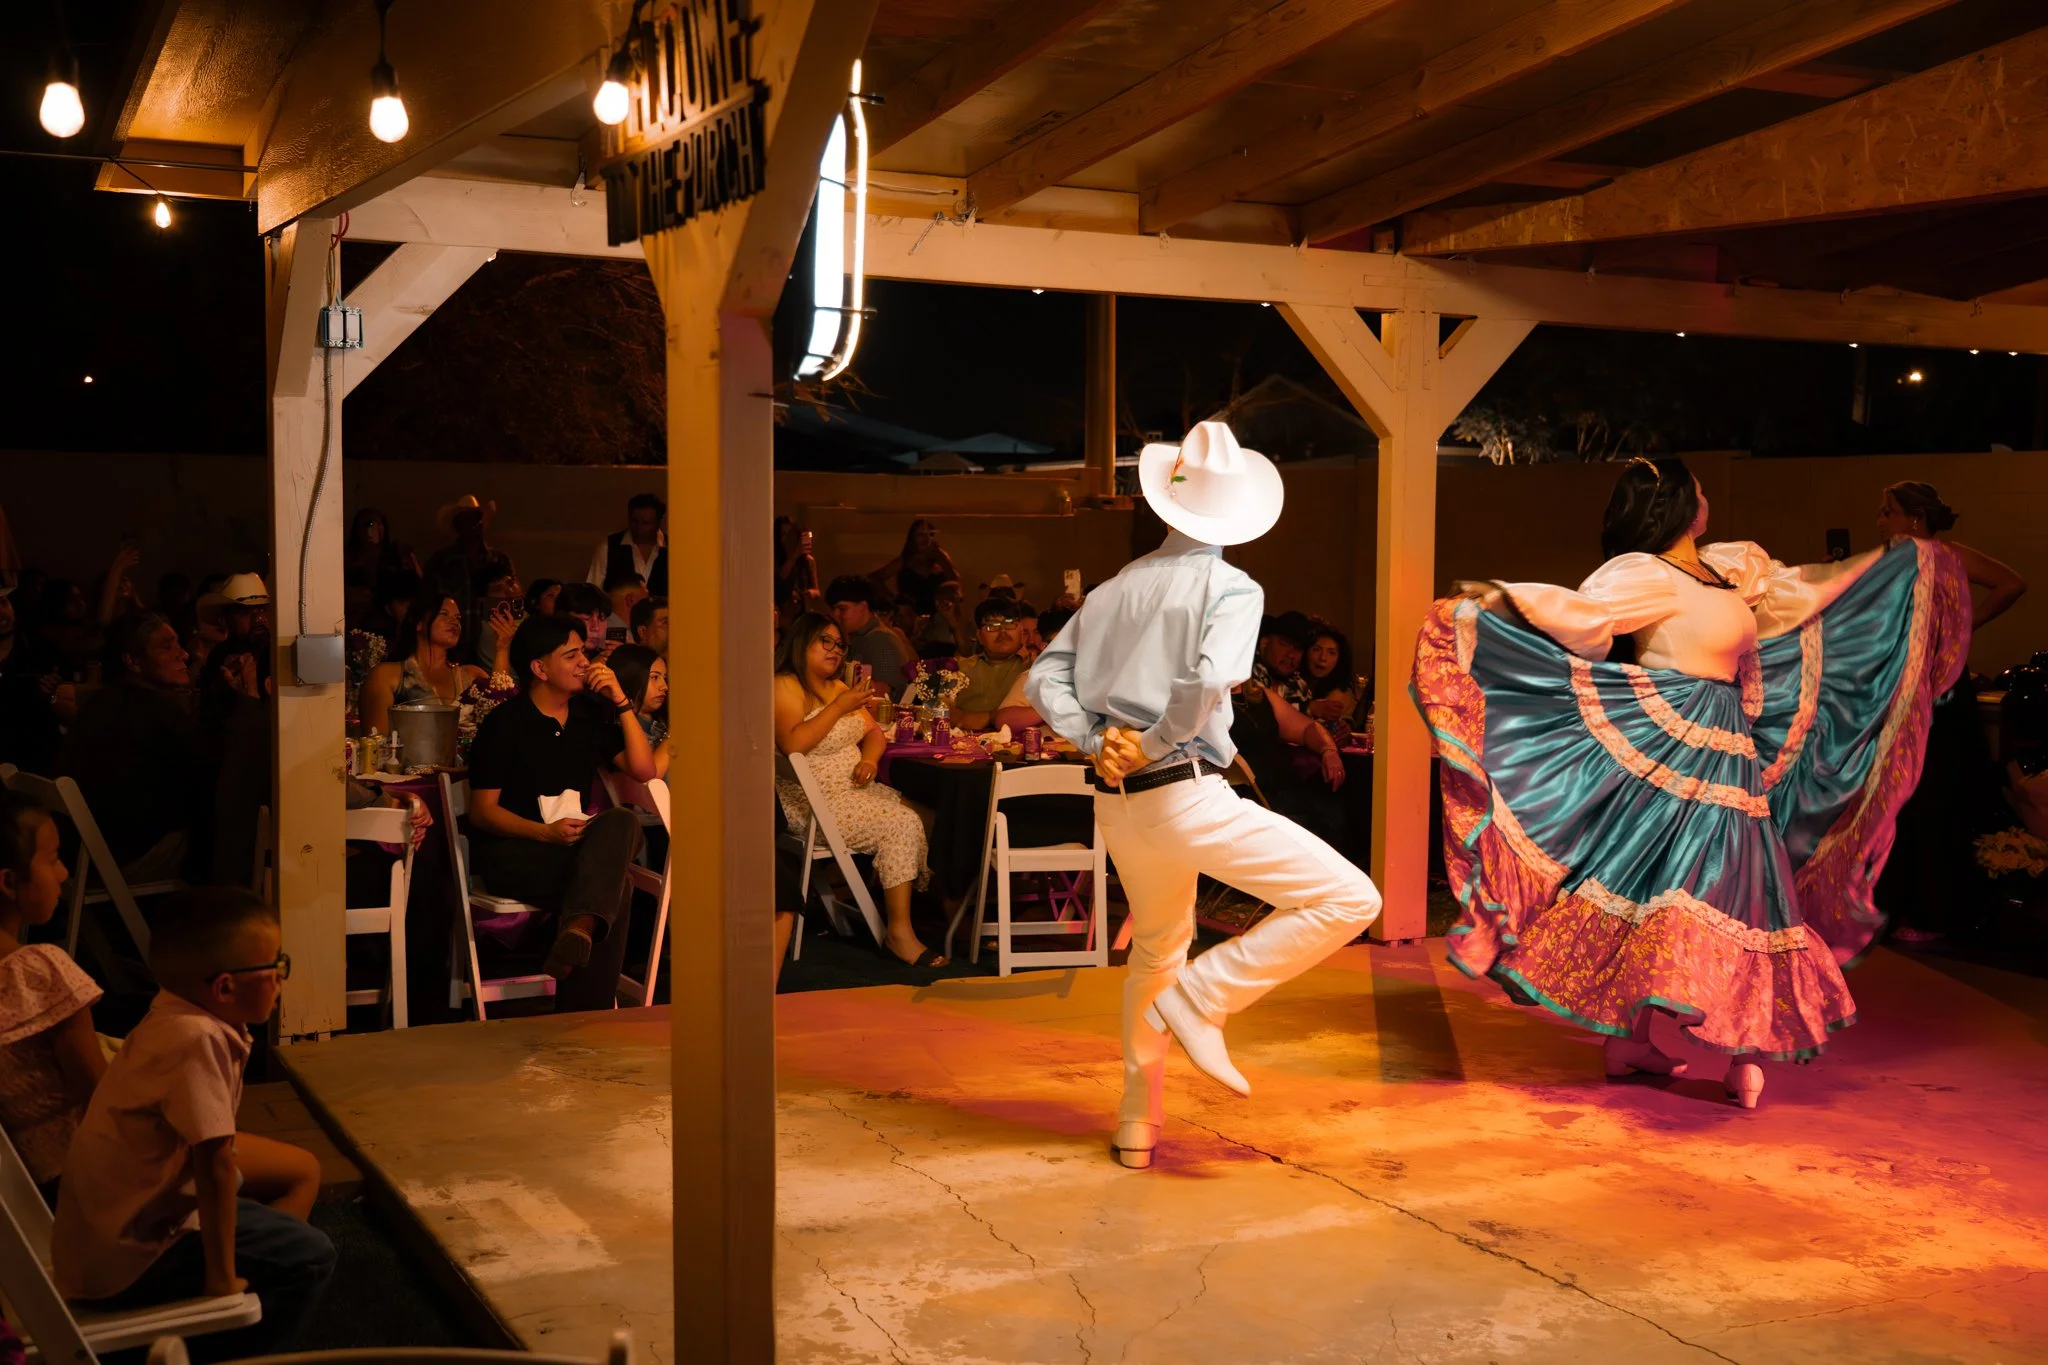
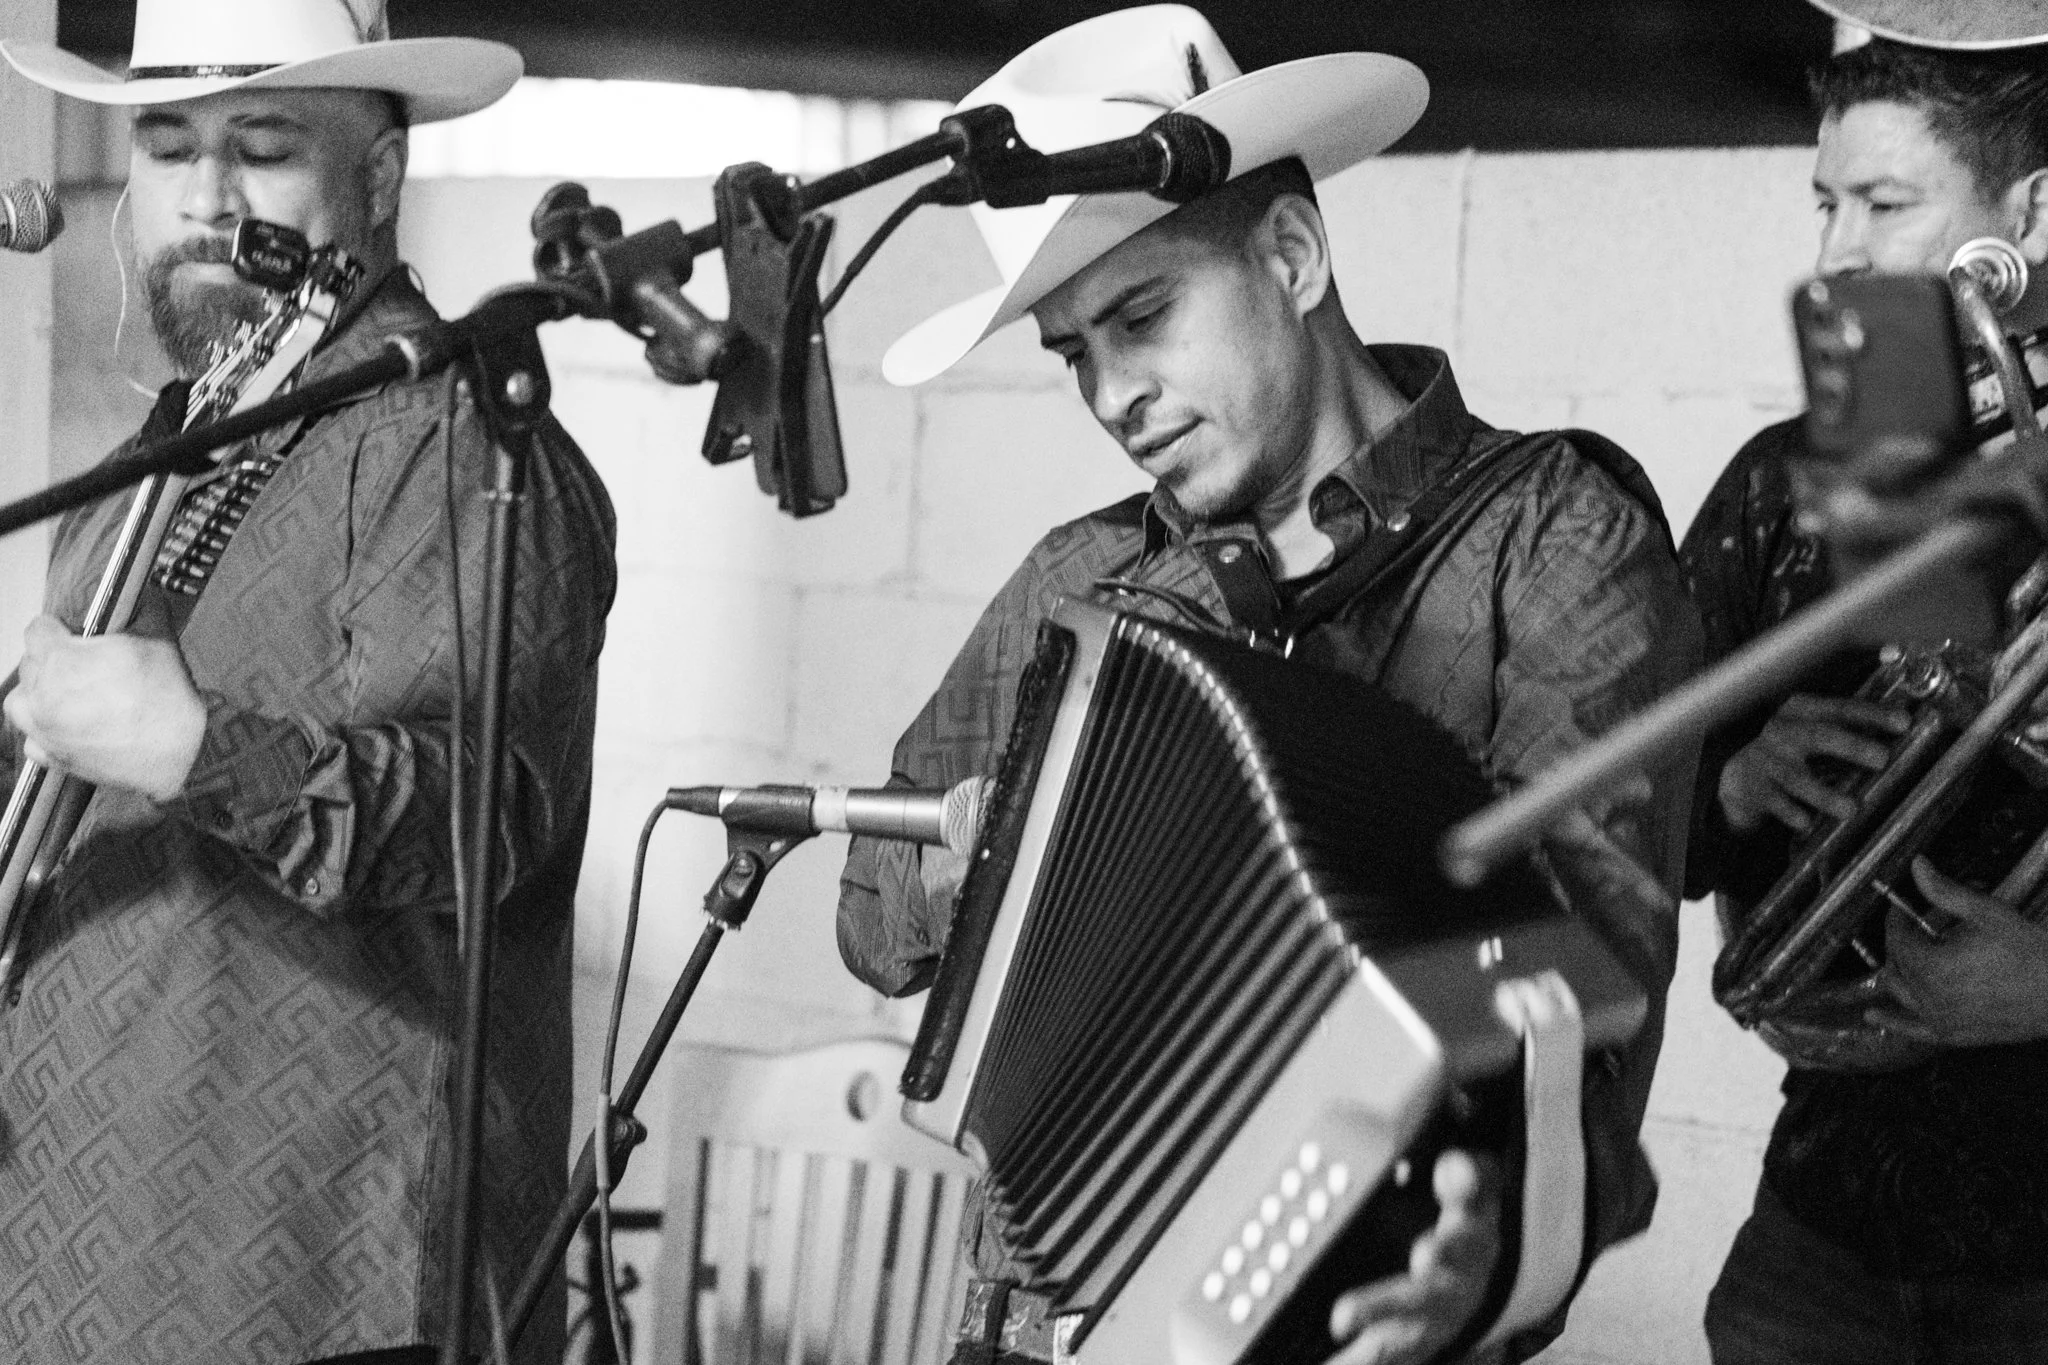
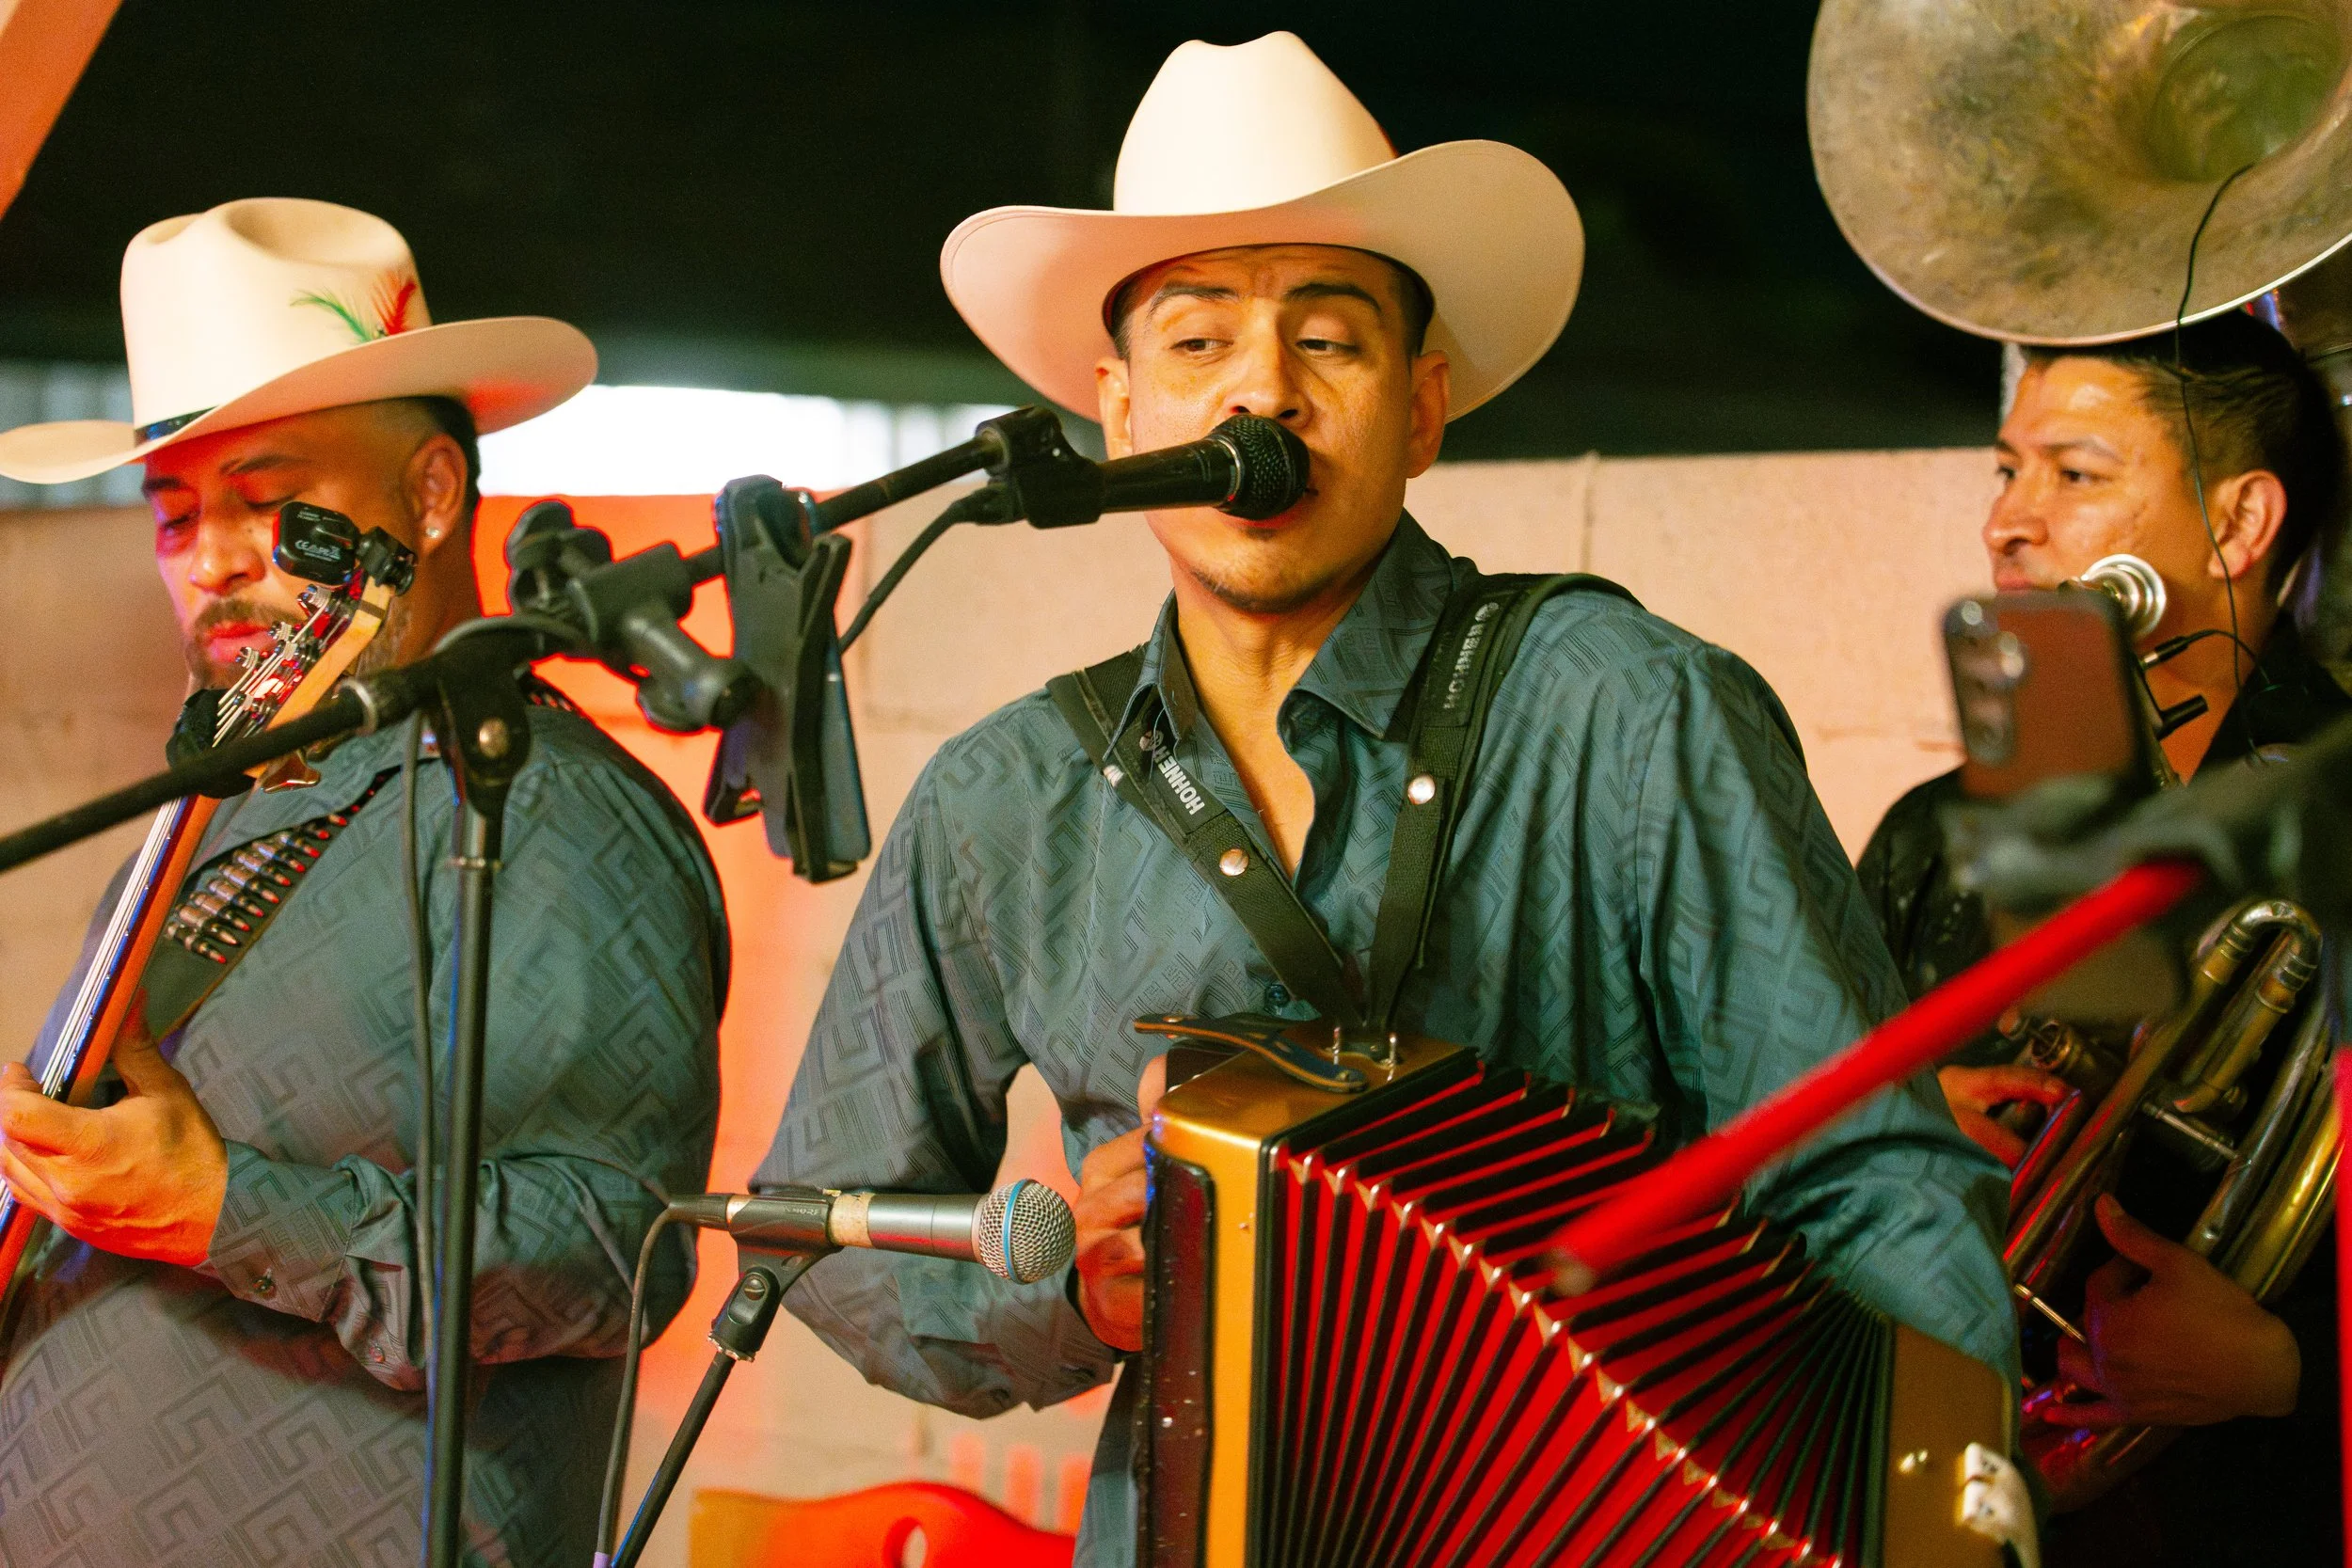
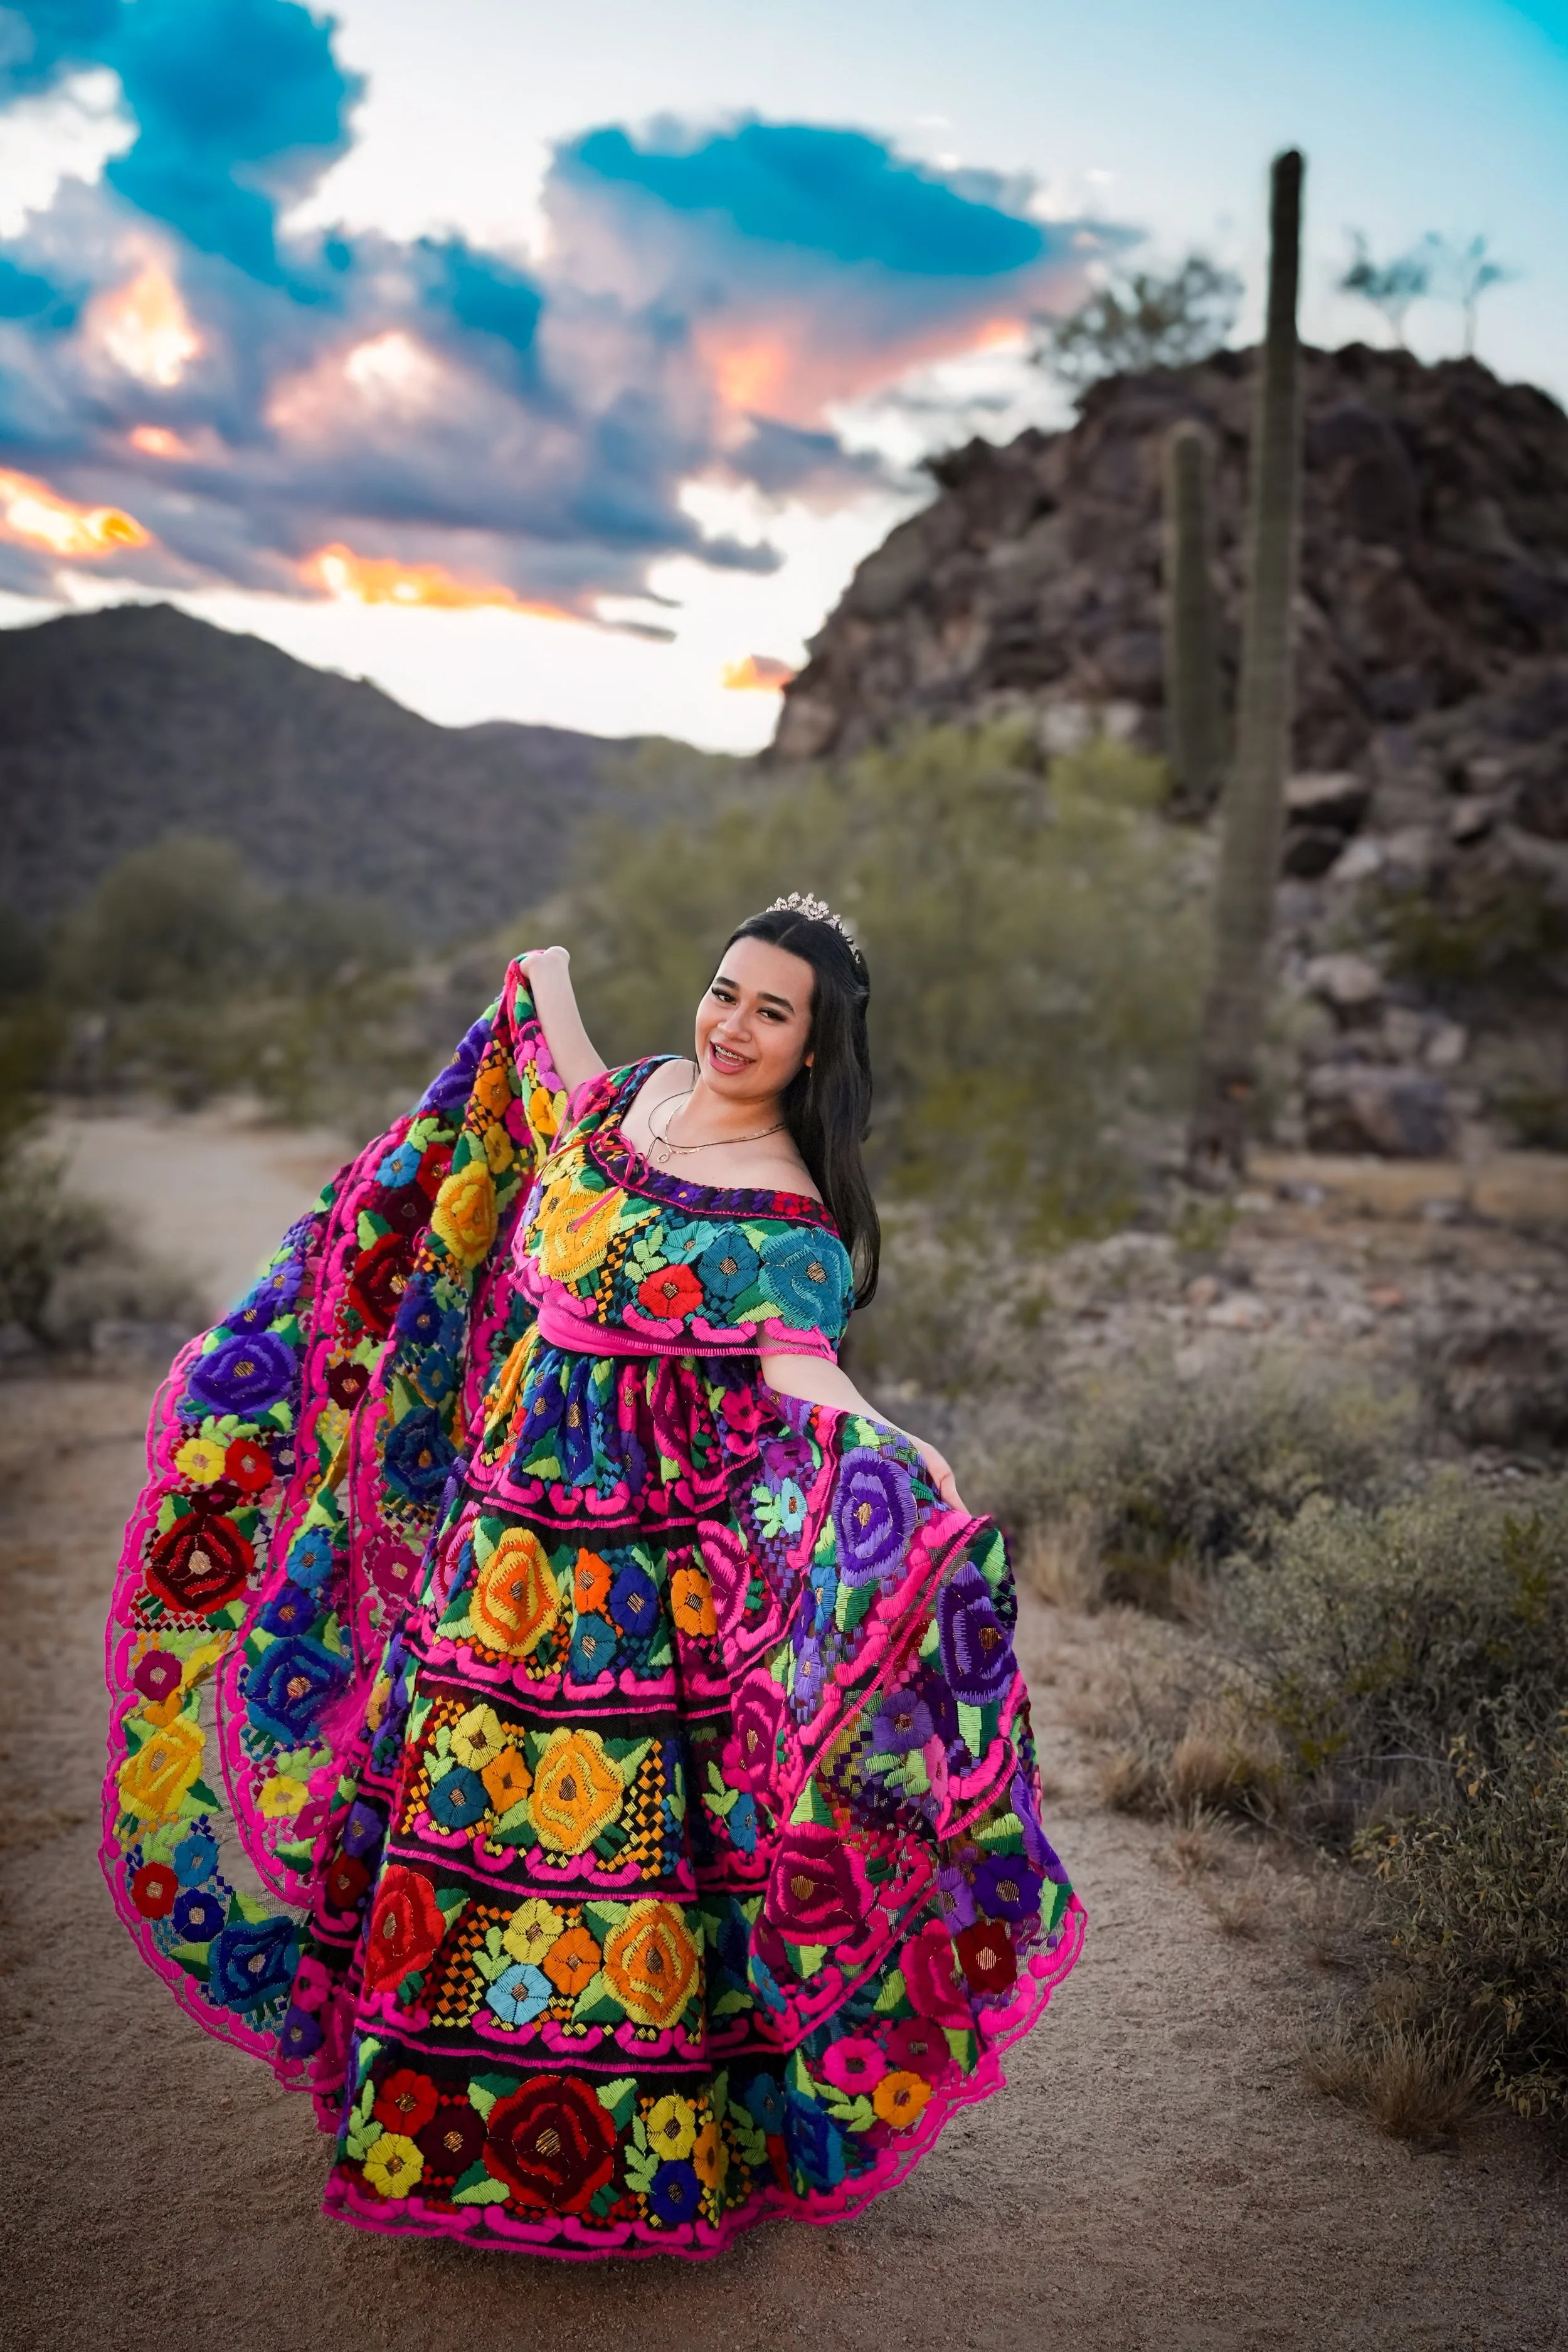
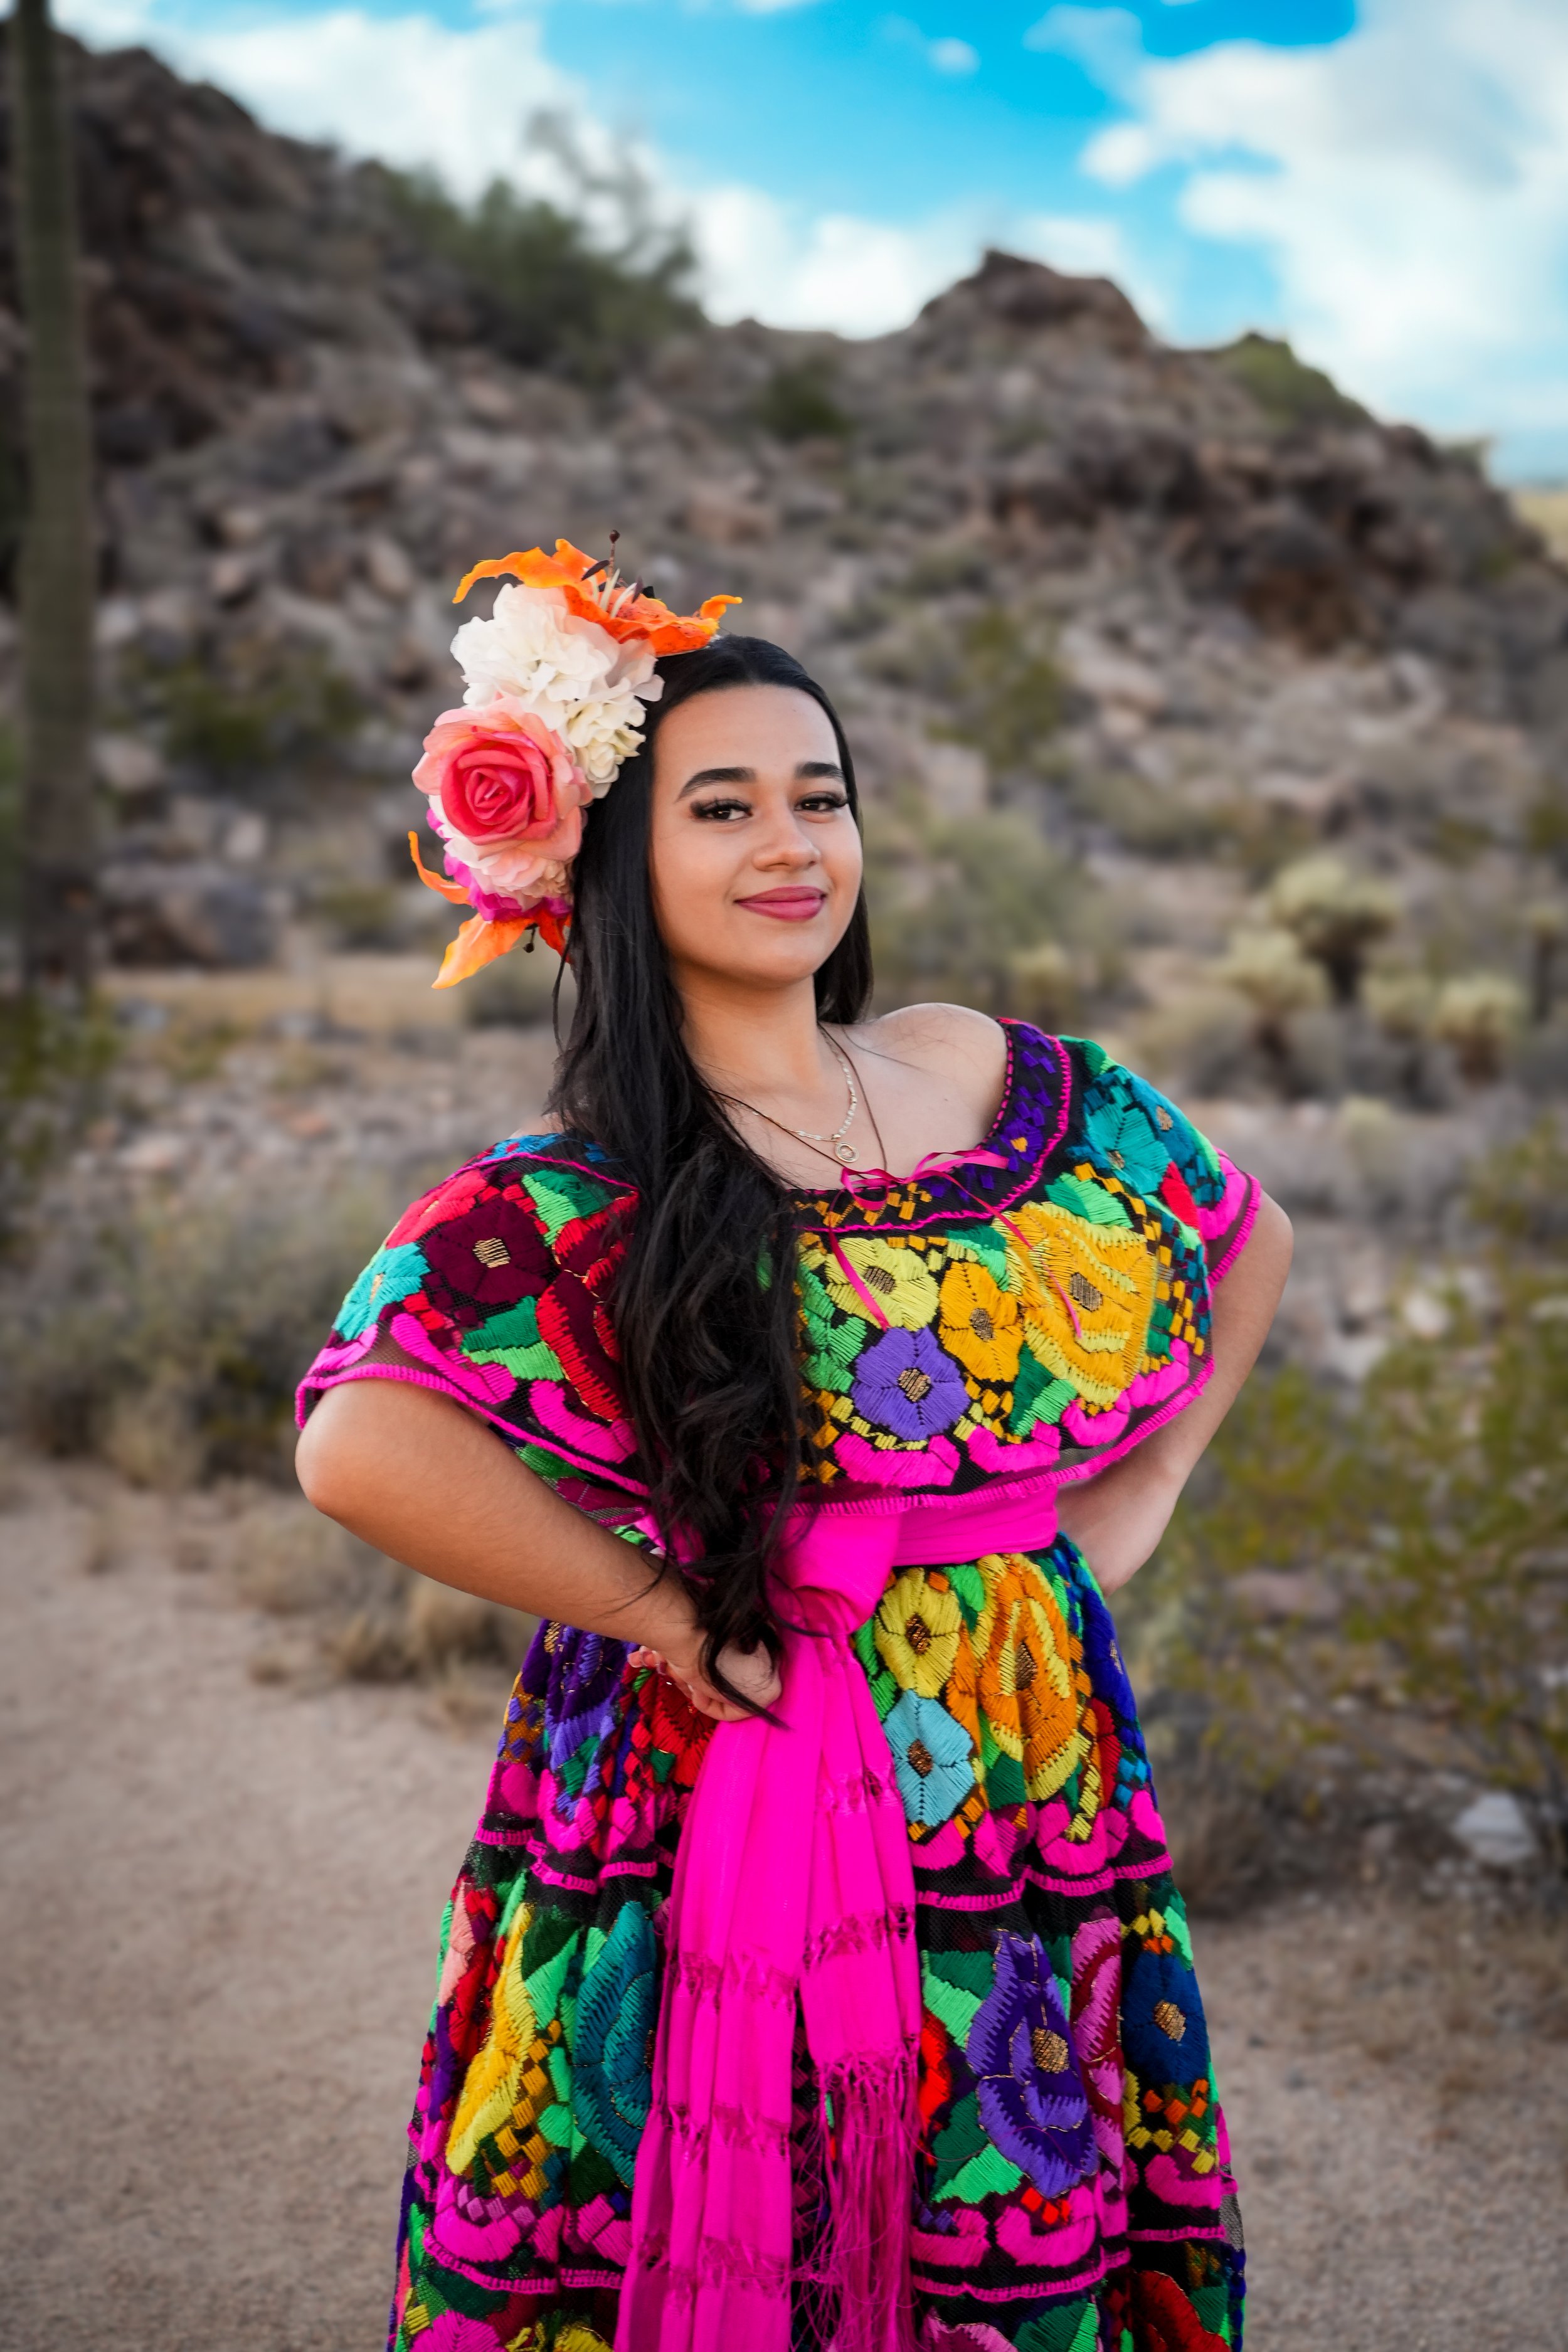
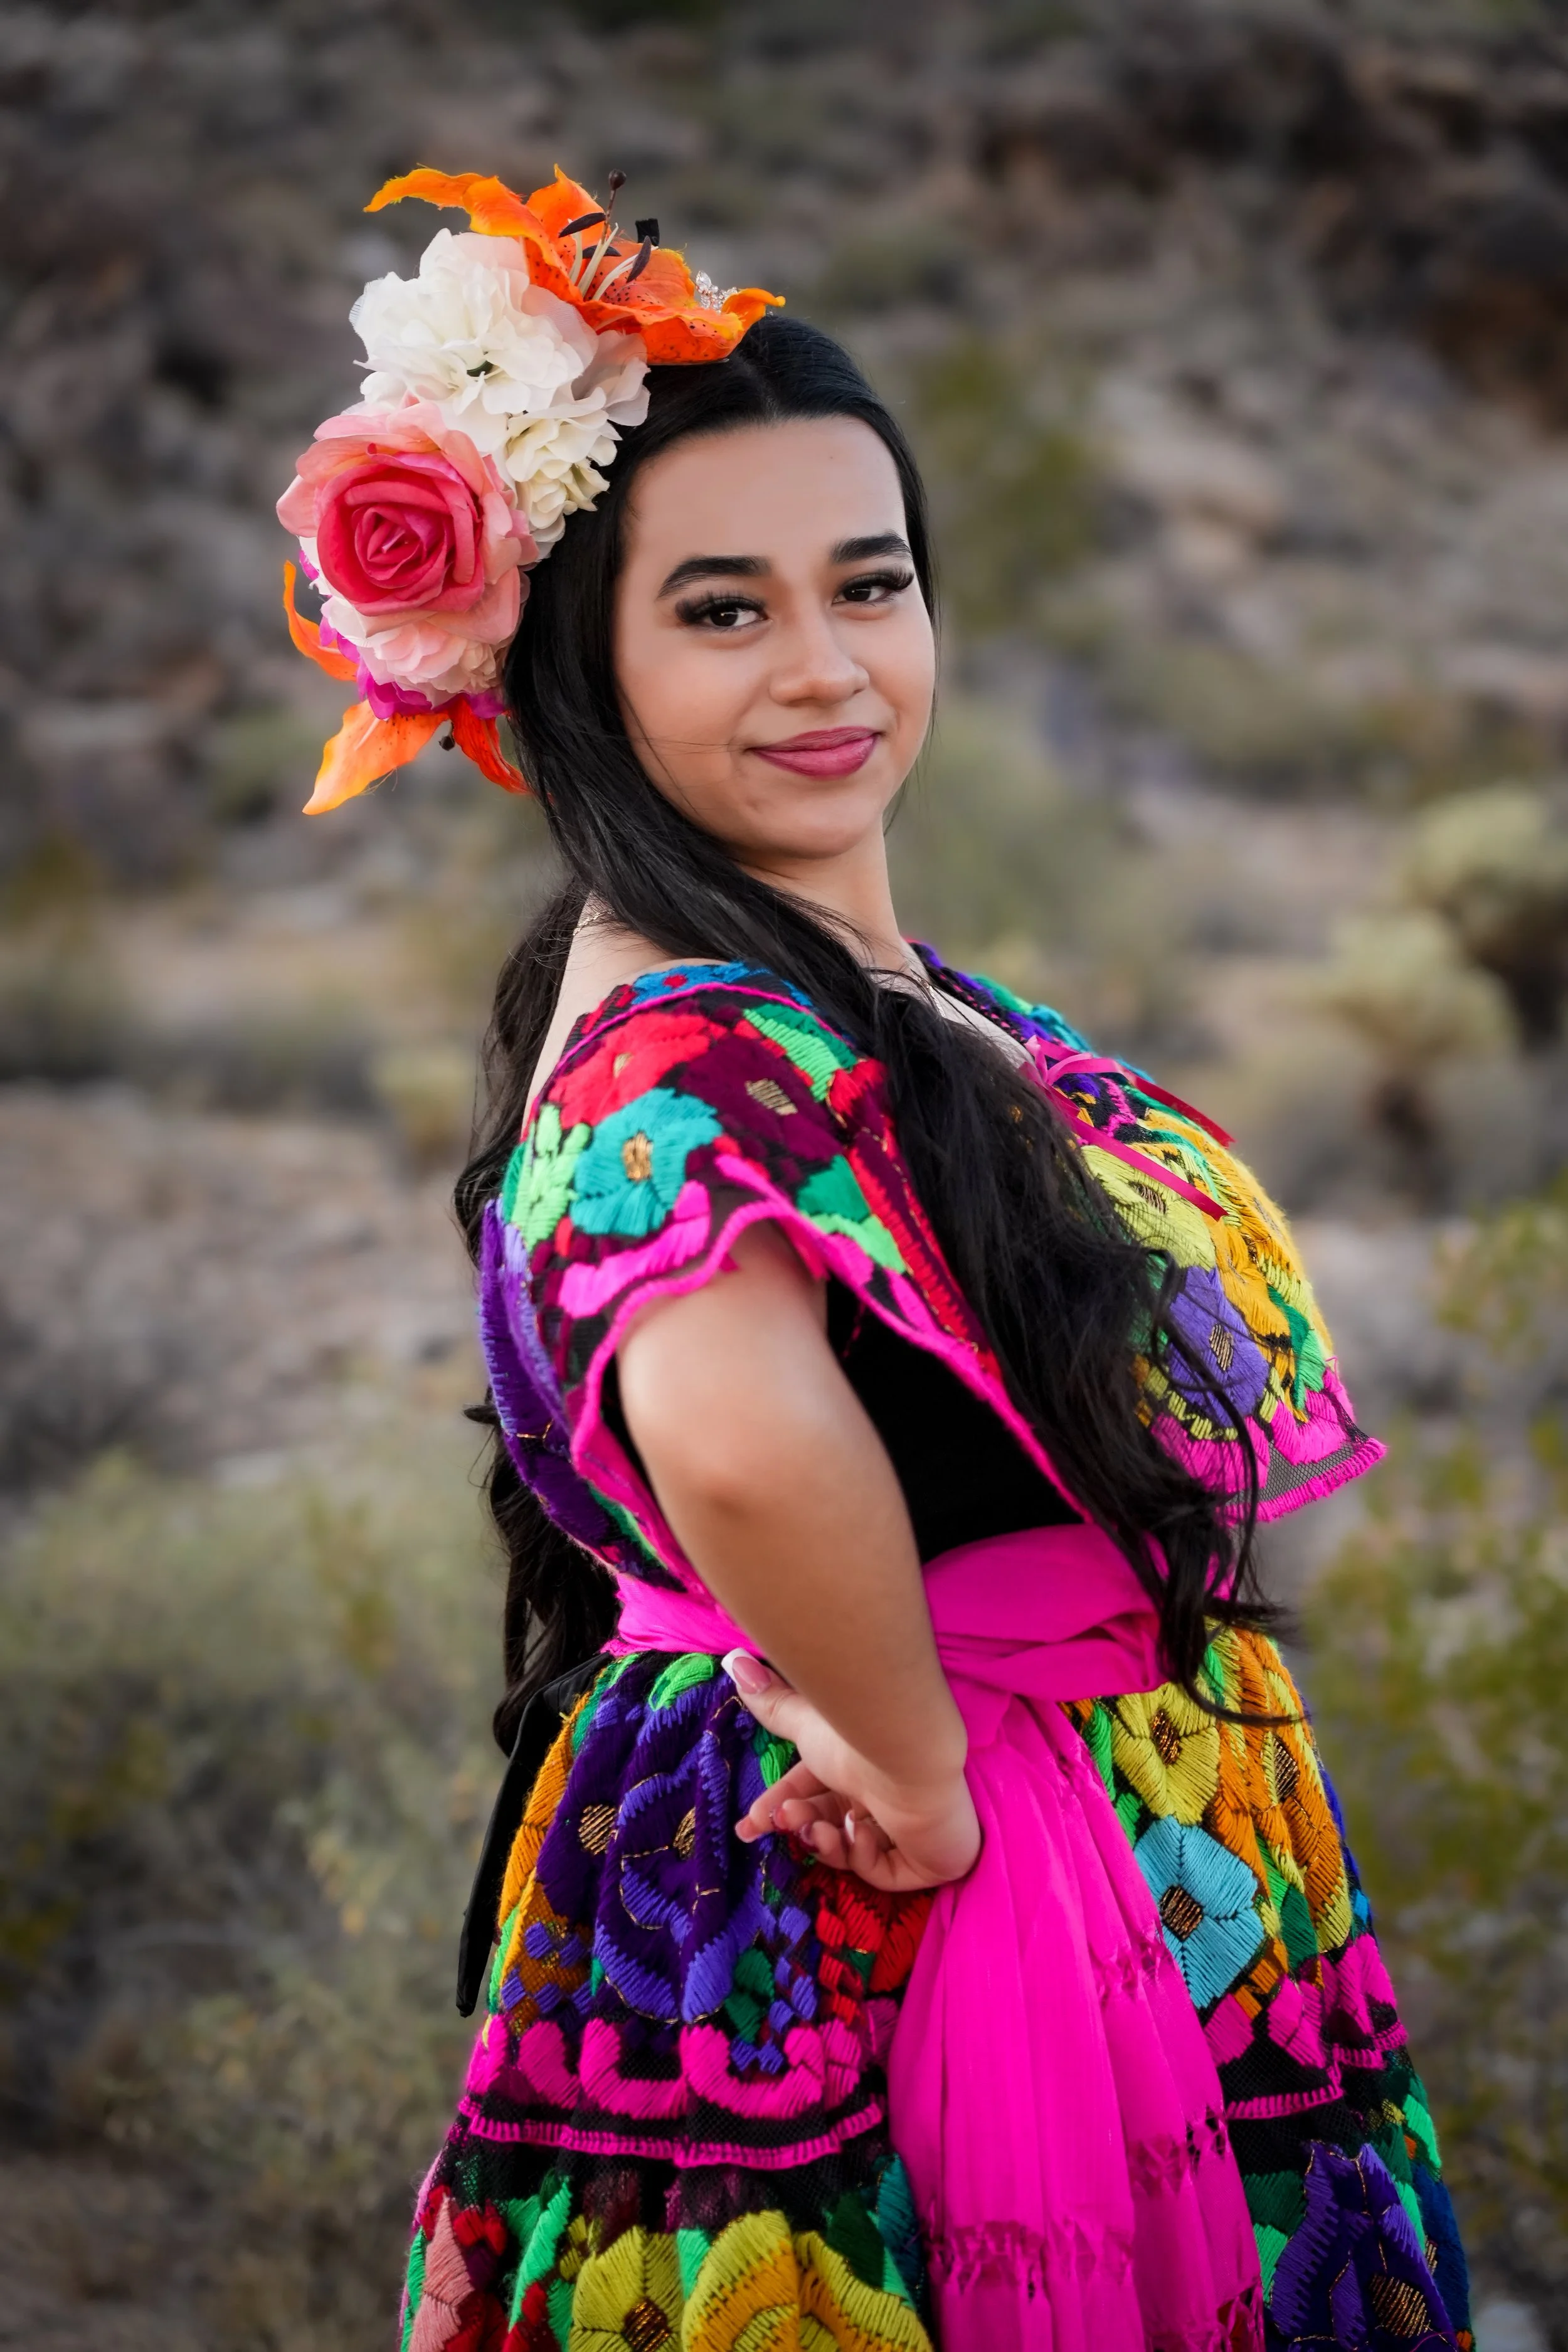
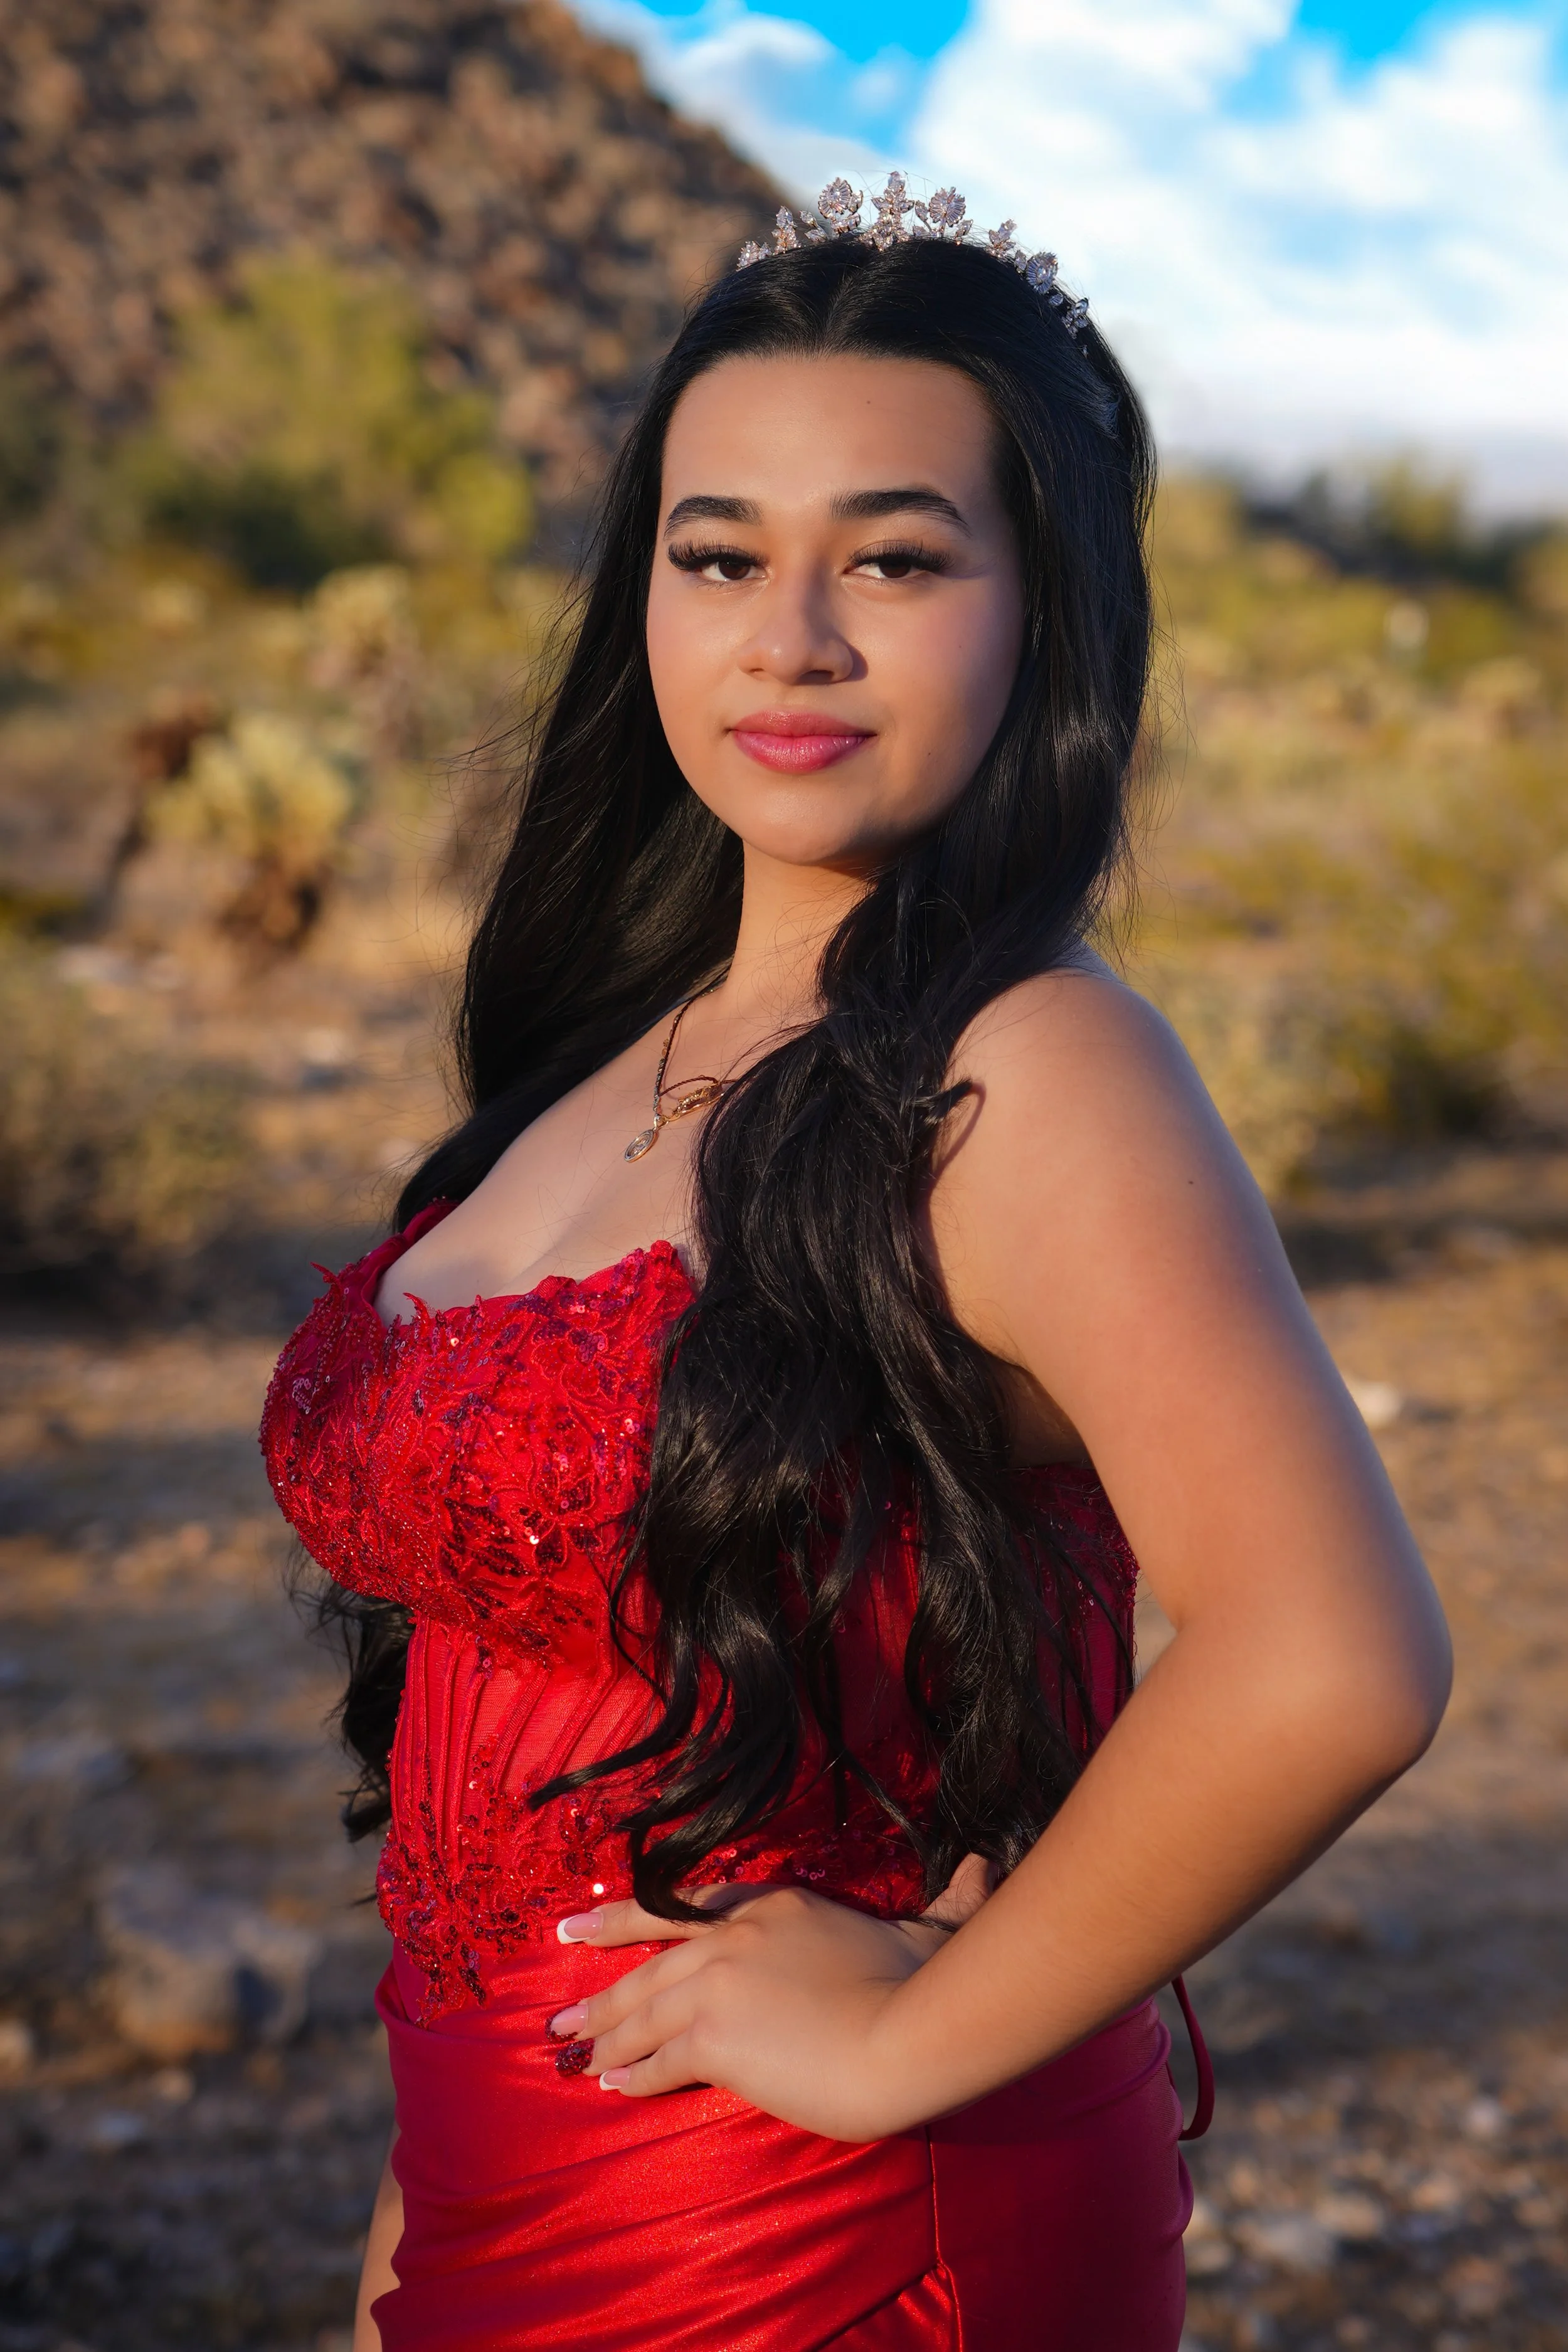
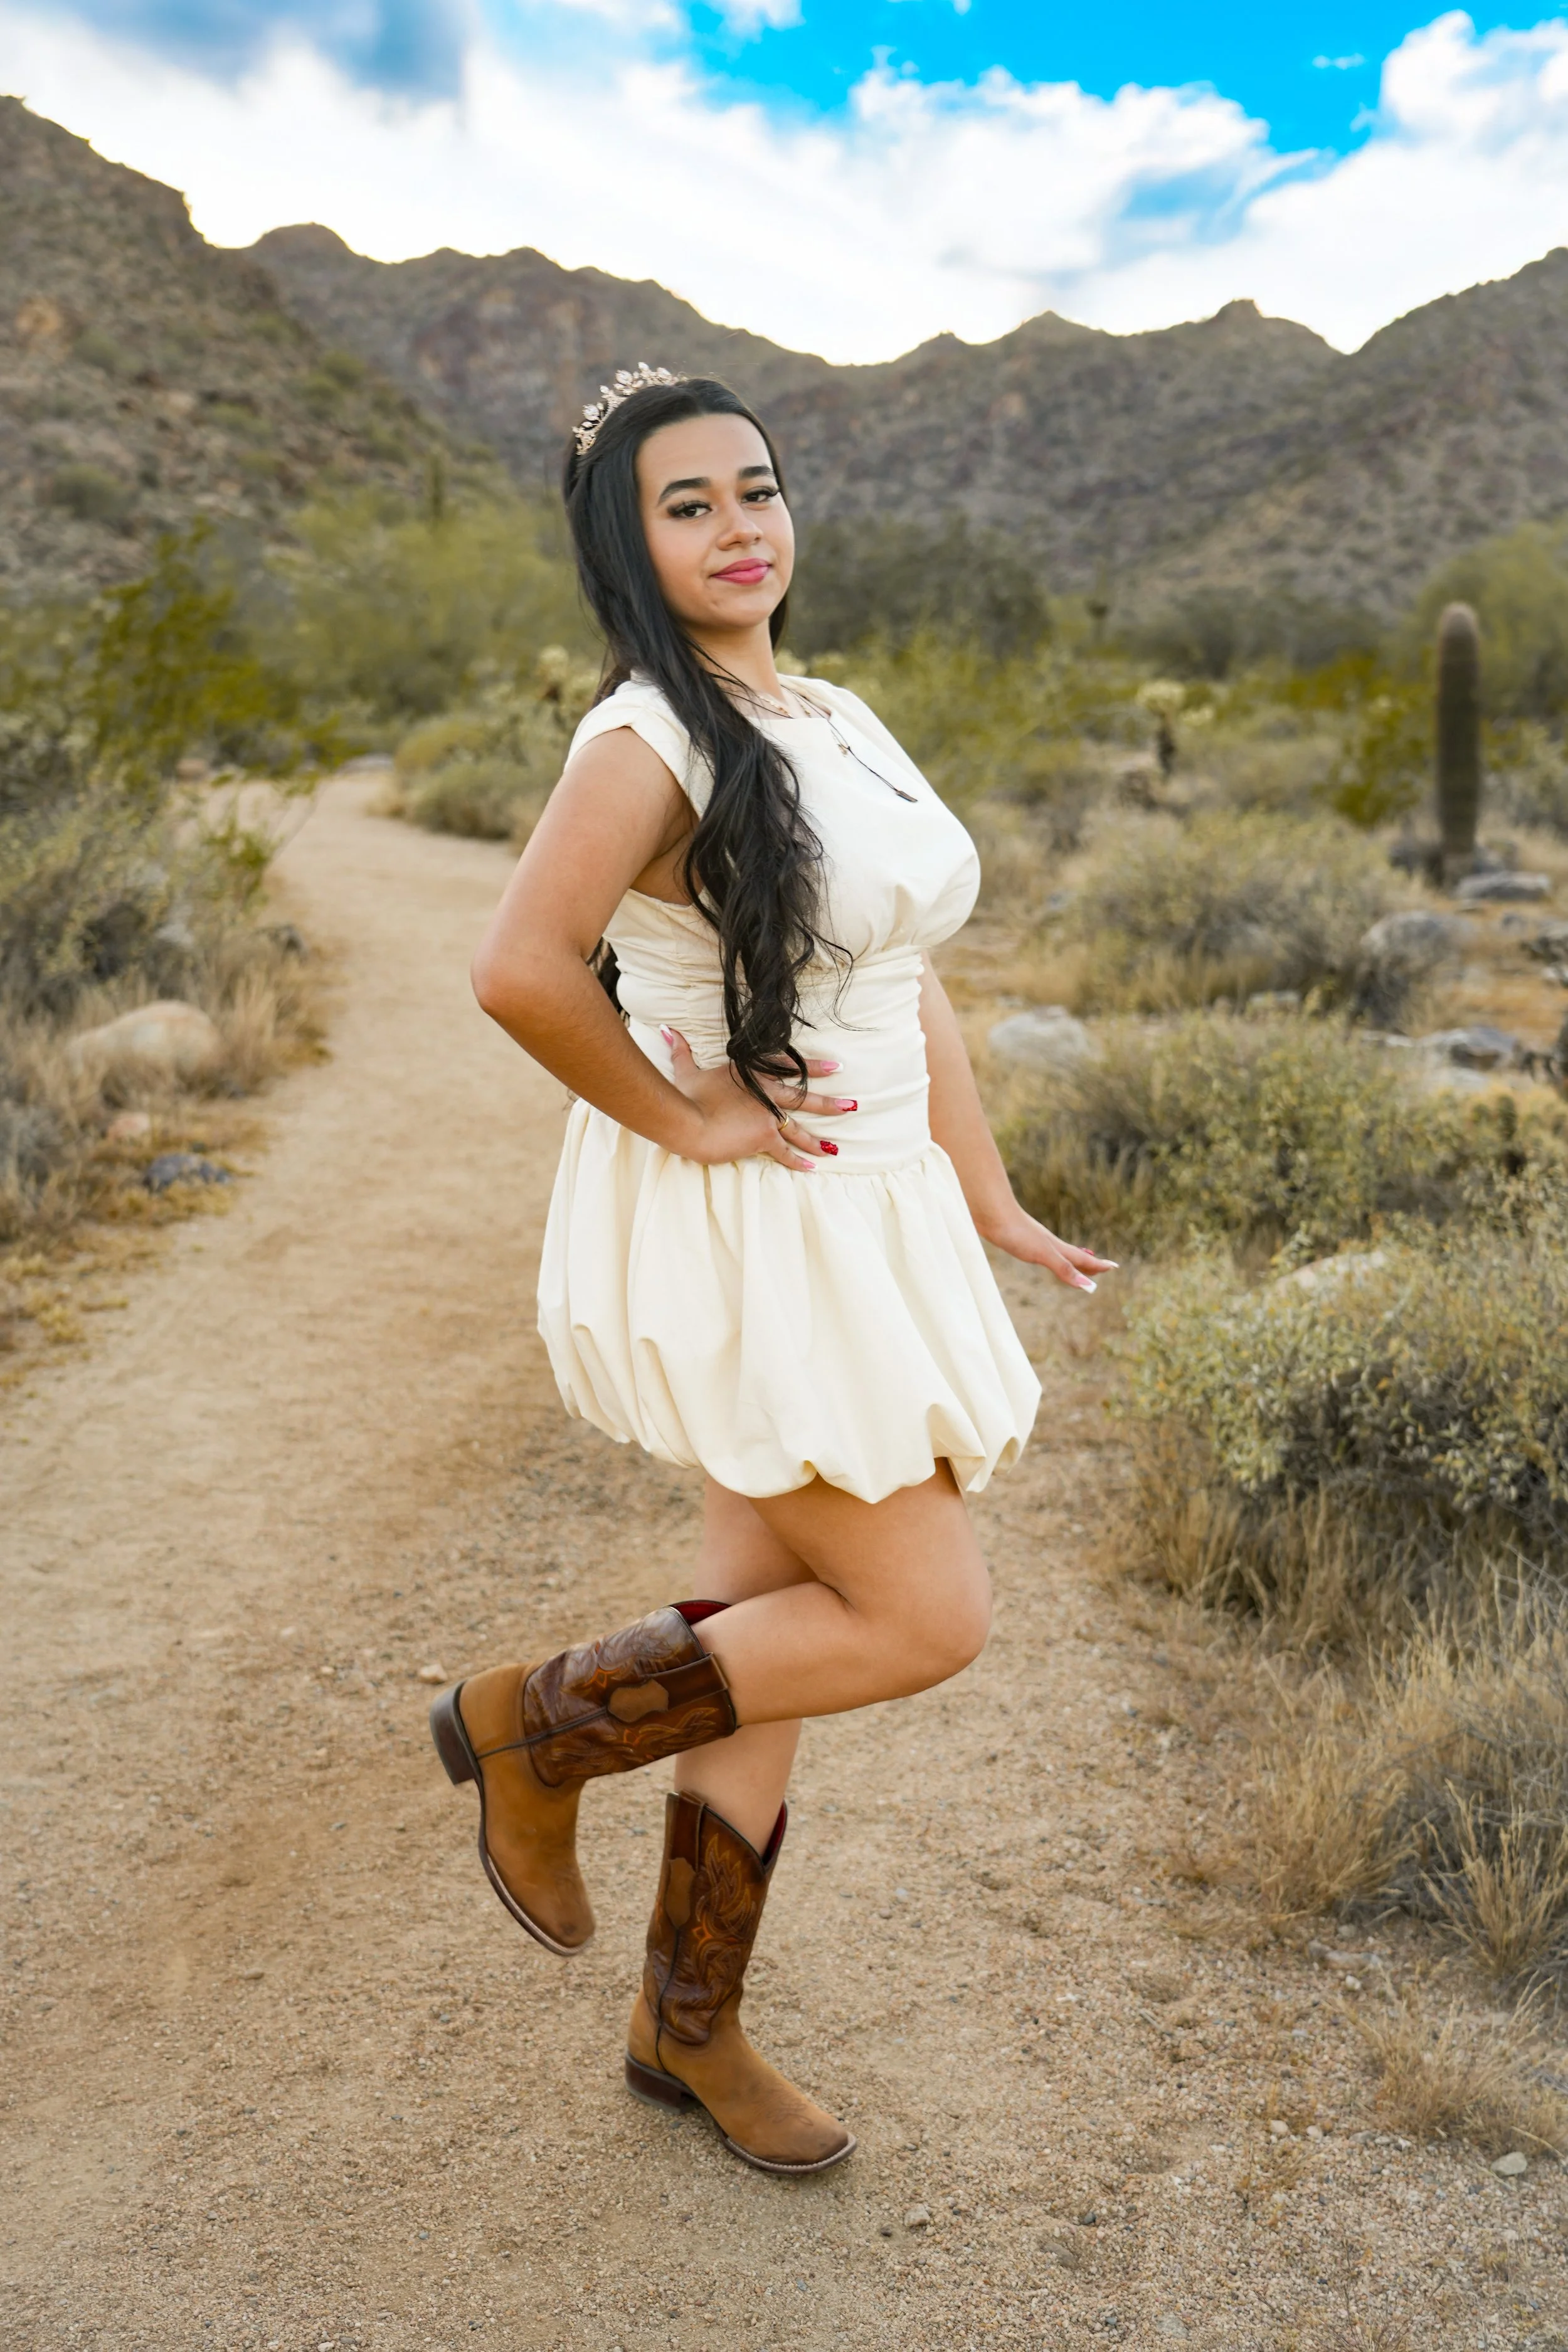
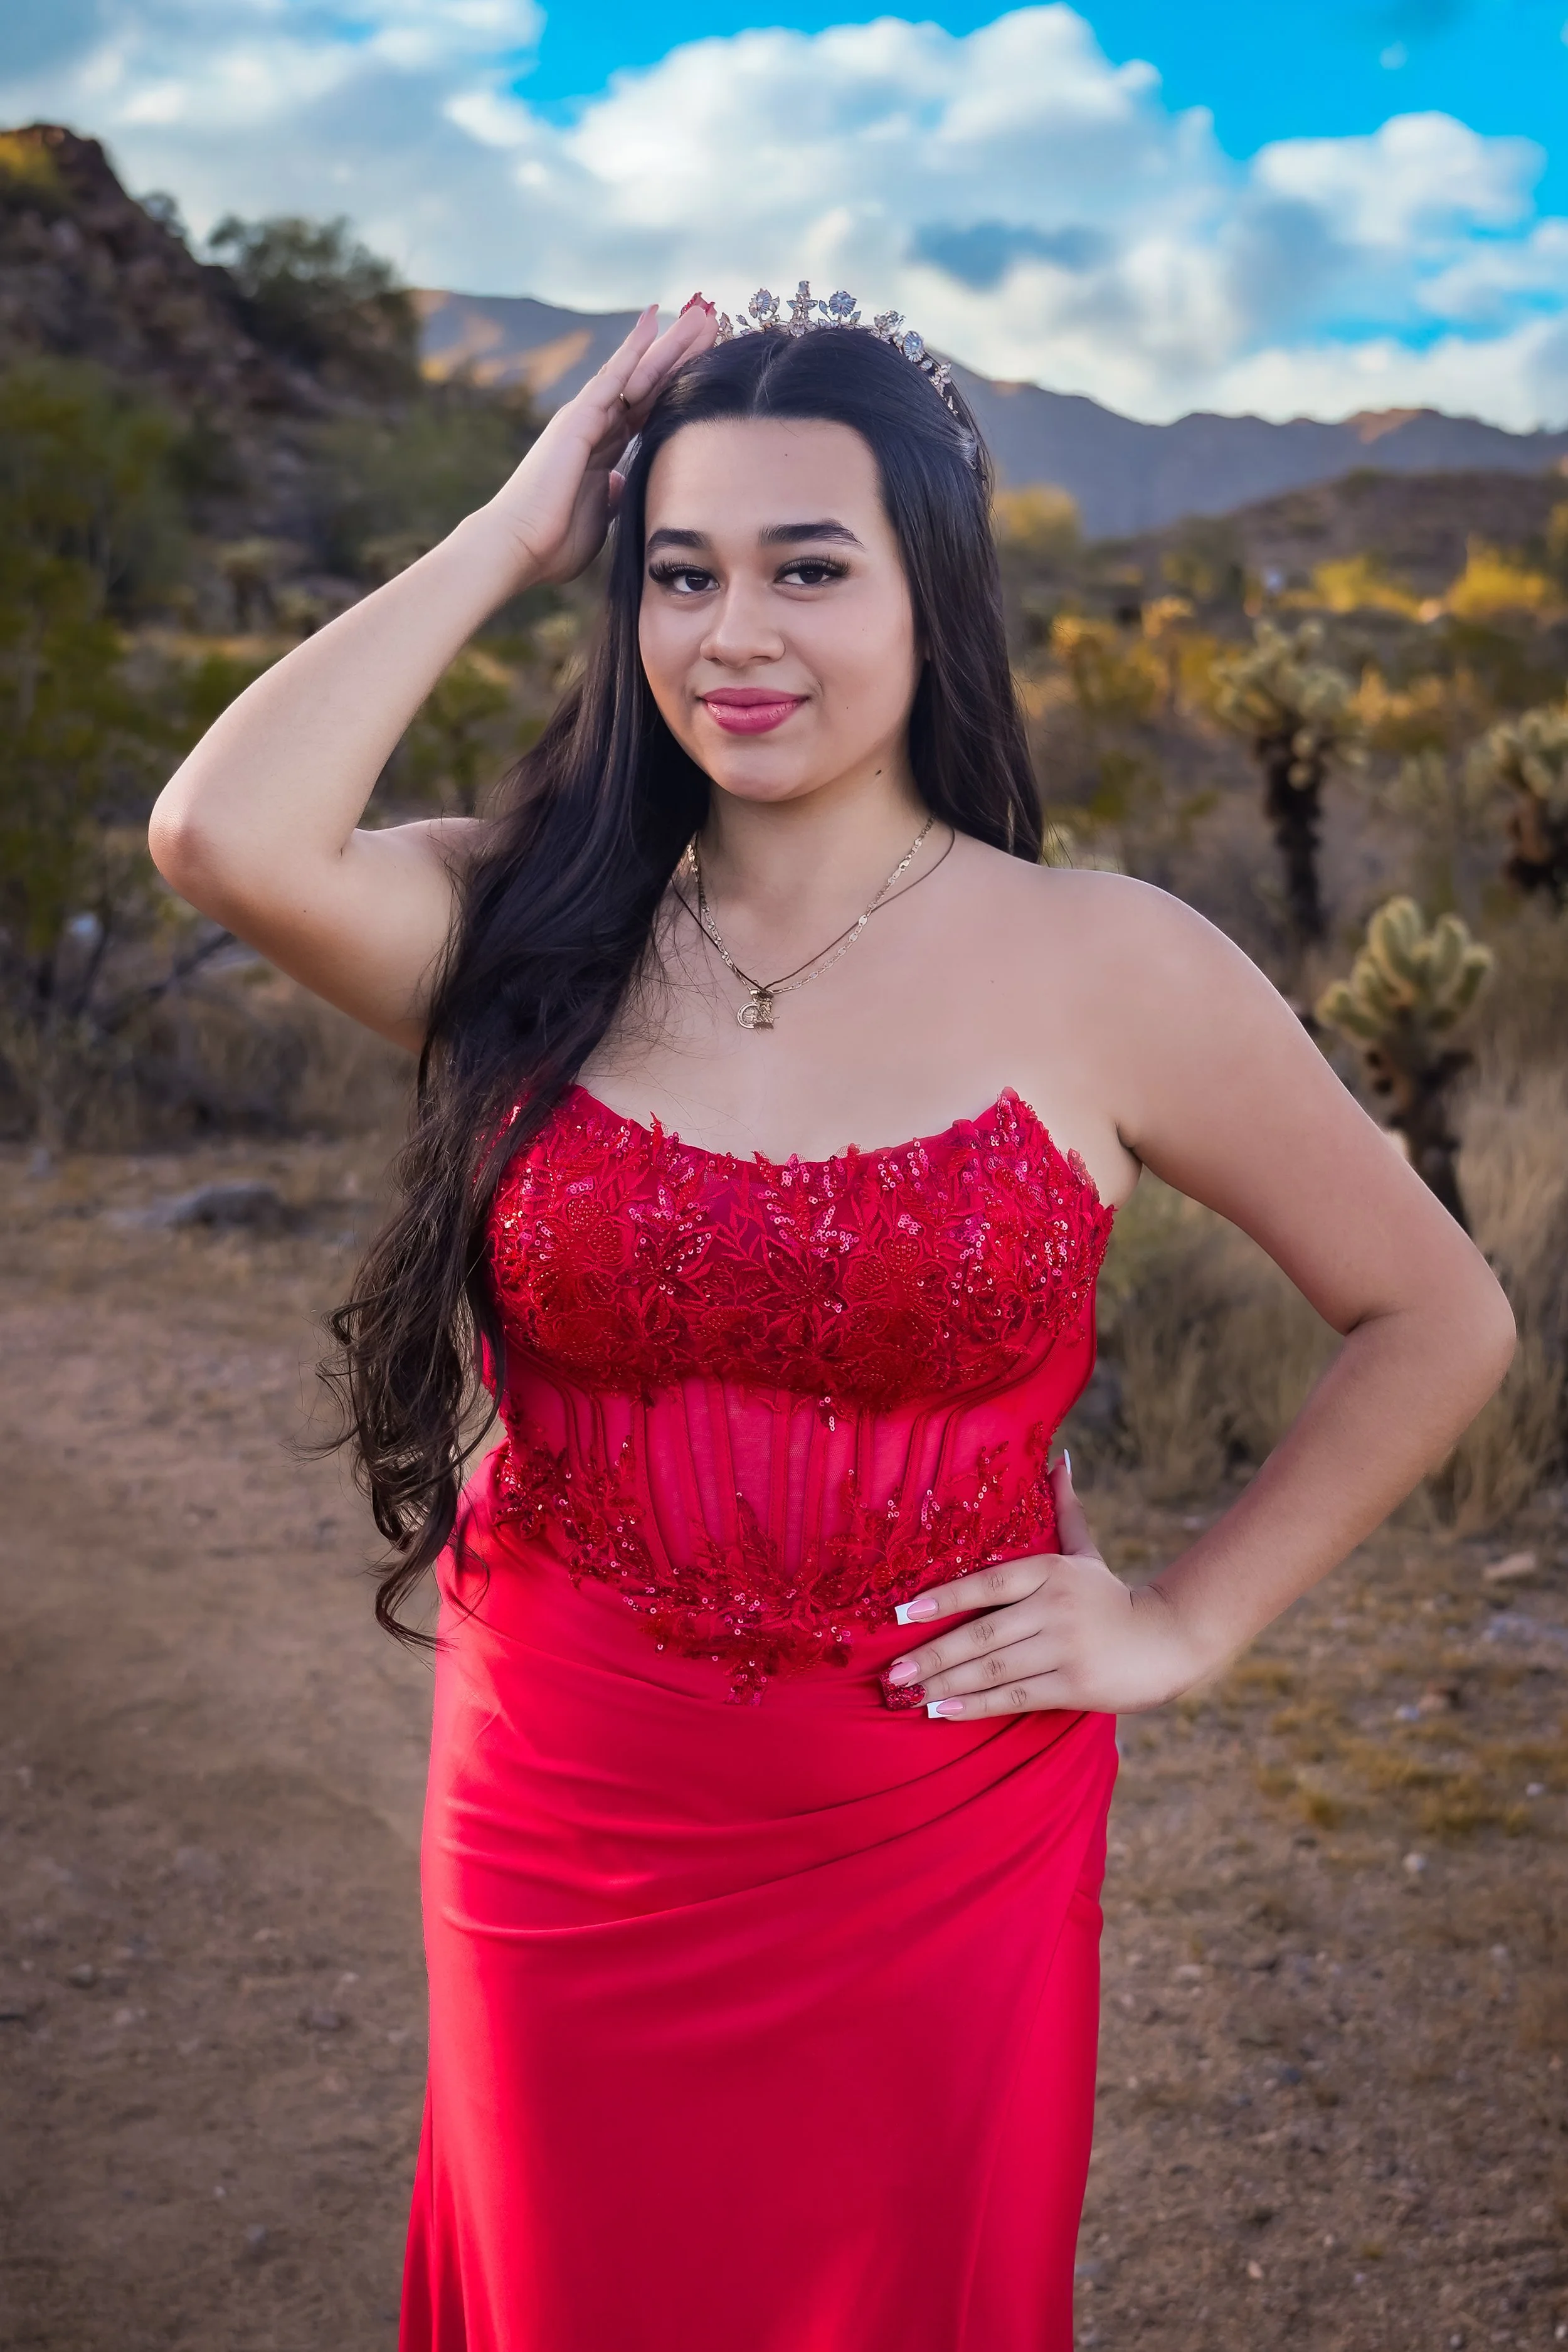
For years I chased the cleanest, smoothest files I could get—this weekend a Quinceañera taught me to love grain.
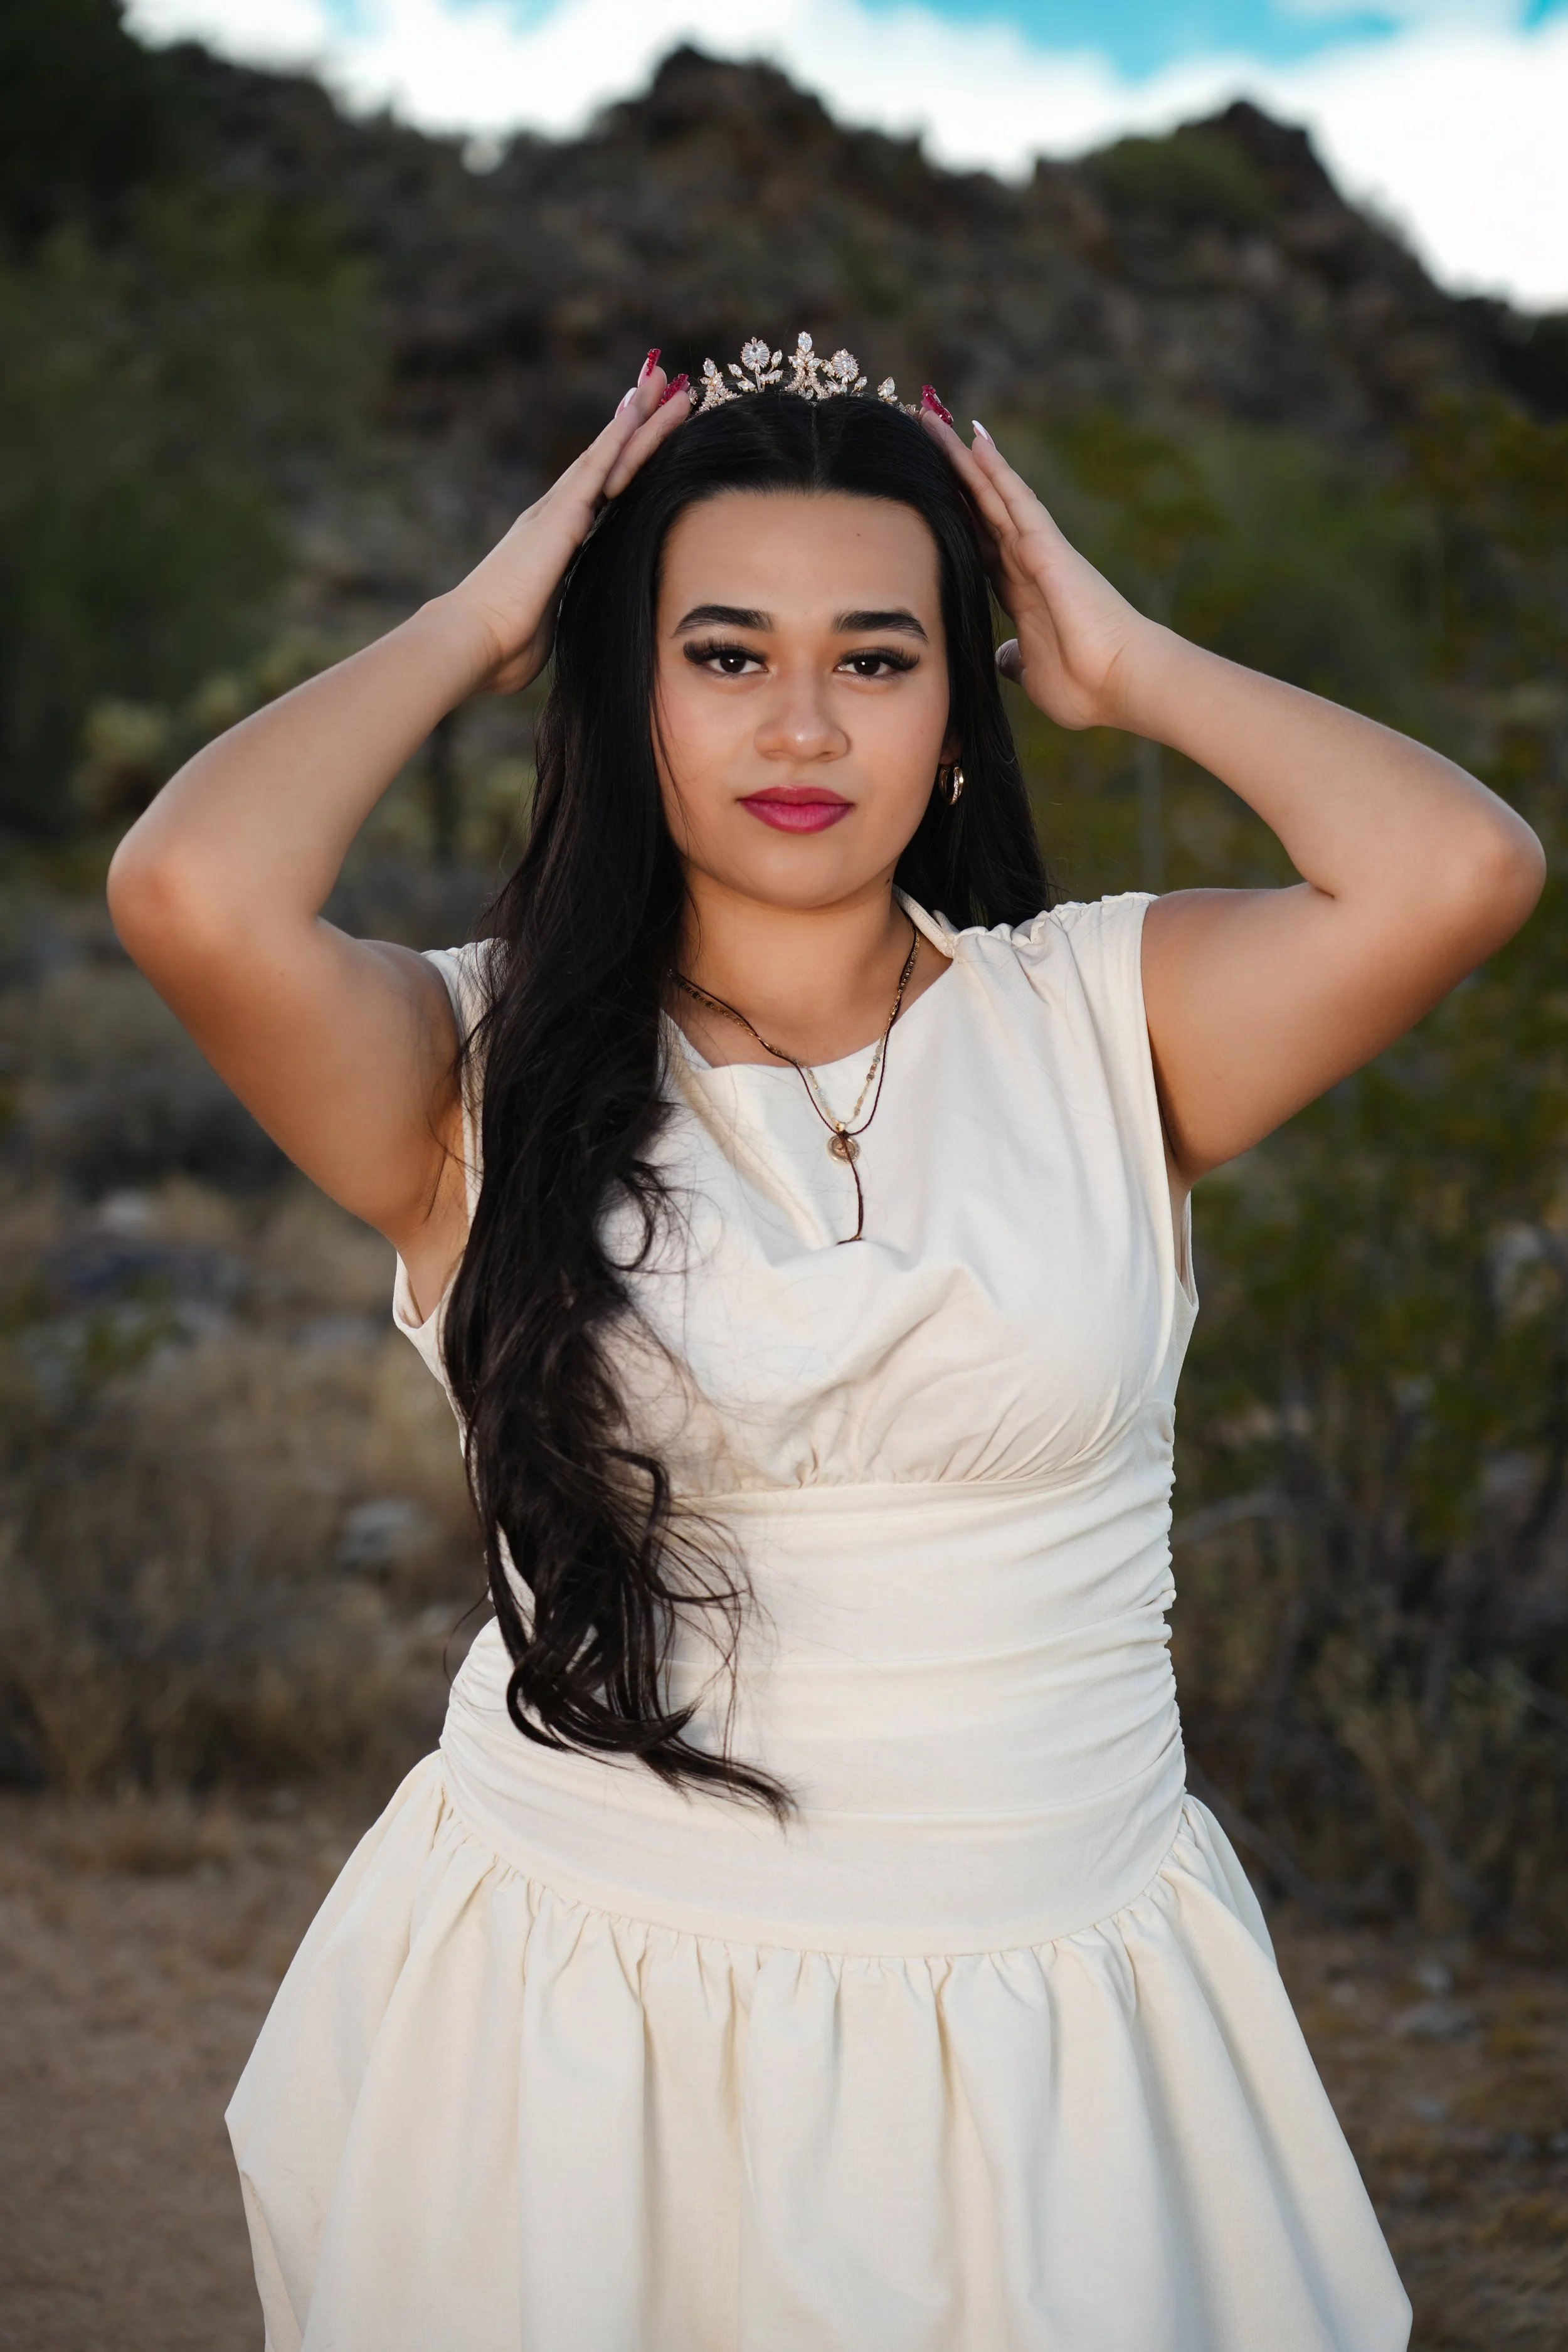
This past weekend I had the absolute honor of photographing a Quinceañera. I’d shot portraits the weekend before and edited a loop of images to play at the party.
More traditional portraits with low ISO and my Westcott FJ 400 off camera flash.
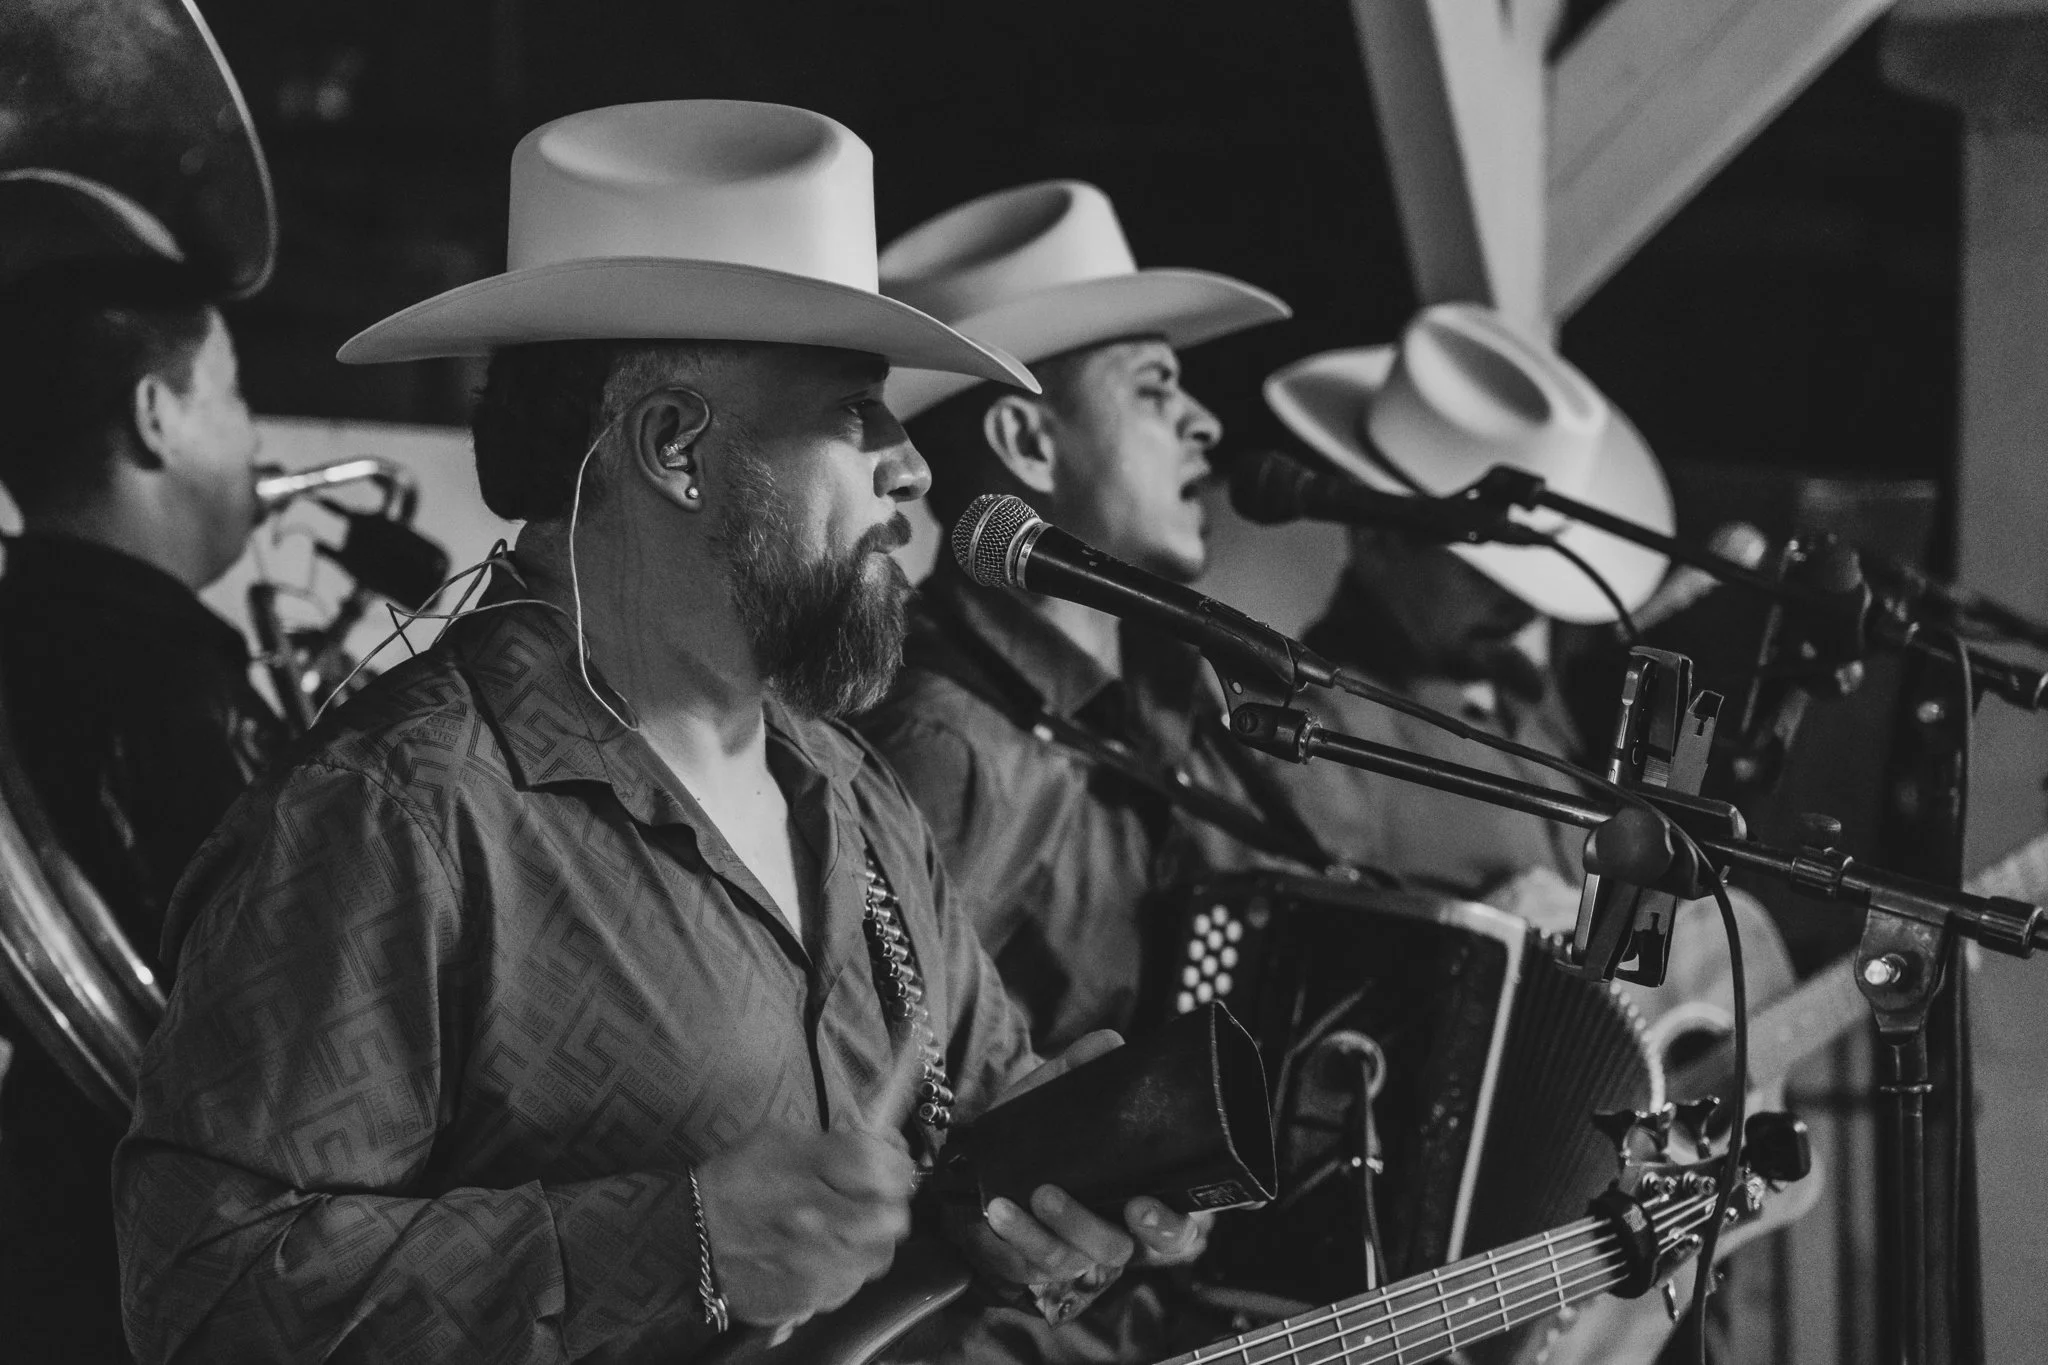
At the event I handled the group photos, but the real joy came from the candid moments—the dancing, the band, the laughter, the tiny, messy moments that make a night feel alive. The backyard was dark, so I pushed my ISO harder than I normally would. The result: grain. And damned if I didn’t end up loving it.
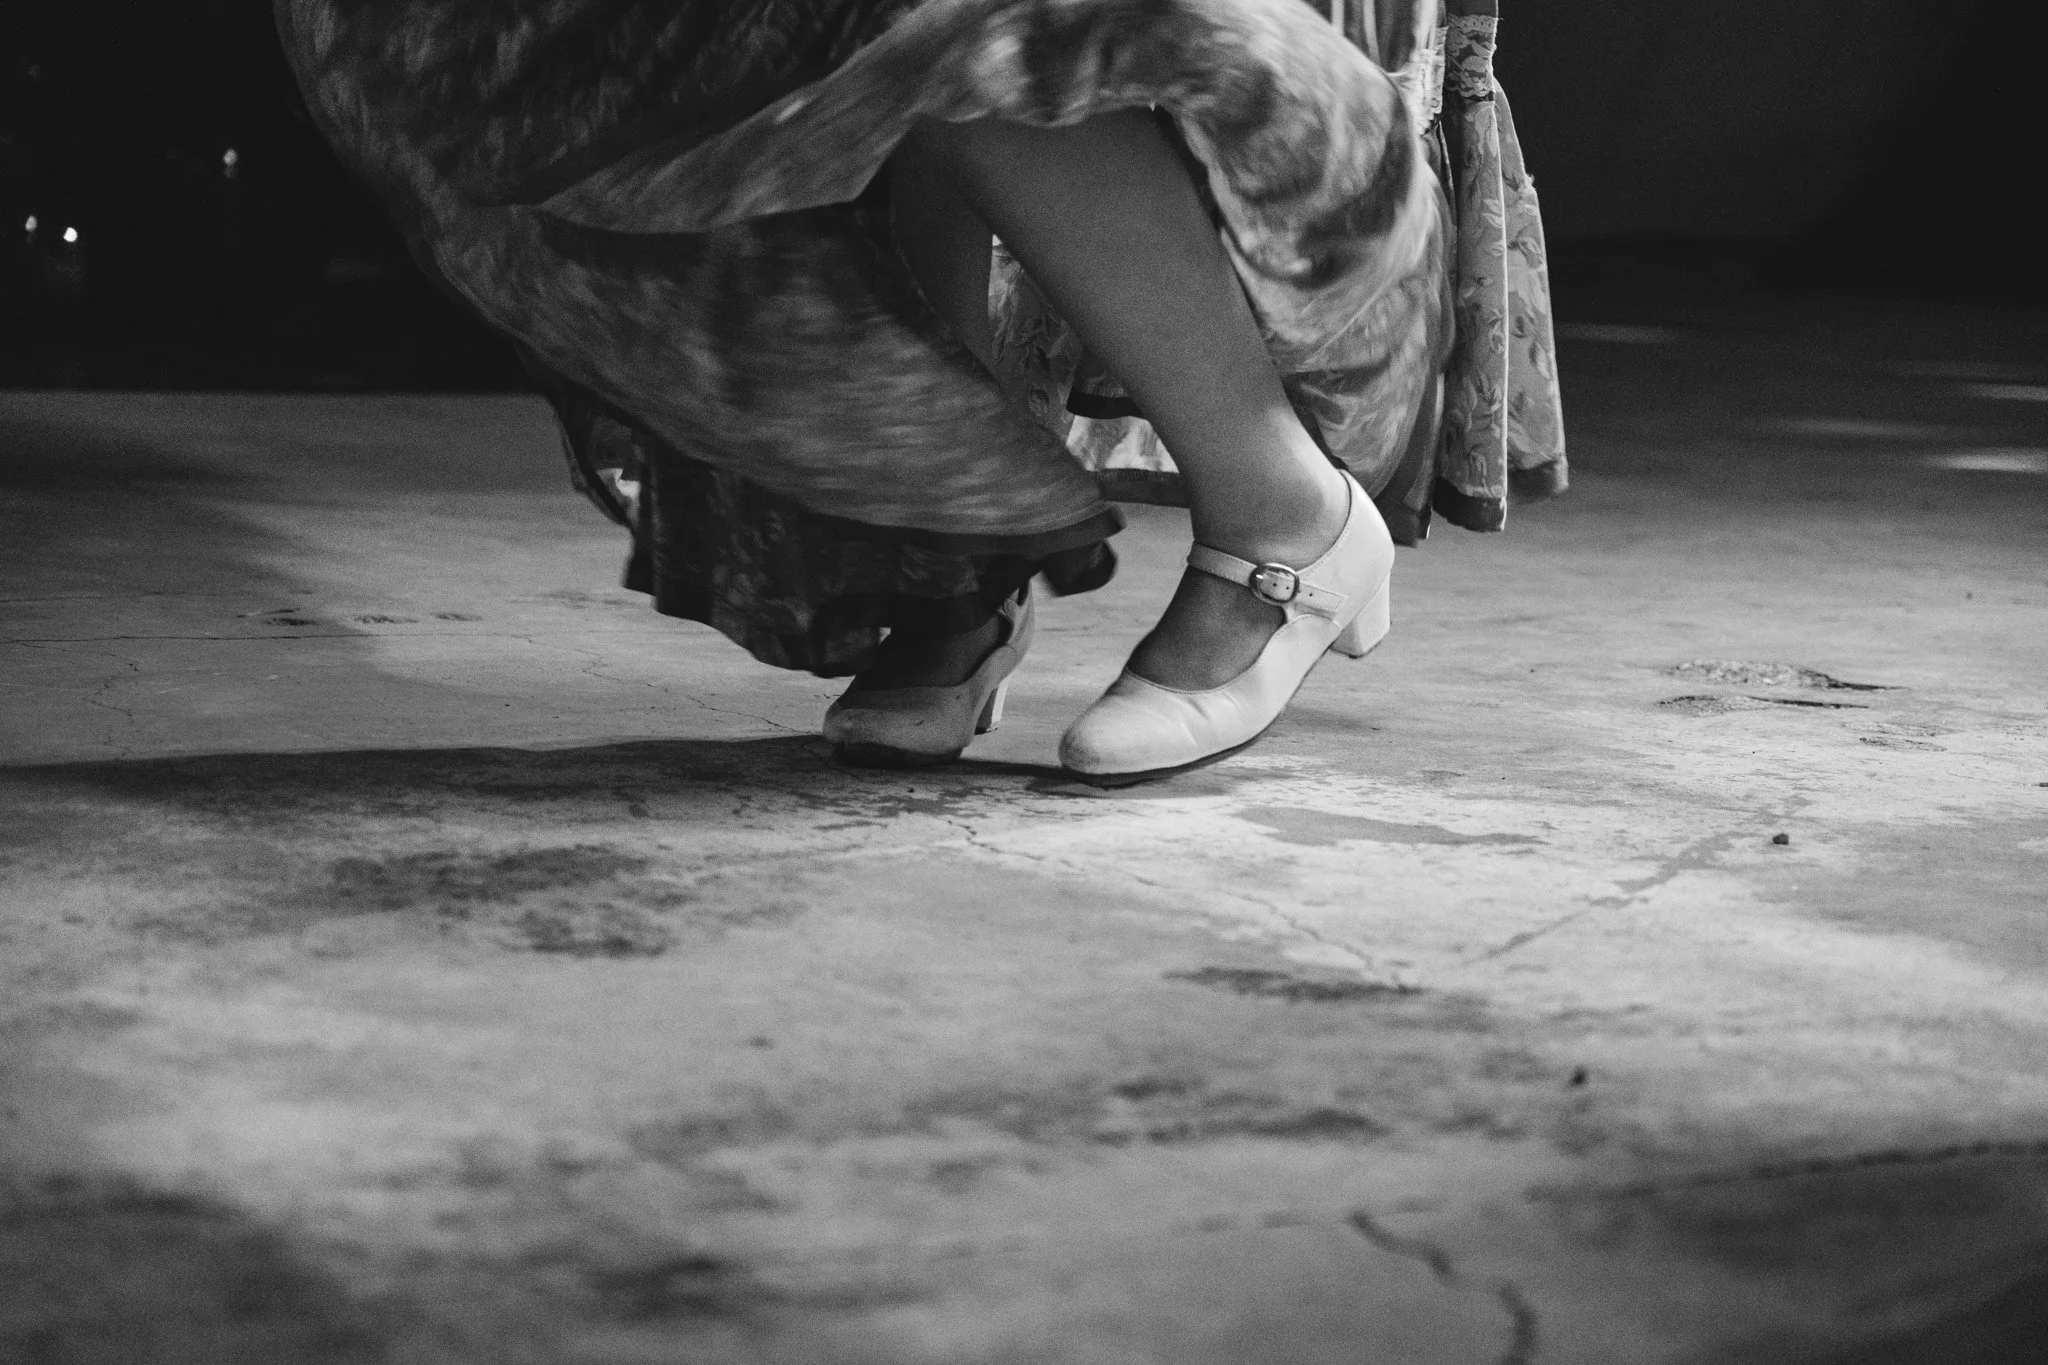
Youth Dancing -Exposed for the highlights and let the rest of the image go dark.
My old rule: avoid grain at all costs For a long time my aesthetic credo was simple: use the lowest ISO possible. Clean files, minimal noise, maximum detail. I judged grain as a technical “defect,” something to fix in post or to avoid entirely by using faster lenses, flash, or brighter locations.
So much energy in this photo with the grain and slight motion blur! Shadows from the shaft of light provide a natural vignette.
Why this shoot changed my mind In the dim backyard light, raising ISO was the only way to stay present and responsive. I could feel the rhythm of the music, dart around the dance floor, and keep shutter speeds high enough to freeze motion.
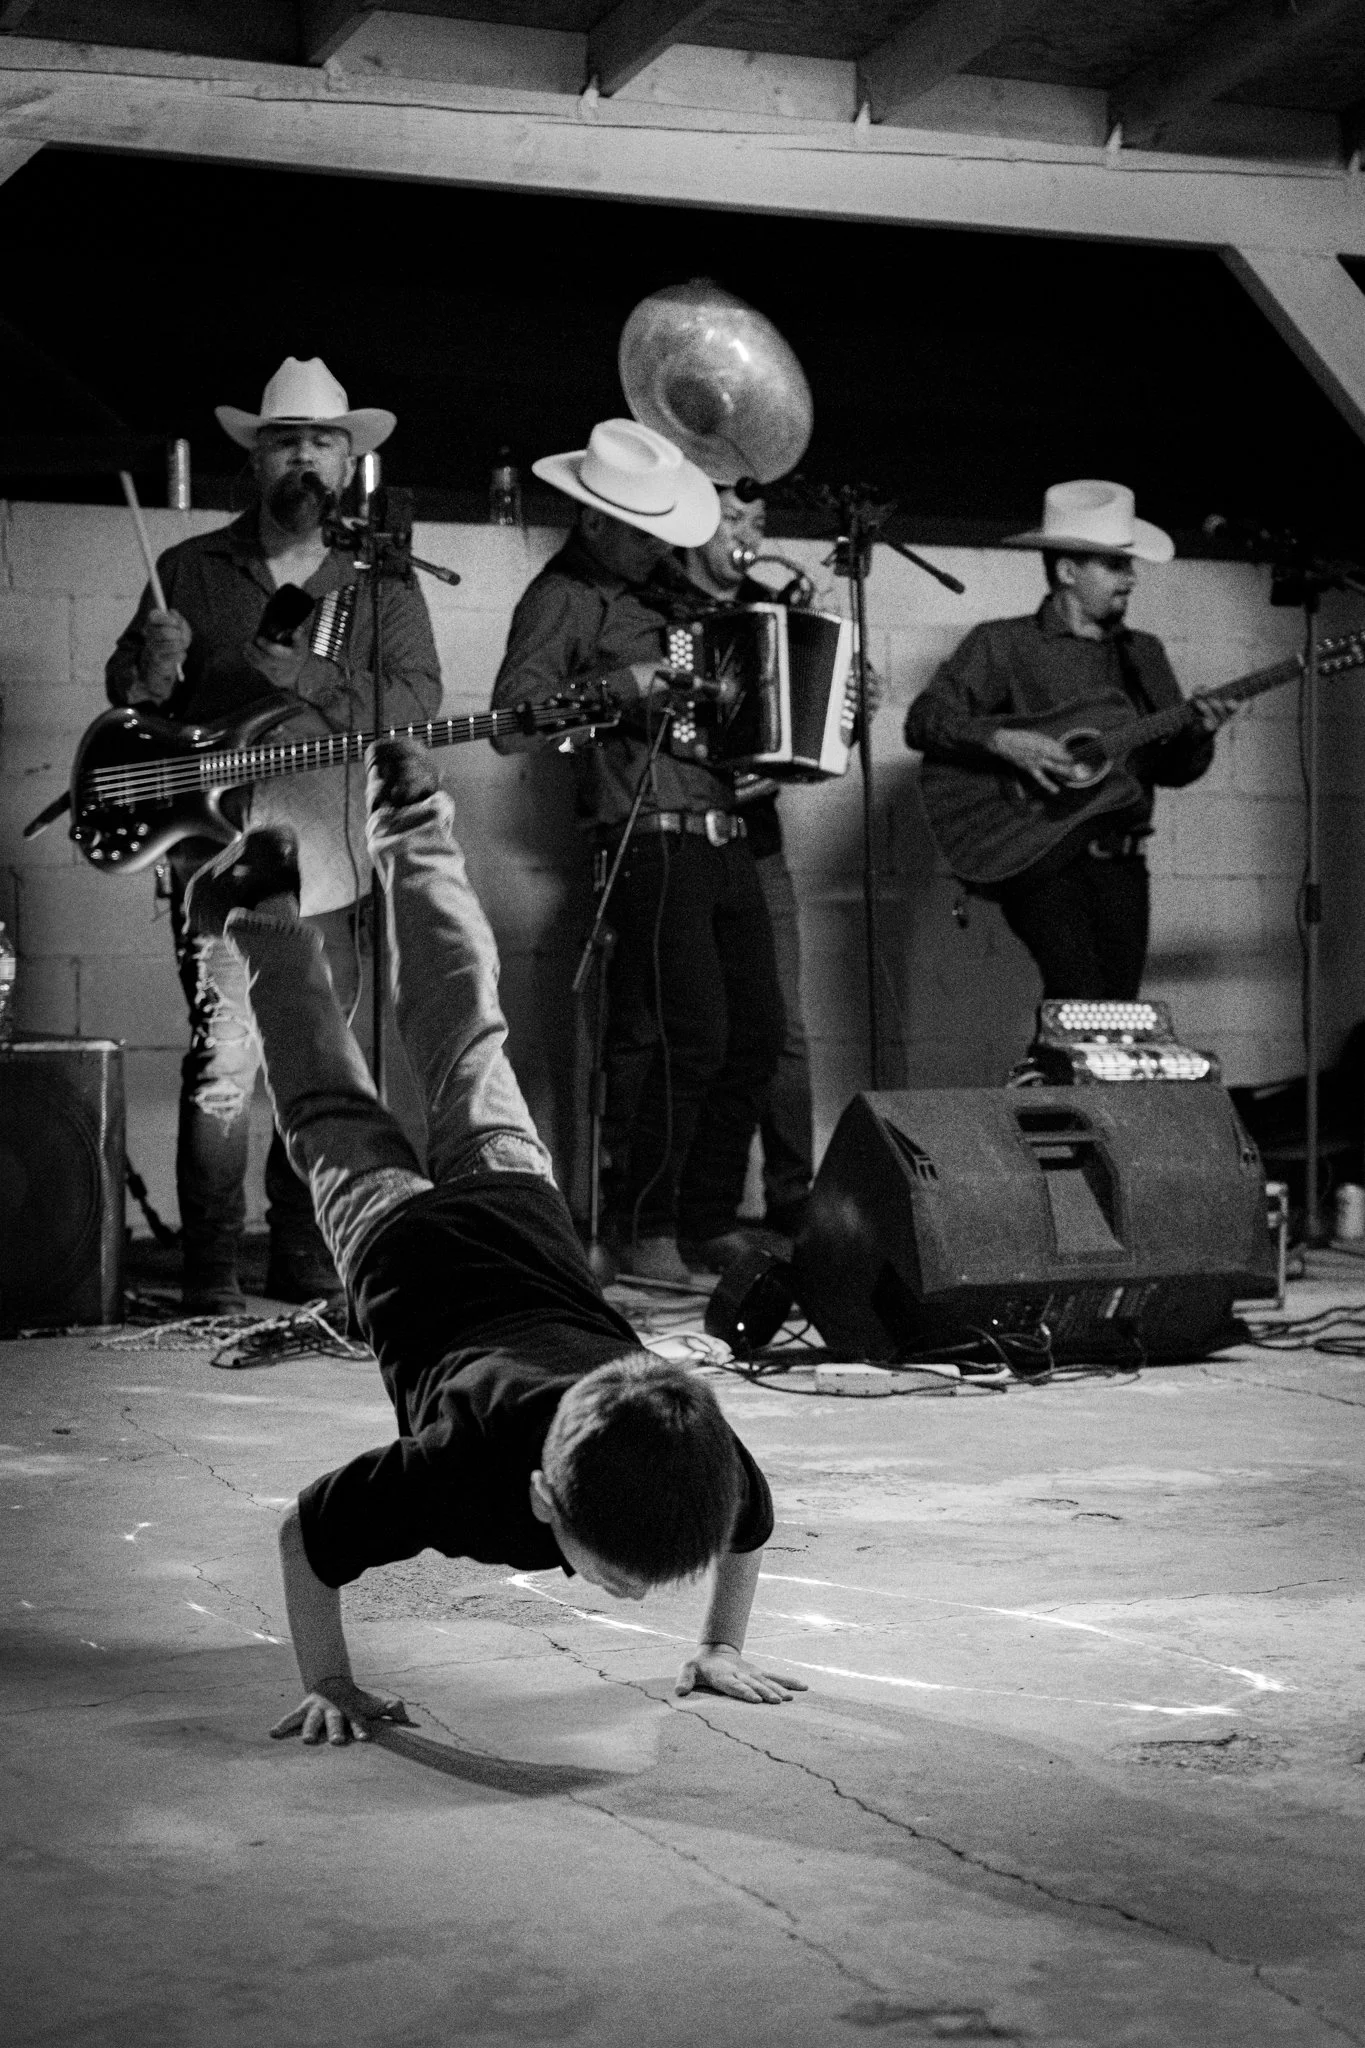
This photo I anticipated happening. Saw the kid doing his hand stand into “The worm” and tried to position myself so I could get him doing this with the band in the background.
The grain that came with those higher ISOs didn’t bother me—it enhanced the story. It gave texture to faces, grit to the air, and a film-like quality that made the photos feel lived-in and immediate. Grain translated movement into atmosphere; it made the images feel tactile and true.
40mm, 1/160th sec, F 4.0, ISO 10000 - I did use denoise a little on this one!
Technical notes (for those who care)
Camera + lens choices: These were all shot on the Sony AX 7 (Sony having a great rep for shooting in lowlight situations!)
Settings I leaned on: moderate-to-high ISO to maintain 1/125–1/250s for dancing, widest practical aperture for separation, and metering that favored faces over background detail.
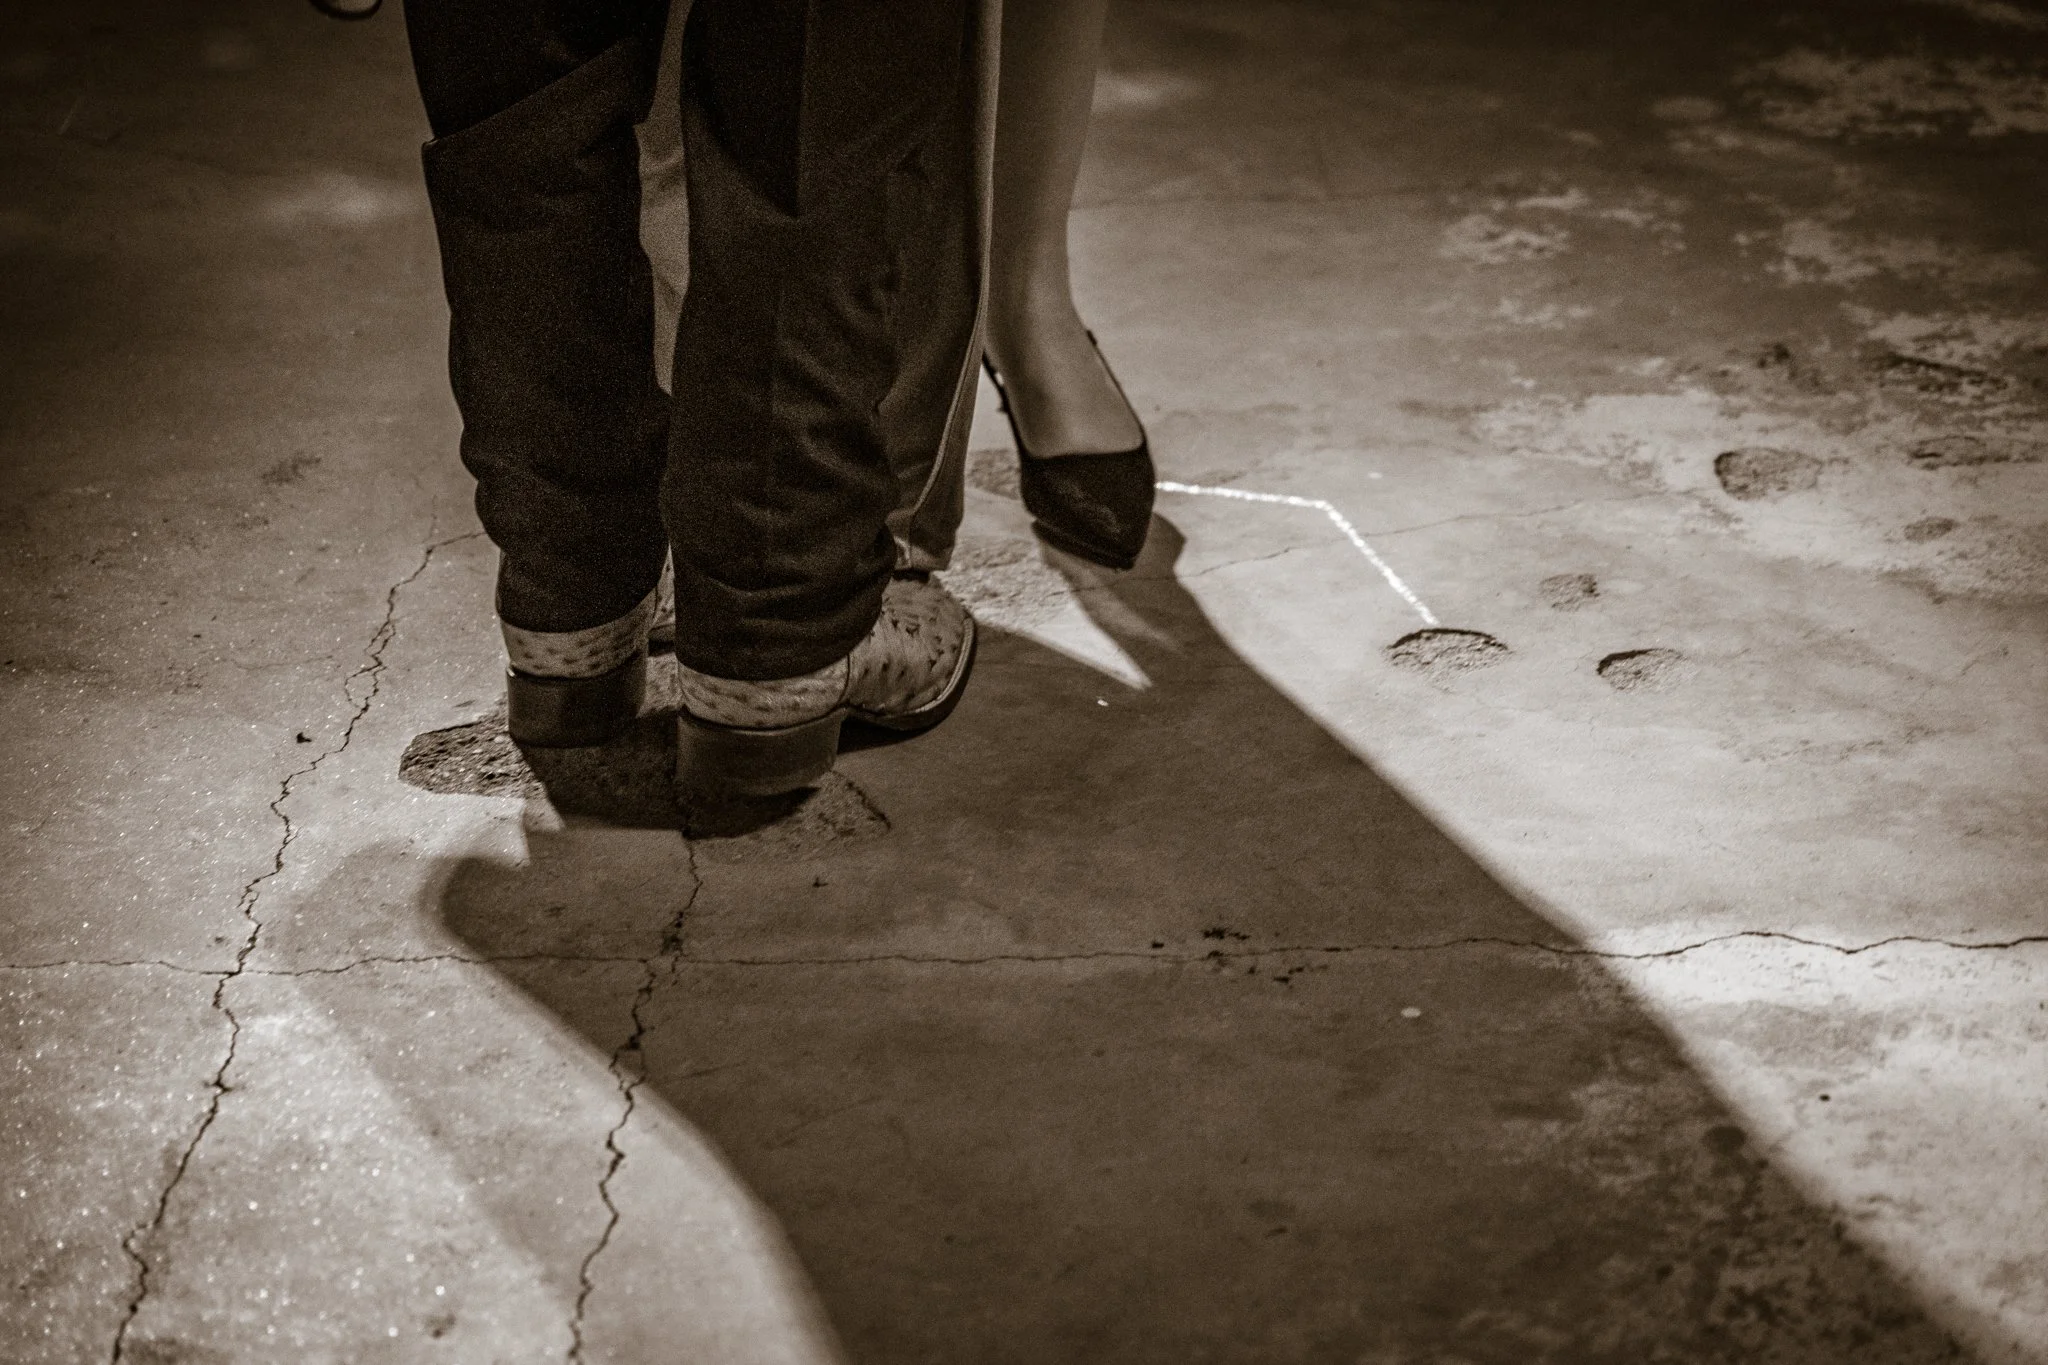
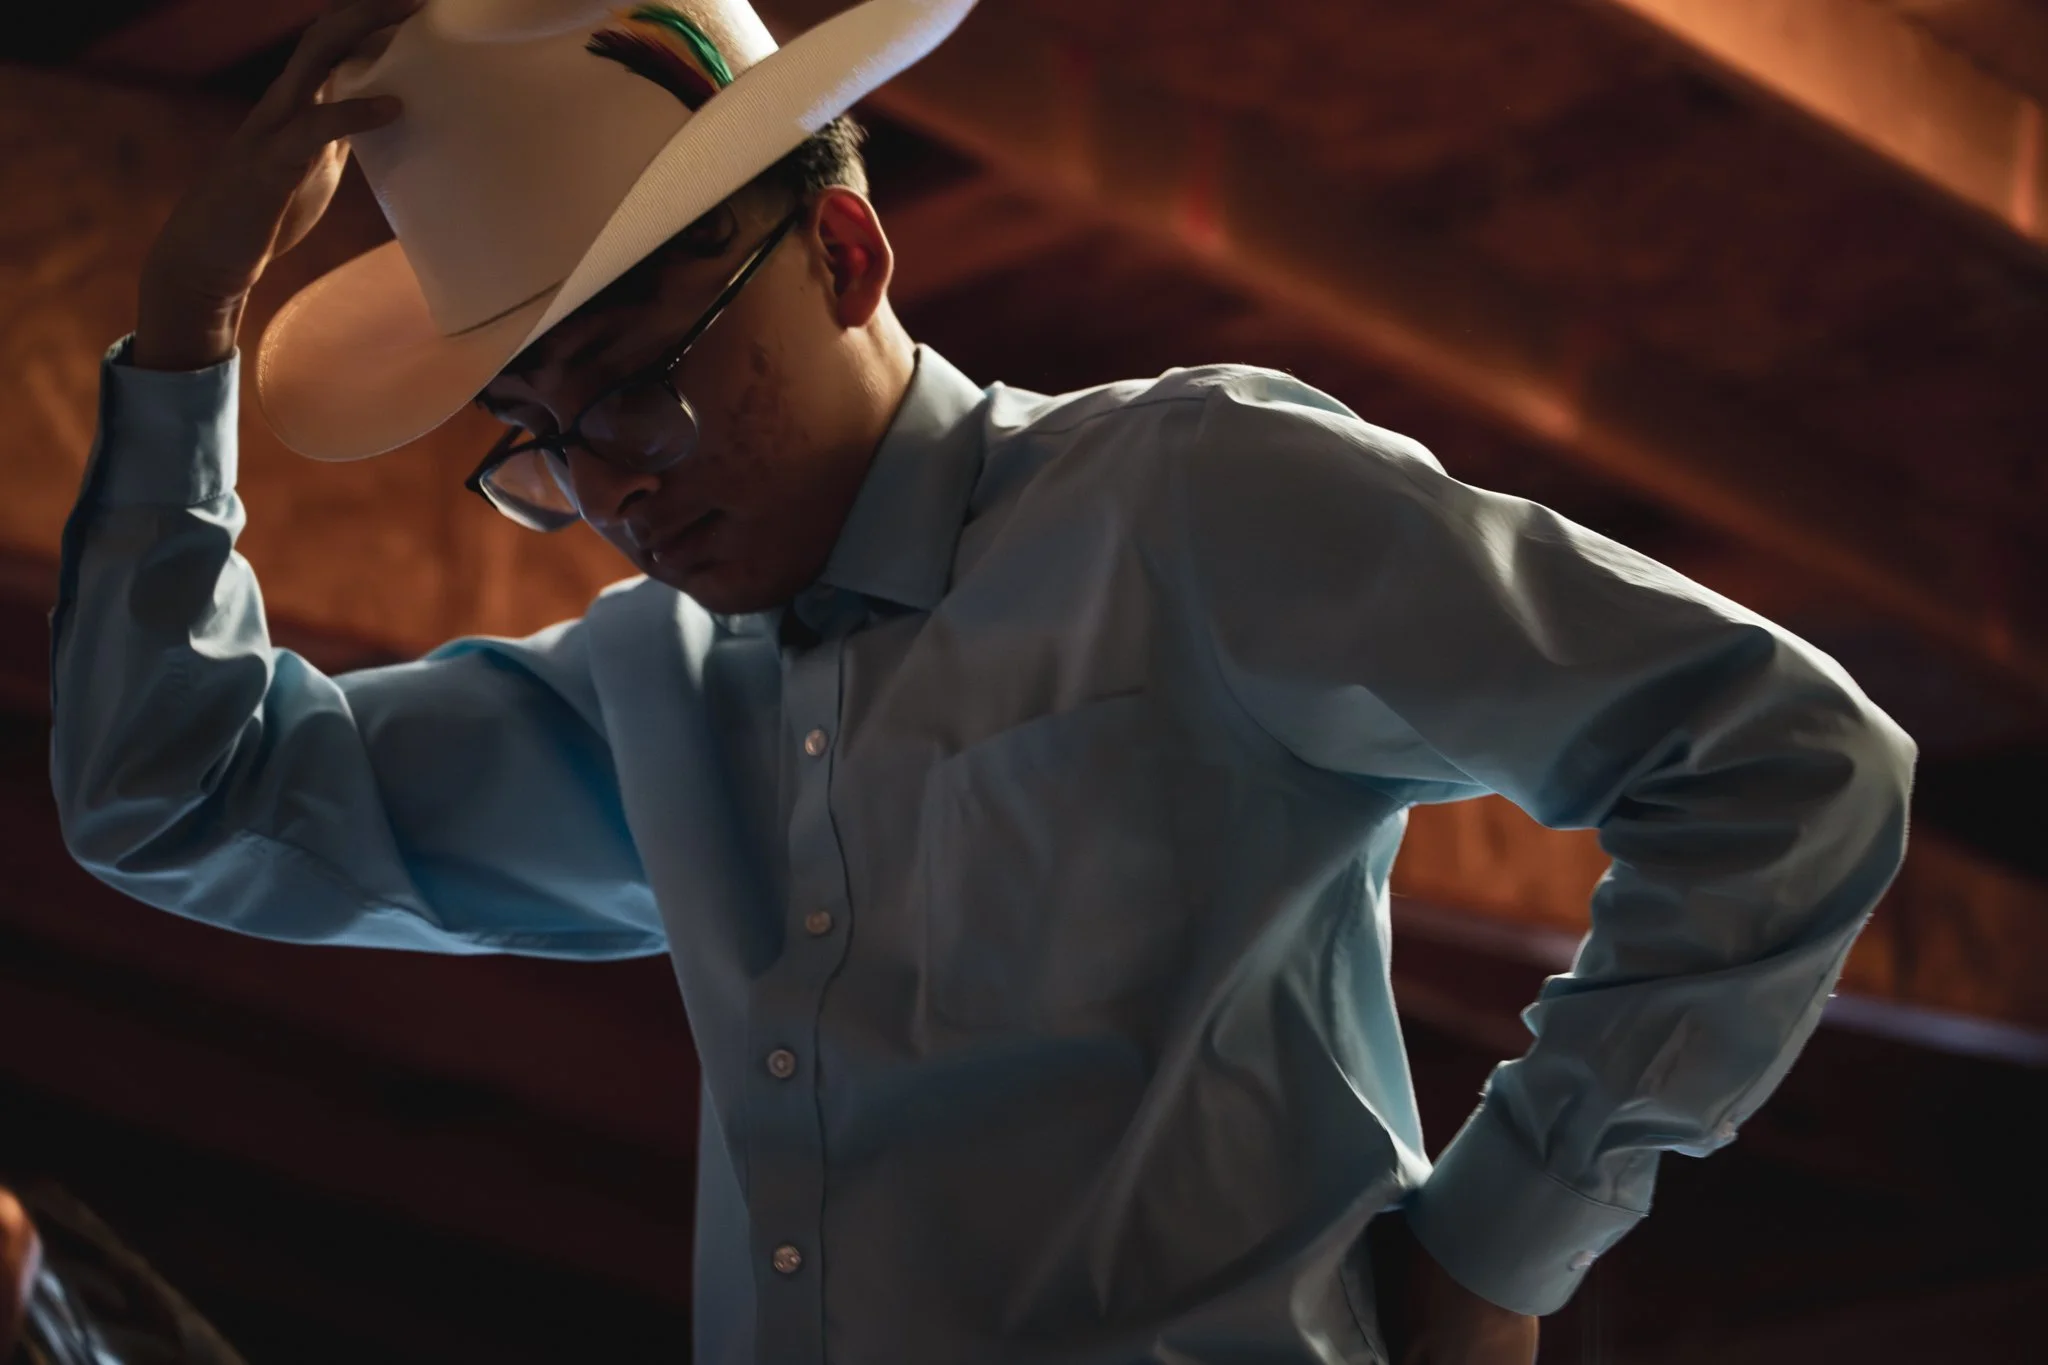
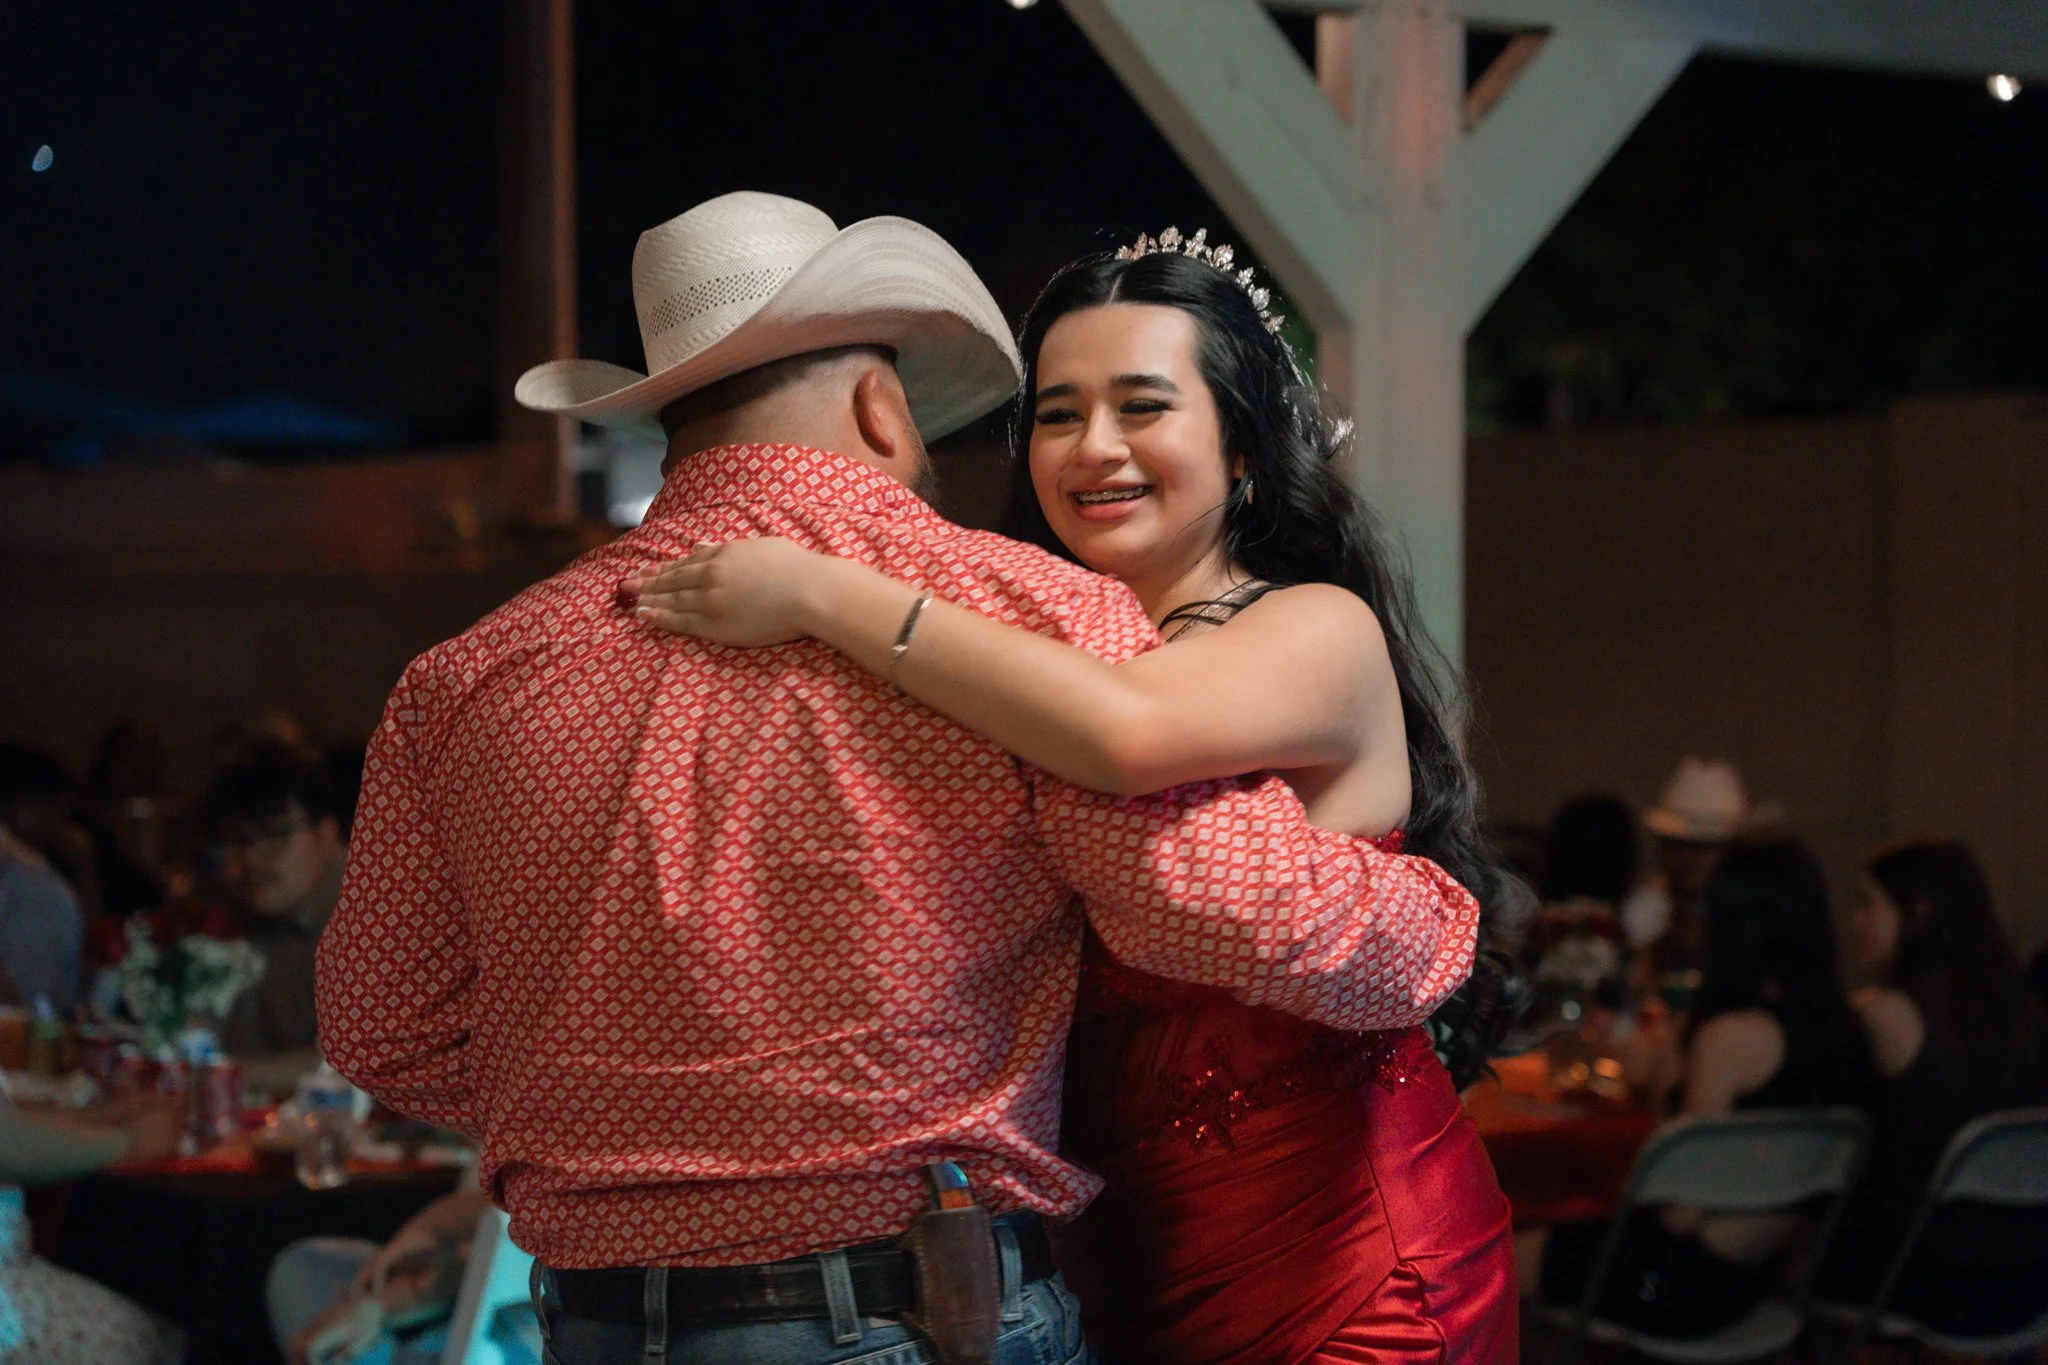
Dad and Daughter Dance
Grain as storytelling
What changed for me wasn’t just a technical acceptance; it was a storytelling revelation. Grain carried the mood of the night. It wasn’t merely noise—it was texture, memory, a visual shorthand for energy and intimacy. The candid shots felt less posed, more documentary, and the party’s warmth was amplified by imperfection. Grain reminded me that photography’s power lies in emotion, not in pixel perfection.
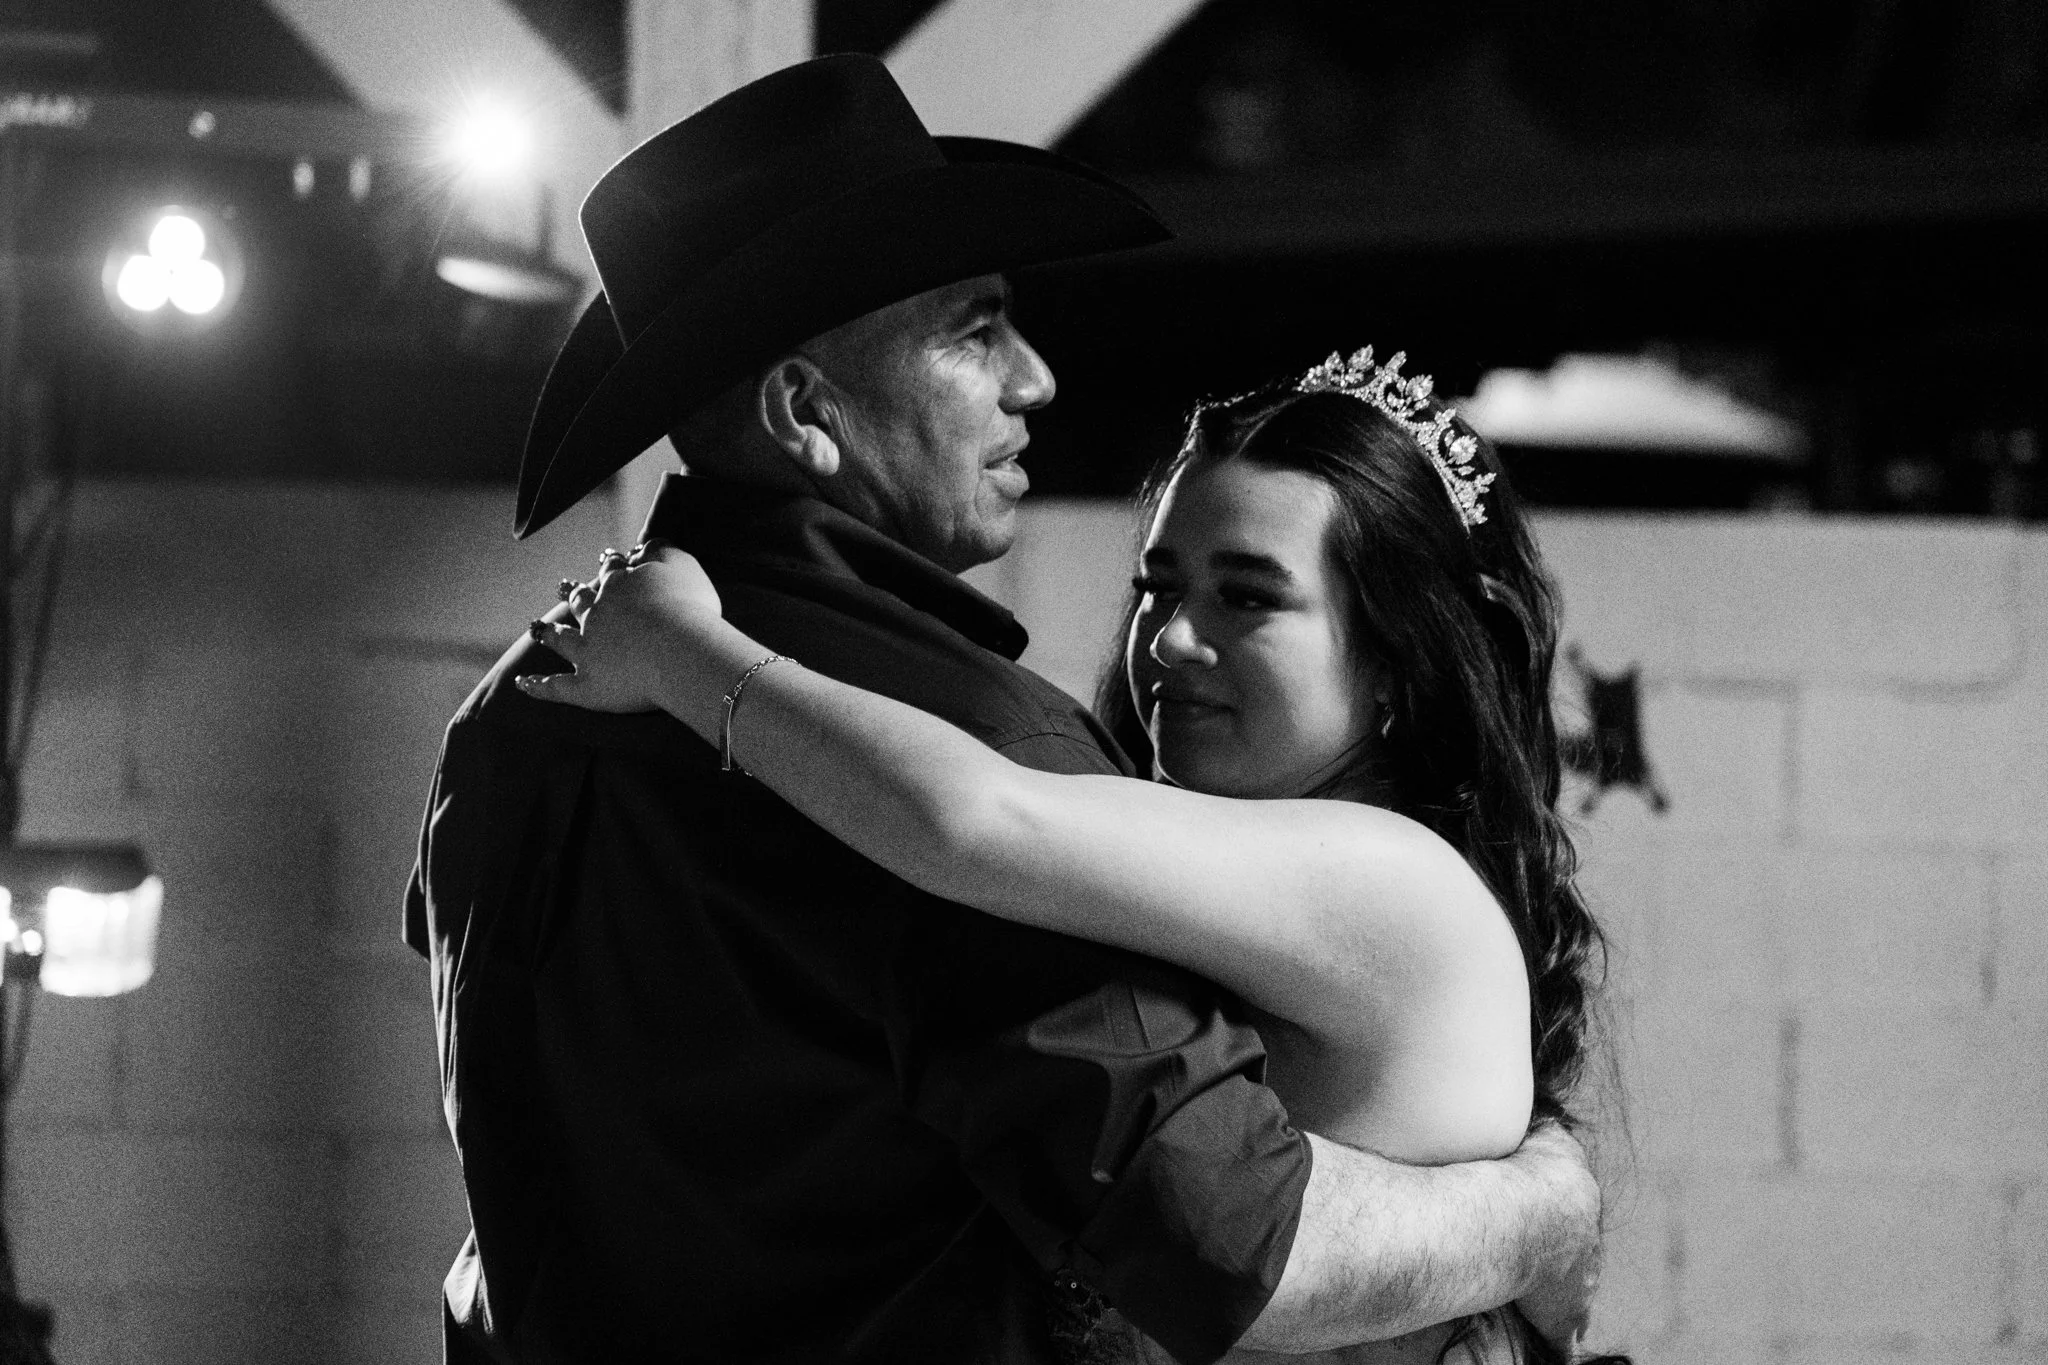
I like this one in black and white, and the backlight hitting dads shoulder and hat.
A new approach I’m not saying grain is always better. There will always be times to chase the cleanest file possible. But I am saying I’ll stop treating grain as an automatic failure. Going forward I’ll evaluate noise as part of the image’s emotional toolkit. If a little (or a lot) of grain helps the story land, I’ll embrace it.
I take back the mean things I’ve said about grain. That weekend, grain did what crisp, clean files sometimes can’t: it made the photos feel true. If you’ve ever avoided high ISO out of habit, try it on purpose next time—get close, move fast, and see what the grain brings to the story.
That rough, documentary feel reminded me of Robert Frank — the way he favored imperfect, immediate moments over polished composition. Frank taught photographers to value lived experience and texture, and, as he put it, “grain is not a defect — it is a language,” a way to speak the grit and truth of a scene rather than sanitize it.
I think there’s something to this being a Quinceanera, a tradition that is a celebrated, old right of passage, that also suits the grain.
Technical Difficulties, Artistic Doubt — What a Quinceañera Taught Me
This past weekend I had the chance to shoot a quinceañera portrait session I’d been looking forward to for weeks. I’d been practicing my off-camera lighting and imagining that long-awaited evening shoot: sunset in the background, lights sculpting the subject, the magic that happens when both elements come together.
We arrive at the location and—of course—my main light decides not to cooperate. I tried everything I could think of on site. Daylight was slipping away, the client had three outfit changes, and there were a couple of concept shots we’d planned. I never got the light to behave. Later, back home, a firmware update fixed it. In the moment, though, I had to improvise.
That’s one of the realities of photography: you don’t always control your gear, the weather, or timing. You do control how you respond. Clients need confidence from you; they don’t need to see you scramble. I focused on leading calmly, making clear choices, and finding workarounds with the available light. Looking back, I wish I’d pushed for a wider variety of poses, but I also kept things moving and kept the subject comfortable through several outfit changes.
The editing session after the shoot hit me harder than the technical failure. Images didn’t match the vision I’d been carrying—no dramatic backlit portraits with perfectly placed catchlights. That voice we all know so well—the harsh inner critic—came in loud and fast: “You’re not good enough. These are terrible.” It’s a voice that seeks impossible perfection and measures every result against an ideal that’s rarely realistic.
Then the client texted: “I love all of the photos.” That message shifted everything. The photos weren’t exactly what I’d imagined, but they delivered value: multiple outfits captured, important concepts covered, and a happy client. That mattered more than my internal standard.

What I took away:
Technical problems will happen. Run basic checks, but cultivate improvisation skills—composition, natural light, and posing can save a session.
Lead with calm. Your confidence helps the client feel safe and enjoy the shoot.
Perfection is a mirage. Use the gap between vision and result as fuel for learning, not as ammunition for self-doubt.
Client satisfaction is a crucial metric. If they feel seen and happy, you did far more than you might think.
And like the Buddhist expression—“Chop wood, carry water”—I will have a chance to try again; everything is just an opportunity for growth.
I want to get better at both the technical side—regular firmware checks included—and the artistic side: experimenting with poses, refining concepts under pressure, and building the confidence to accept imperfect but meaningful results. Practice and experience are the cure for both technical hiccups and that relentless inner critic.
If anything, this session reminded me that resilience, not perfection, is the photographer’s real superpower.

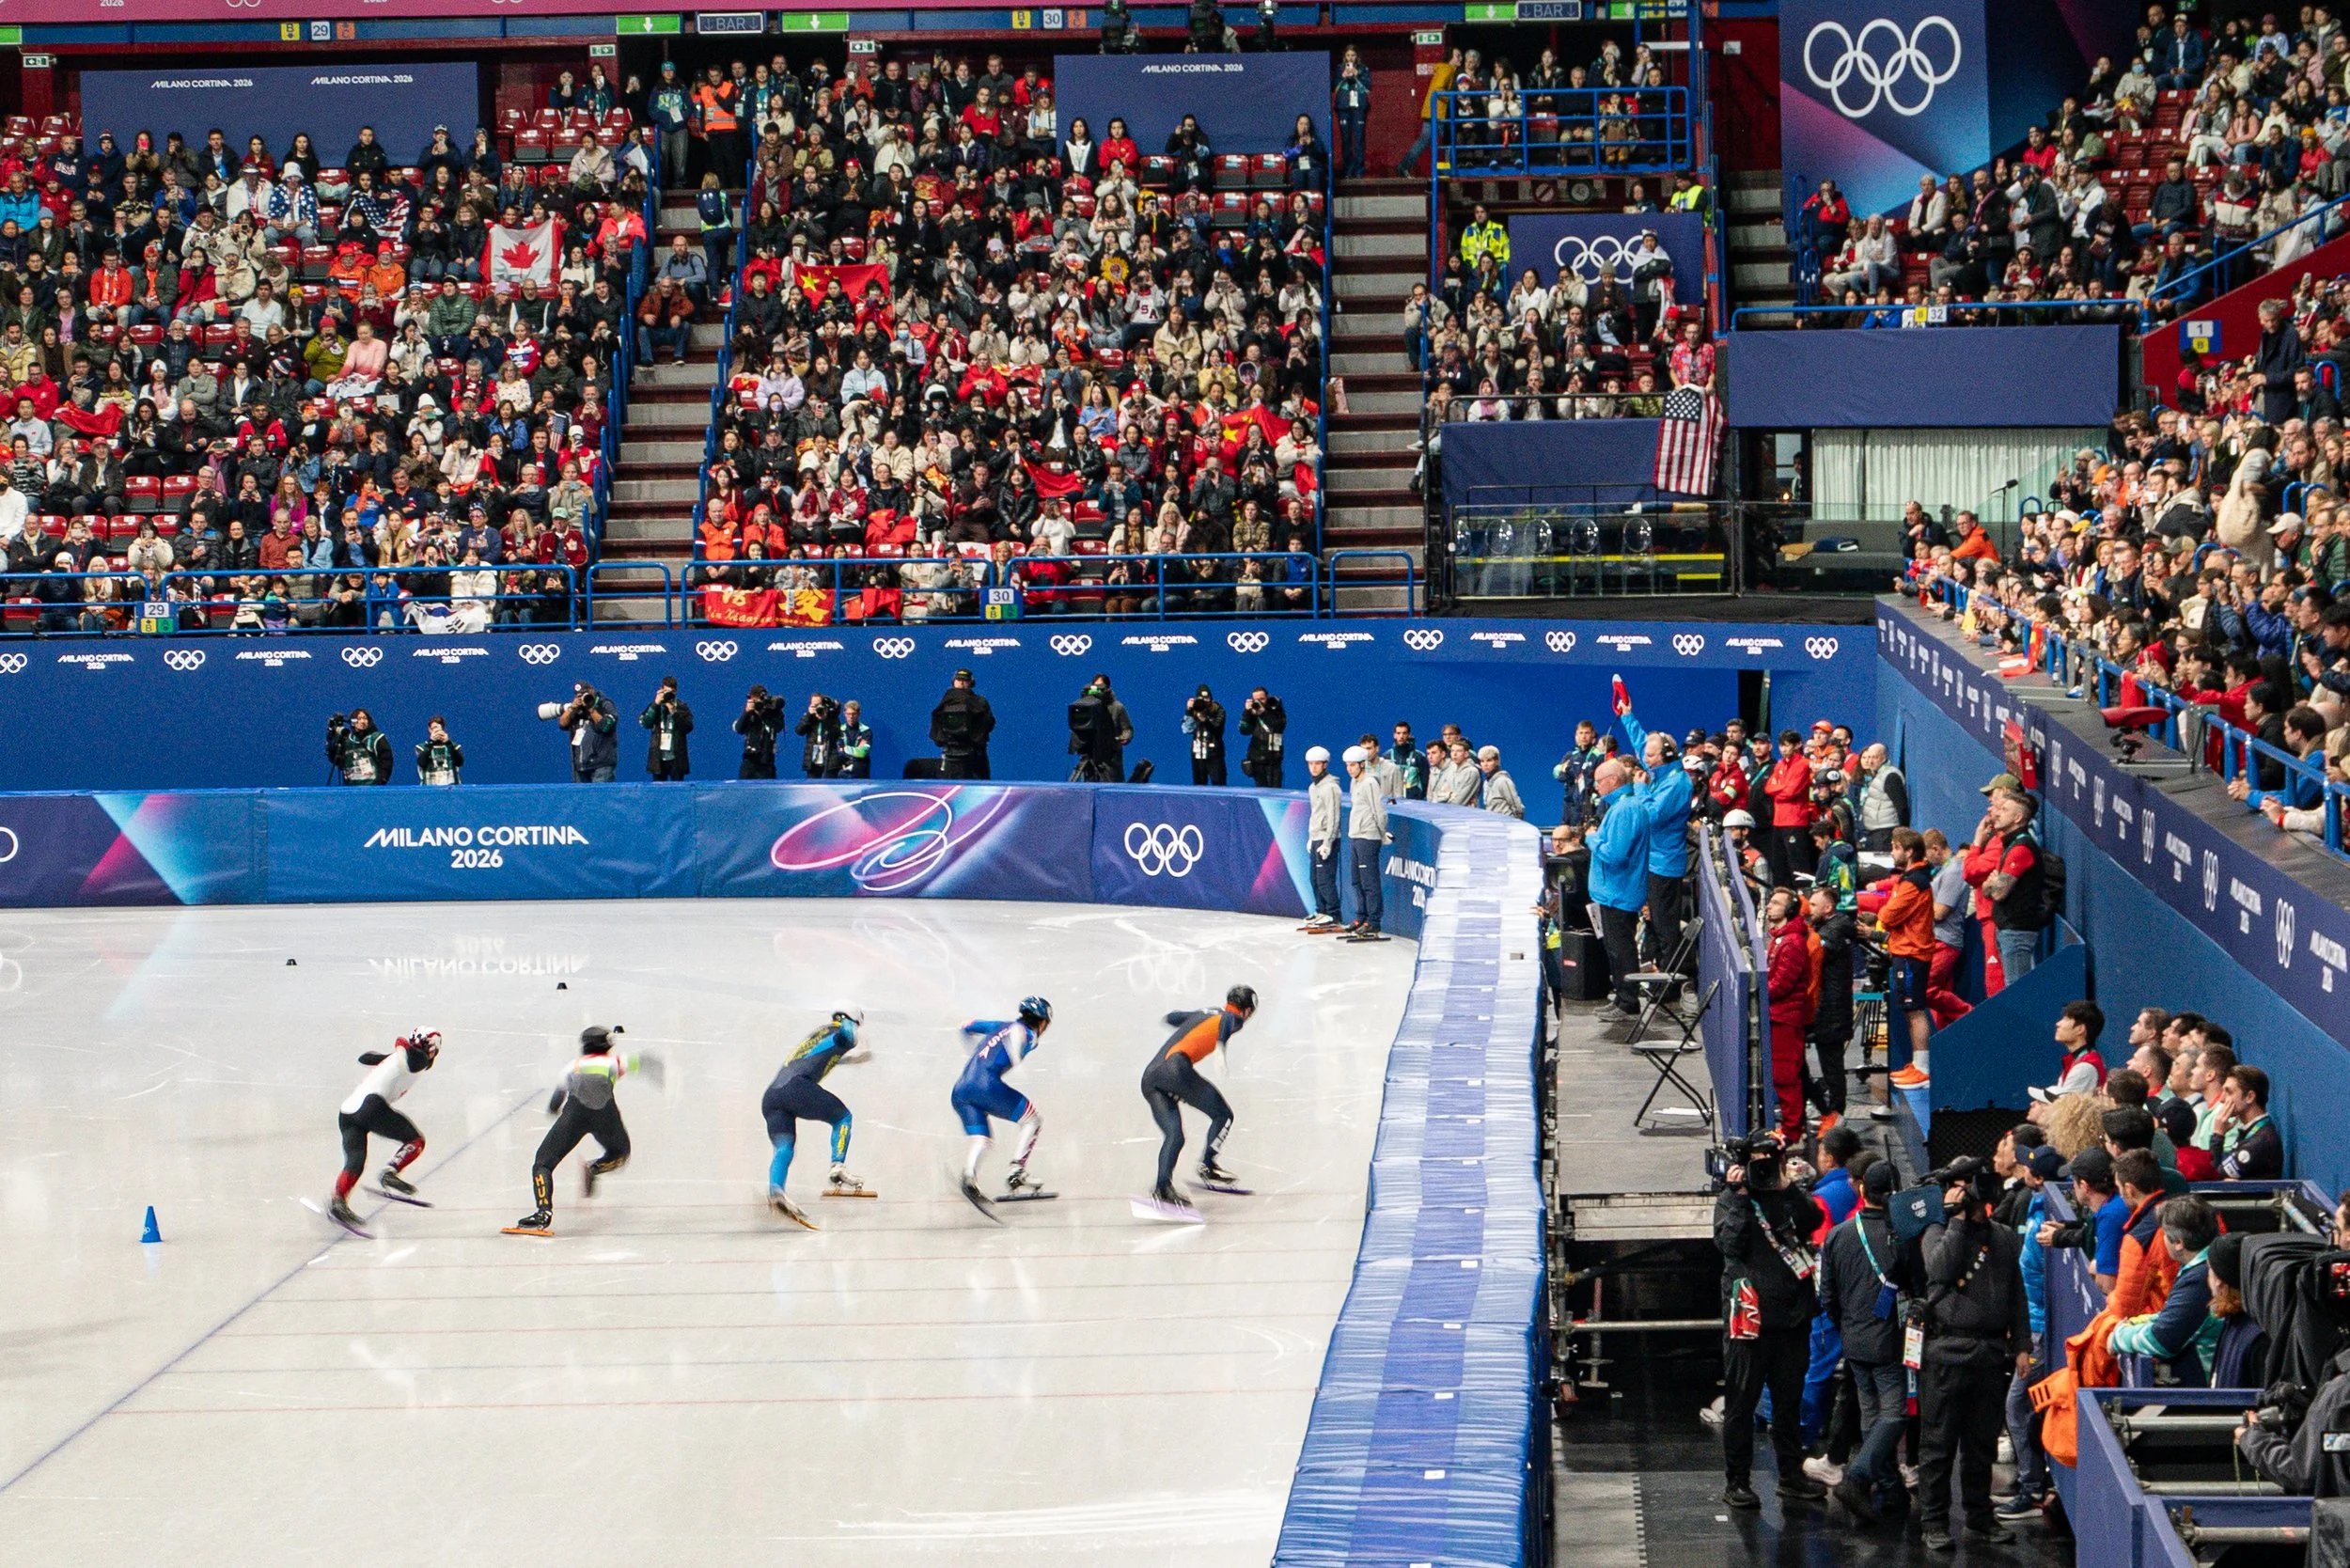
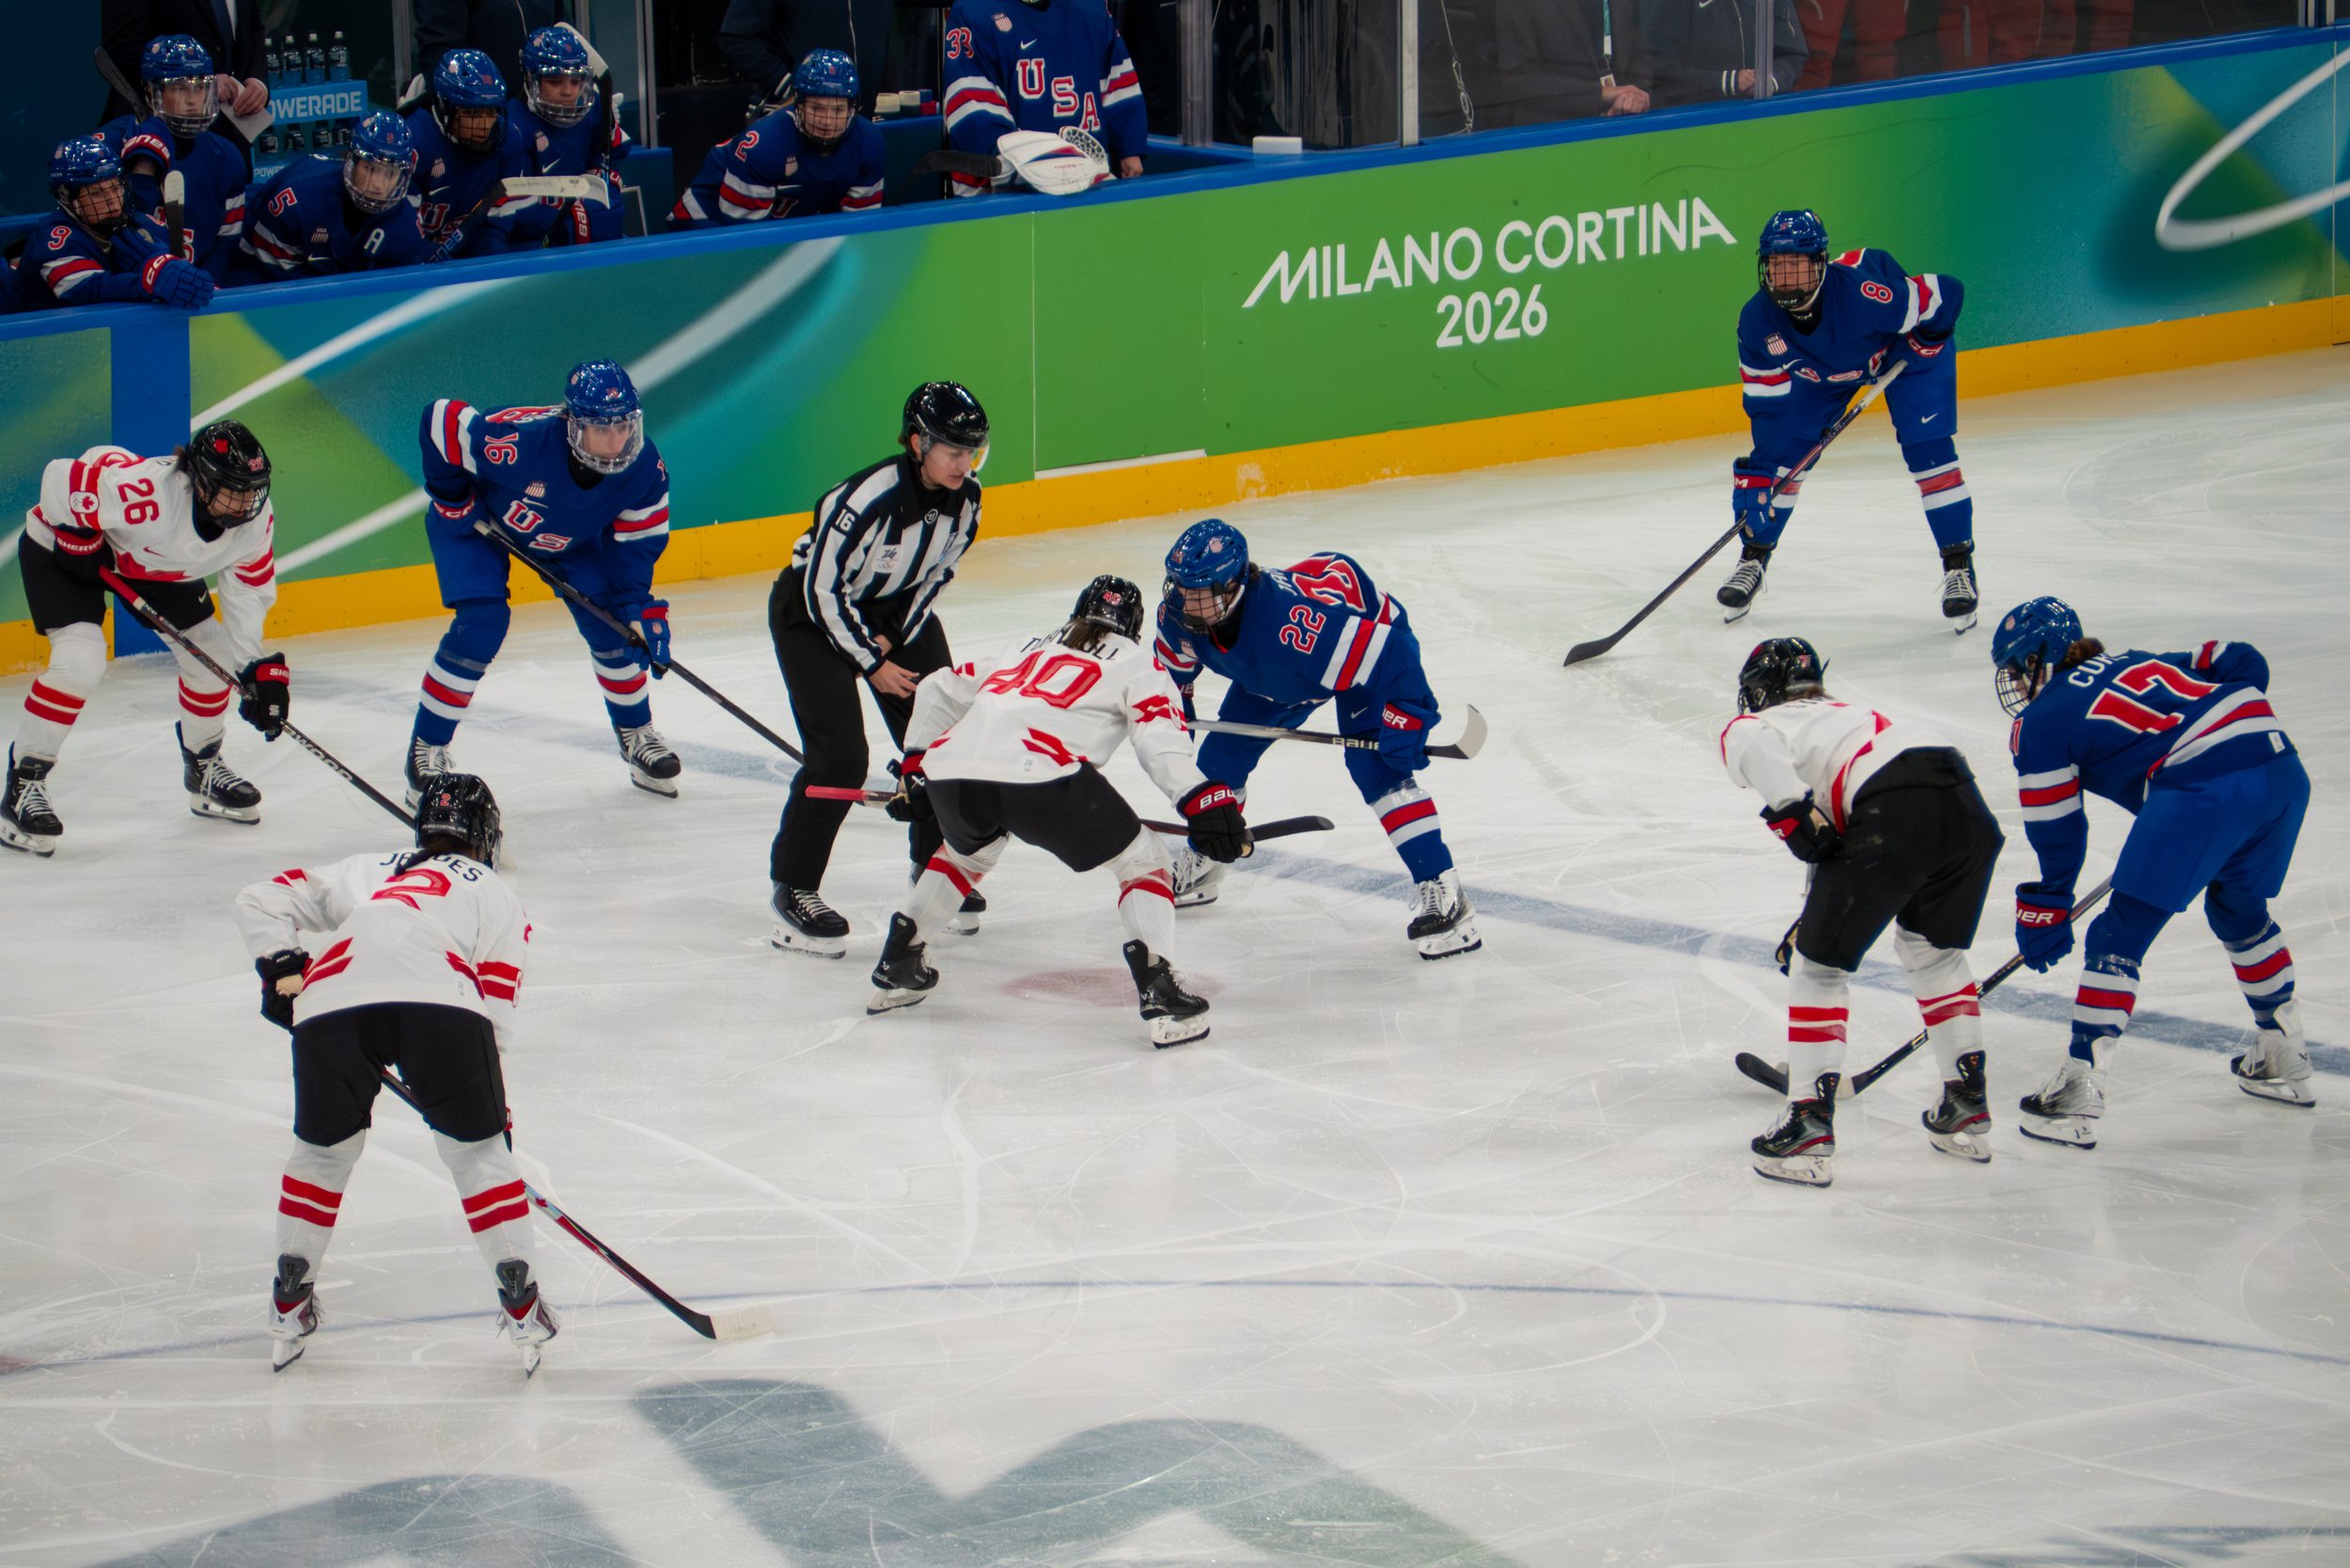
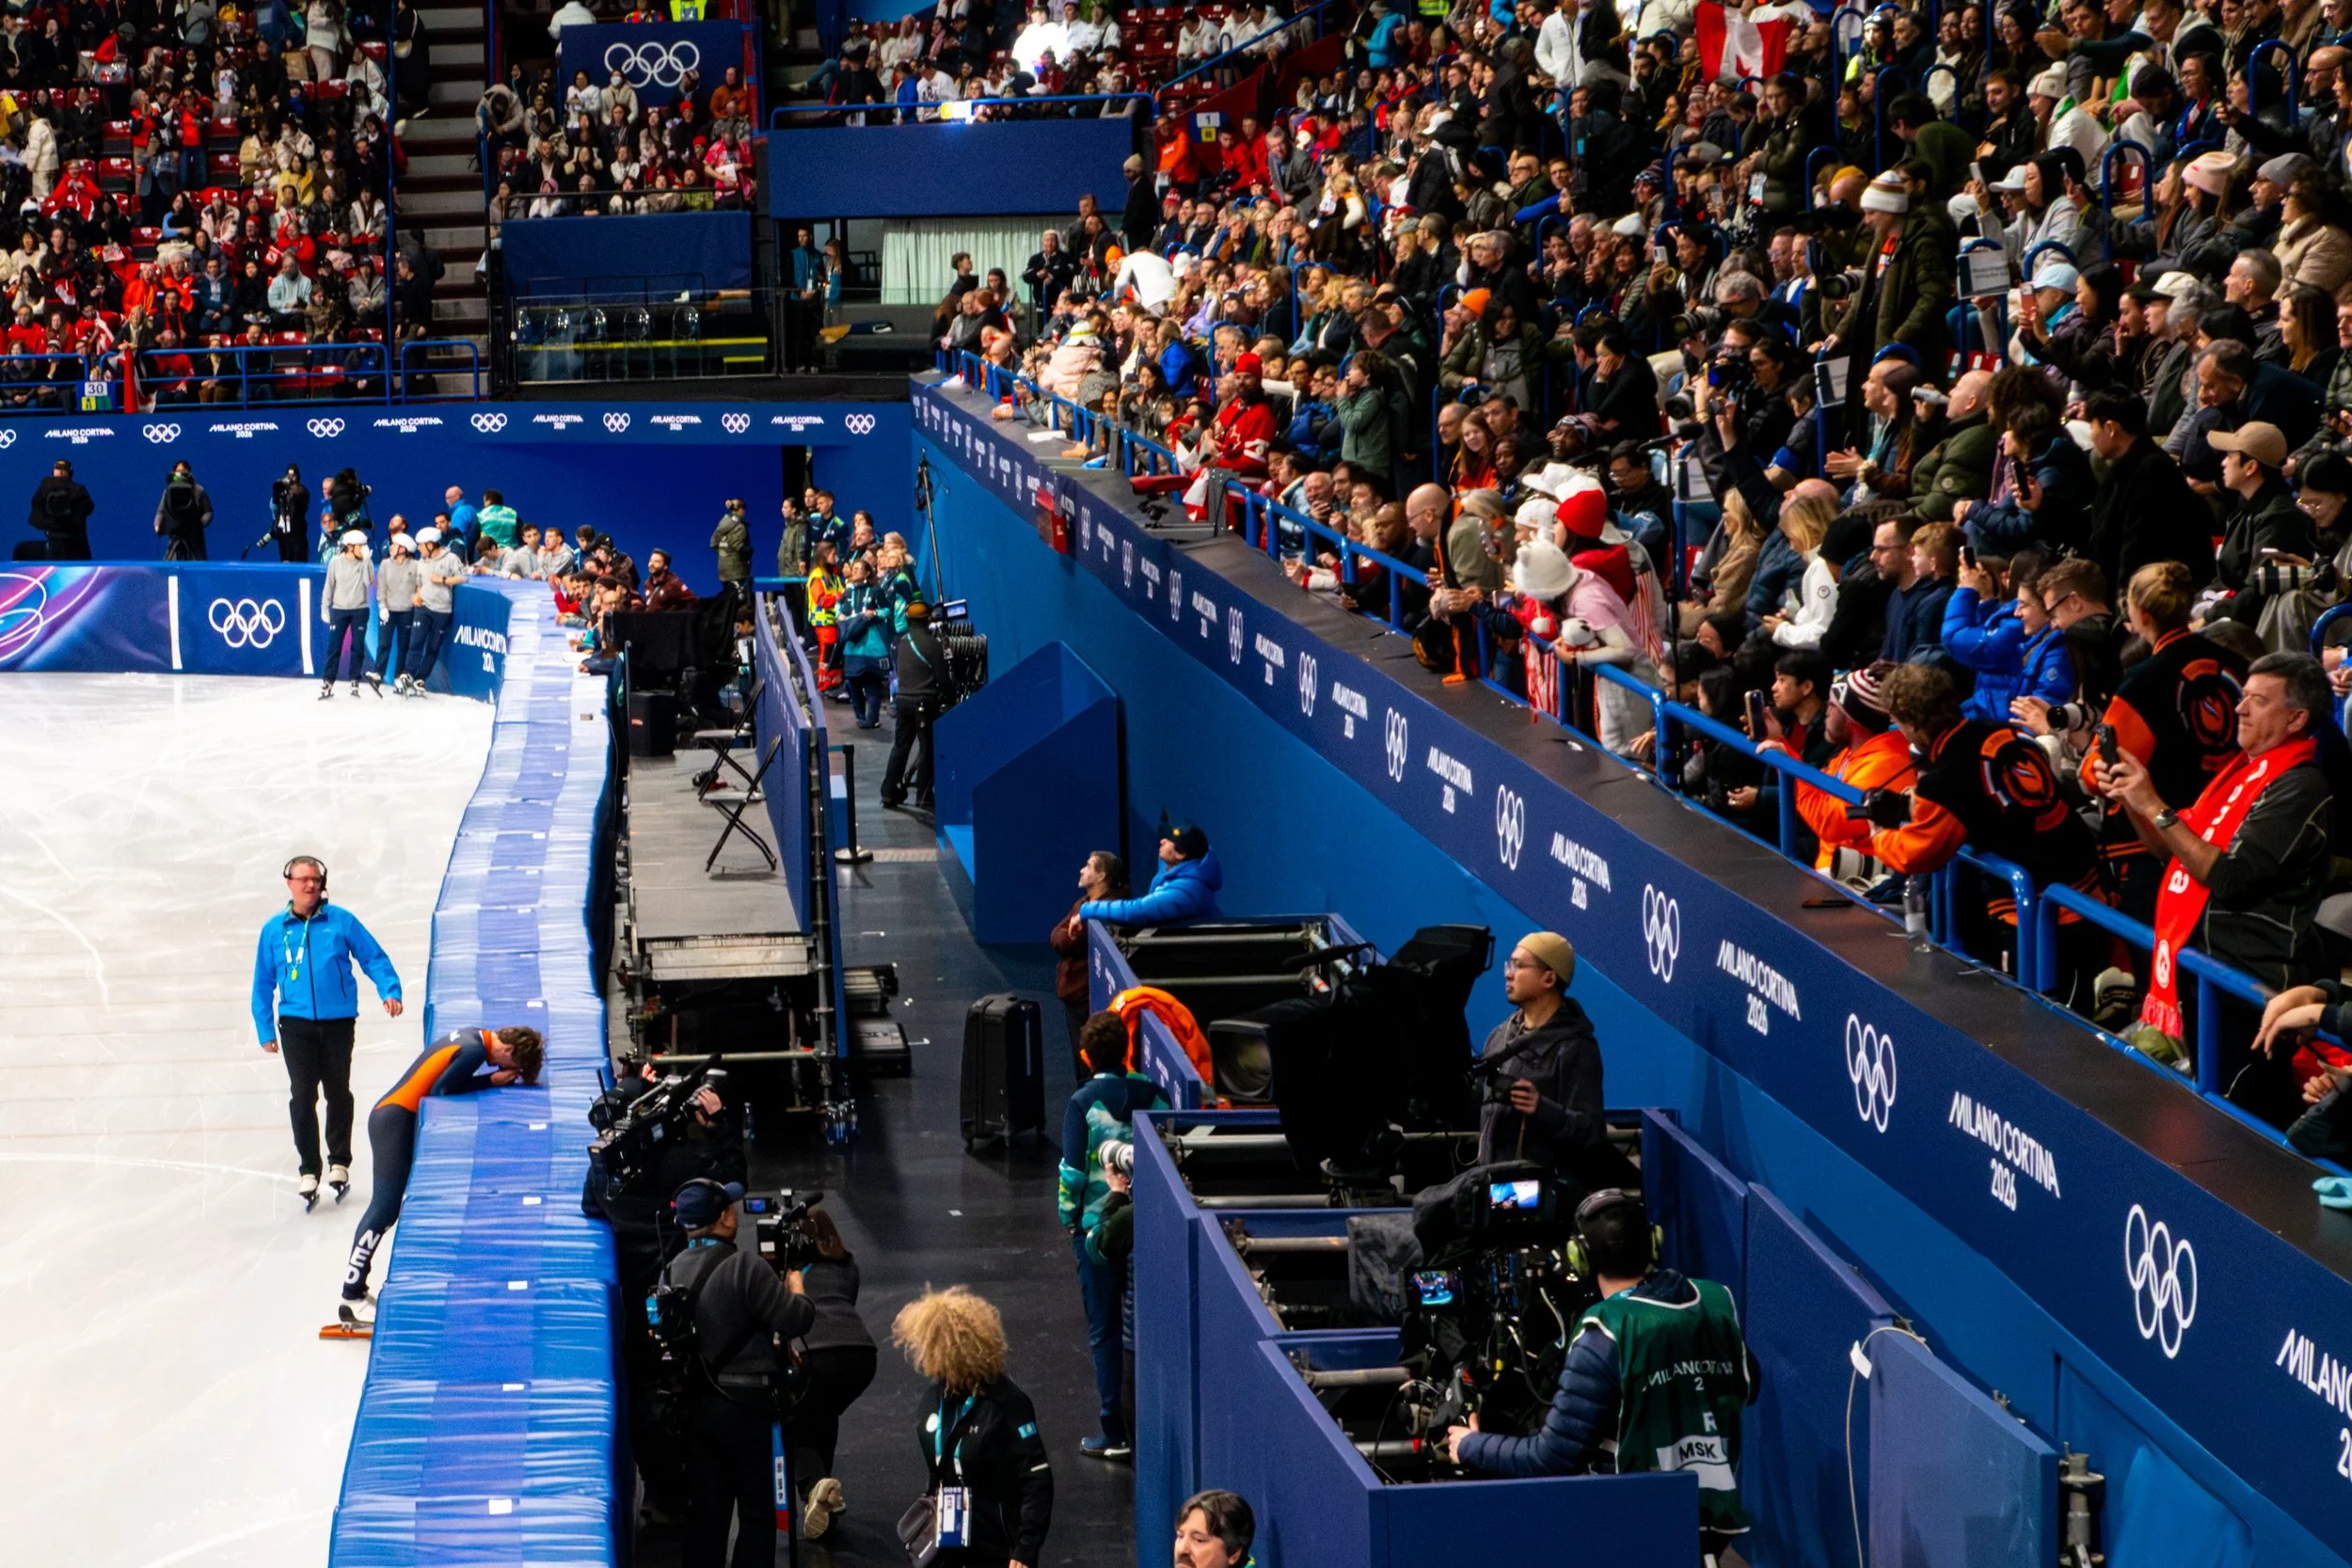
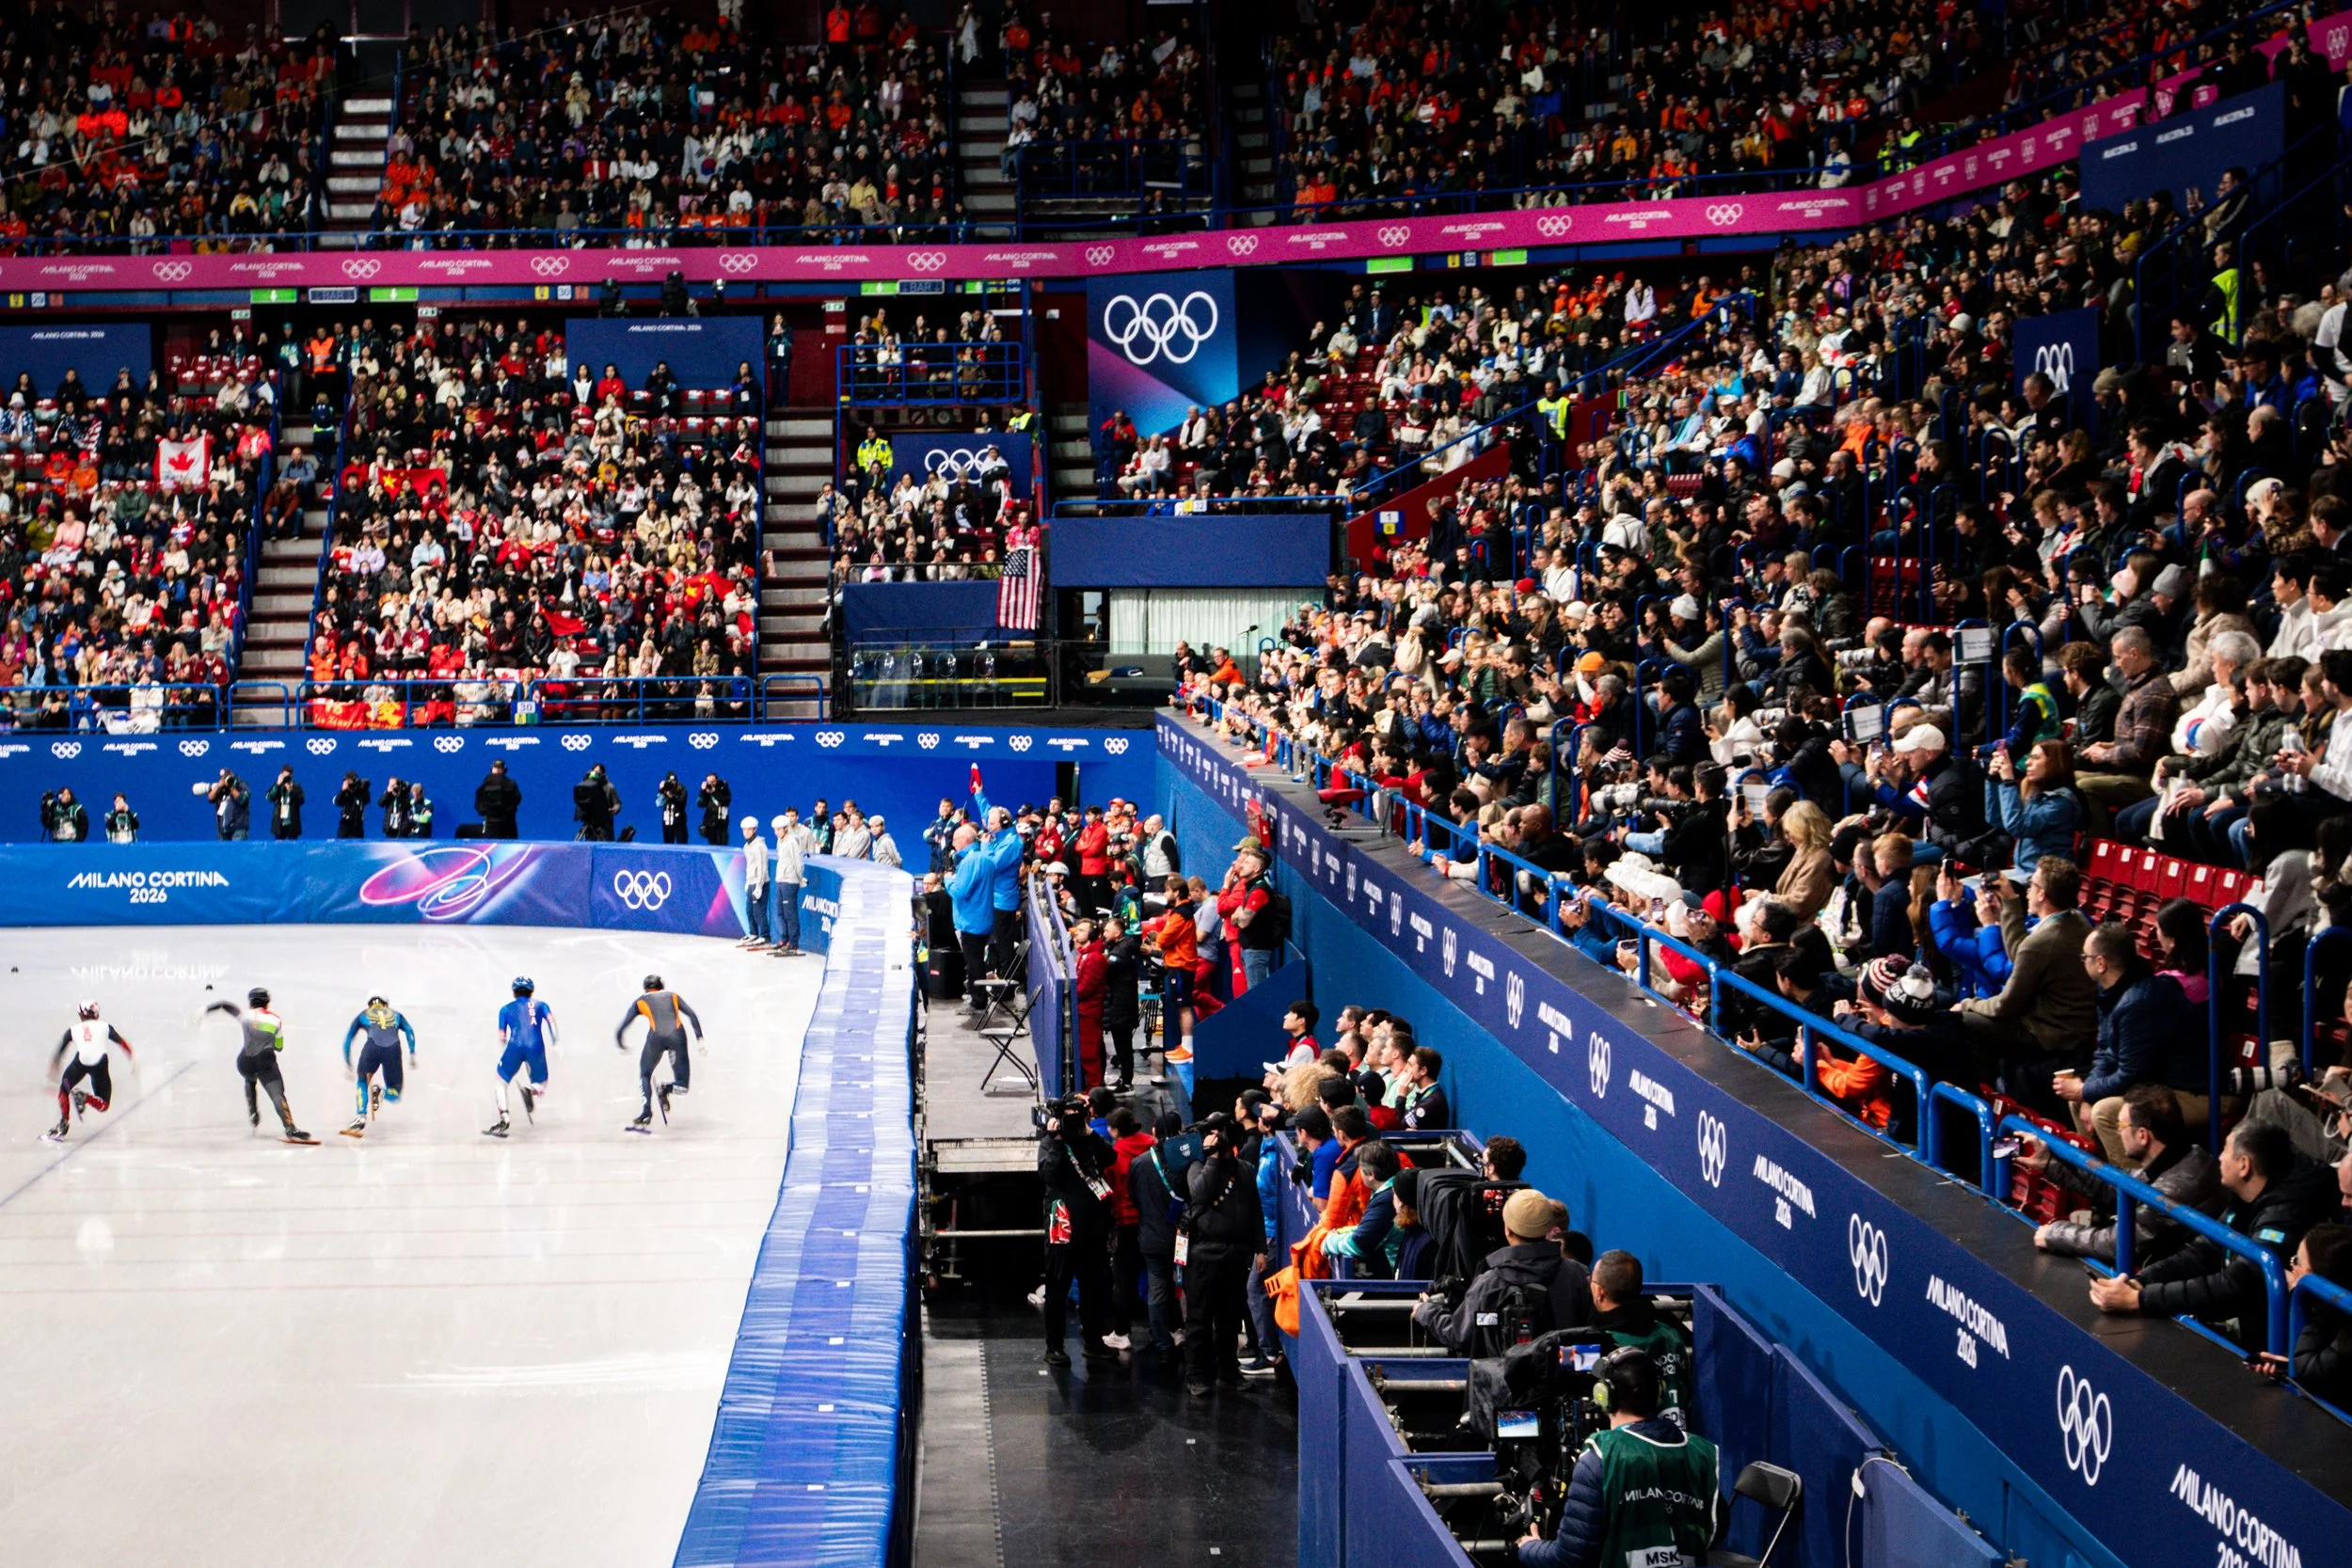
Speed Skating and the Exposure Triangle
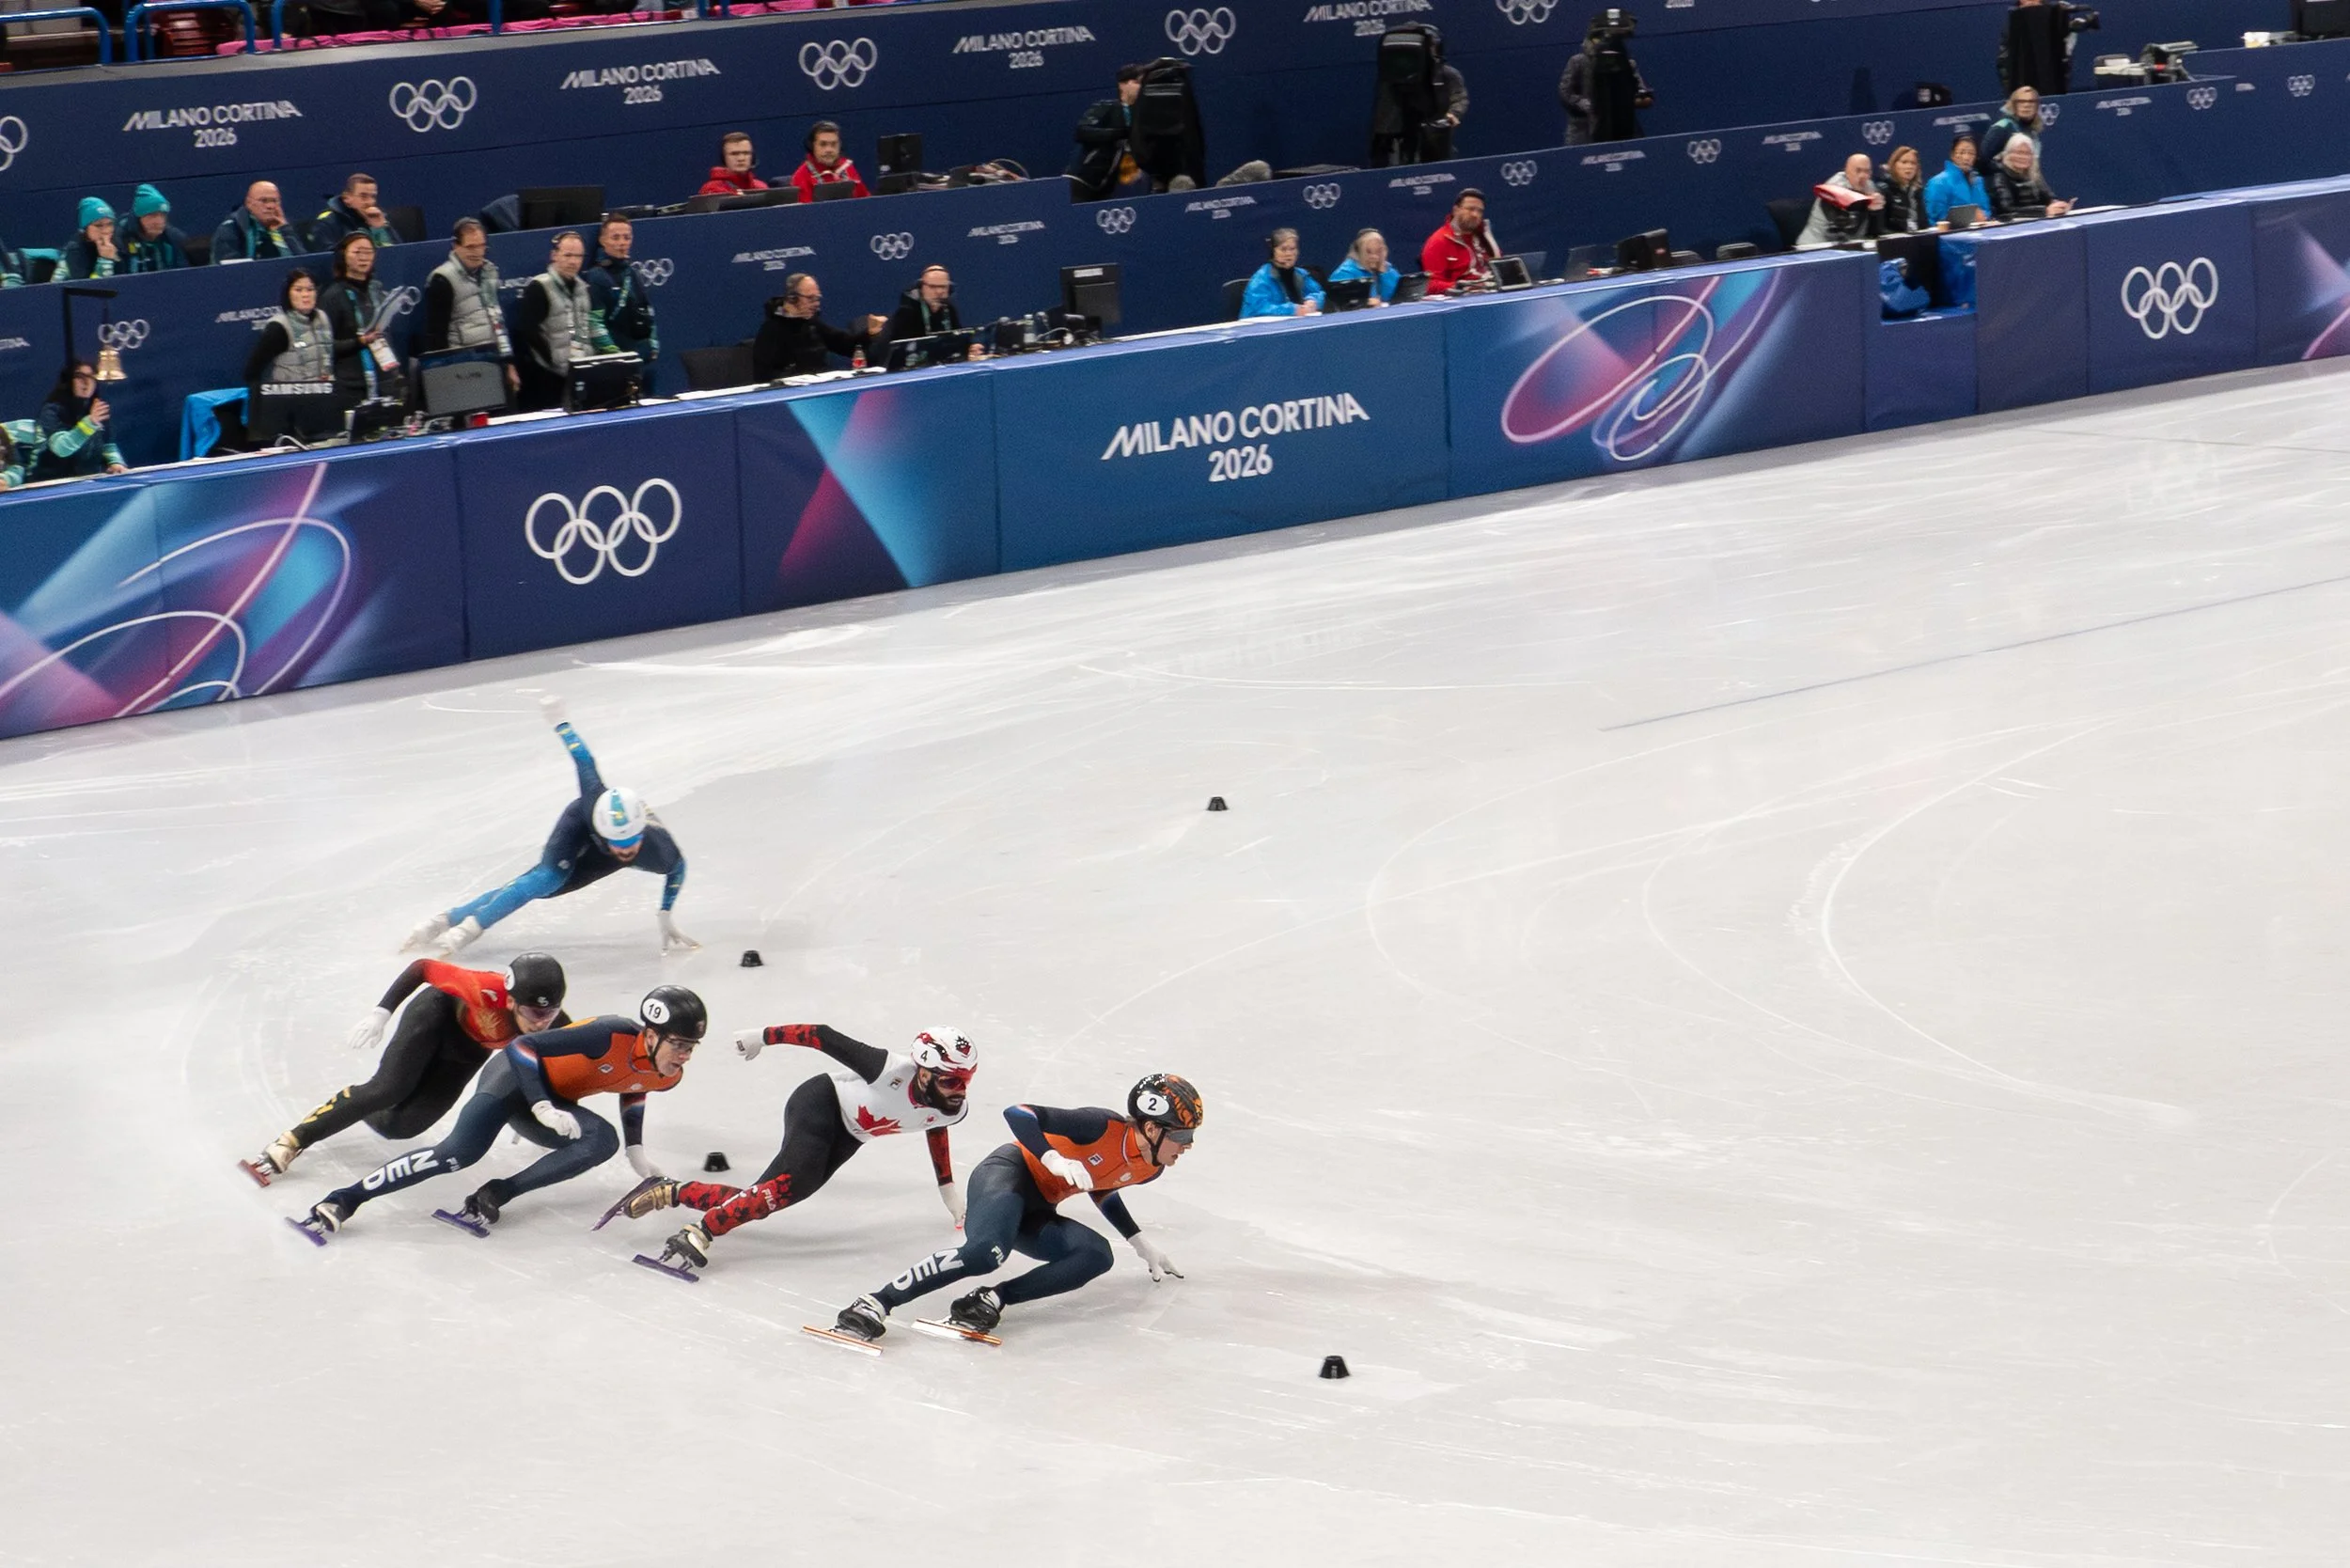
For fun I took my Panasonic Lumix GX85 to the Olympics. It’s a small mirrorless camera that’s surprisingly affordable and a lot of fun to use. I brought the 12–35mm kit lens to the short-track speed skating — not an ideal sports lens for distant action, but an interesting challenge. Speed skaters move incredibly fast, so I knew from the start that shutter speed would be the first thing I’d have to think about.
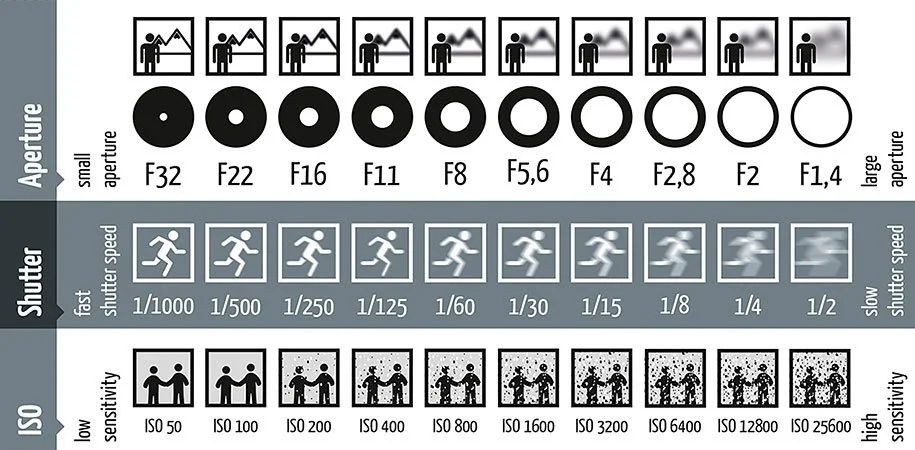
That leads into the exposure triangle: the three settings that control how bright or dark your image is — ISO, shutter speed, and aperture. Each changes exposure, but each also changes something else that affects the final image. Higher ISO brightens the image but adds grain. Faster shutter speed freezes motion but reduces the light hitting the sensor (making the image darker). Wider aperture (a larger hole) brightens the image and gives a shallower depth of field. Balancing these three is the whole point.
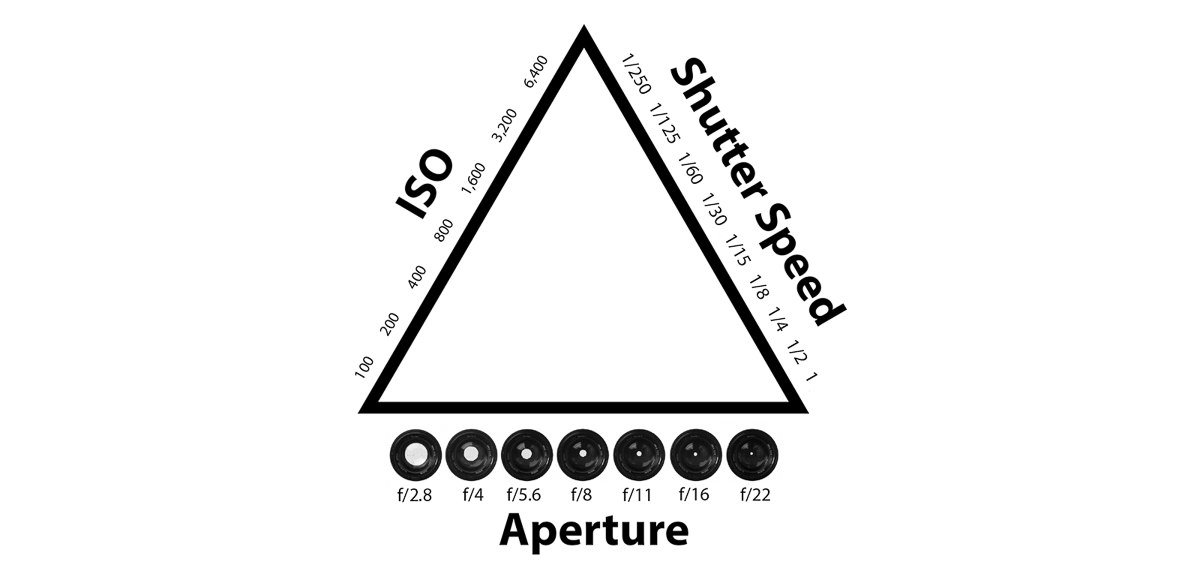
For speed skating I generally want a fast shutter speed to freeze the action and avoid motion blur. But a fast shutter makes the image darker, so I have to decide where the extra light will come from: raise ISO and risk more grain, or open the aperture and accept a shallower depth of field.
Different cameras and lenses handle high ISO differently — Lightroom’s denoise tools help, but they aren’t a perfect substitute for good exposure. If you can keep ISO as low as practical, that’s usually best, though sometimes a touch of grain can be stylistically pleasing.
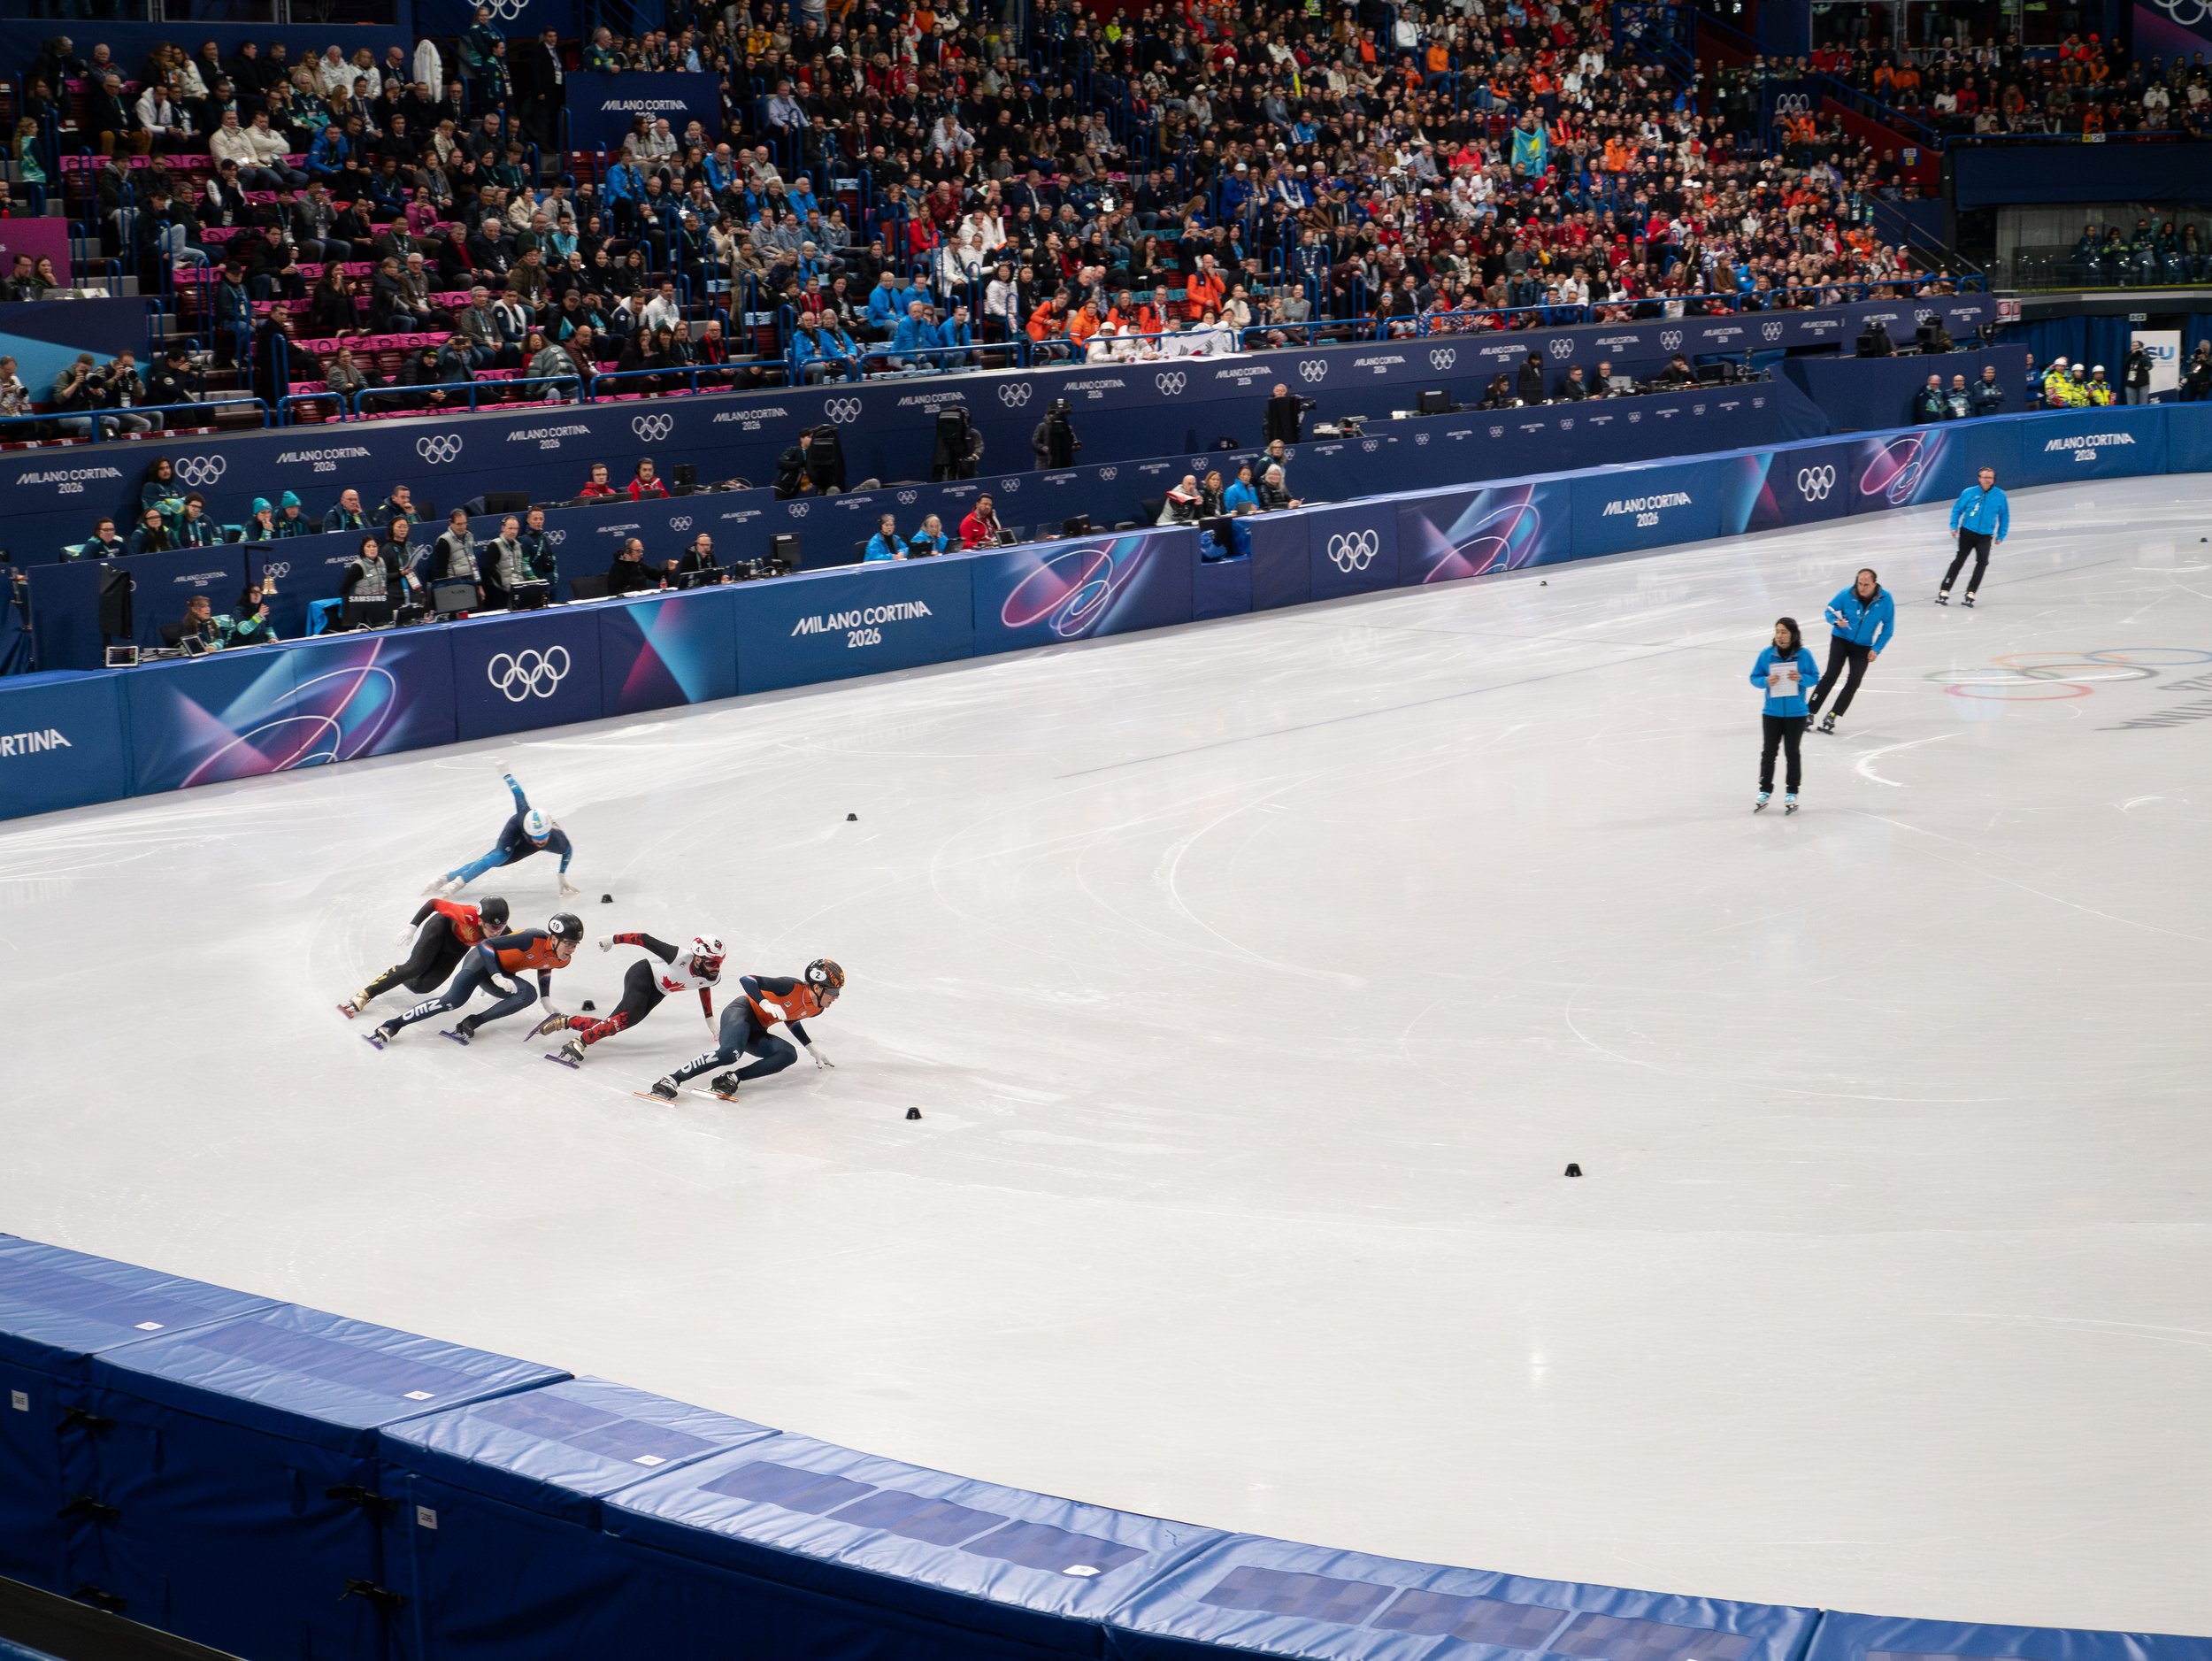
Above is the unedited image. The Settings: ISO 3200, Shutter Speed 500/sec, Aperature 5.6 and I’m shooting at 30mm (which caused problems in and of itself)
Going above 3200 ISO you’re going to get a grainy image. I was surprised that even only at 500/sec shutter speed the skaters are in focus on the turn.
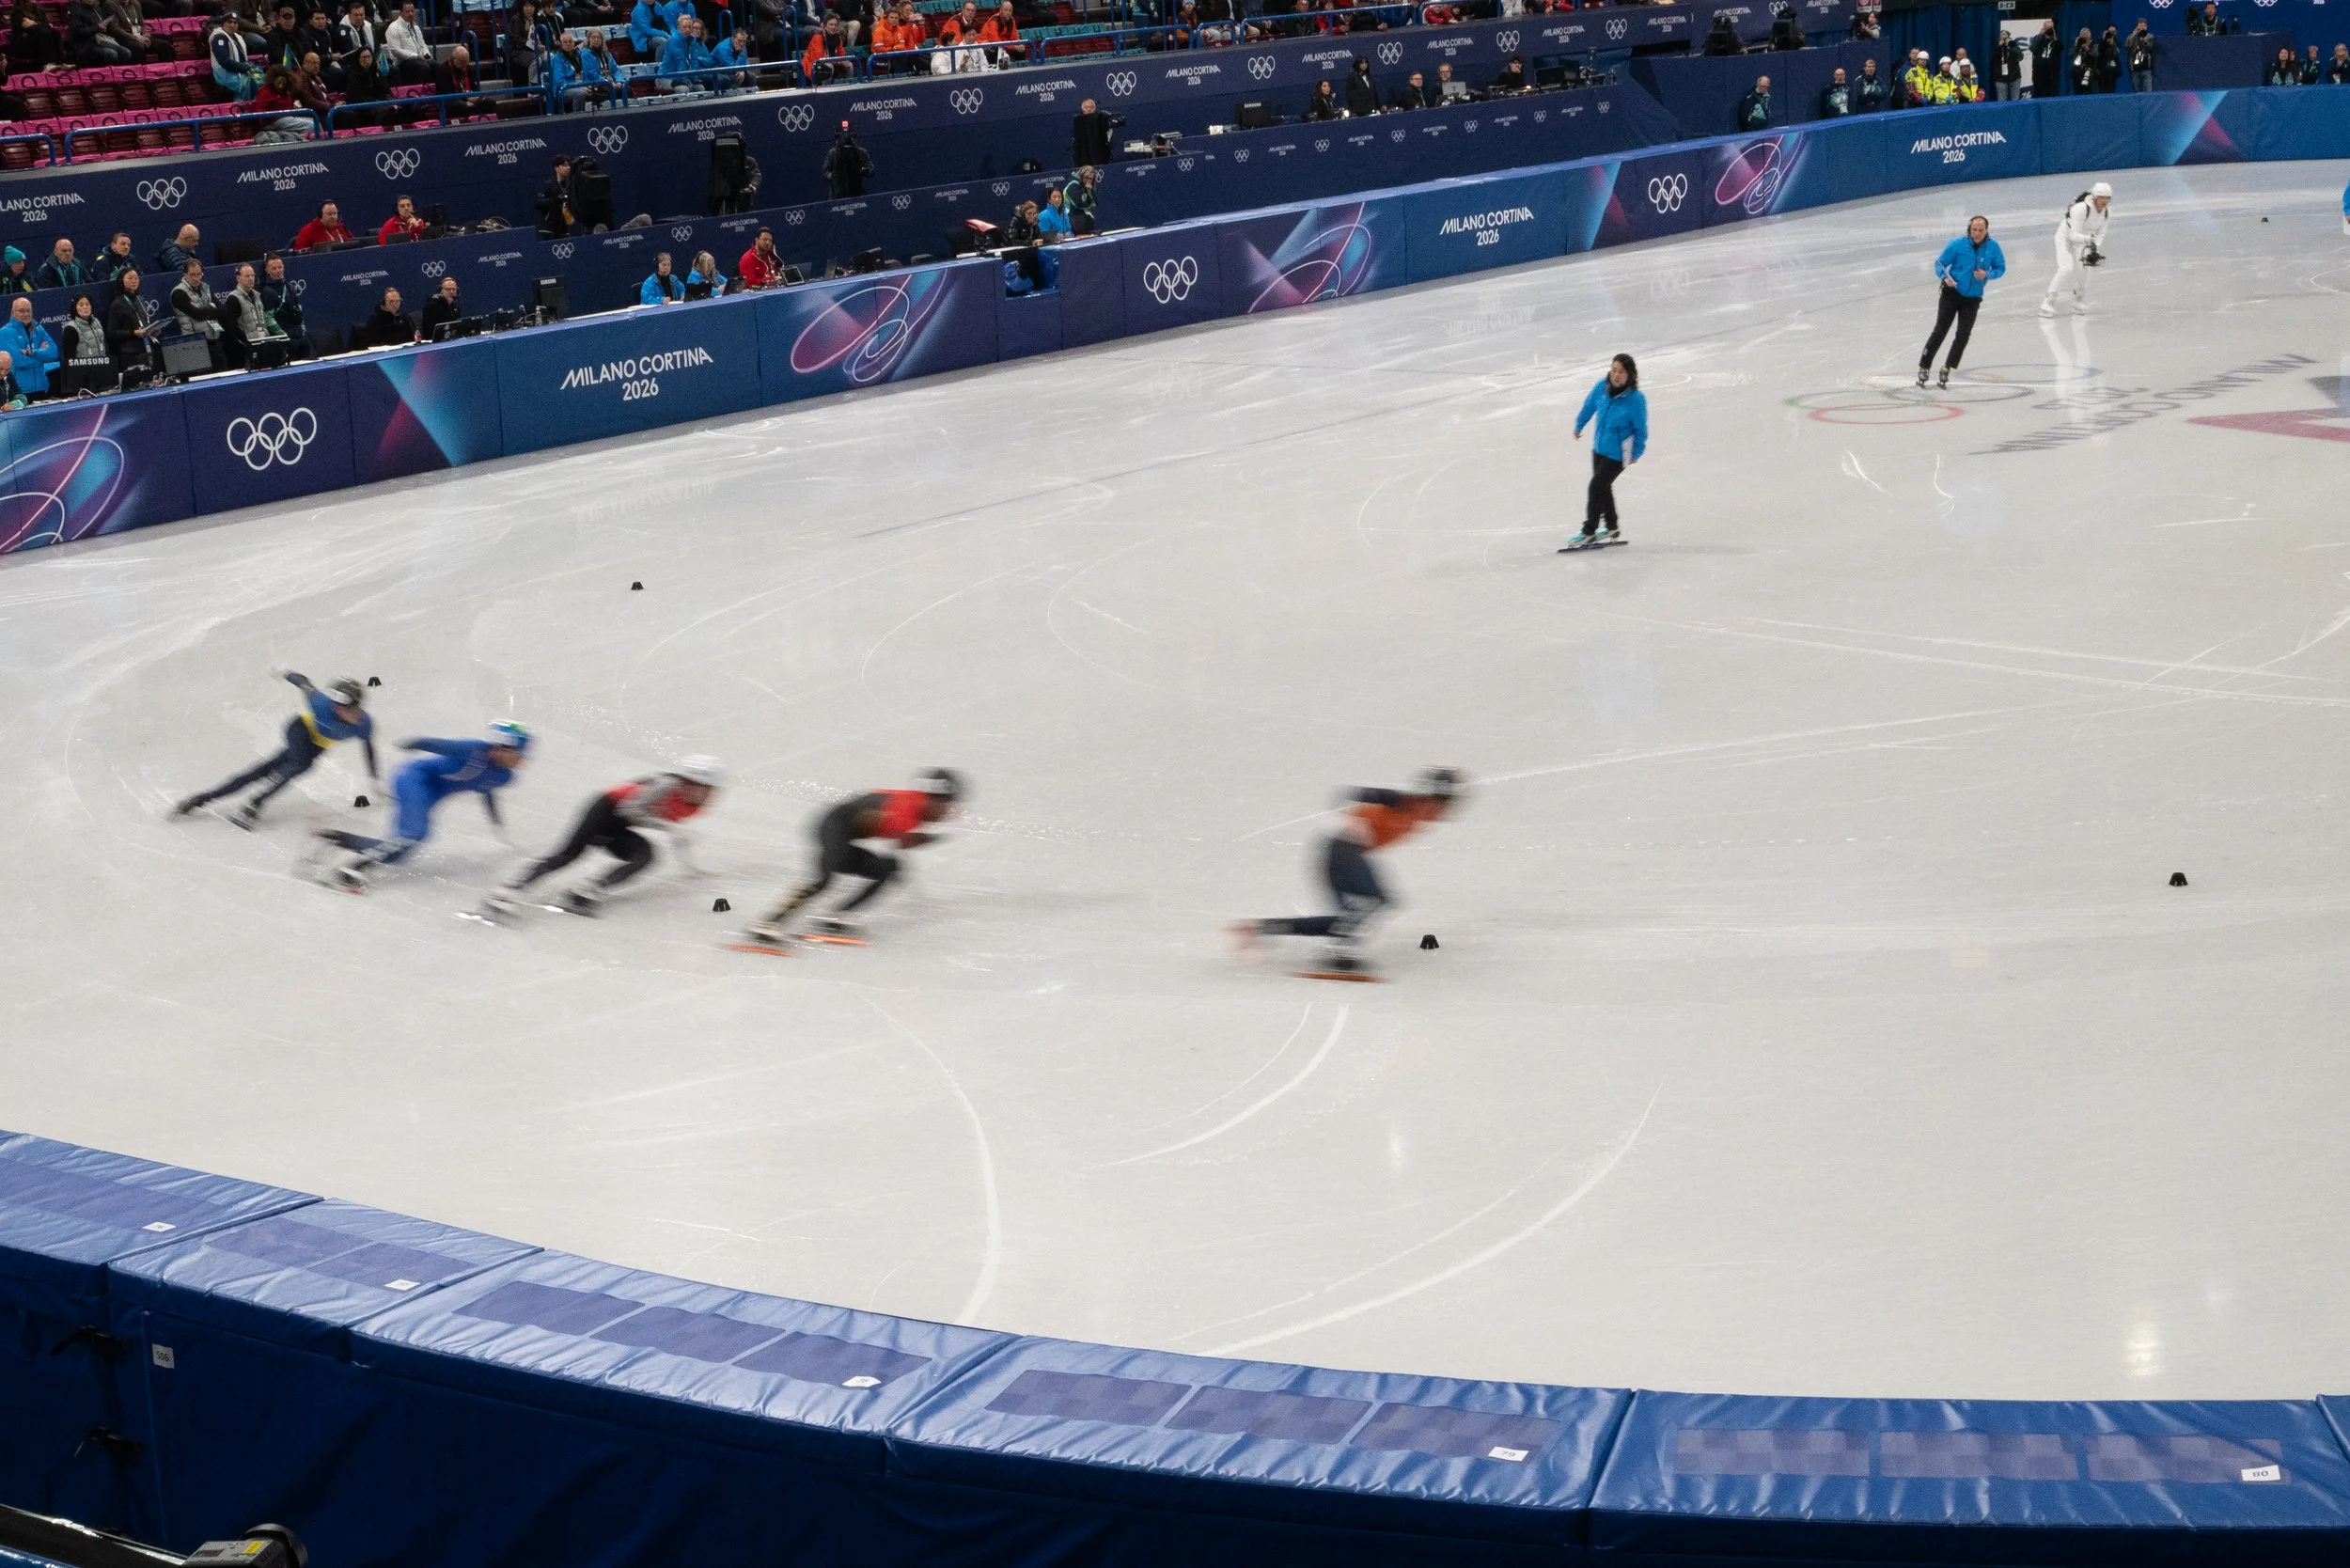
Above is the unedited image. The Settings: ISO 1600, Shutter Speed 60/sec, Aperture F11.
So above is an example where I shot with only 60/sec shutter speed and you can clearly see the motion blur. This got my thinking, what if I tried to get a cool artistic blur - so I played around. Noting that I didn’t have a lot of time to figure out the right settings because these games went incredibly fast.
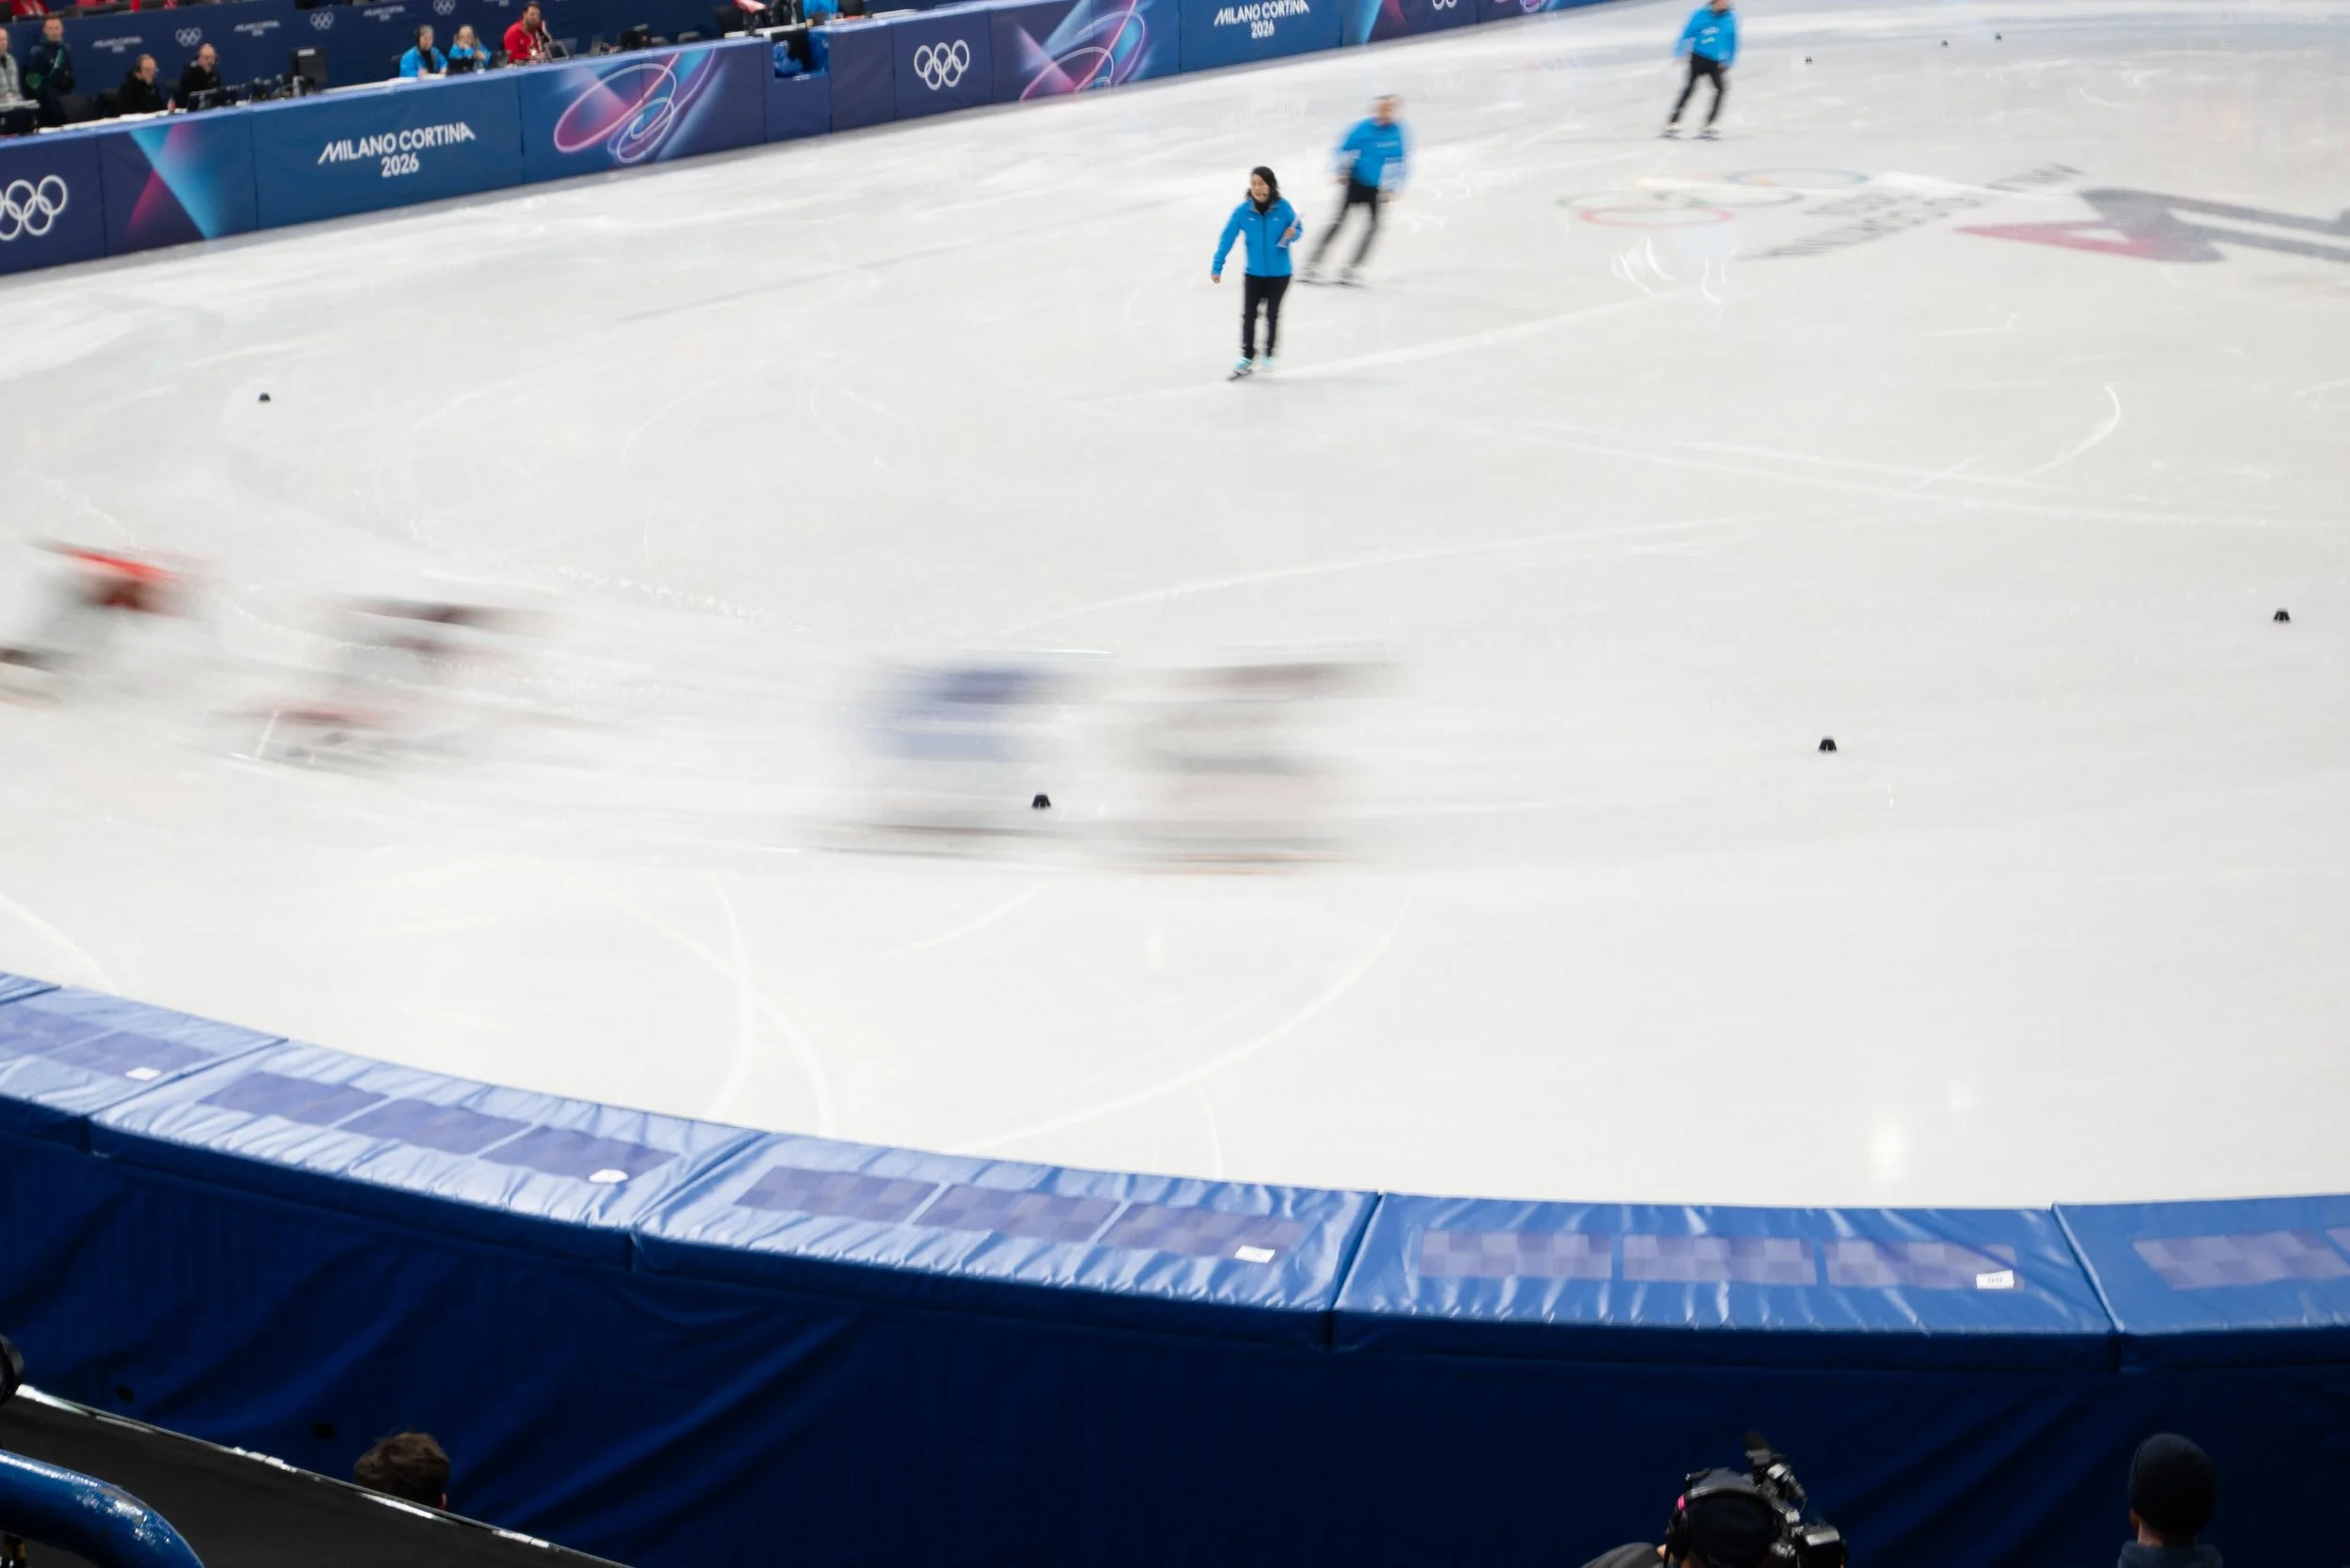
ISO 200, F/6.3, Shutter Speed 1/15sec
Here you can see a good deal of blur, that’s because we are shooting with 1/15 sec shutter speed - super slow shutter speed. The problem, I wasn’t shooting with a tripod - therefore even the blur of camera shake causes even people and objects not moving to be blurry. So I basically hated this shot.

So which shots did I end up sharing? From this shoot, just two. I took the unedited first photo from the top of this post, cropped tighter, and used the denoise to get the above image. Am I amazed - no, but it wasn’t bad considering I just brought by little LUMIX in hopes of getting something.
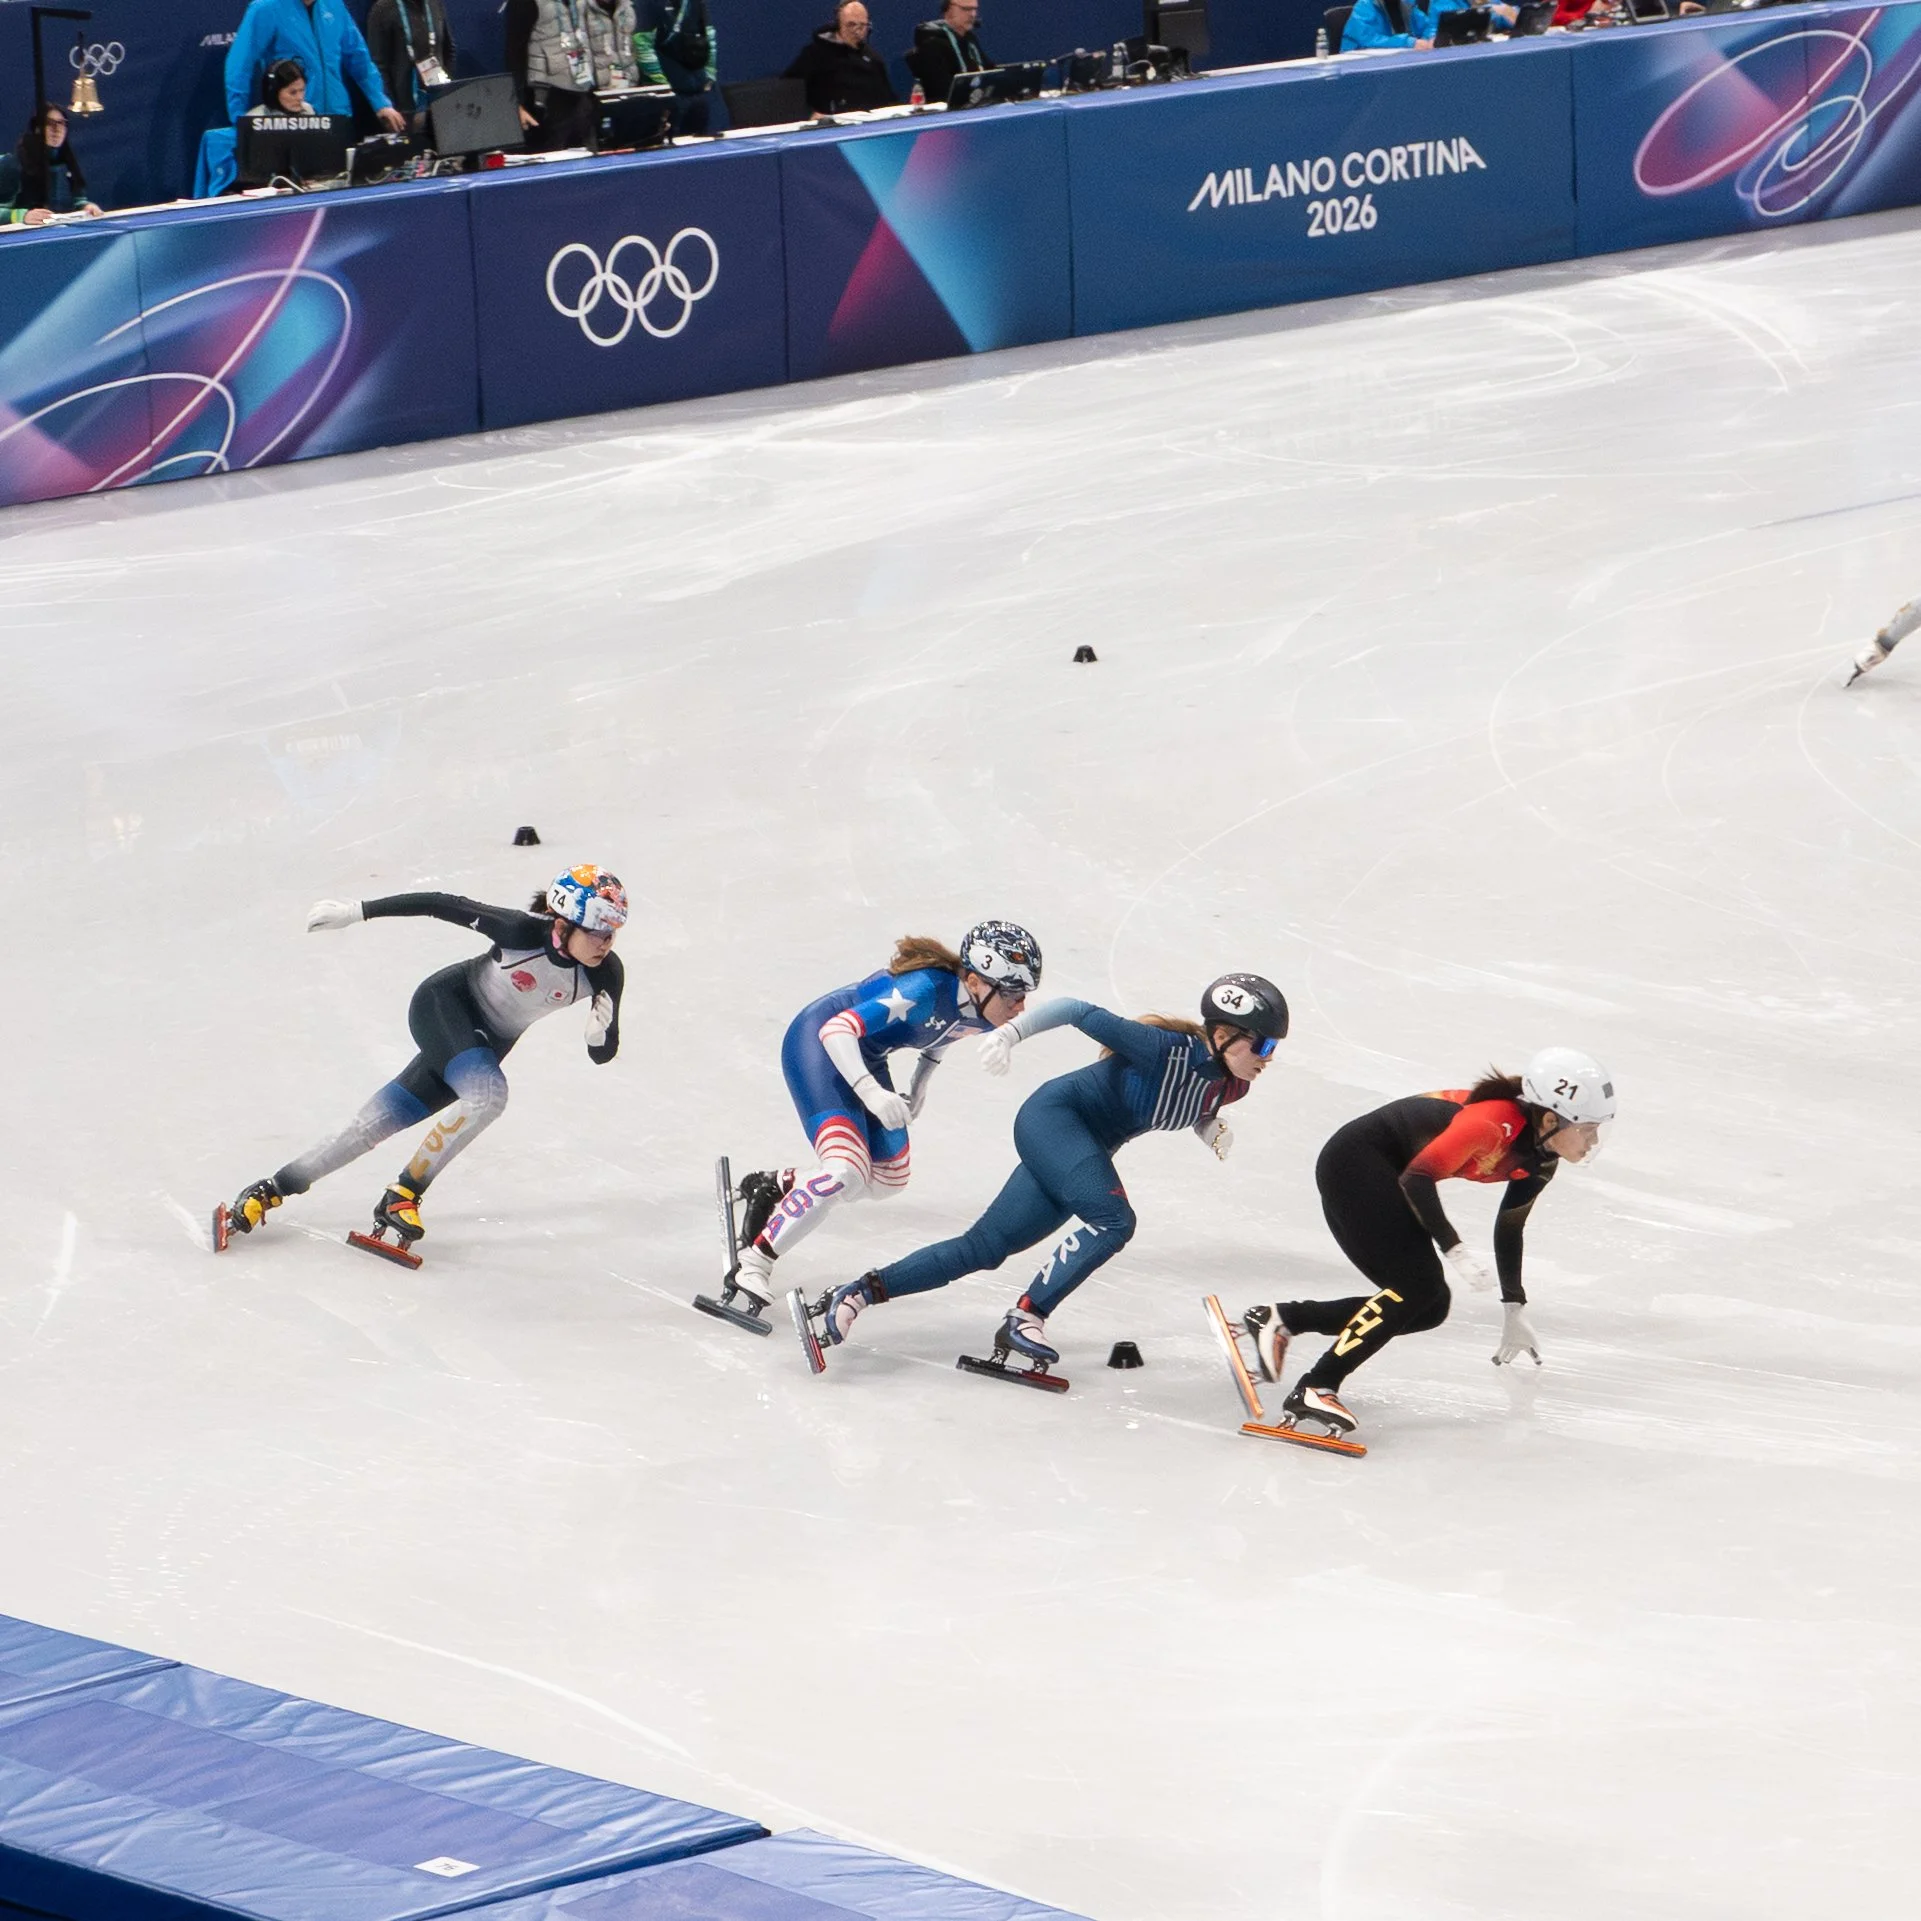
I also shared this image, similar to one above, where I used donoise and got it about as good as you can.
This was shot at 1/40th a second and I liked the little touch of motion blur in their feed.
I also tried to use creative motion blur while touring the city - by trying to get creative motion blur on their trains.

Focal Length 16mm, Shutter Speed 1/30sec, Aperture F 4.0, ISO 400
Now dear reader, this is the edited version. I was walking, this moment was happening and I didn’t get time to get the exposure in camera right below is the original image. You can see I didn’t balance the need for a lower shutter speed by adjusting one of the other triangle elements.
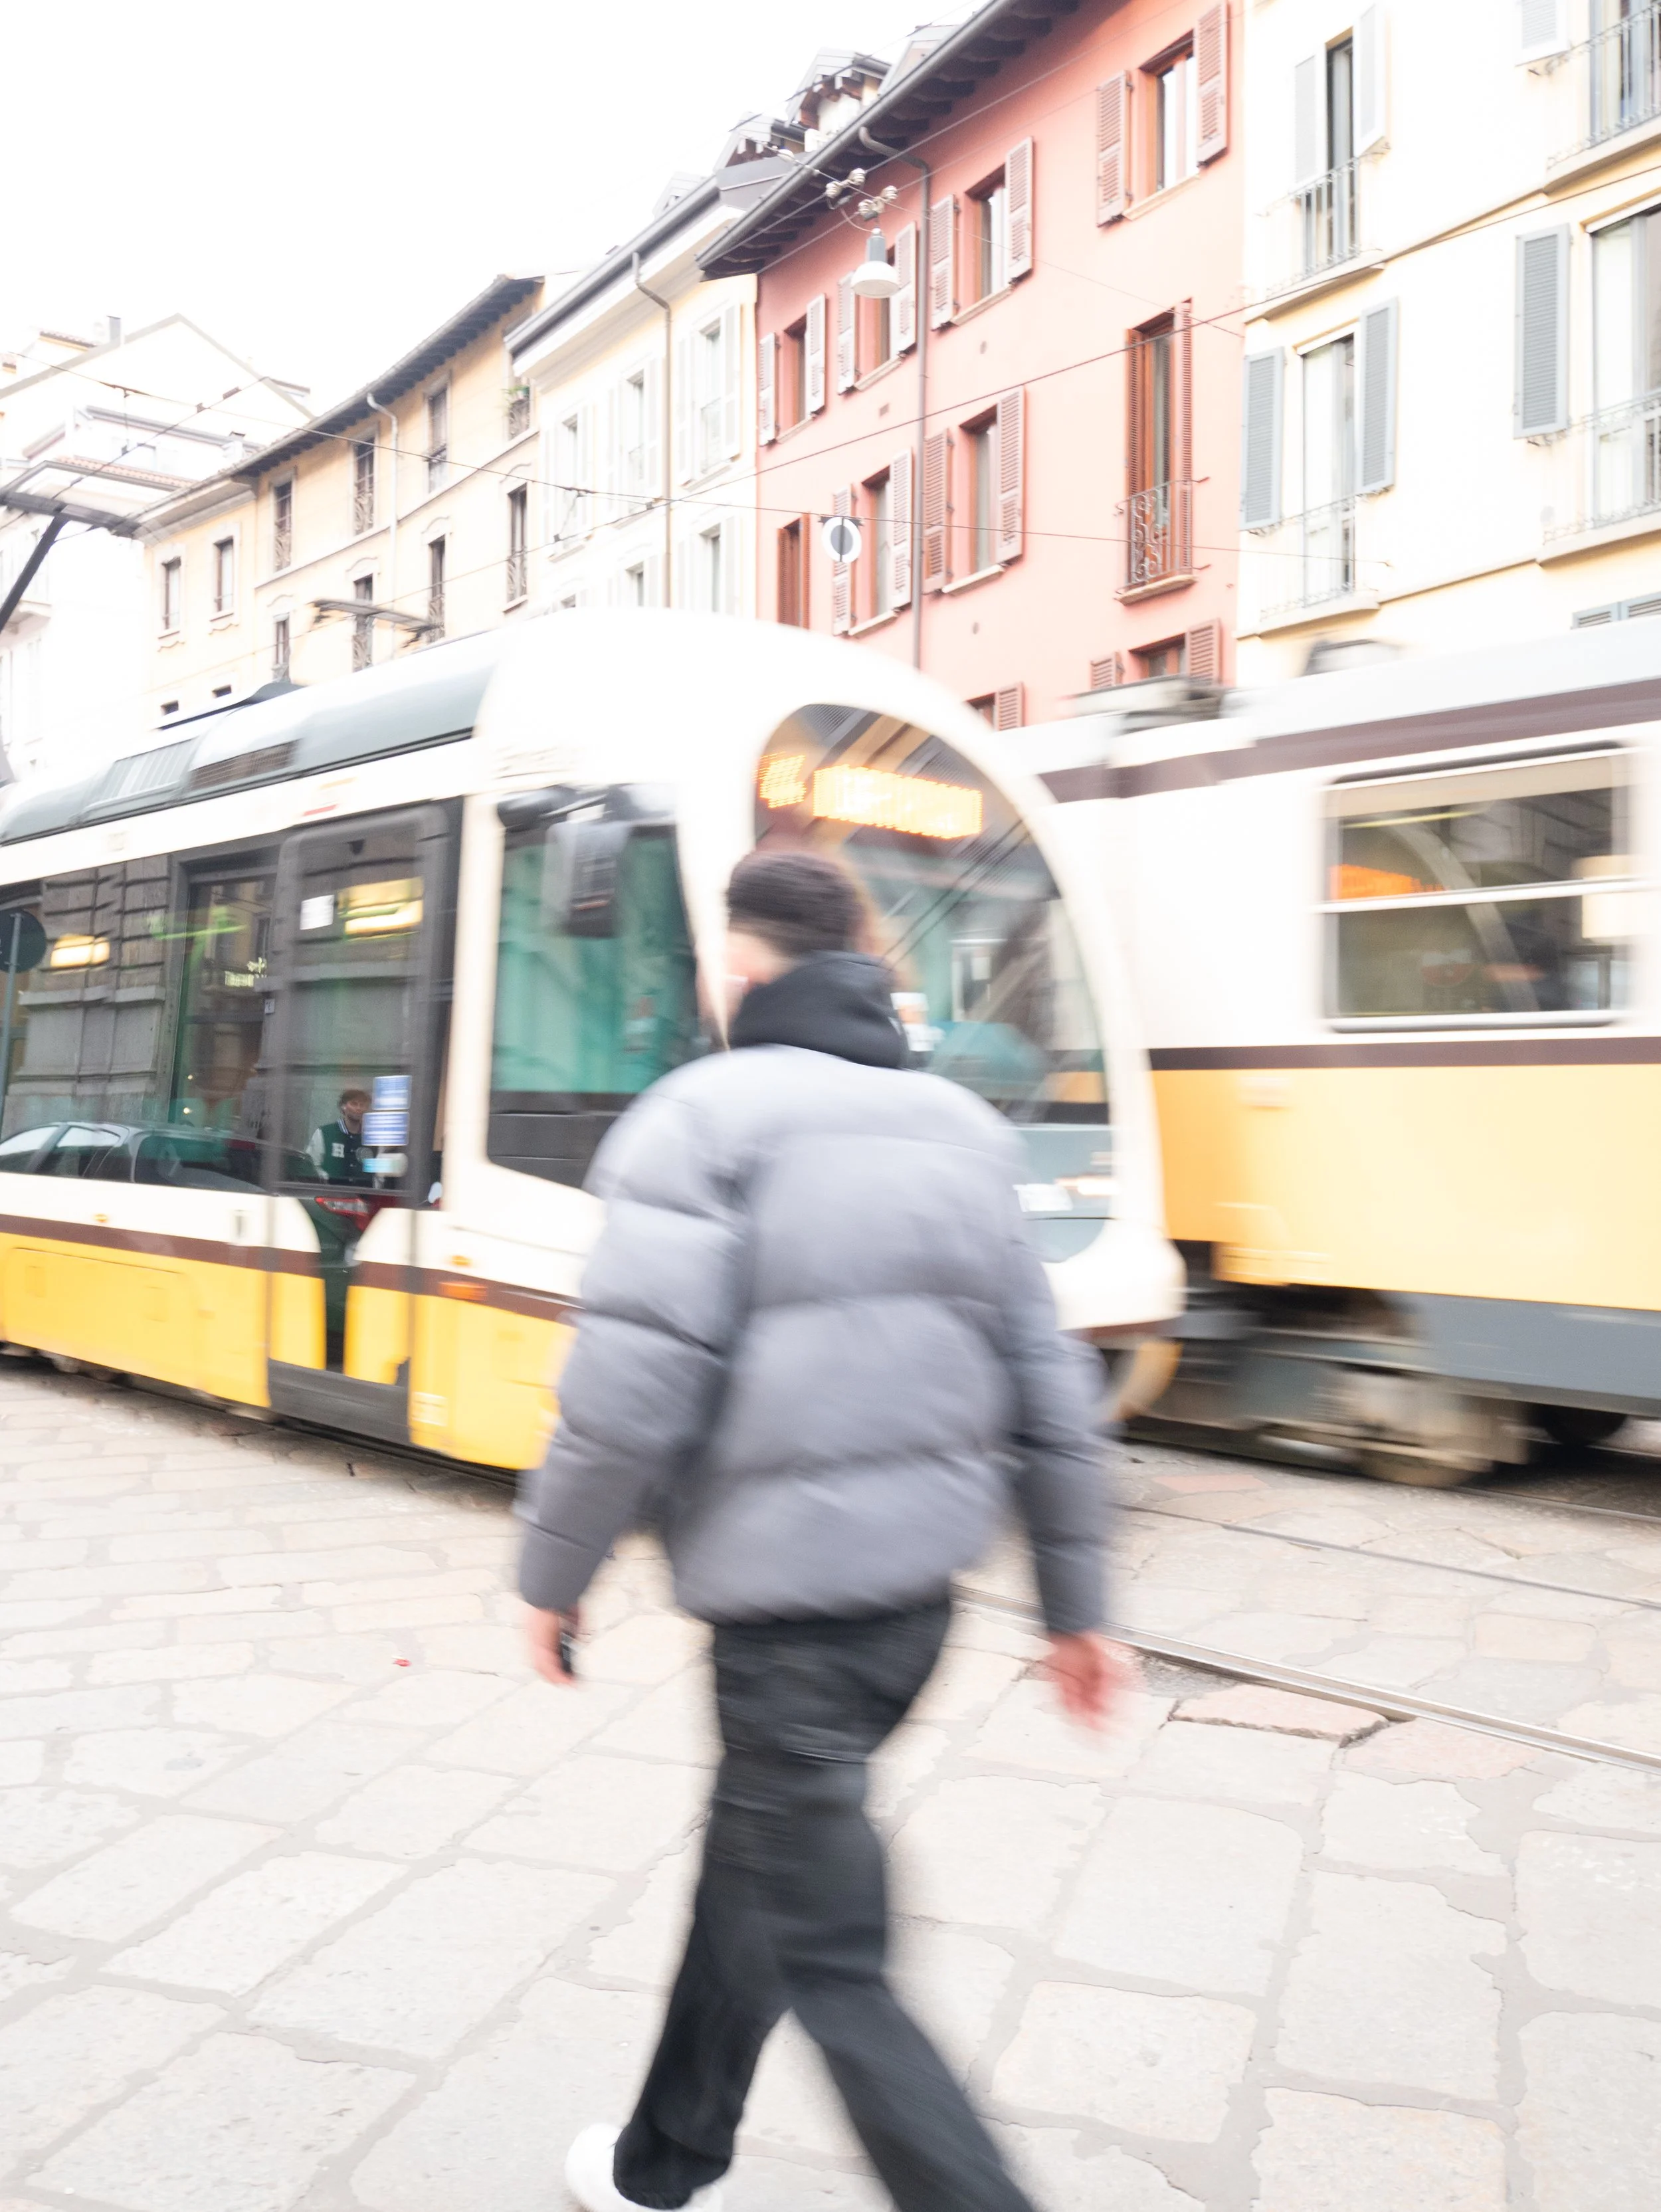
So there you have it, shooting in manual on the fly, especially while trying for intentional blur is a difficult activity, especially when traveling with a group that isn’t a photography group. But each shoot is a learning experience!
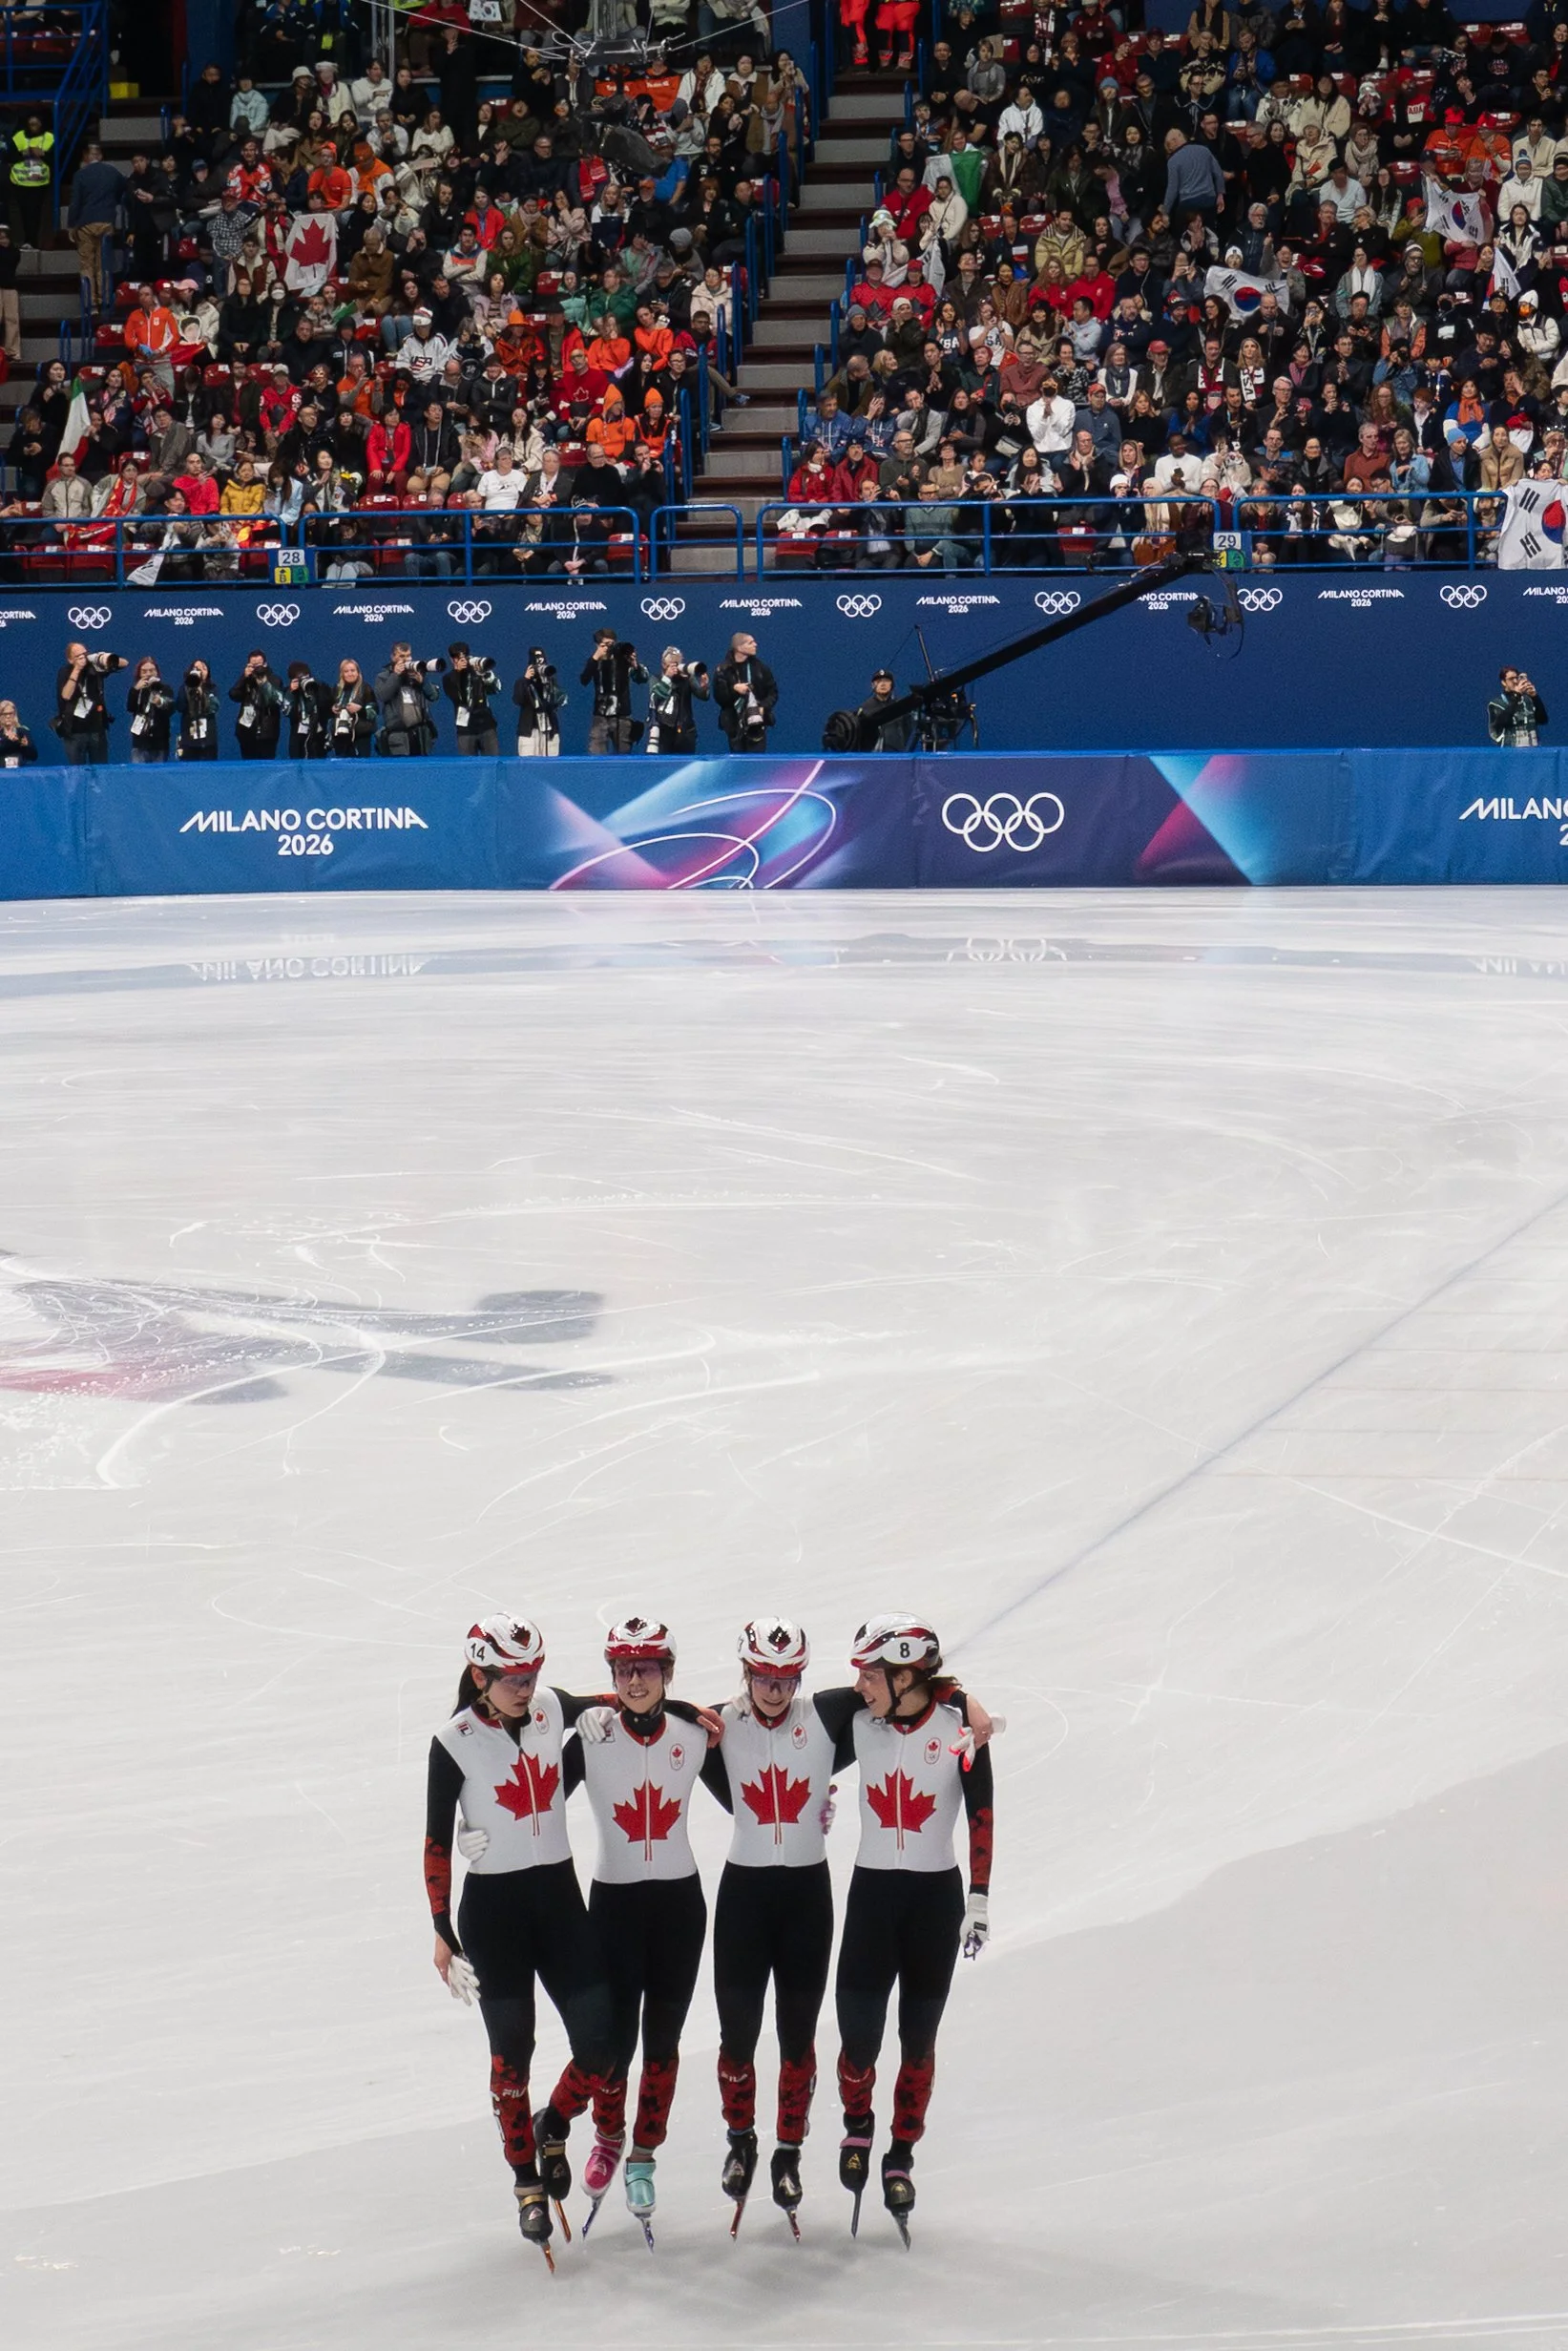
Milan, Manual Mode: Shooting the 2026 Winter Games with a Single Lens
This February I traveled to Milan for the Milan–Cortina Winter Olympics with my sibling and my mother, traveling light with one camera and a single 12–32mm kit lens — and I committed to shooting entirely in manual. With my family constantly on the move, manual shooting was a real challenge, but trips like this force you to learn the exposure triangle and get comfortable changing settings quickly on the fly.
Here are a few of my favorite shots:
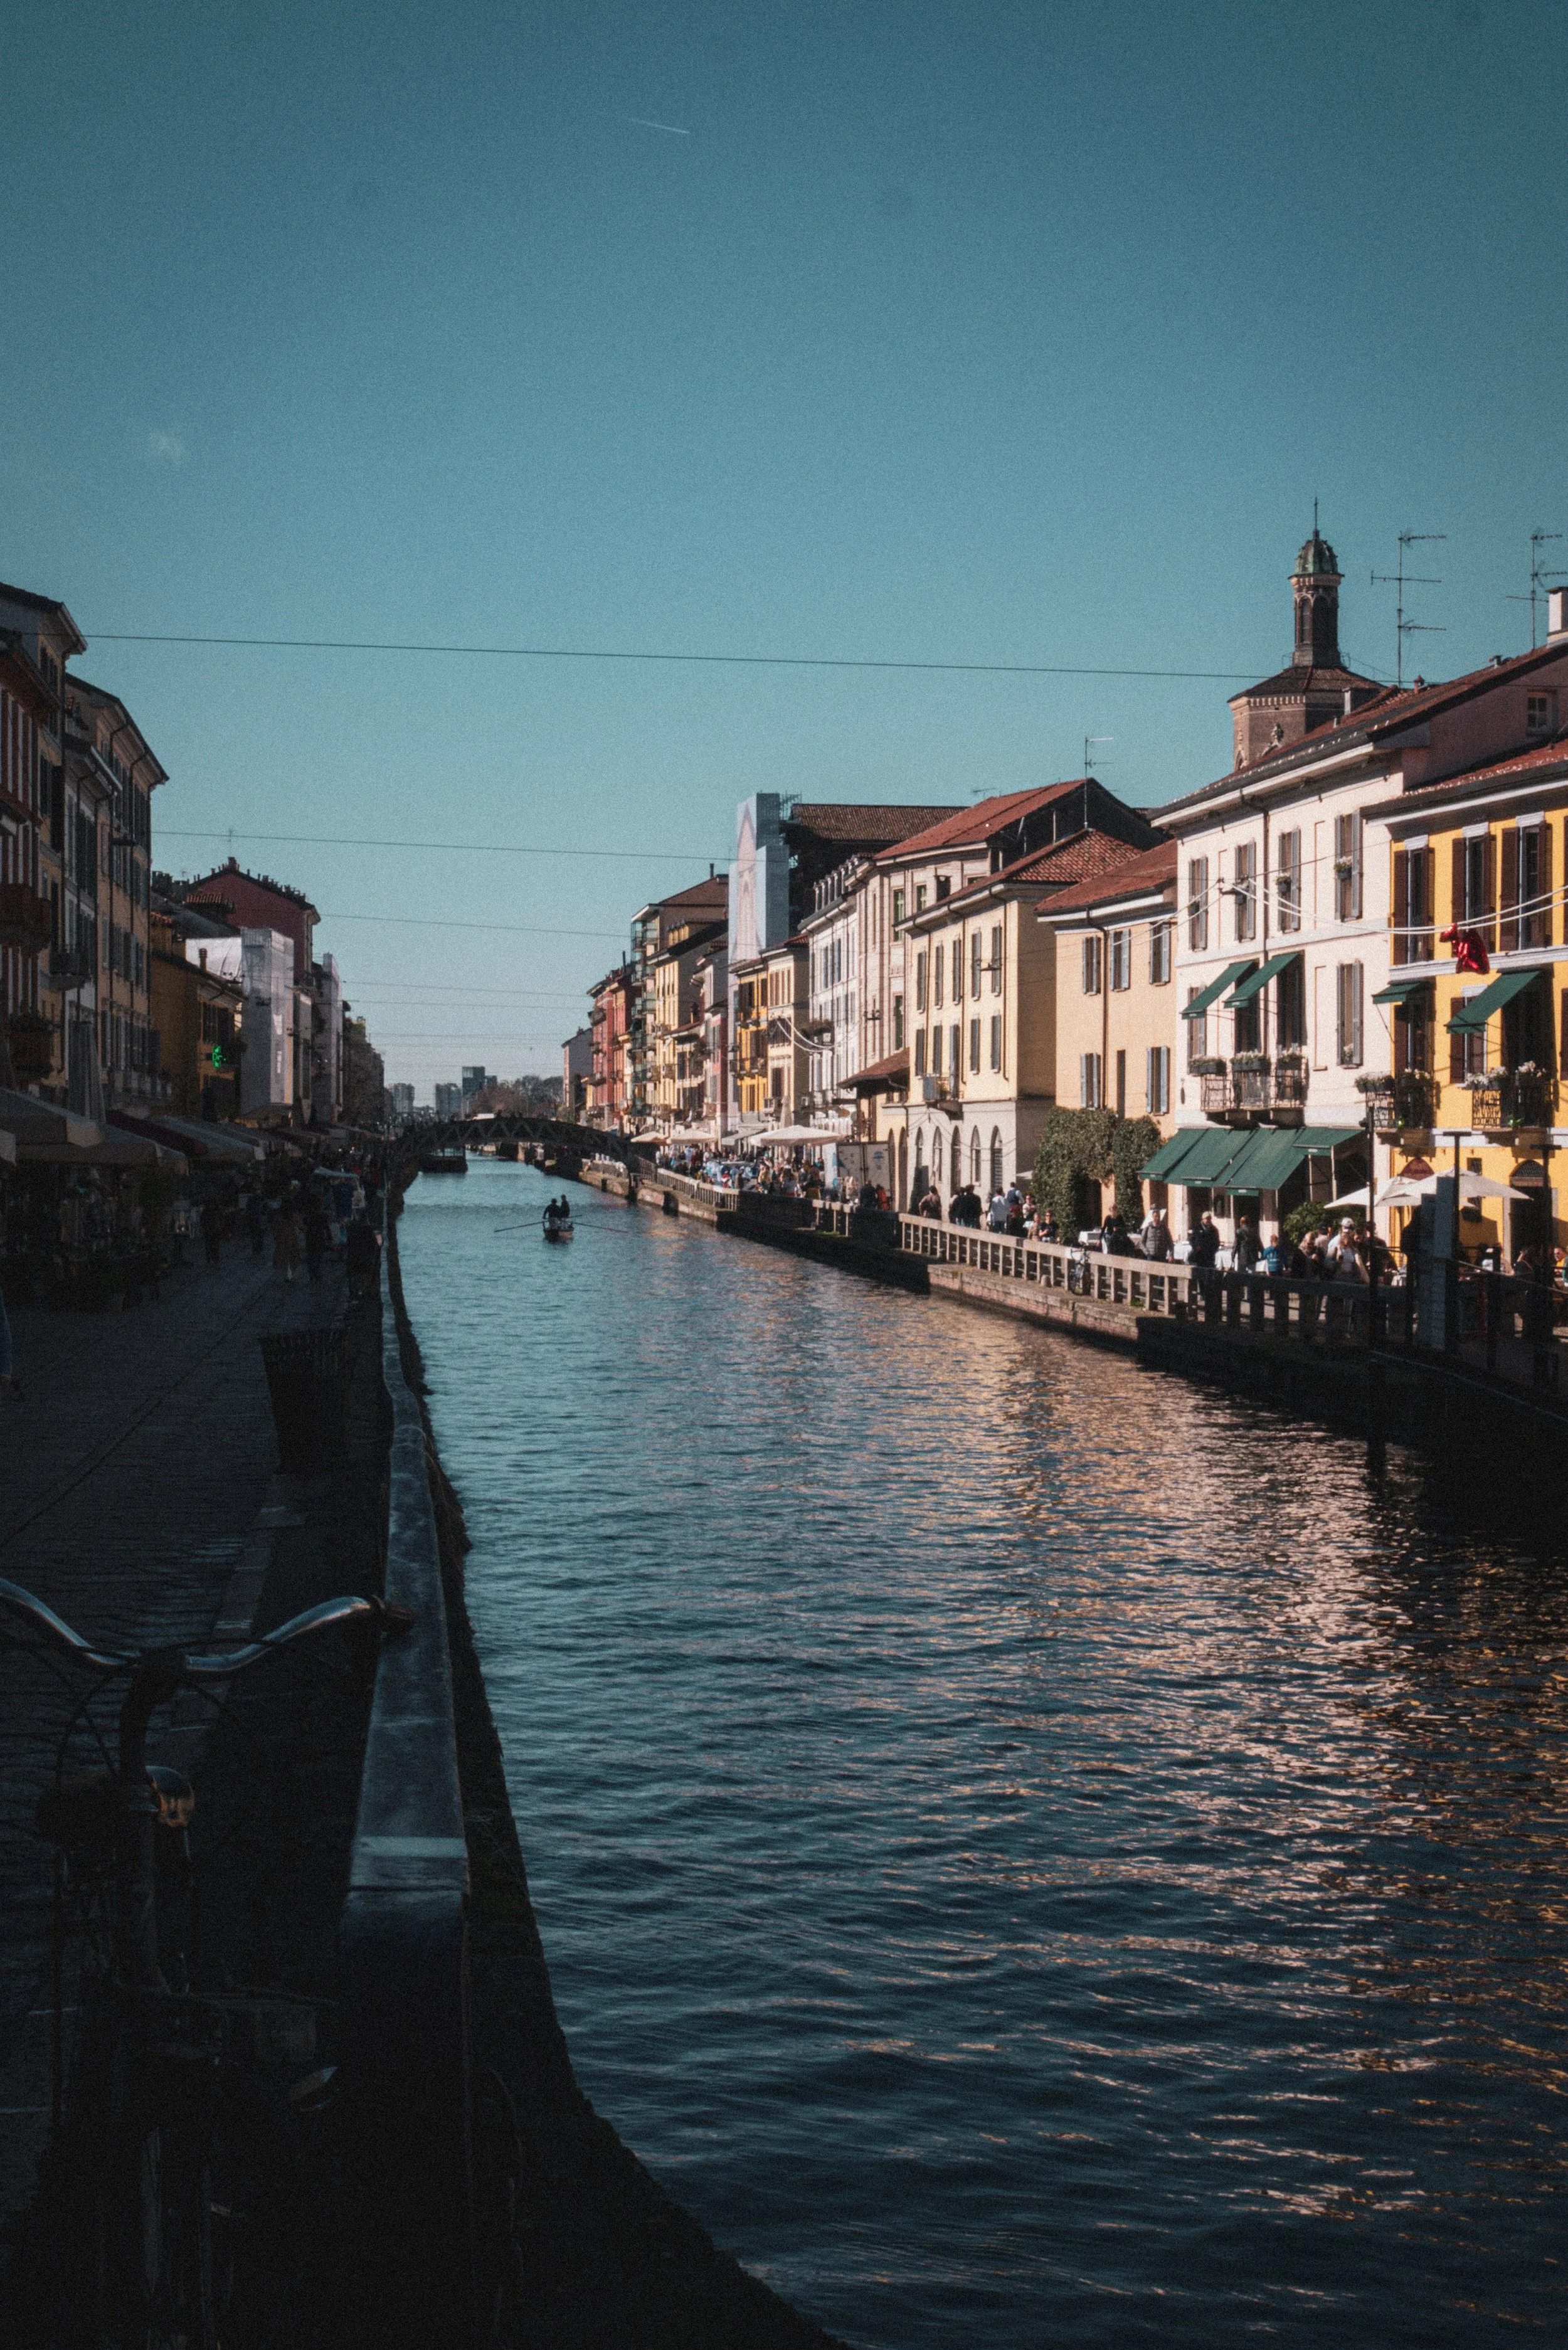
Locks on a Bridge
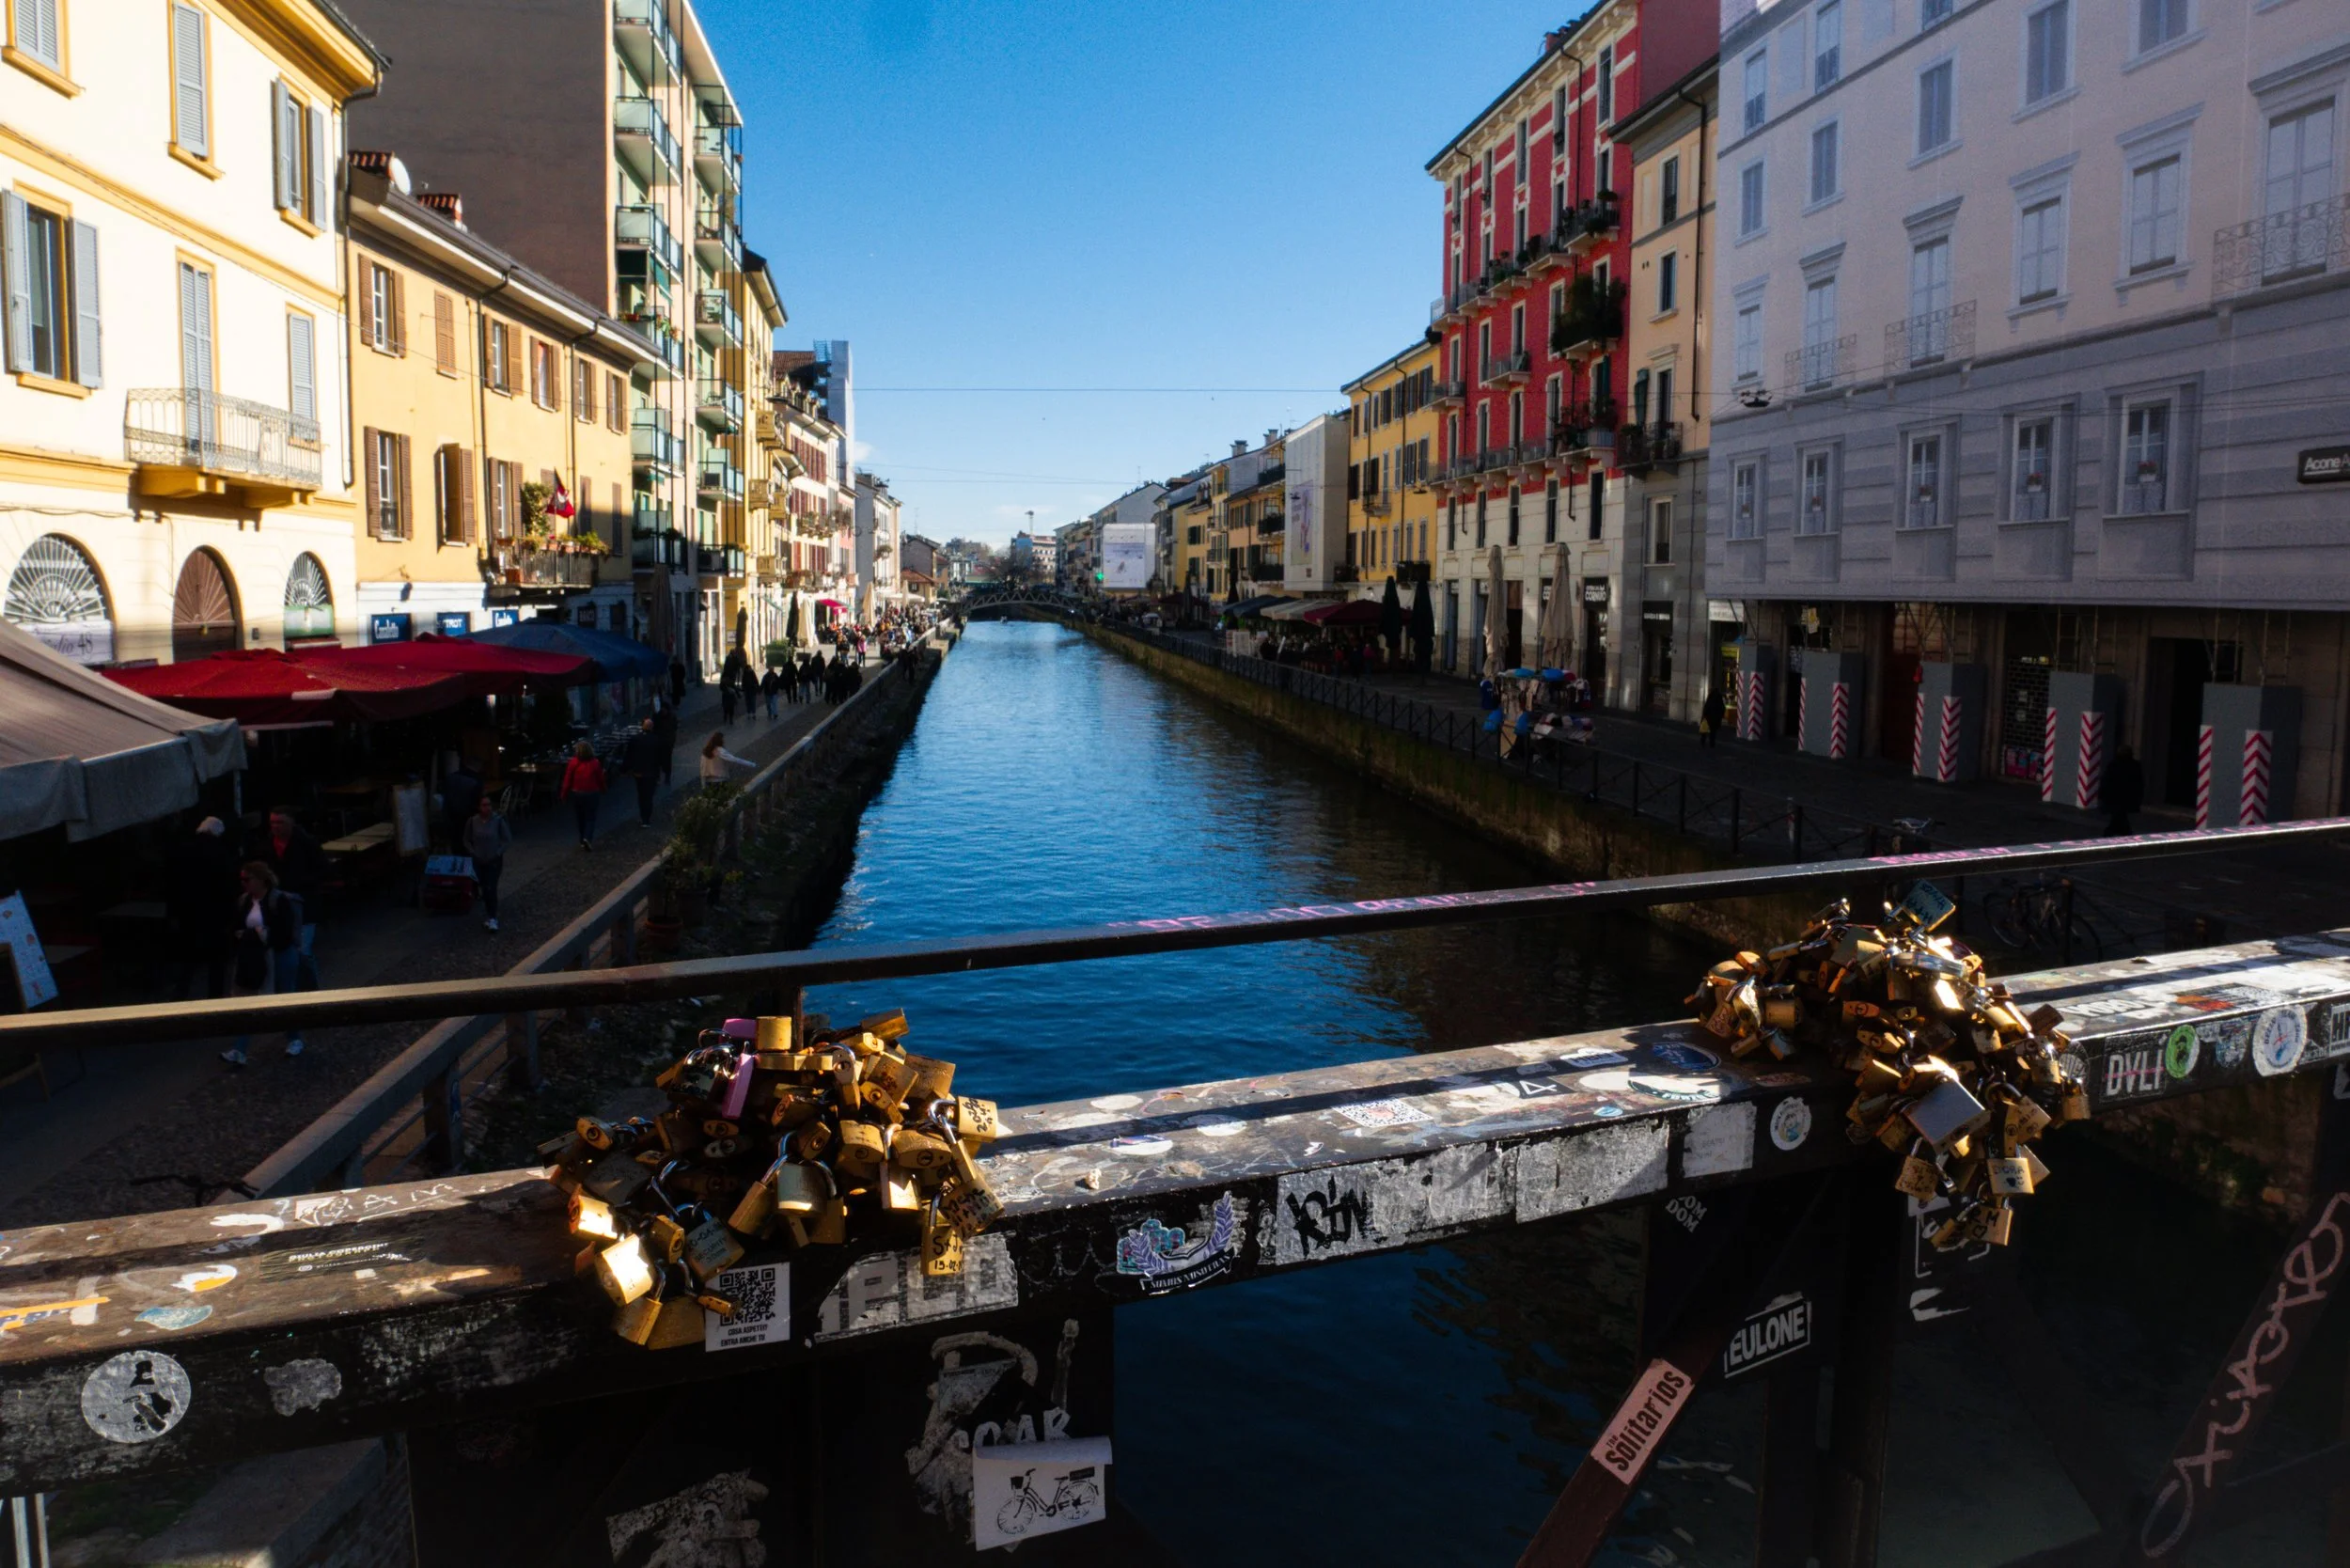
Here the road and bridge create a frame within a frame - Only thing that could have made this a stronger composition is if we had a boat coming down the river in the center or distance.
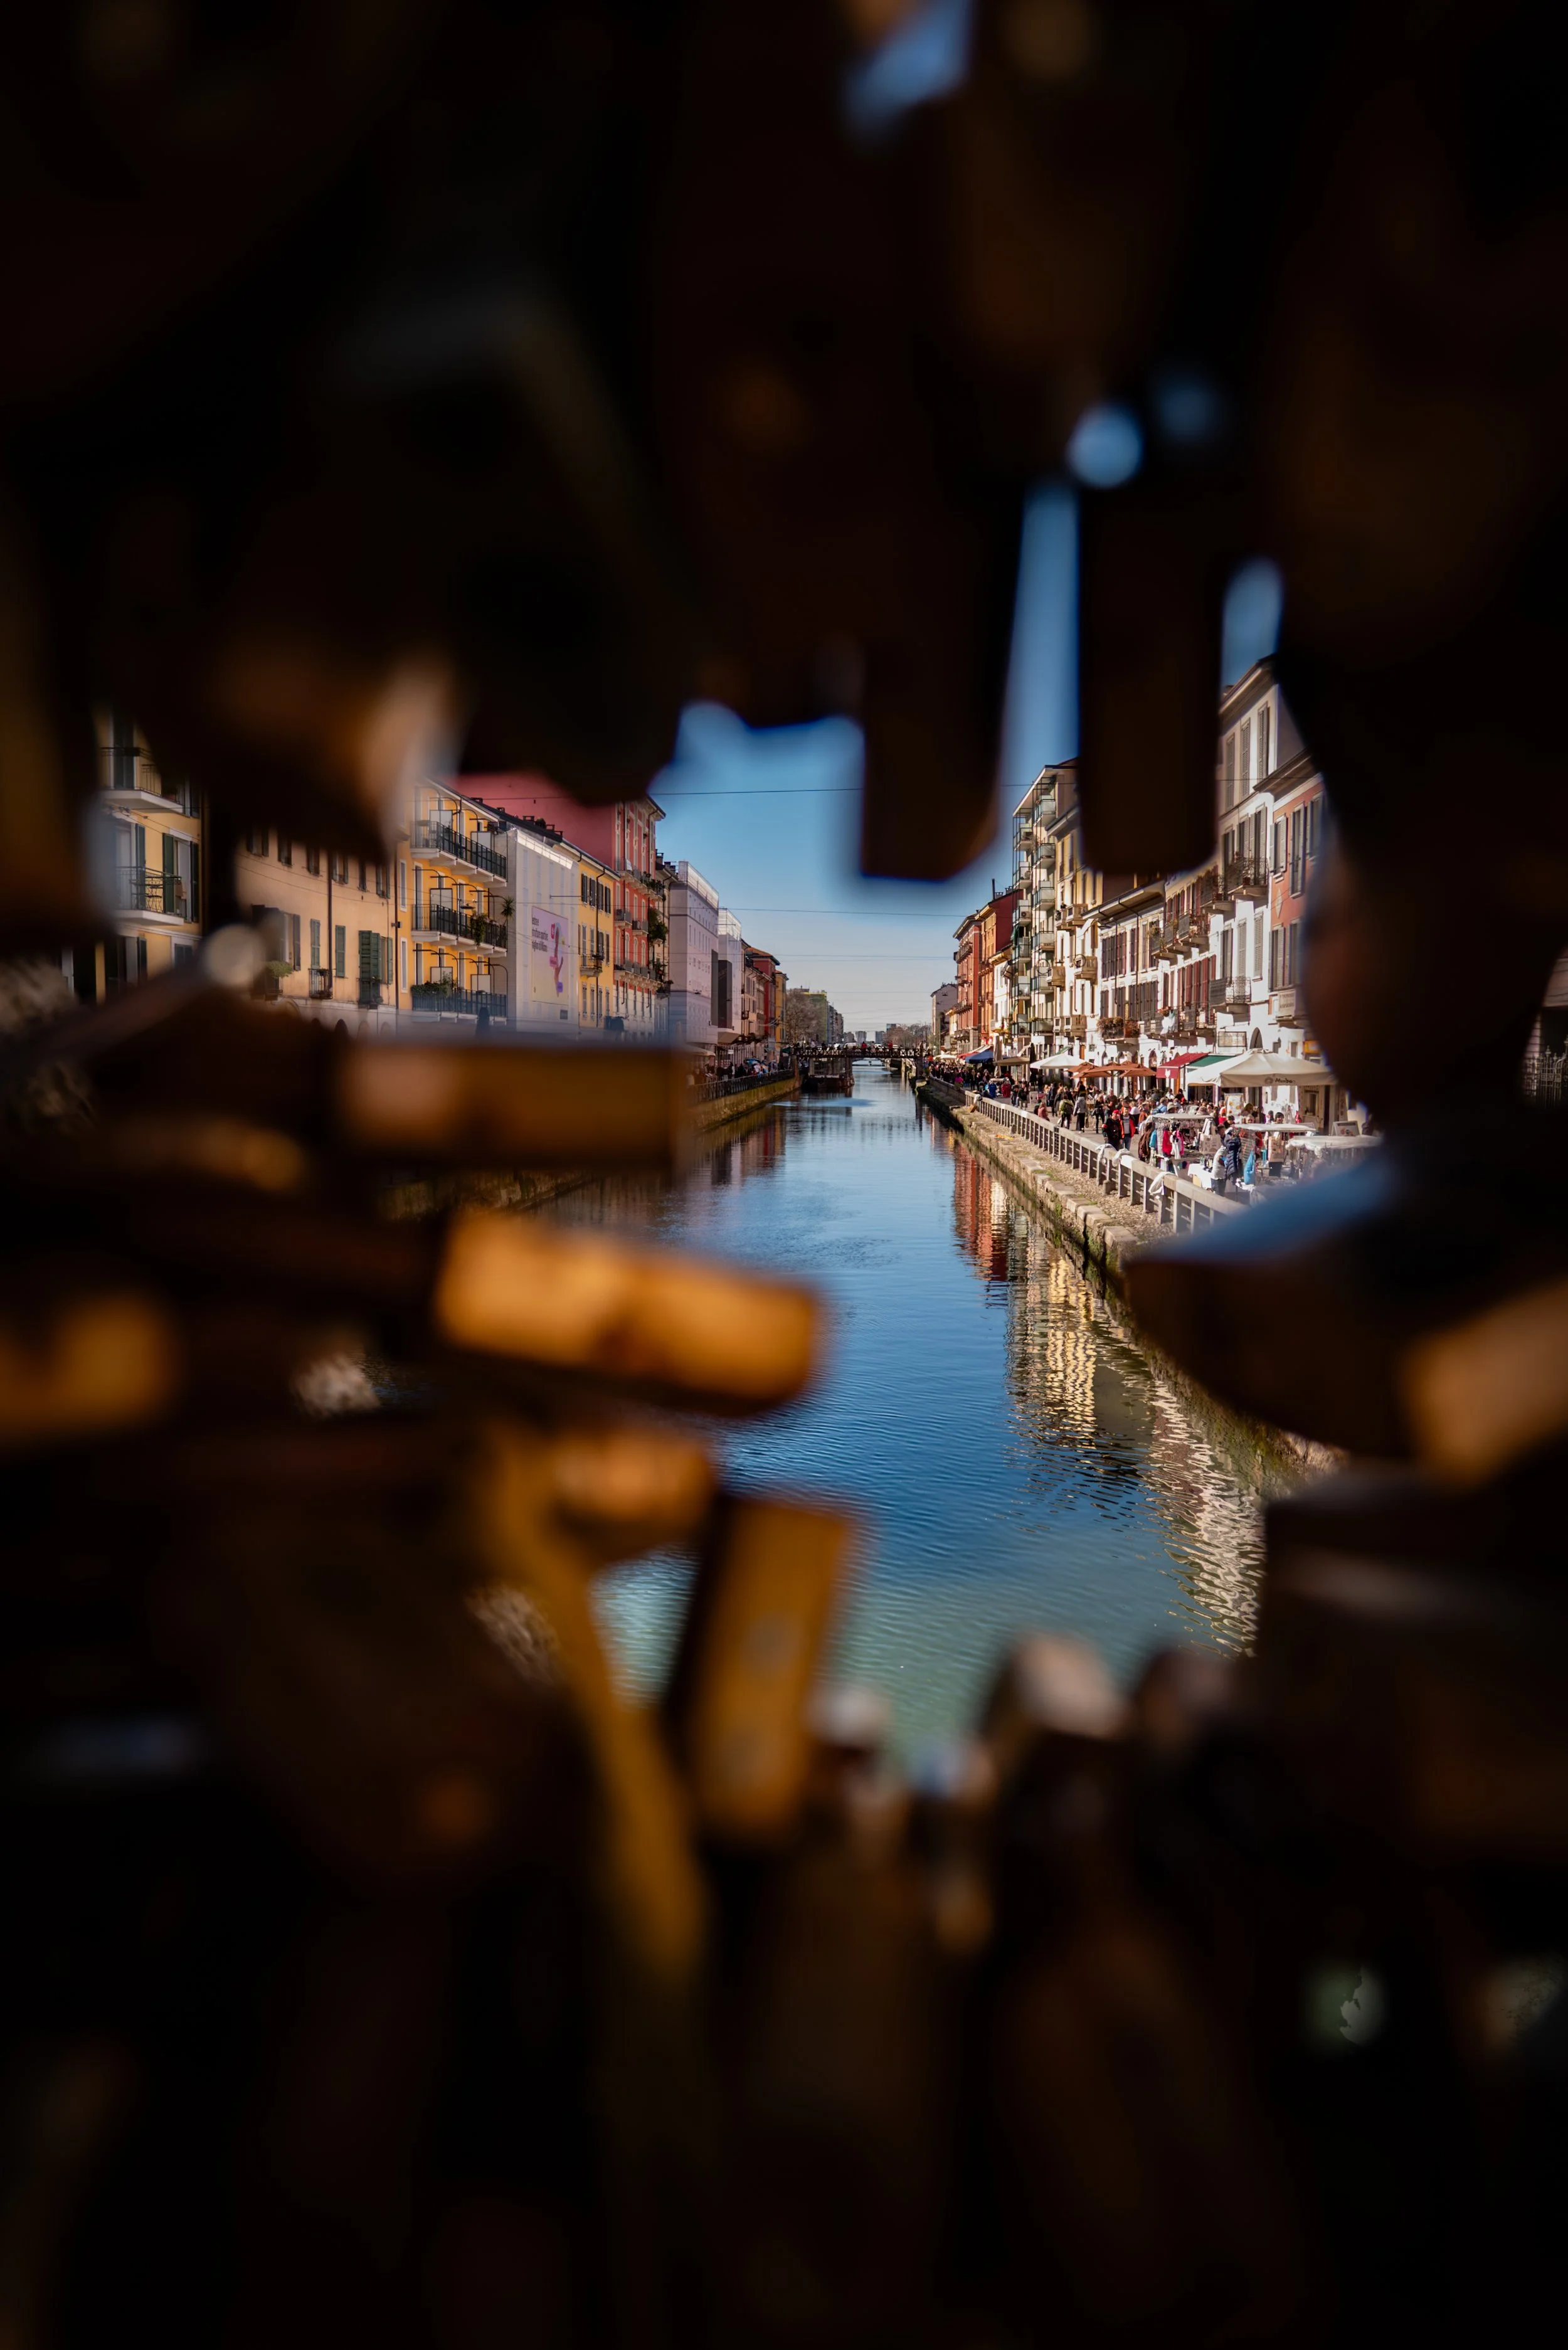
The first two shots I want to share were taken on a bridge covered in locks. I was hoping for a "frame within a frame" — a composition technique that uses doorways or other objects to surround and draw attention to a subject — and the locks made a perfect foreground. By placing elements in both the foreground (the locks) and the background (the river), the technique adds depth and dimension while naturally directing the viewer’s eye to the water beyond.
More Frame within a Frame
Since we’re on the subject, I also used this compositional technique a few more times. Often what you’re looking for is good lighting. Composition can get you so far, but lighting is what makes a photo pop. I went to college at the College of Santa Fe, New Mexico where I took photography classes from Tony O’brien. He always said expose for the bright part of the image and let the rest go dark. Here are some examples of that technique as well.
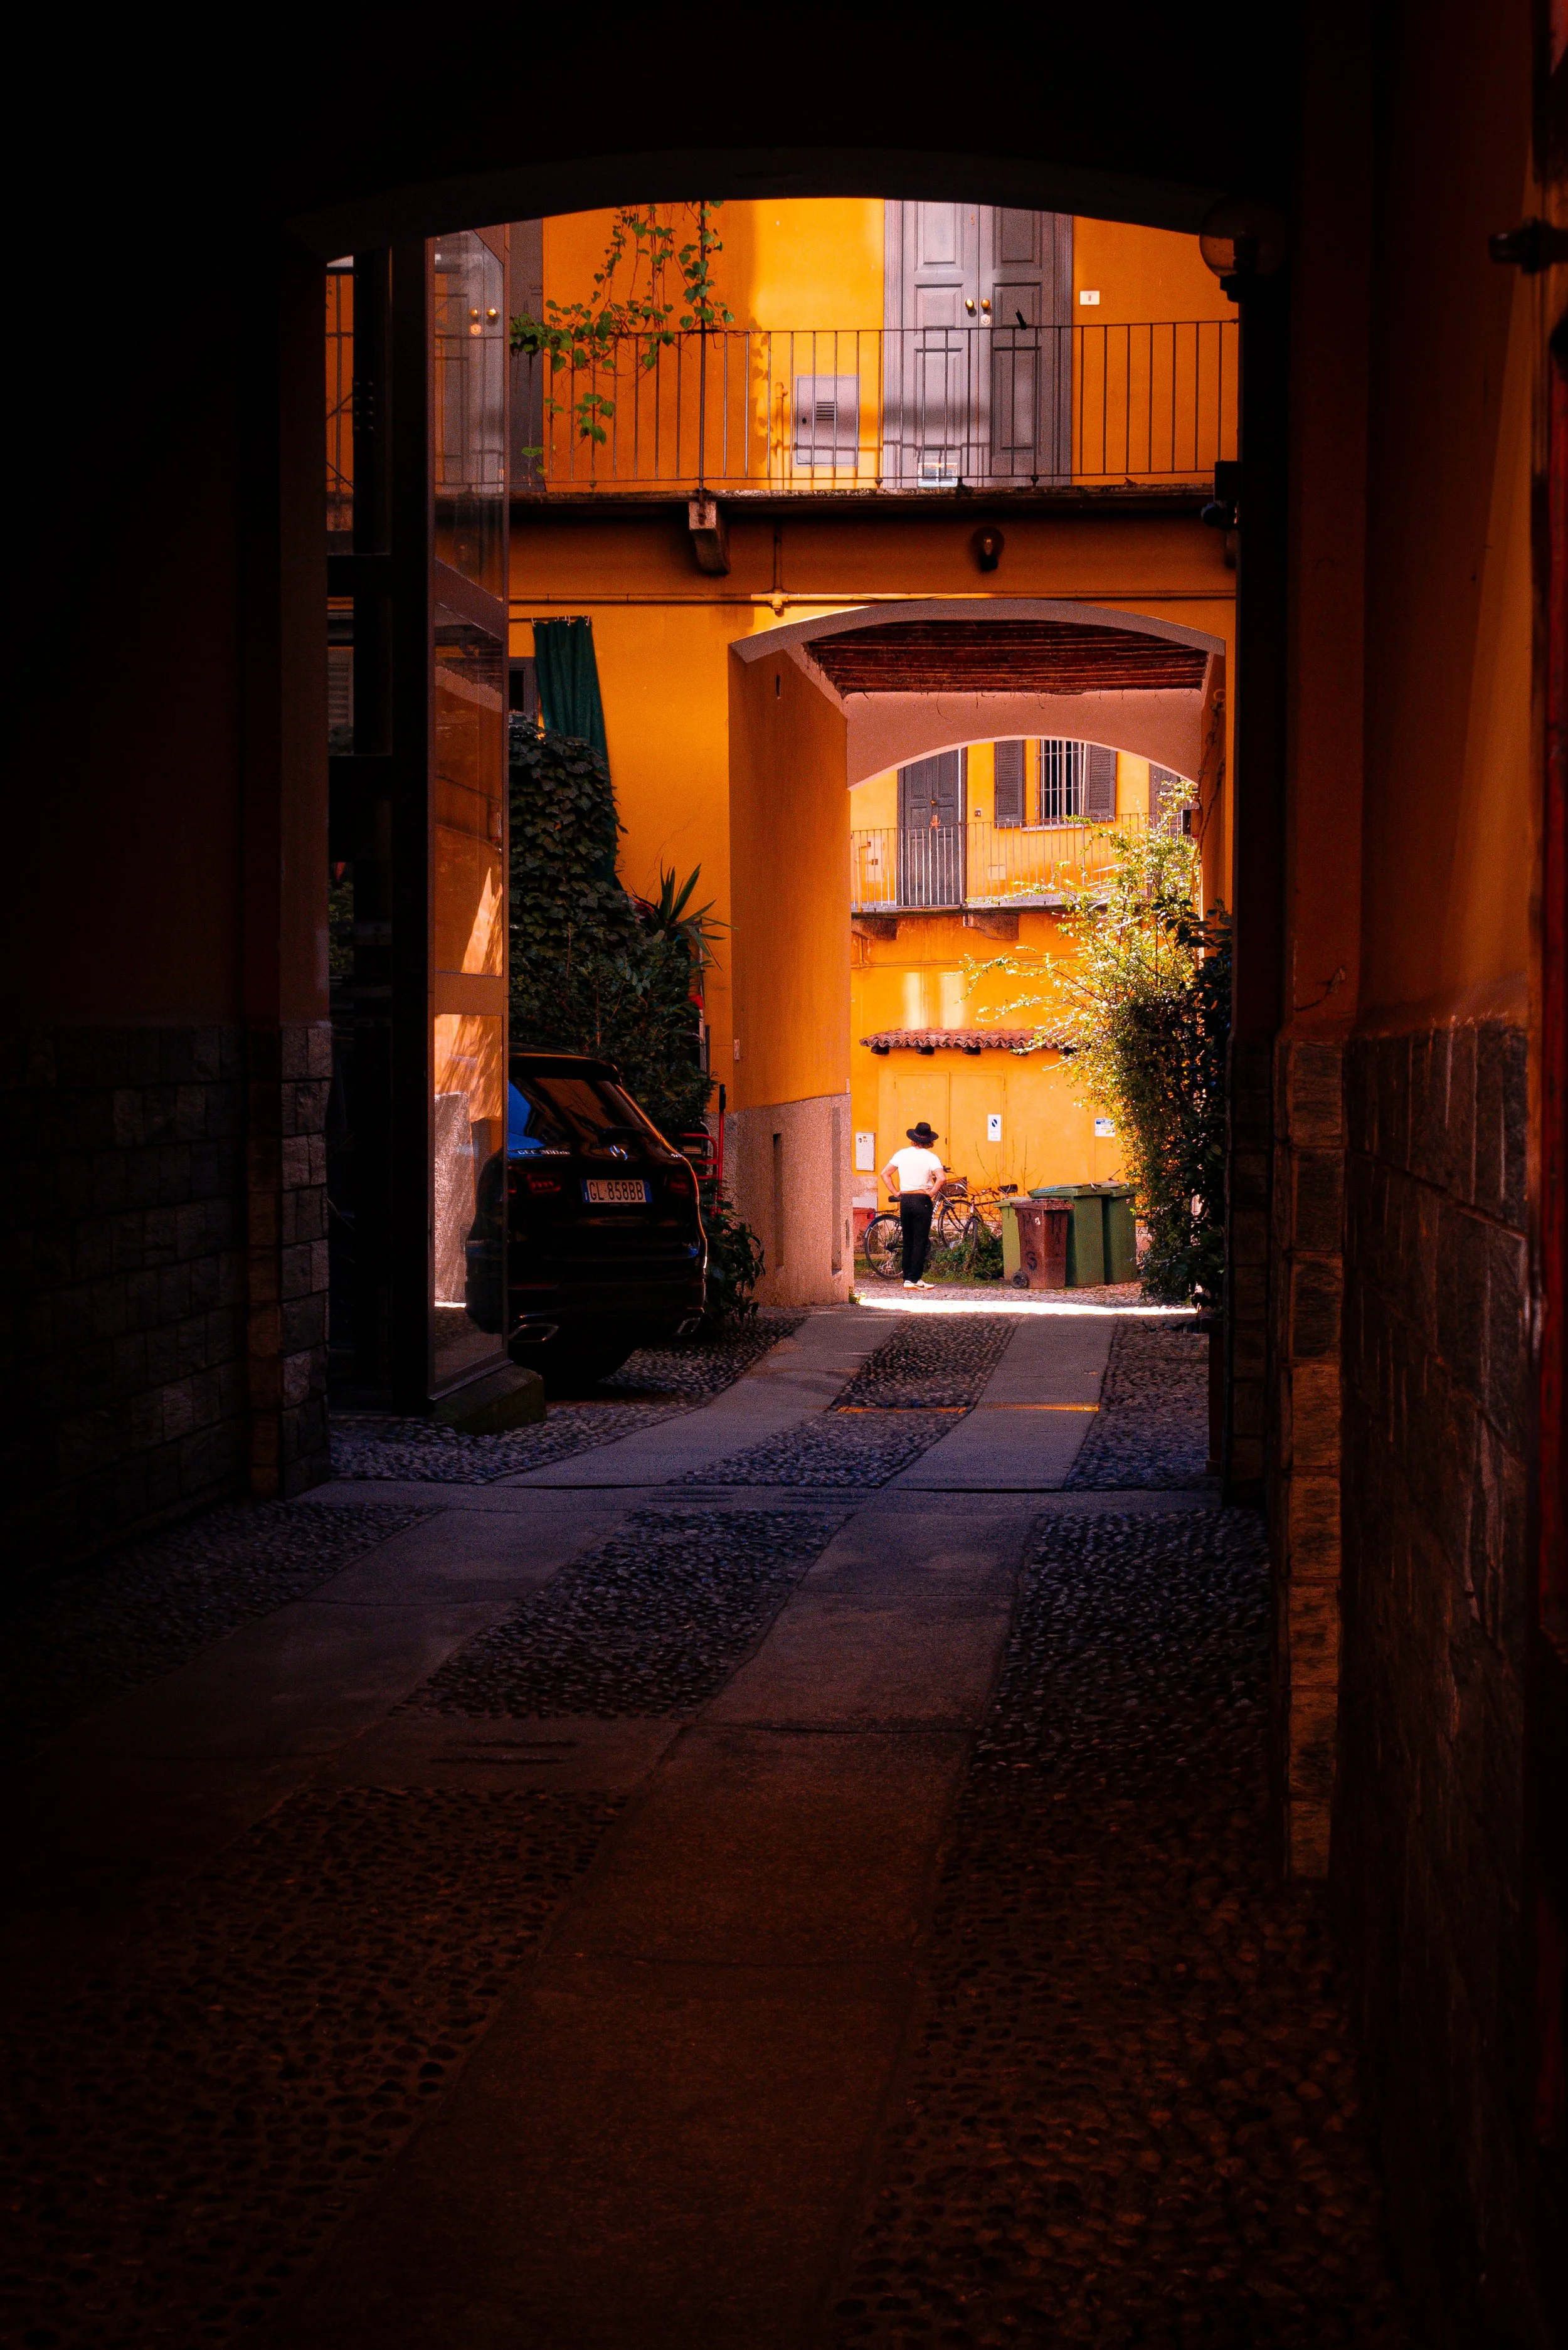
Here we have a pretty simple image of a long pathway, where in manual I set my exposure to make sure the guy in the hat was exposed correctly, knowing that much of the foreground would go dark. This accompanied with leading lines makes this image of daily life, kind of visually interesting.
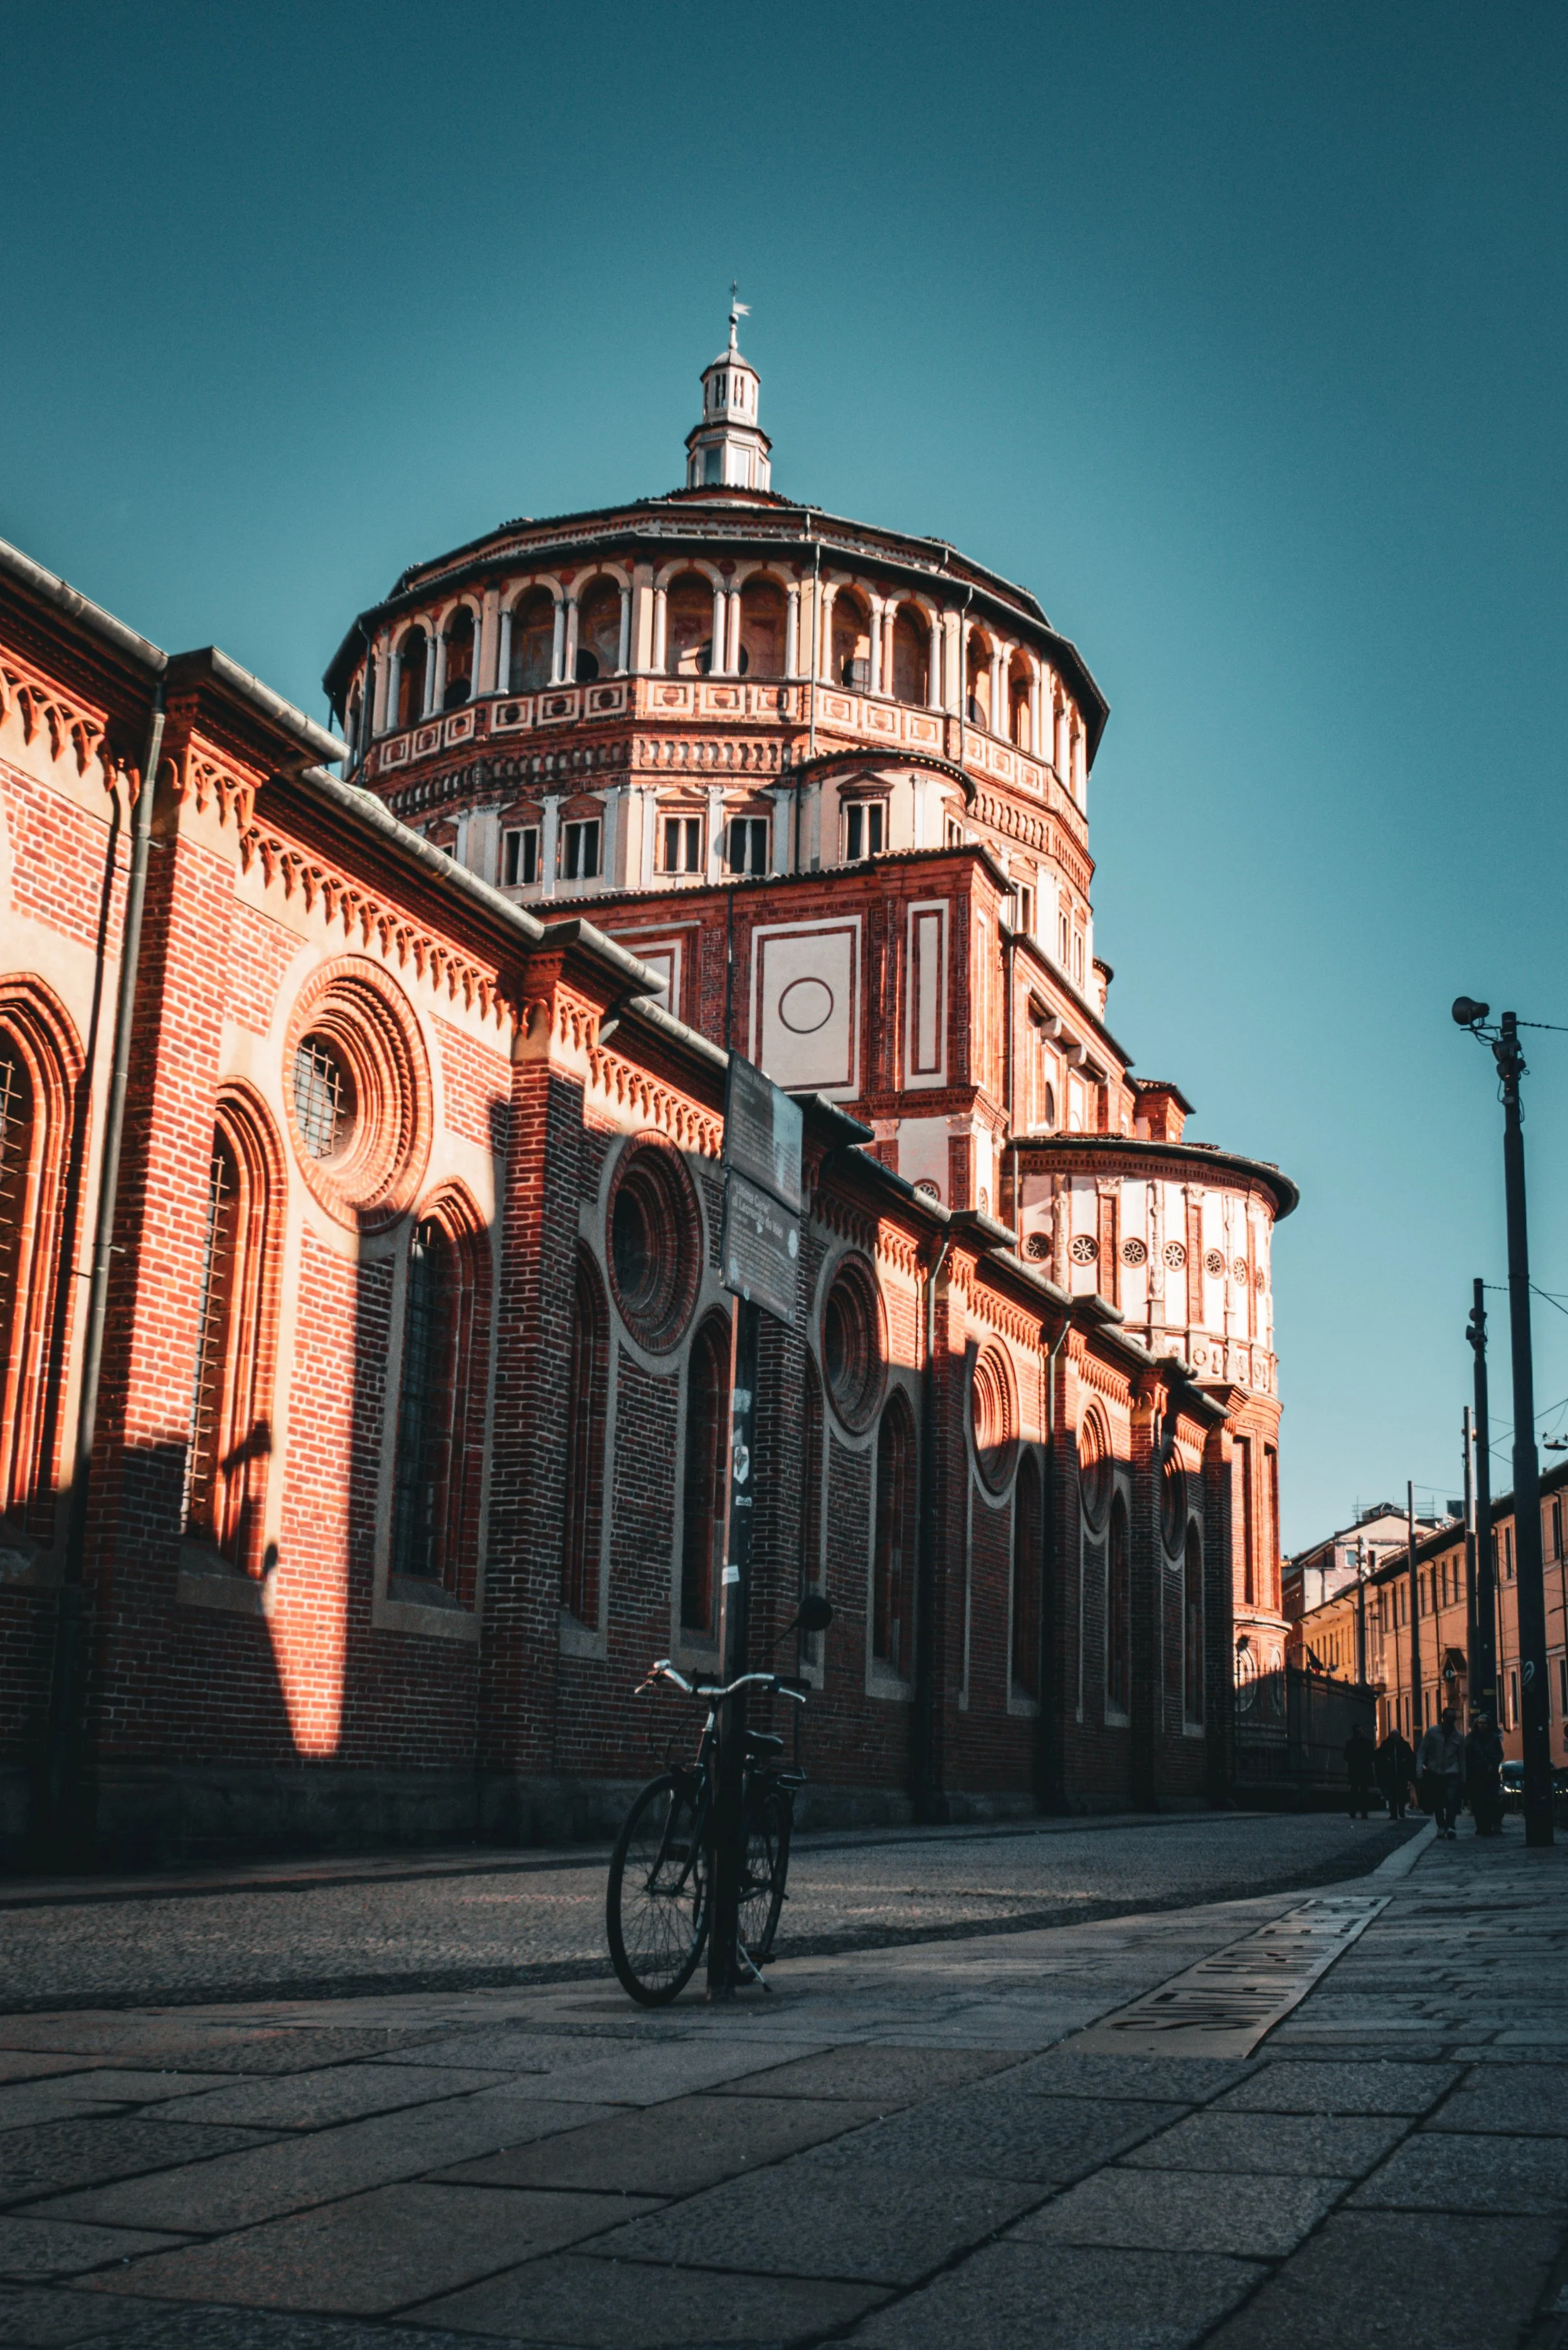
Here I’ve properly exposed for the cathedral and let the street go dark. The shiny reflective bike handles grab your attention. It’s an ok shot.

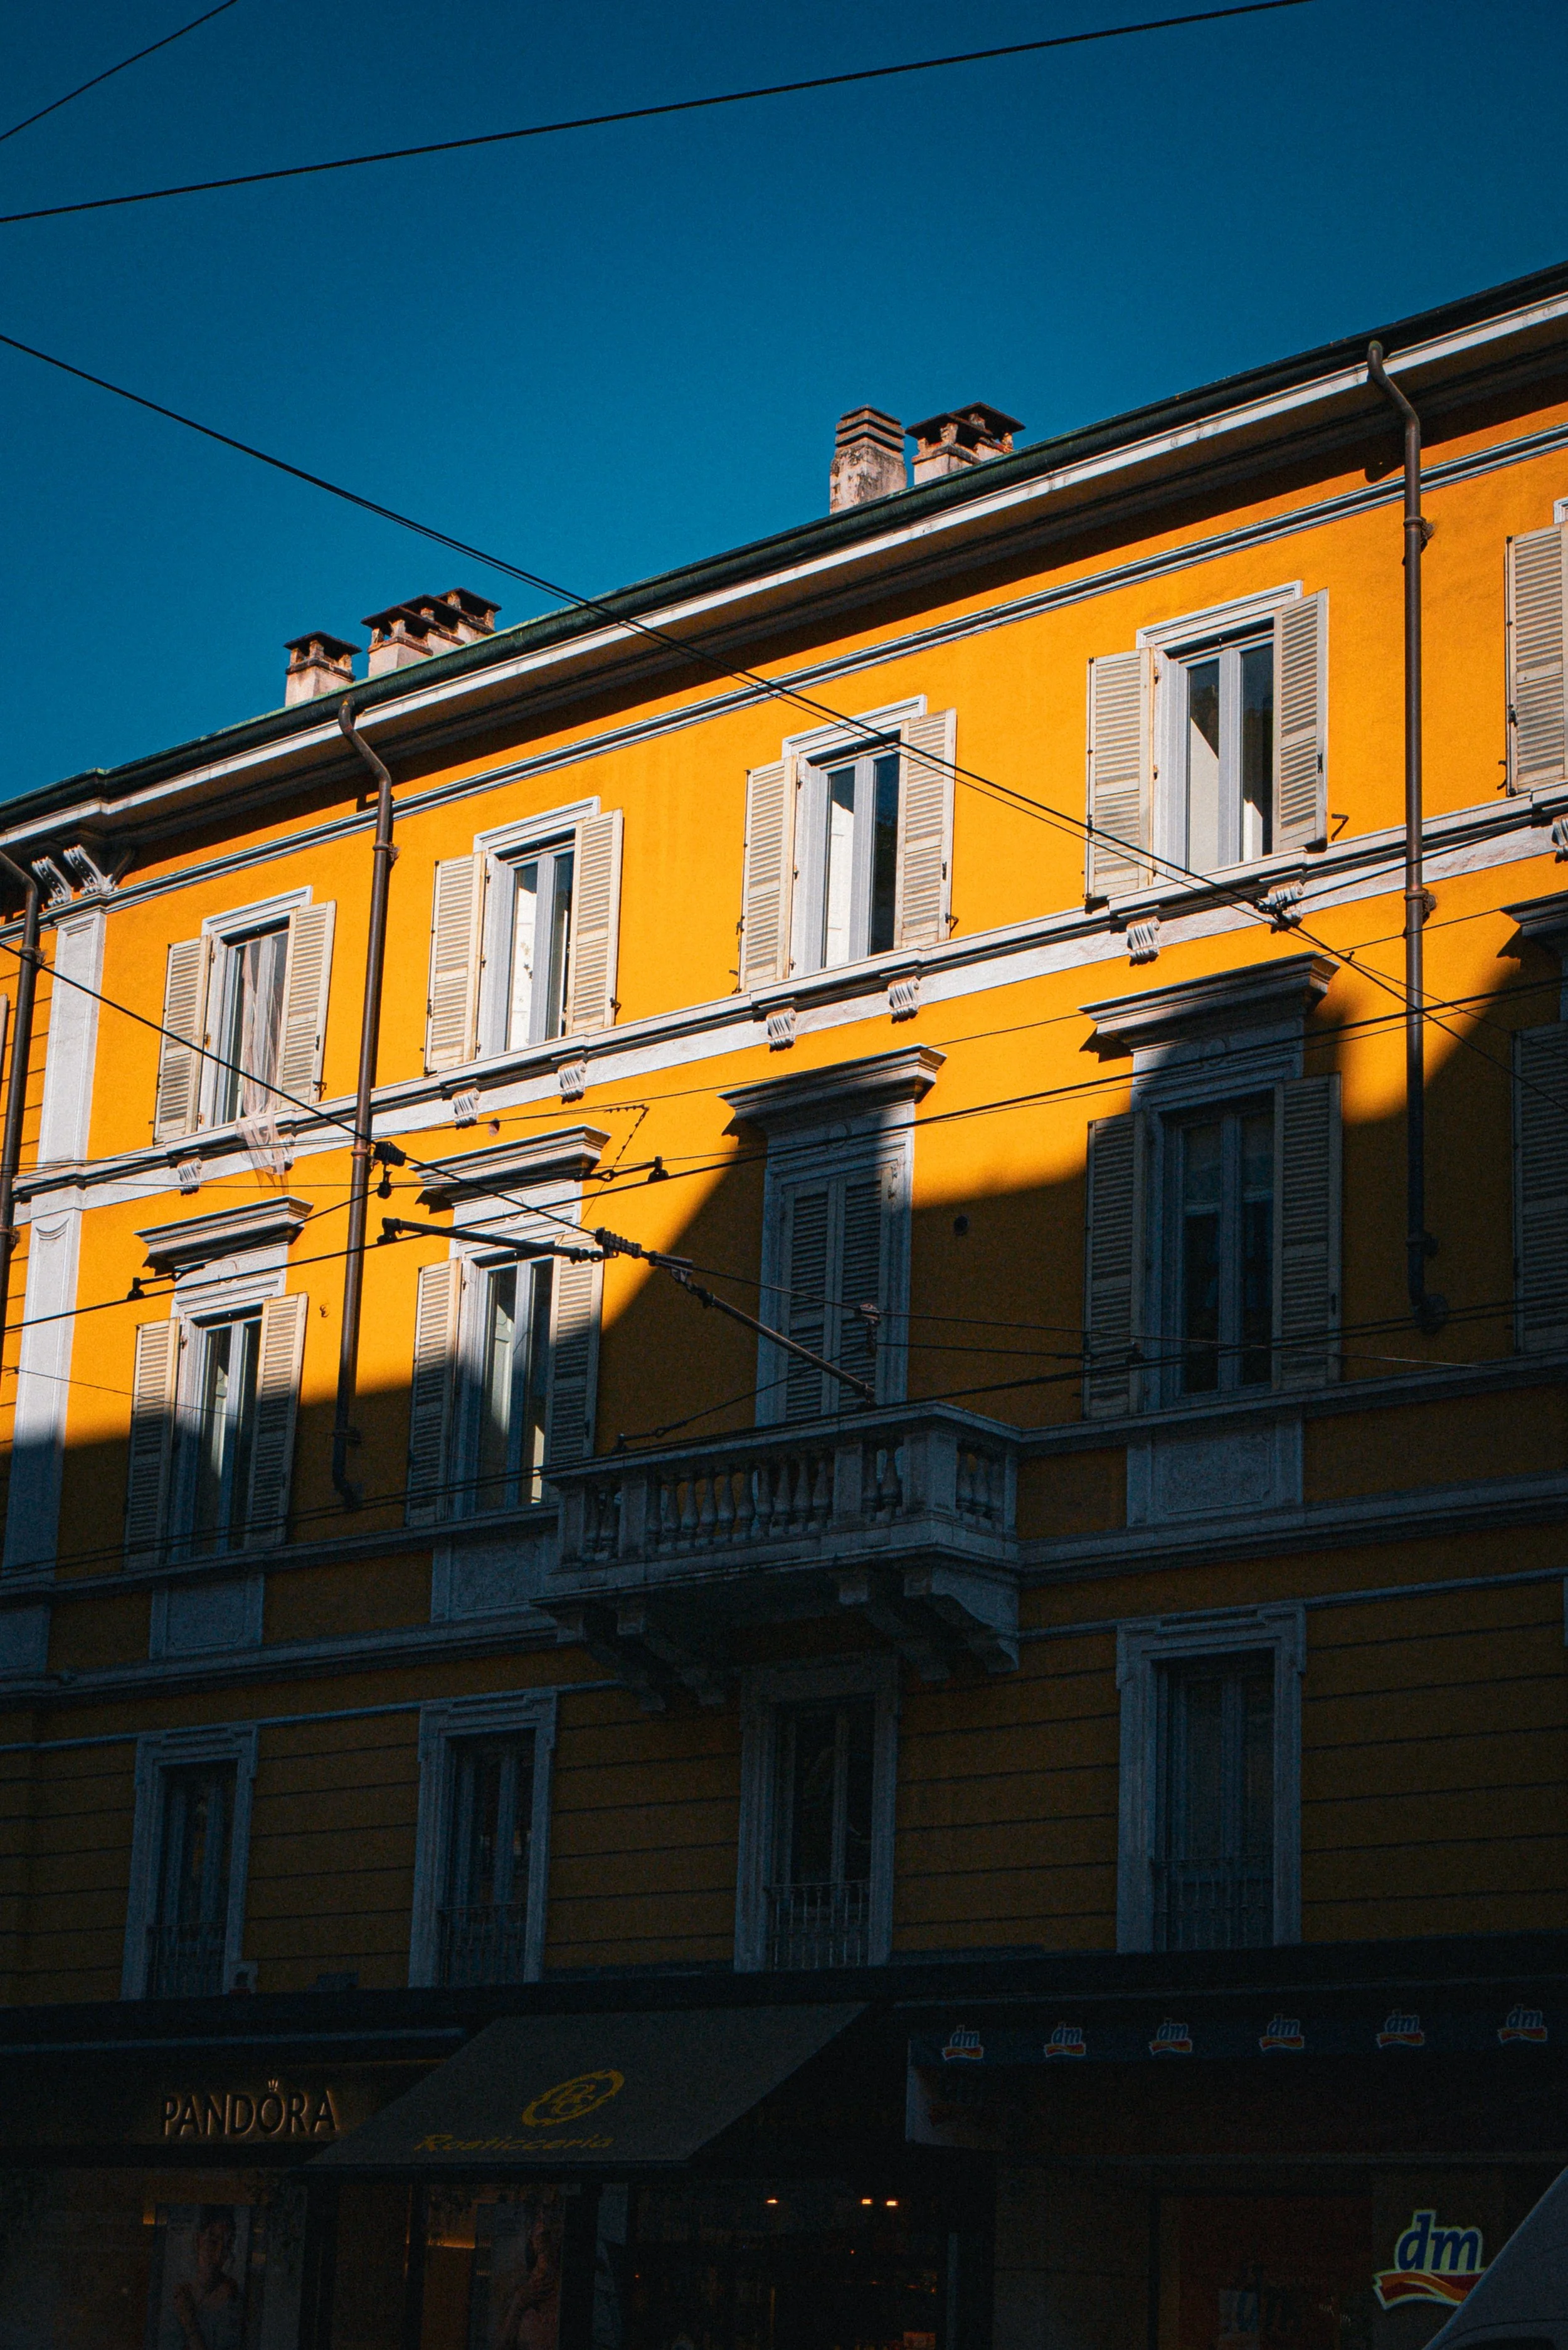
A building we stayed at in Milan.
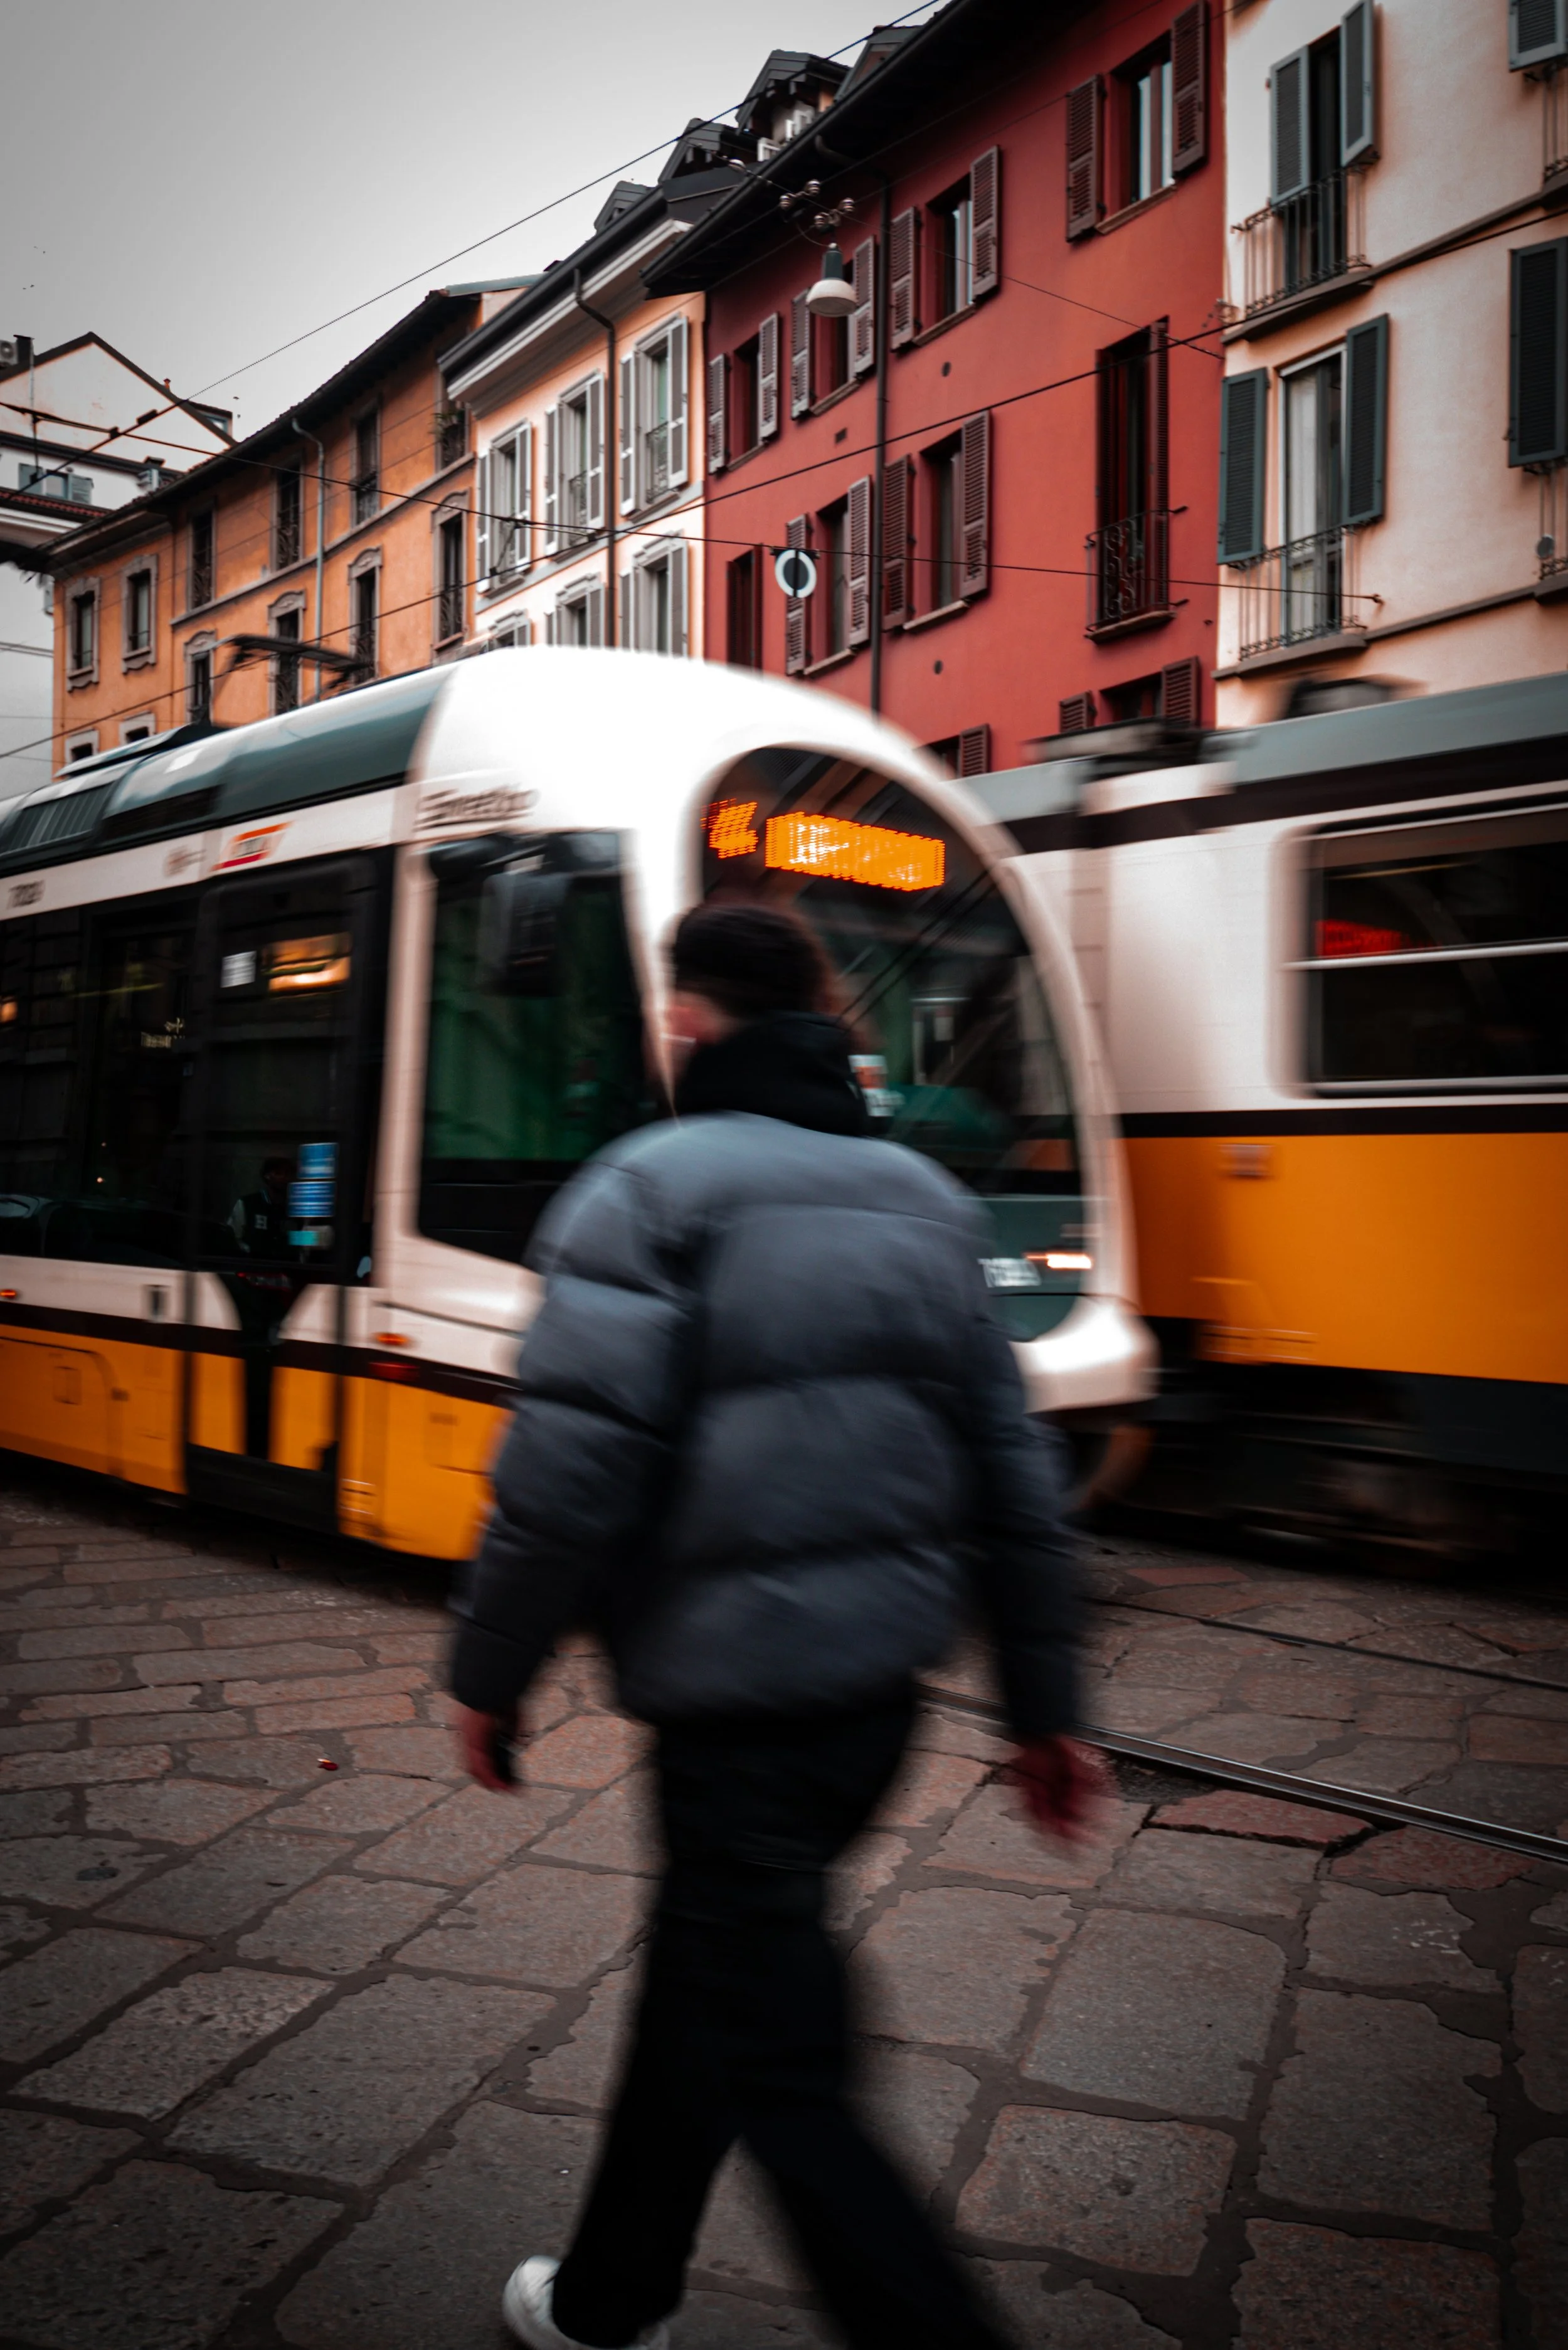
Here I used a little intentional motion blur to catch the action of the train and the guy walking.
Here exposing for the brightest part of the image practically lead to the entire of the bottom image being completely dark. I do love the yellow color.
Not bad for a Little Lumix 85!


Experiencing Defeat
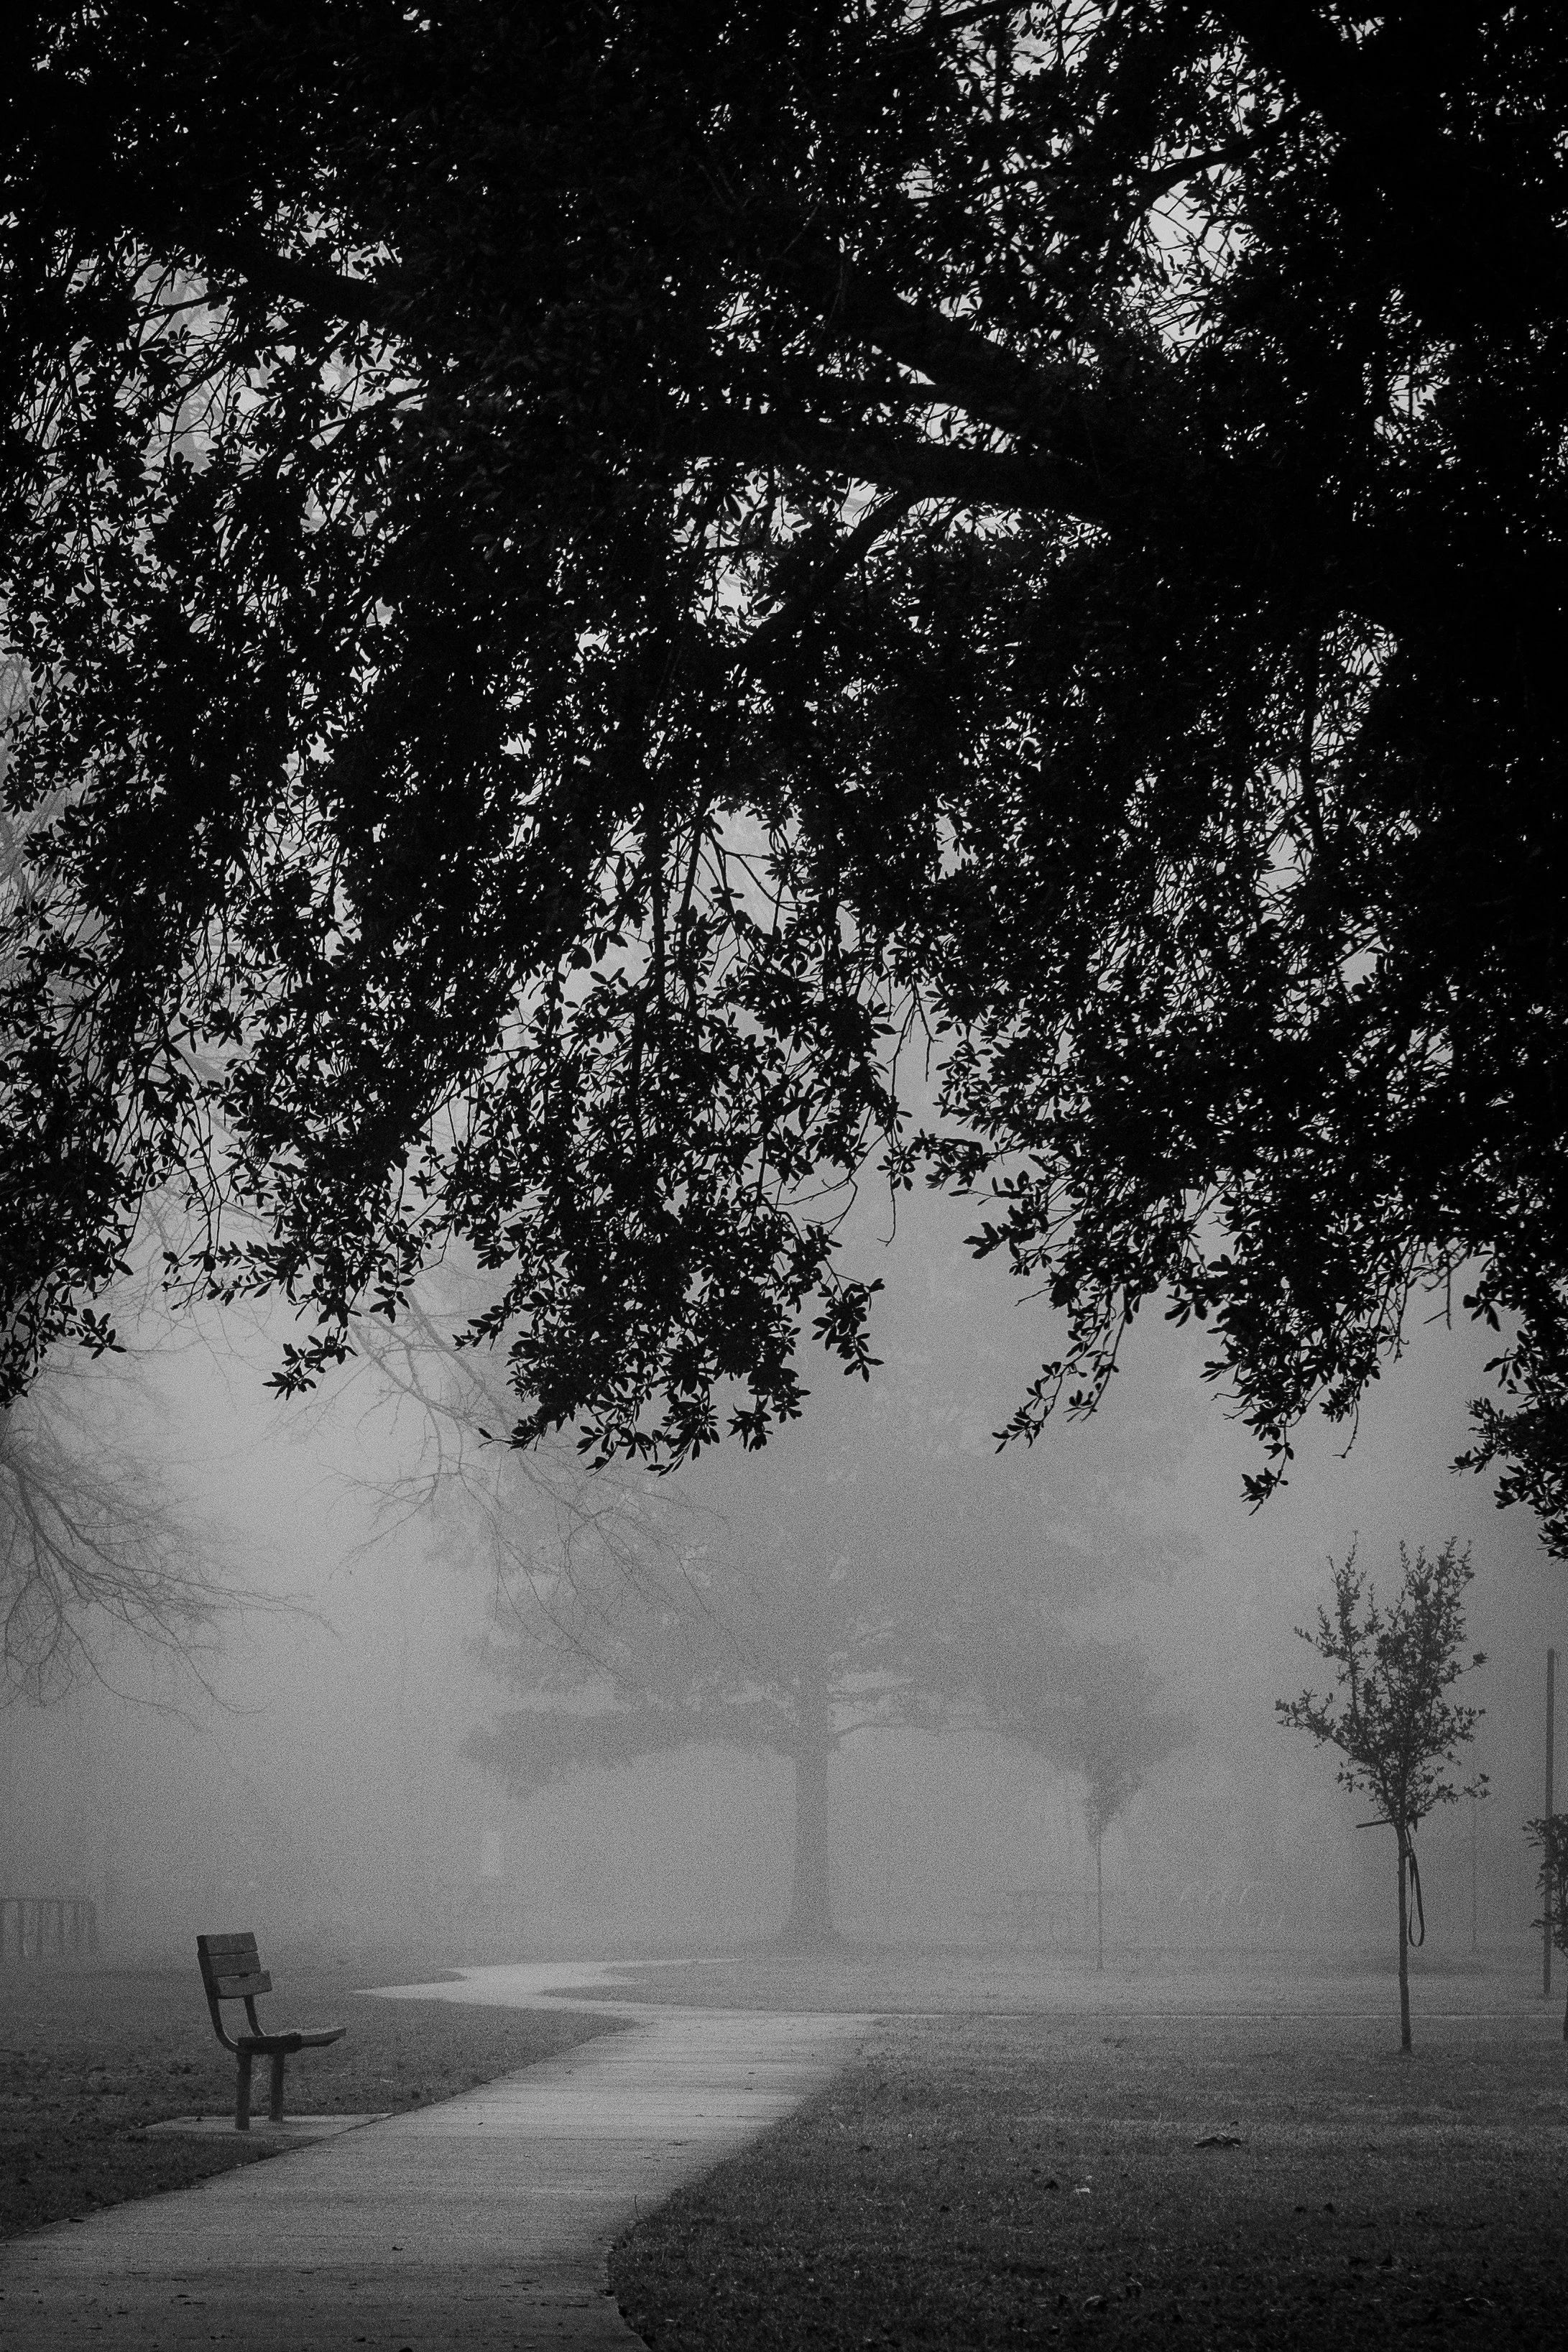
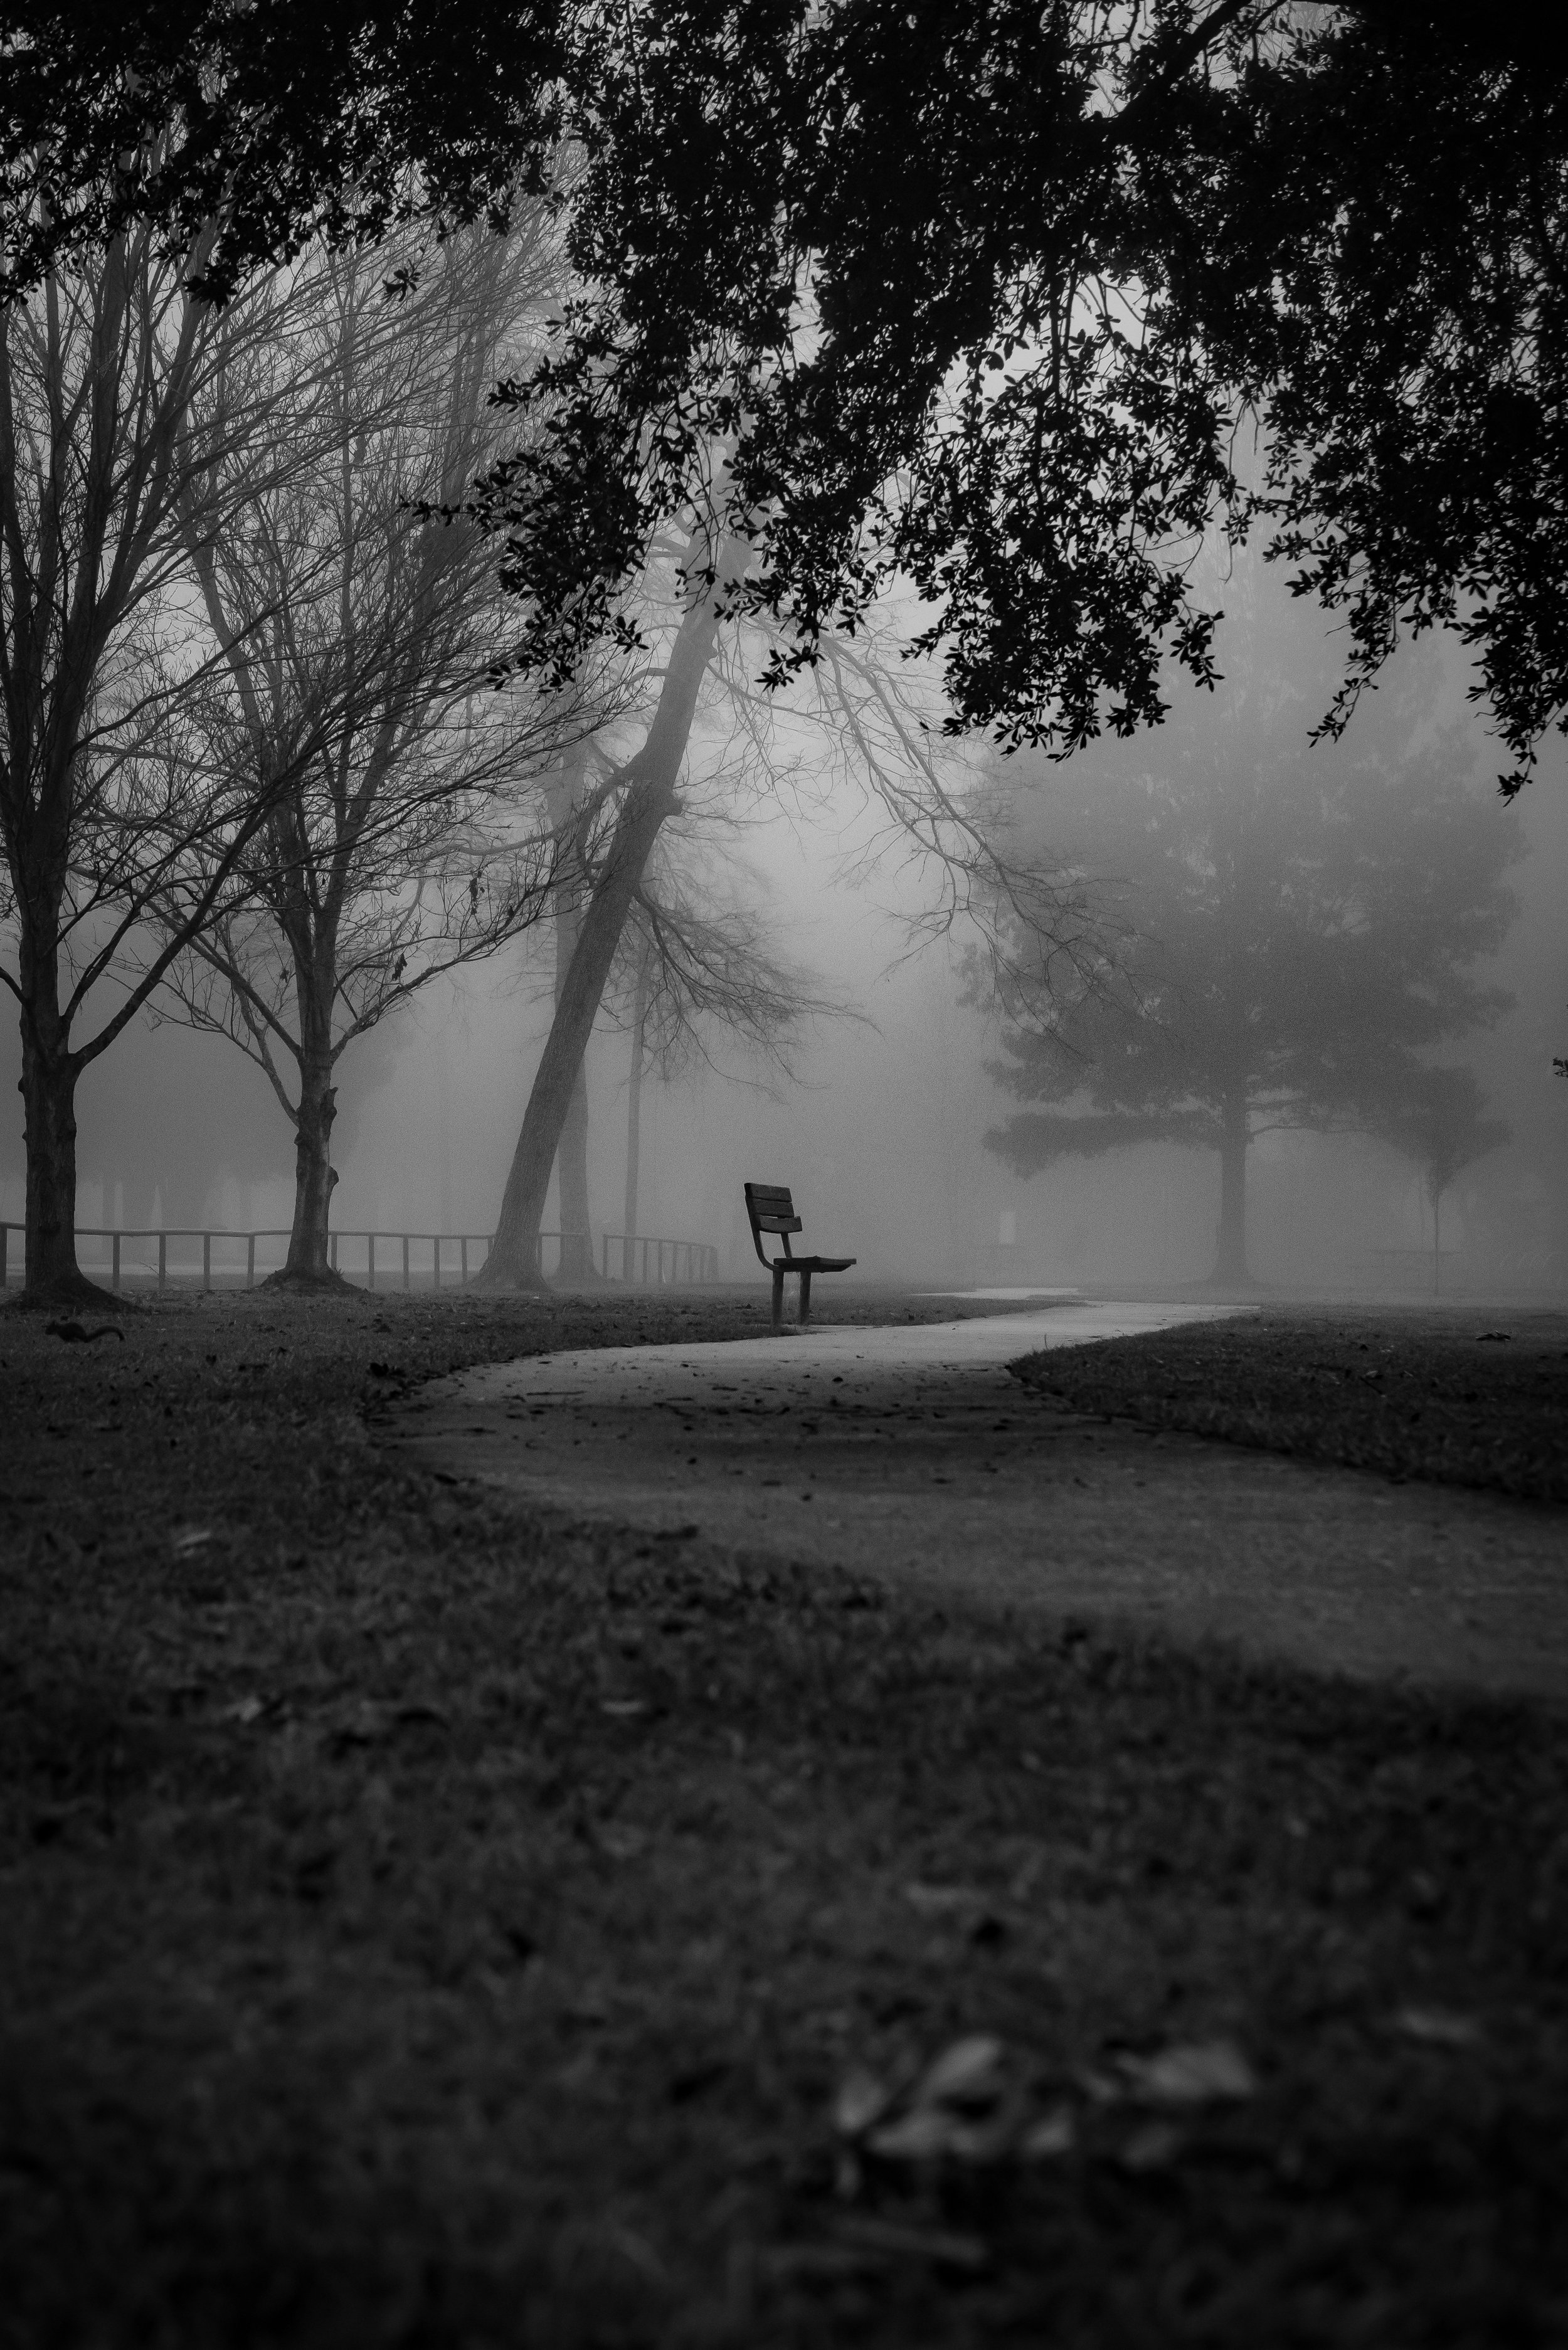
Exploring Negative Space: A Foggy Holiday Photoshoot in Baton Rouge
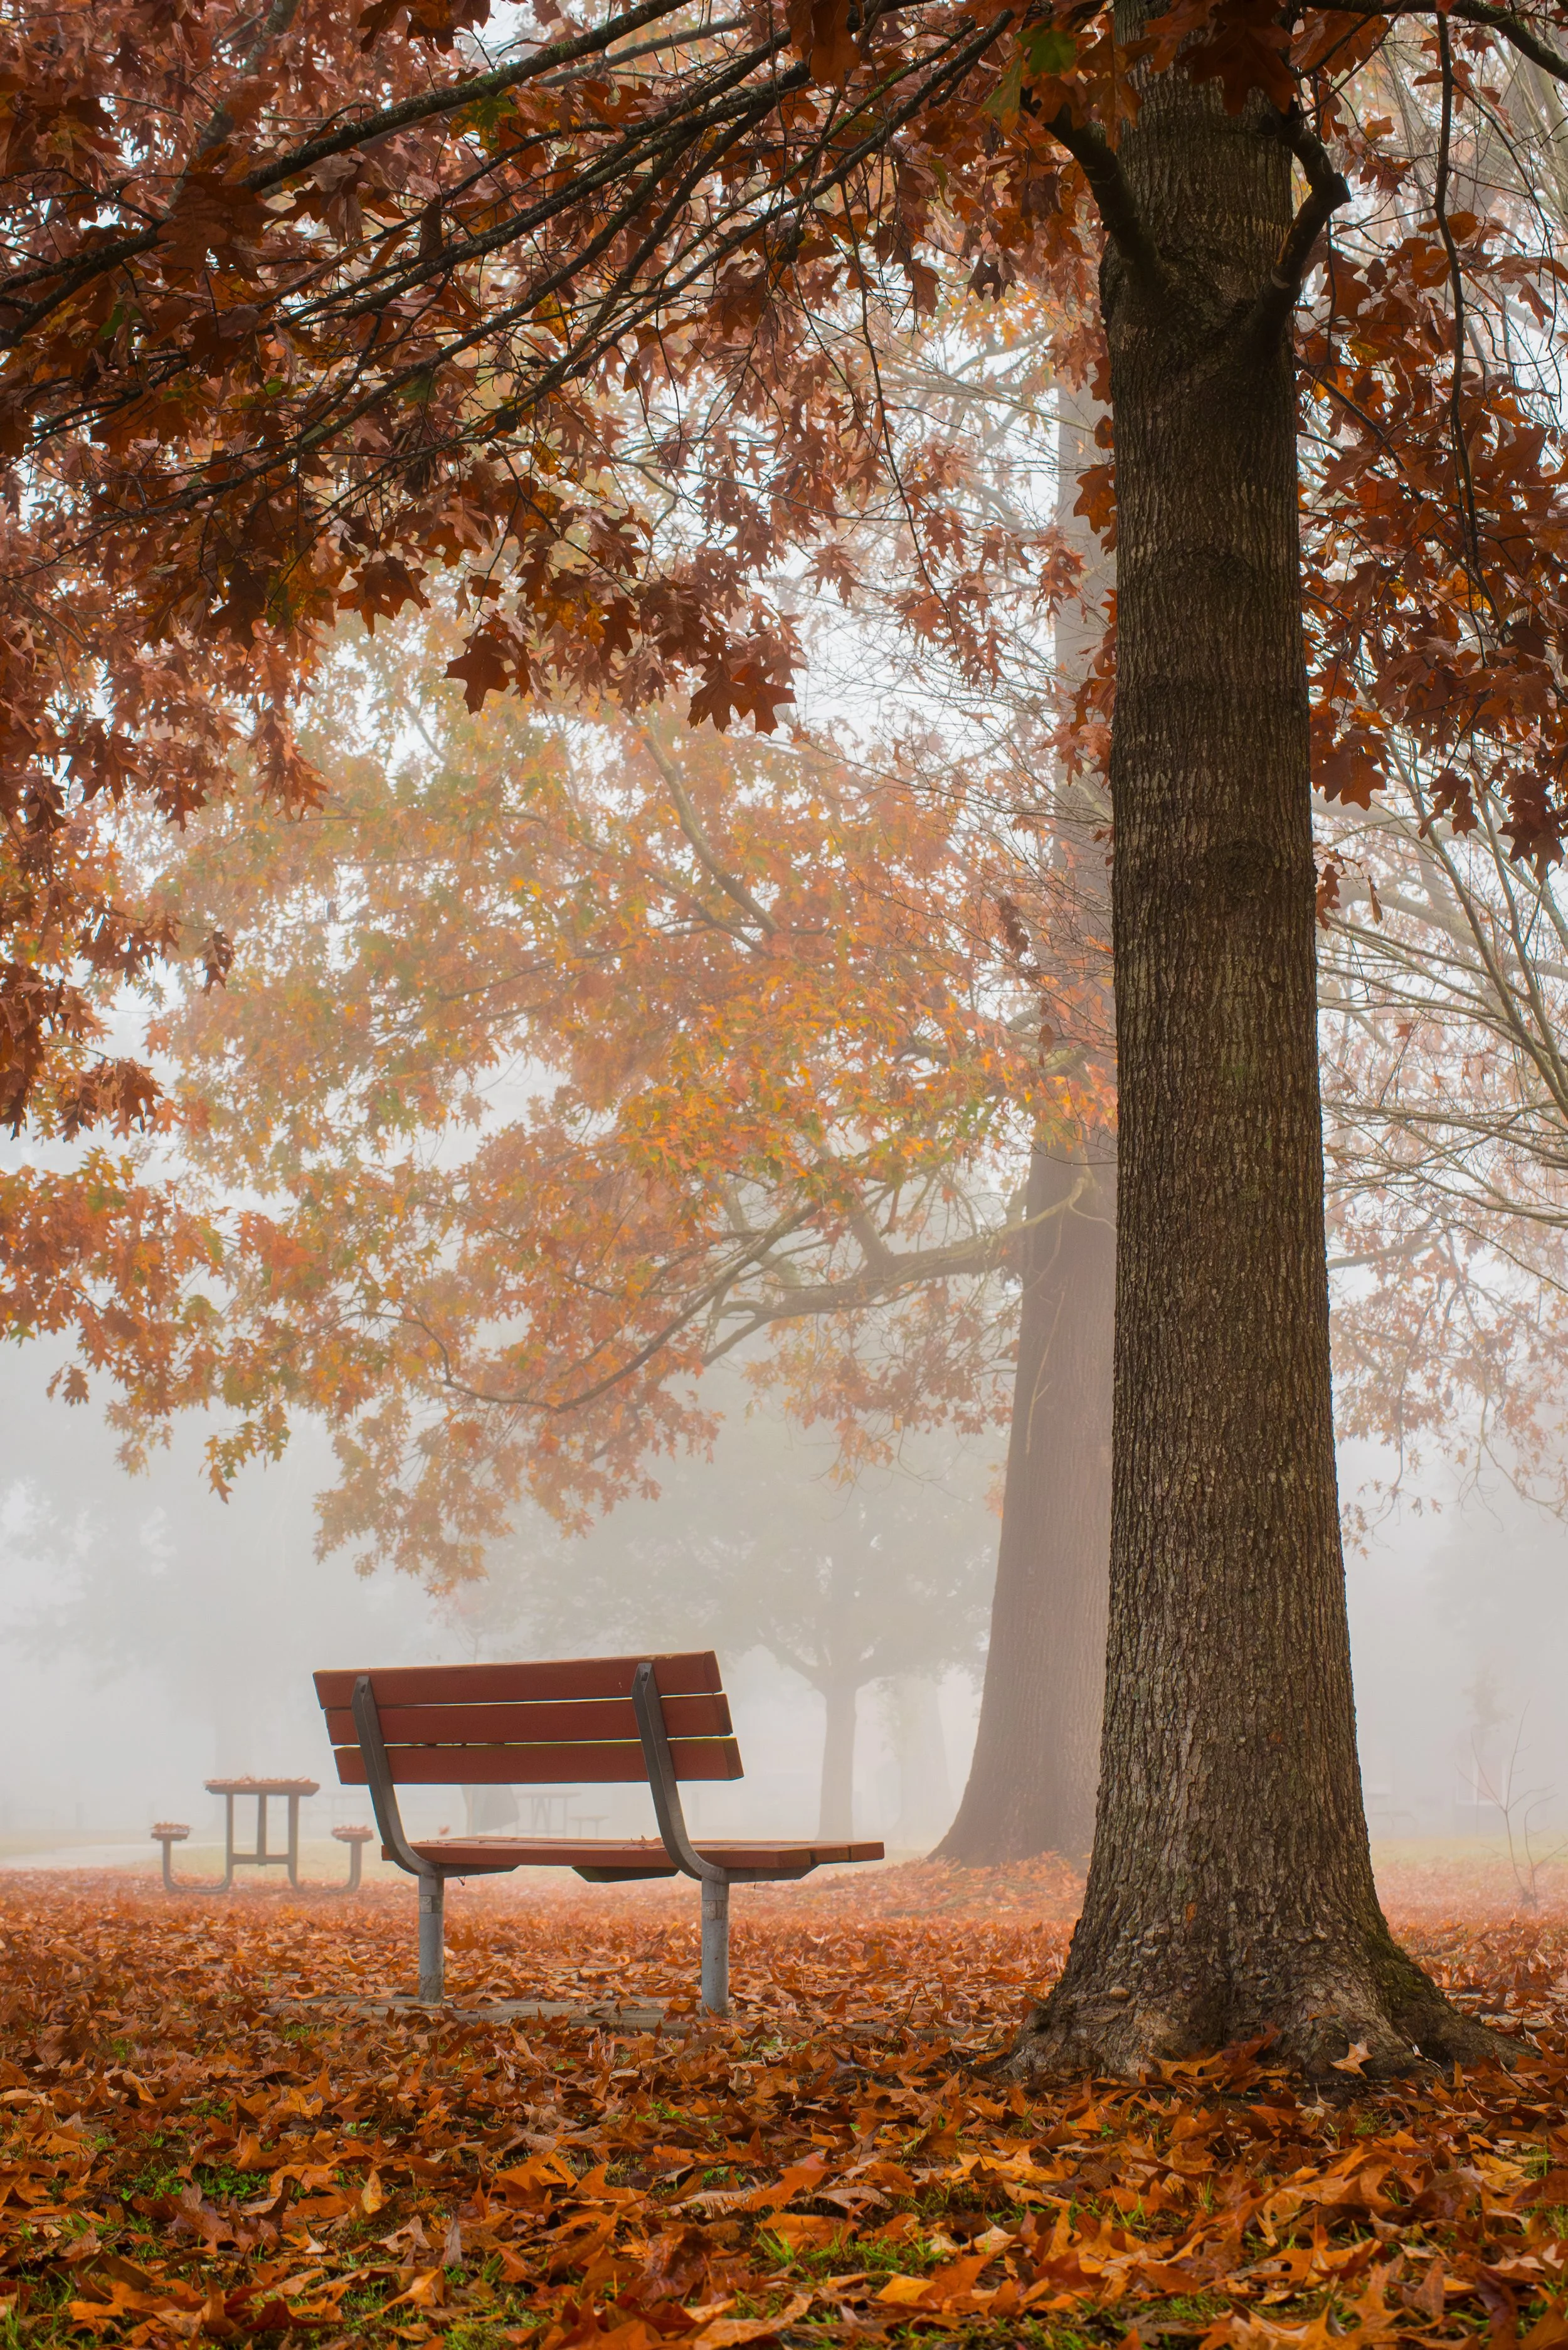
As a photographer, I typically lean towards a "fill the frame" approach. I’ve often subscribed to Robert Capa's belief that "if your photos aren't good, you're not close enough." This philosophy has led me to capture tightly composed images, leaving little room for negative space. However, during my recent holiday visit to Baton Rouge, LA, I encountered a unique opportunity that prompted me to explore the art of negative space photography.
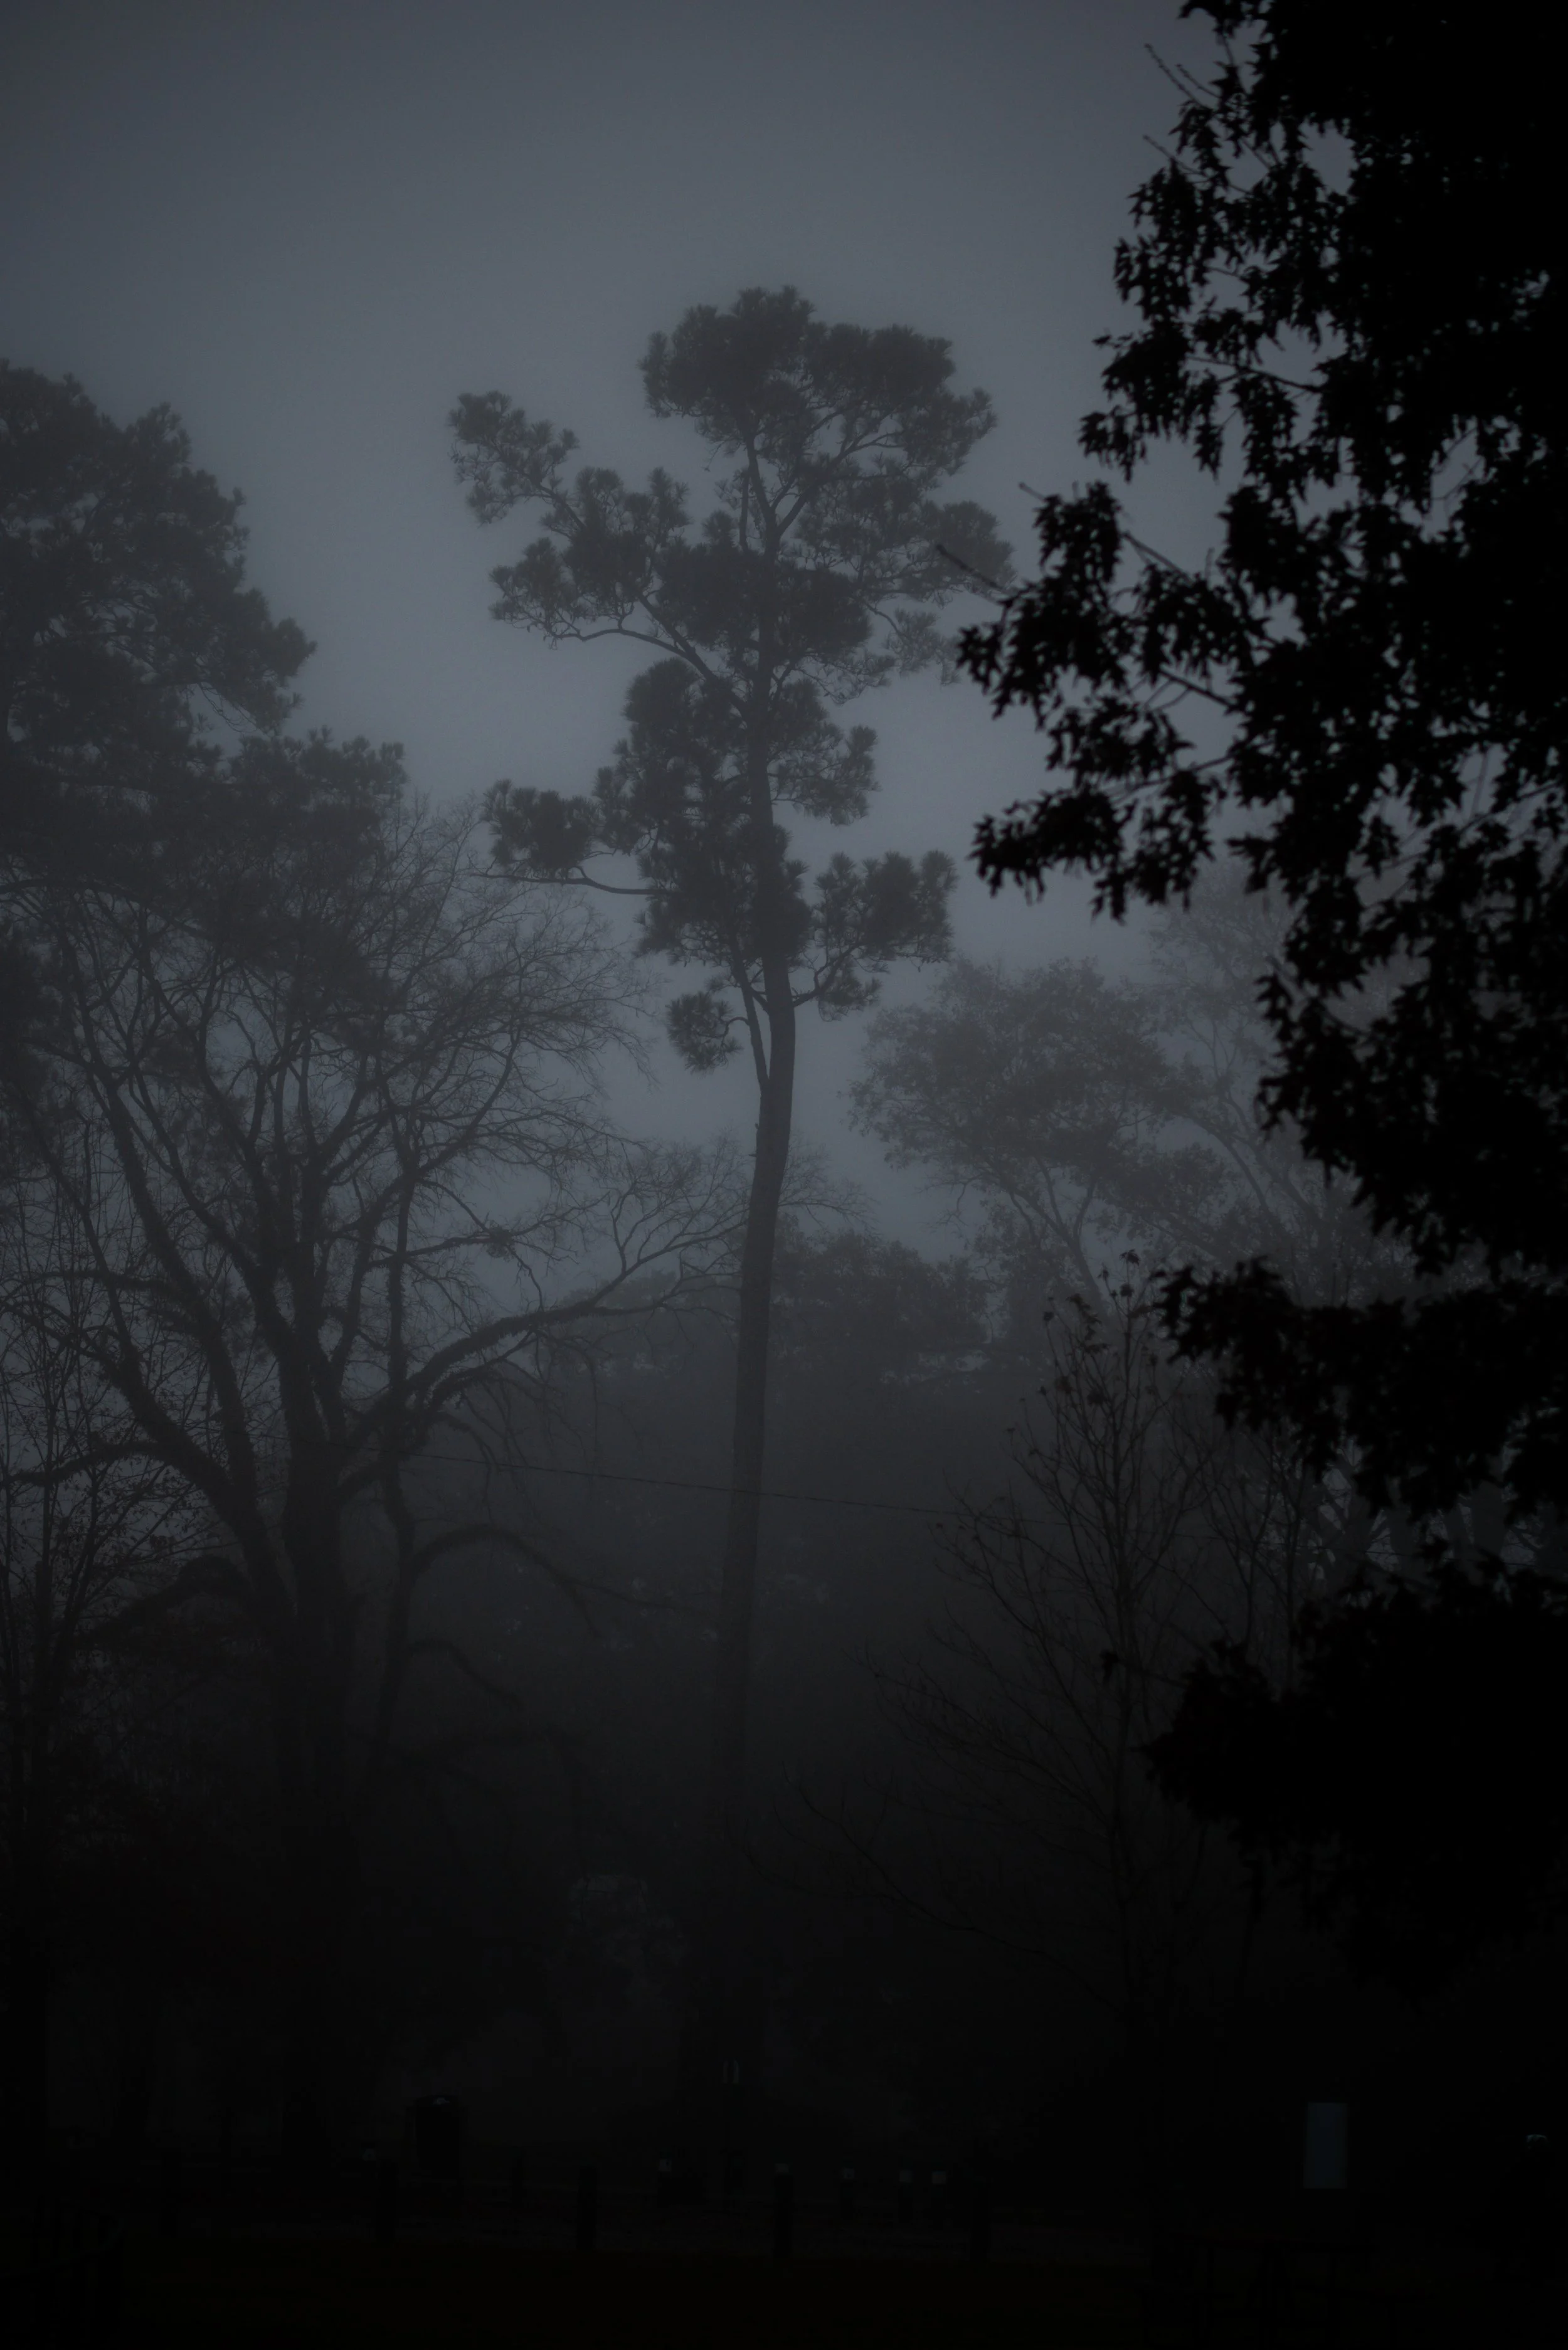
Walking through the thick fog that enveloped the landscape, I realized the potential for creating captivating images using intentional empty space. Negative space is the area around and between the subjects of an image — an element that can hold tremendous power when used thoughtfully. In a world where clarity and detail are often prioritized, fog creates an atmosphere that encourages the viewer to see what’s hidden behind the veil.

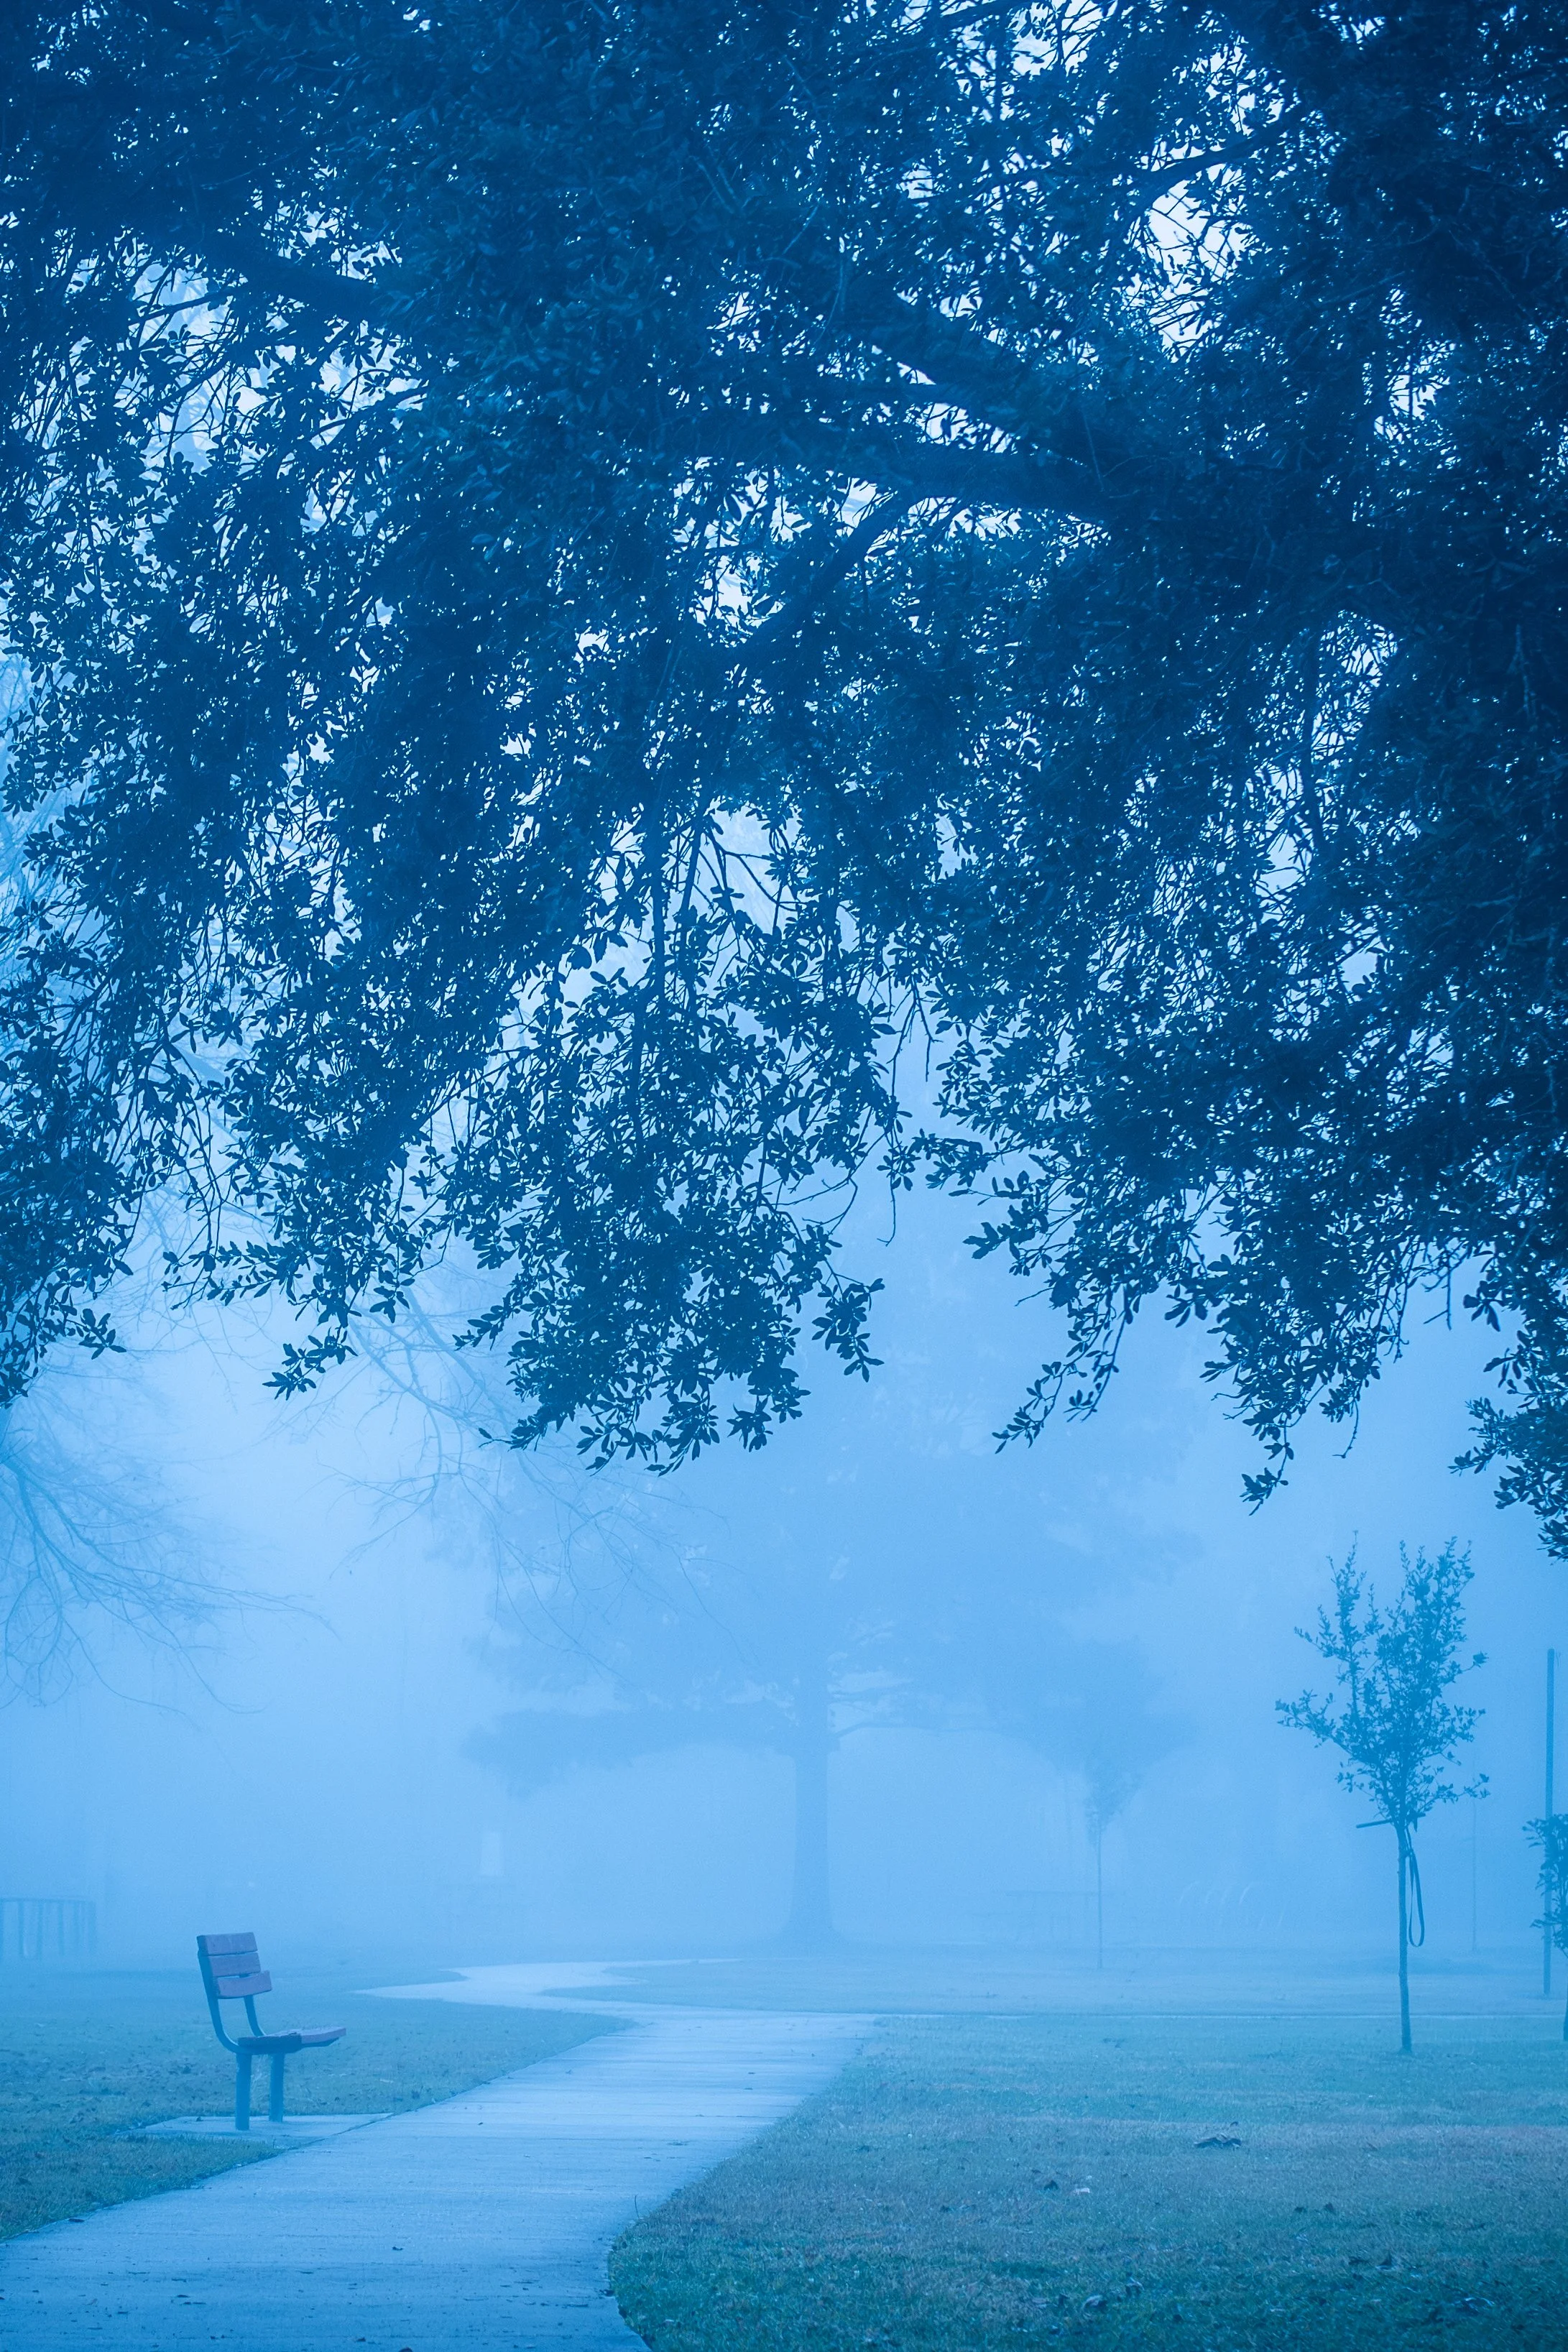
On my first day of shooting, I inadvertently left my white balance settings untouched, resulting in a strikingly blue image. Surprisingly, I found this unexpected outcome delightful; the blue tones highlighted the moody essence of the fog and transformed a simple mistake into art. This experience taught me that sometimes, embracing imperfection can lead to compelling results.
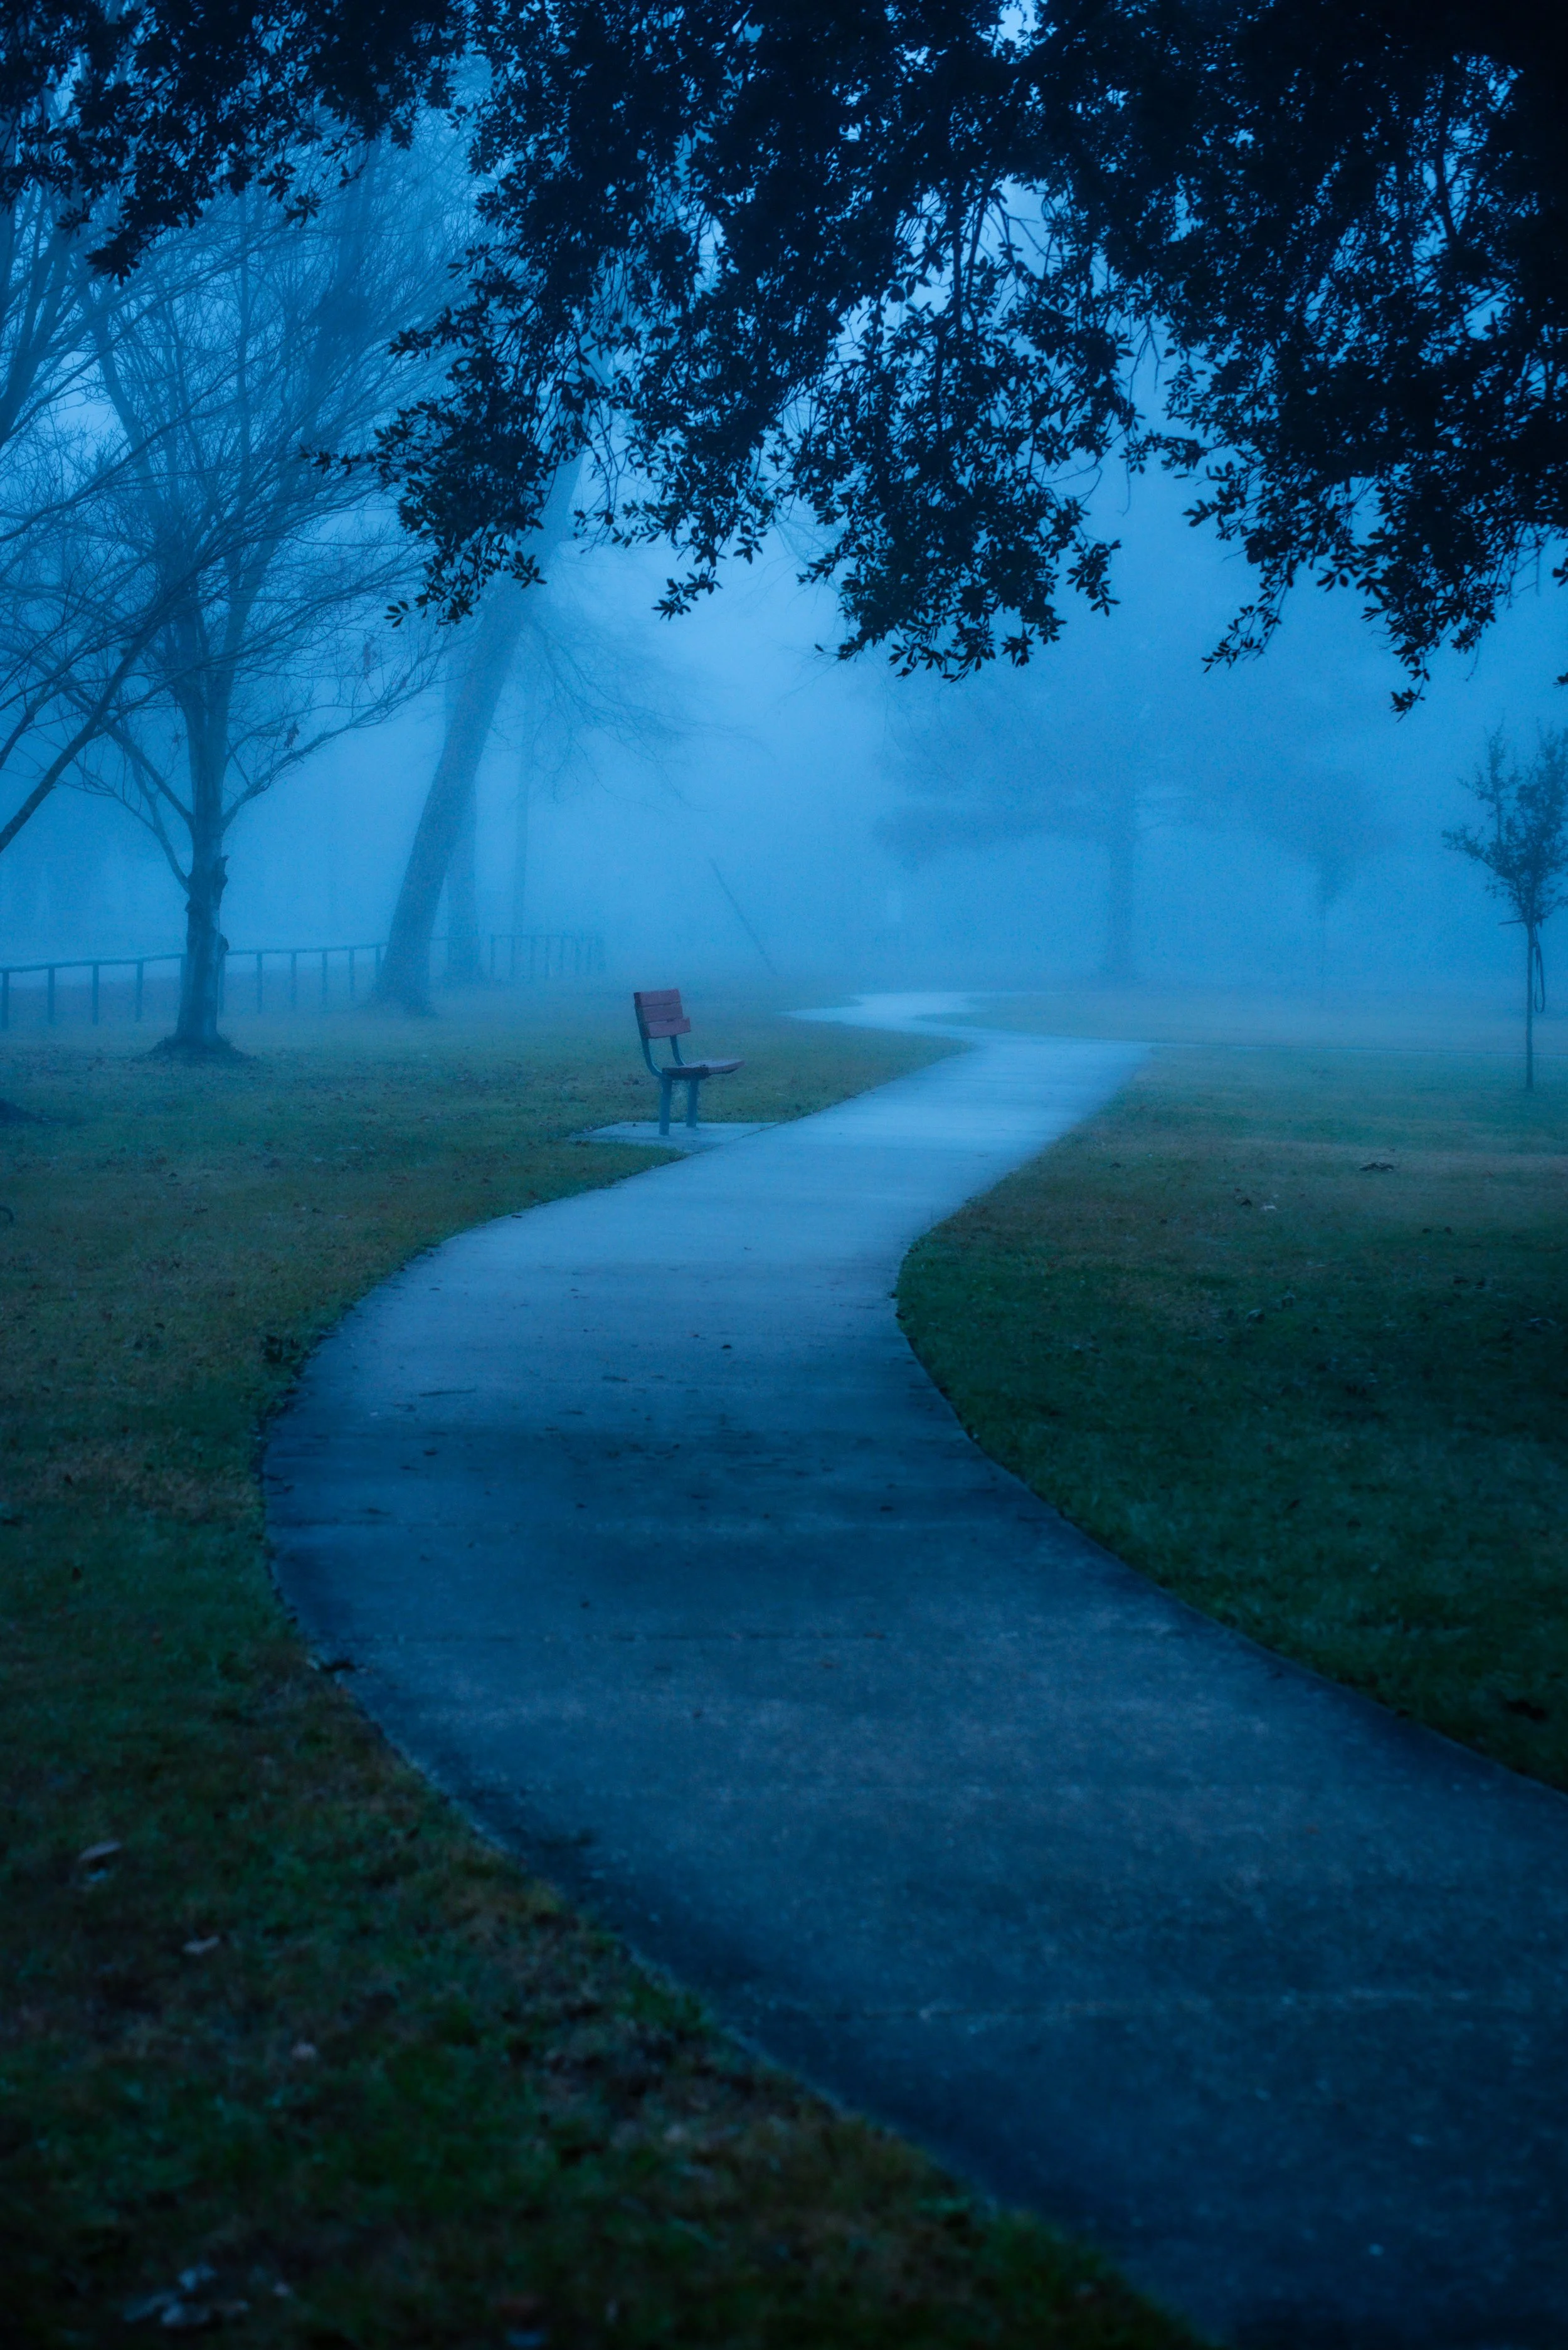
Fog, much like haze used on film sets, enhances depth in photographs. It acts as a visual layer, allowing light to bounce off objects at varying distances. This interplay results in a sense of dimension that draws the viewer into the image. By juxtaposing sharp subjects against the softer background created by fog, I was able to enhance the dimensionality and intrigue of my photographs.
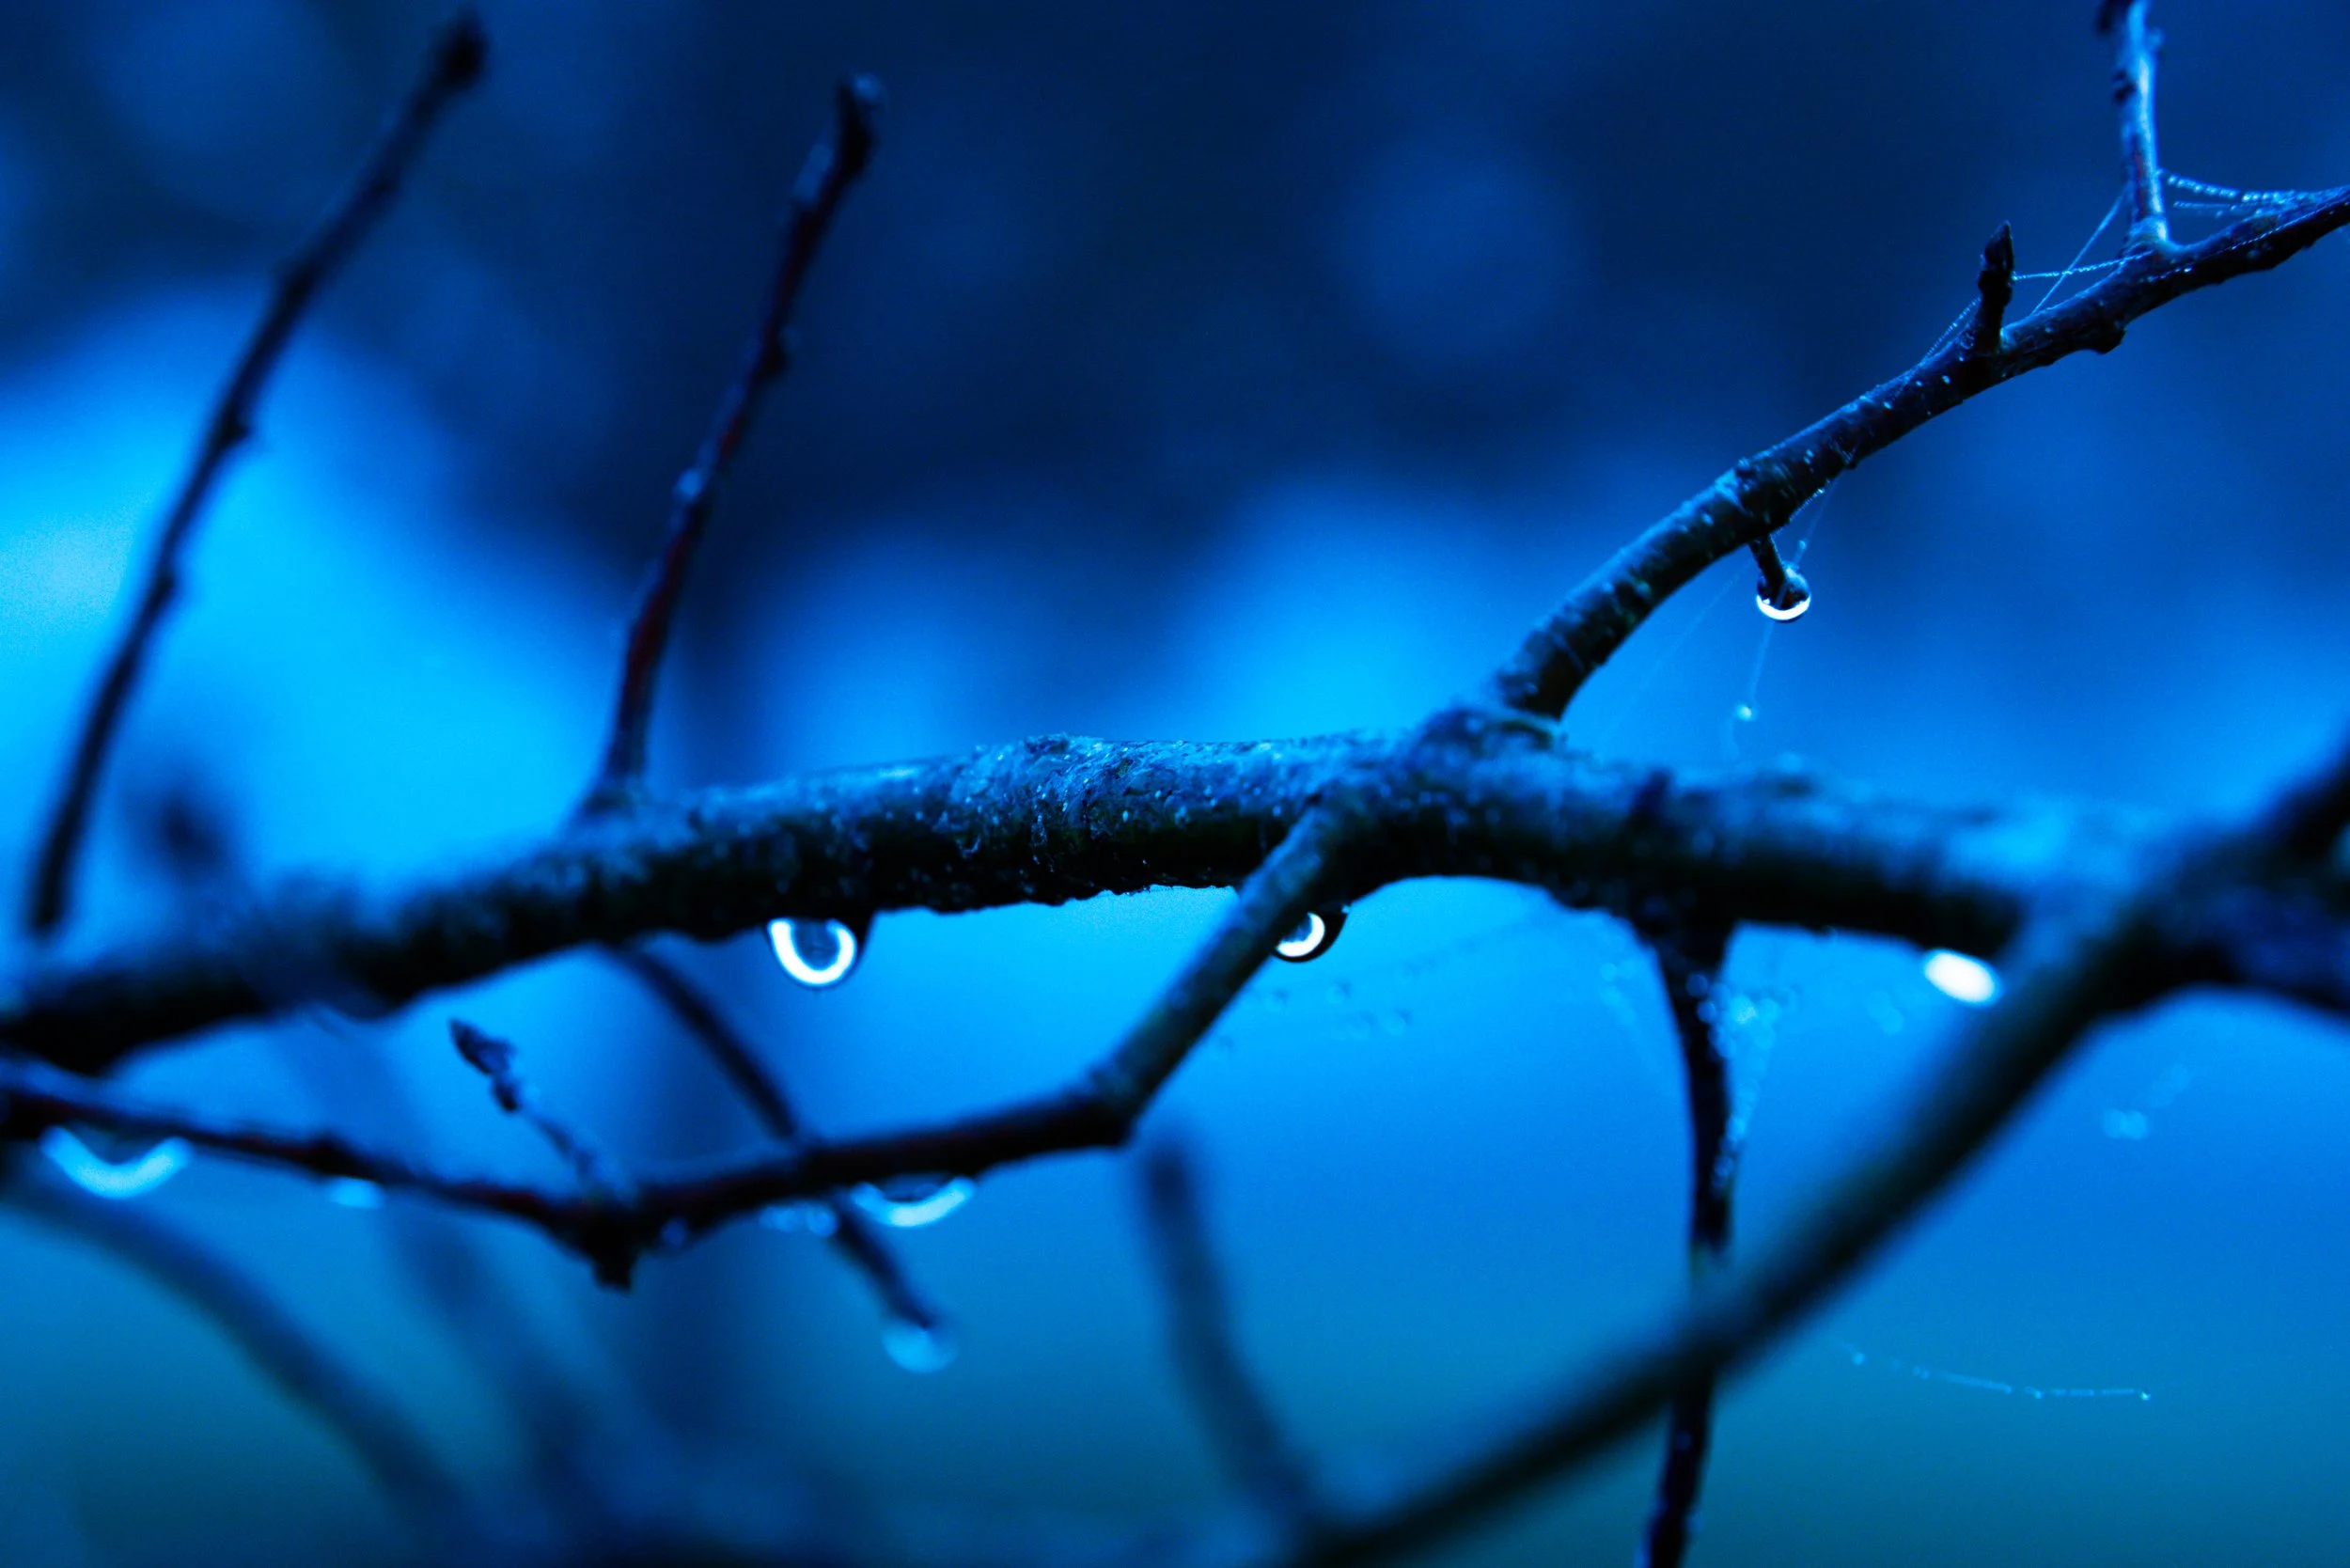
During this shoot, I took photos of the same subject multiple times, making slight adjustments each time to observe how those small changes affected the outcome. This process reinforced the idea that photography is all about exploration and experimentation. Each slight tweak unveiled new perspectives and inspired creativity.
Ultimately, my foggy holiday shoot became an educational experience — a chance to stretch my creative muscles and redefine my approach to photography. By embracing negative space, I discovered new ways to convey emotion and atmosphere in my work.
I encourage fellow photographers to challenge themselves in a similar way. Step into the fog, explore the empty spaces, and see what stories unfold.
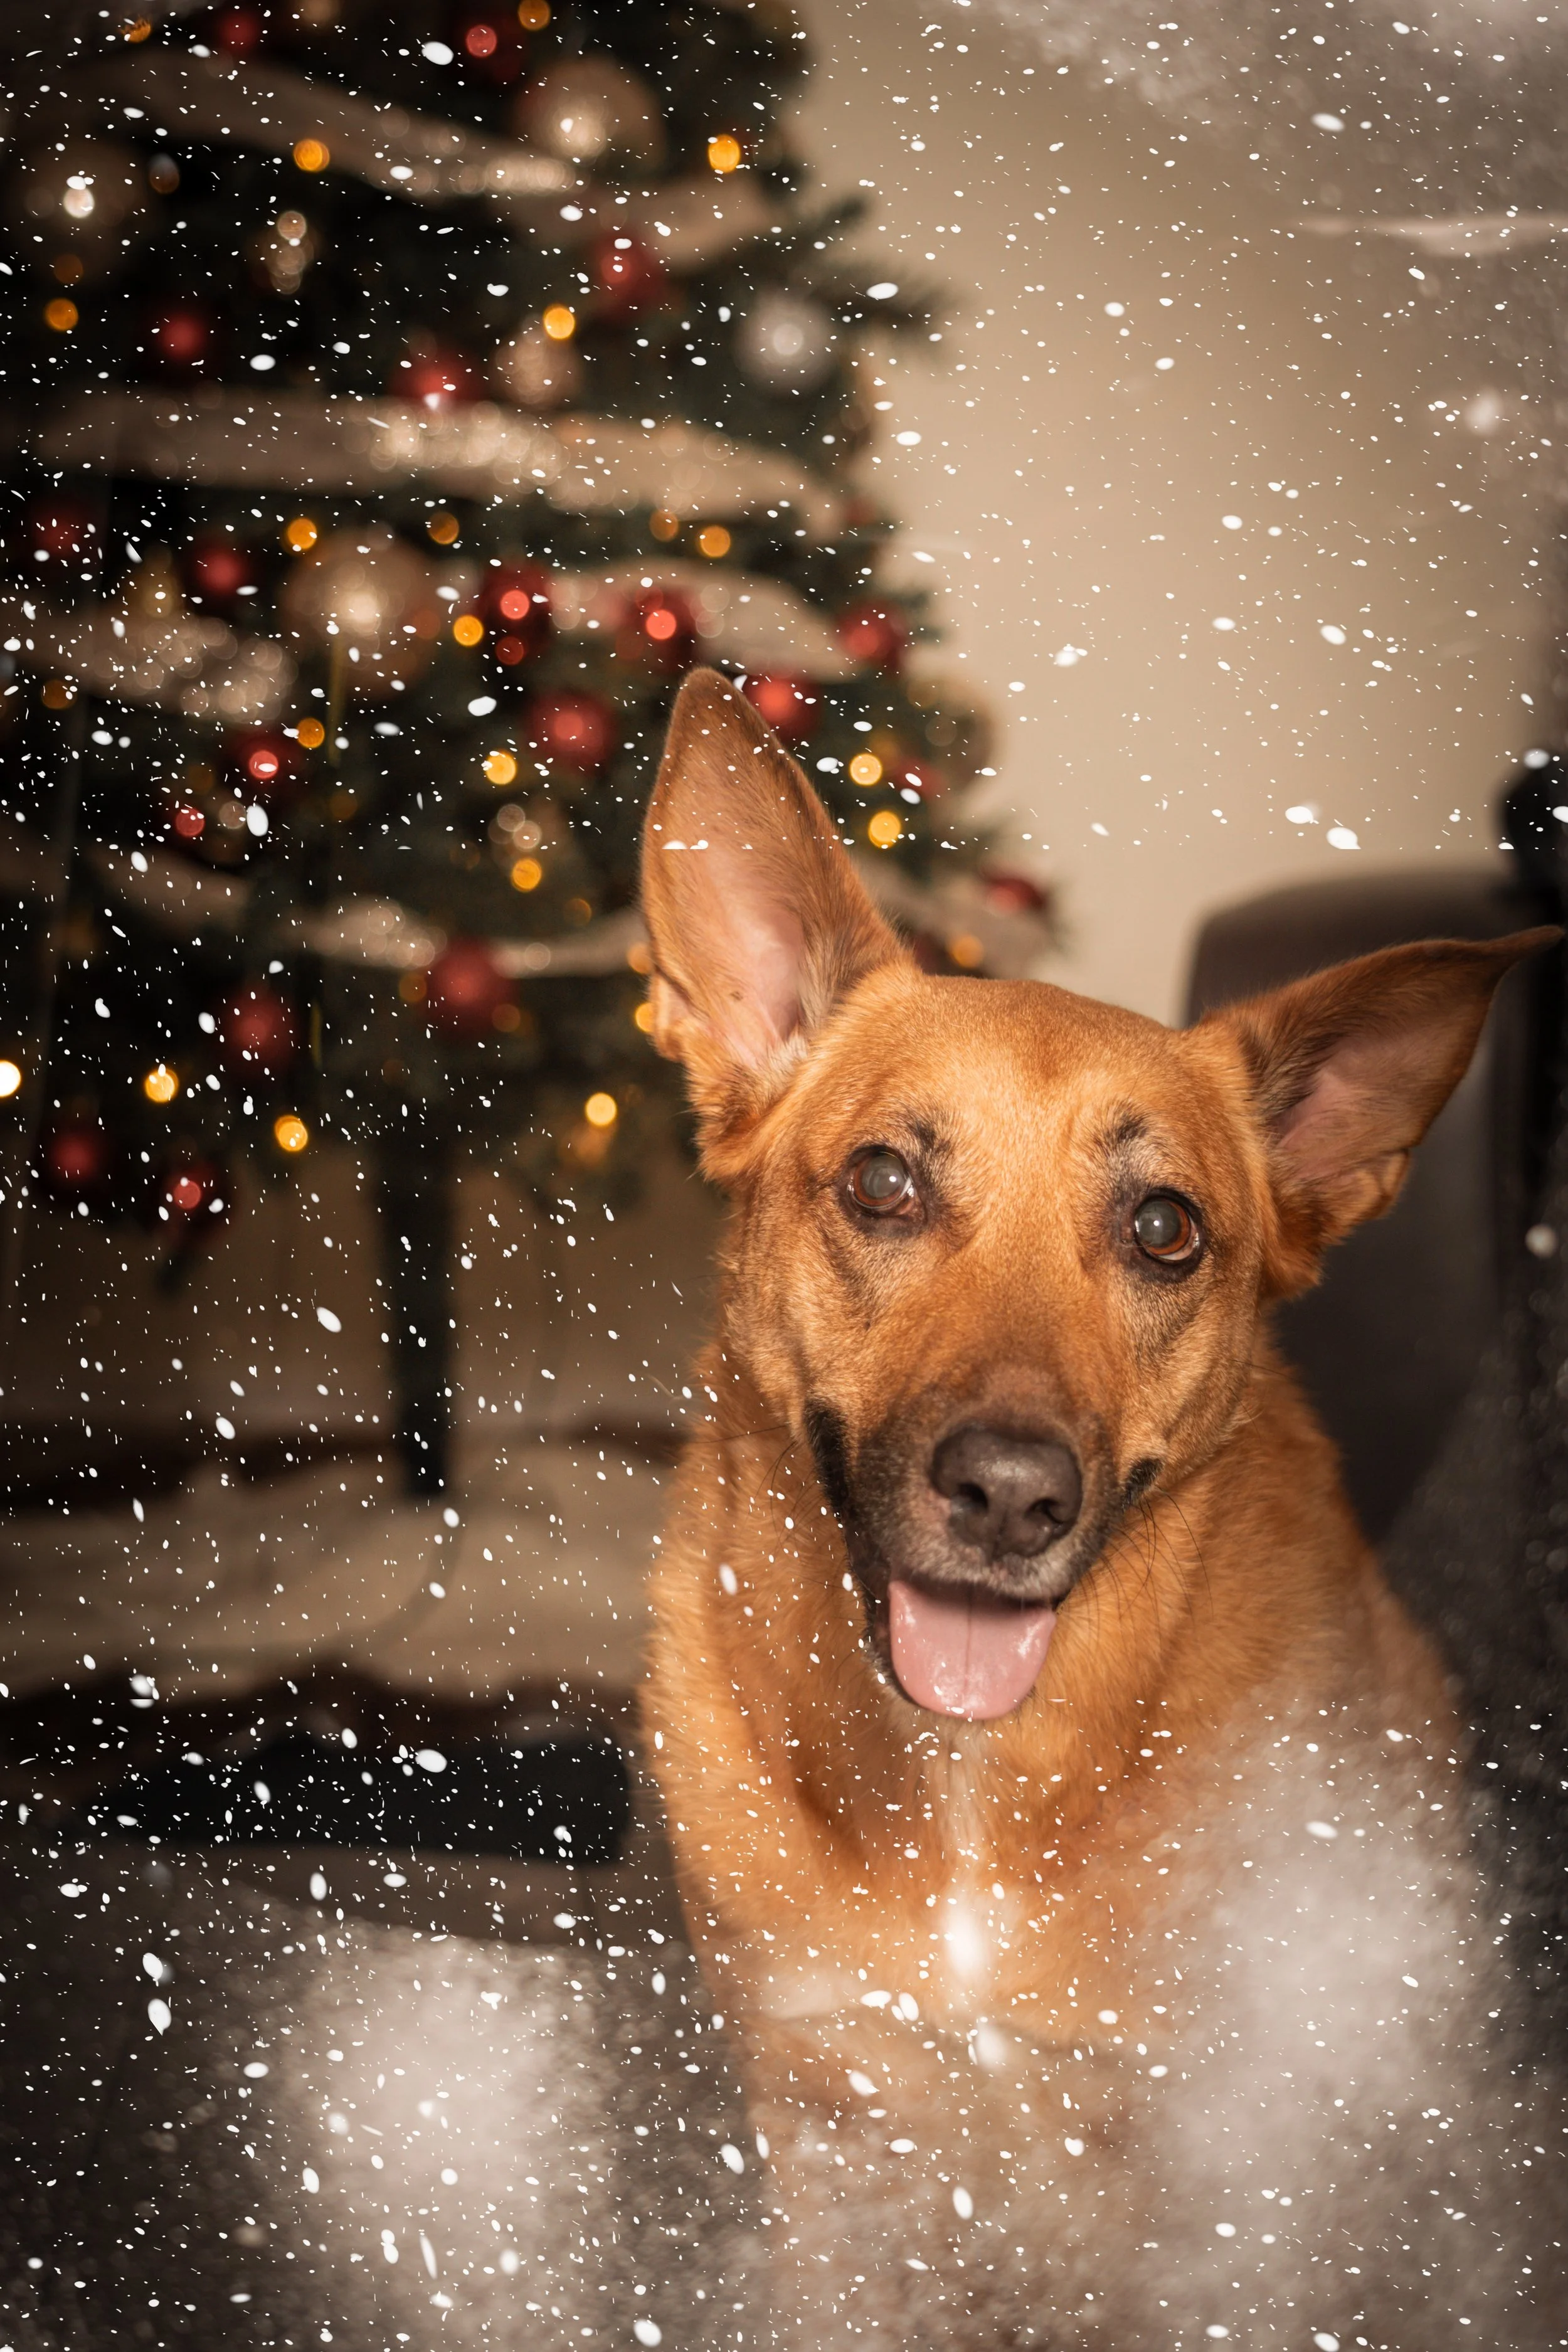
Holiday Photo Trend with Lucinda (my Dog)

This holiday season, I’m noticing two big photo trends making the rounds. One is a returning favorite: the cardboard boxes wrapped in festive paper, arranged and edited to resemble The Brady Bunch opening graphic. I spotted it last year and it’s definitely still going strong.
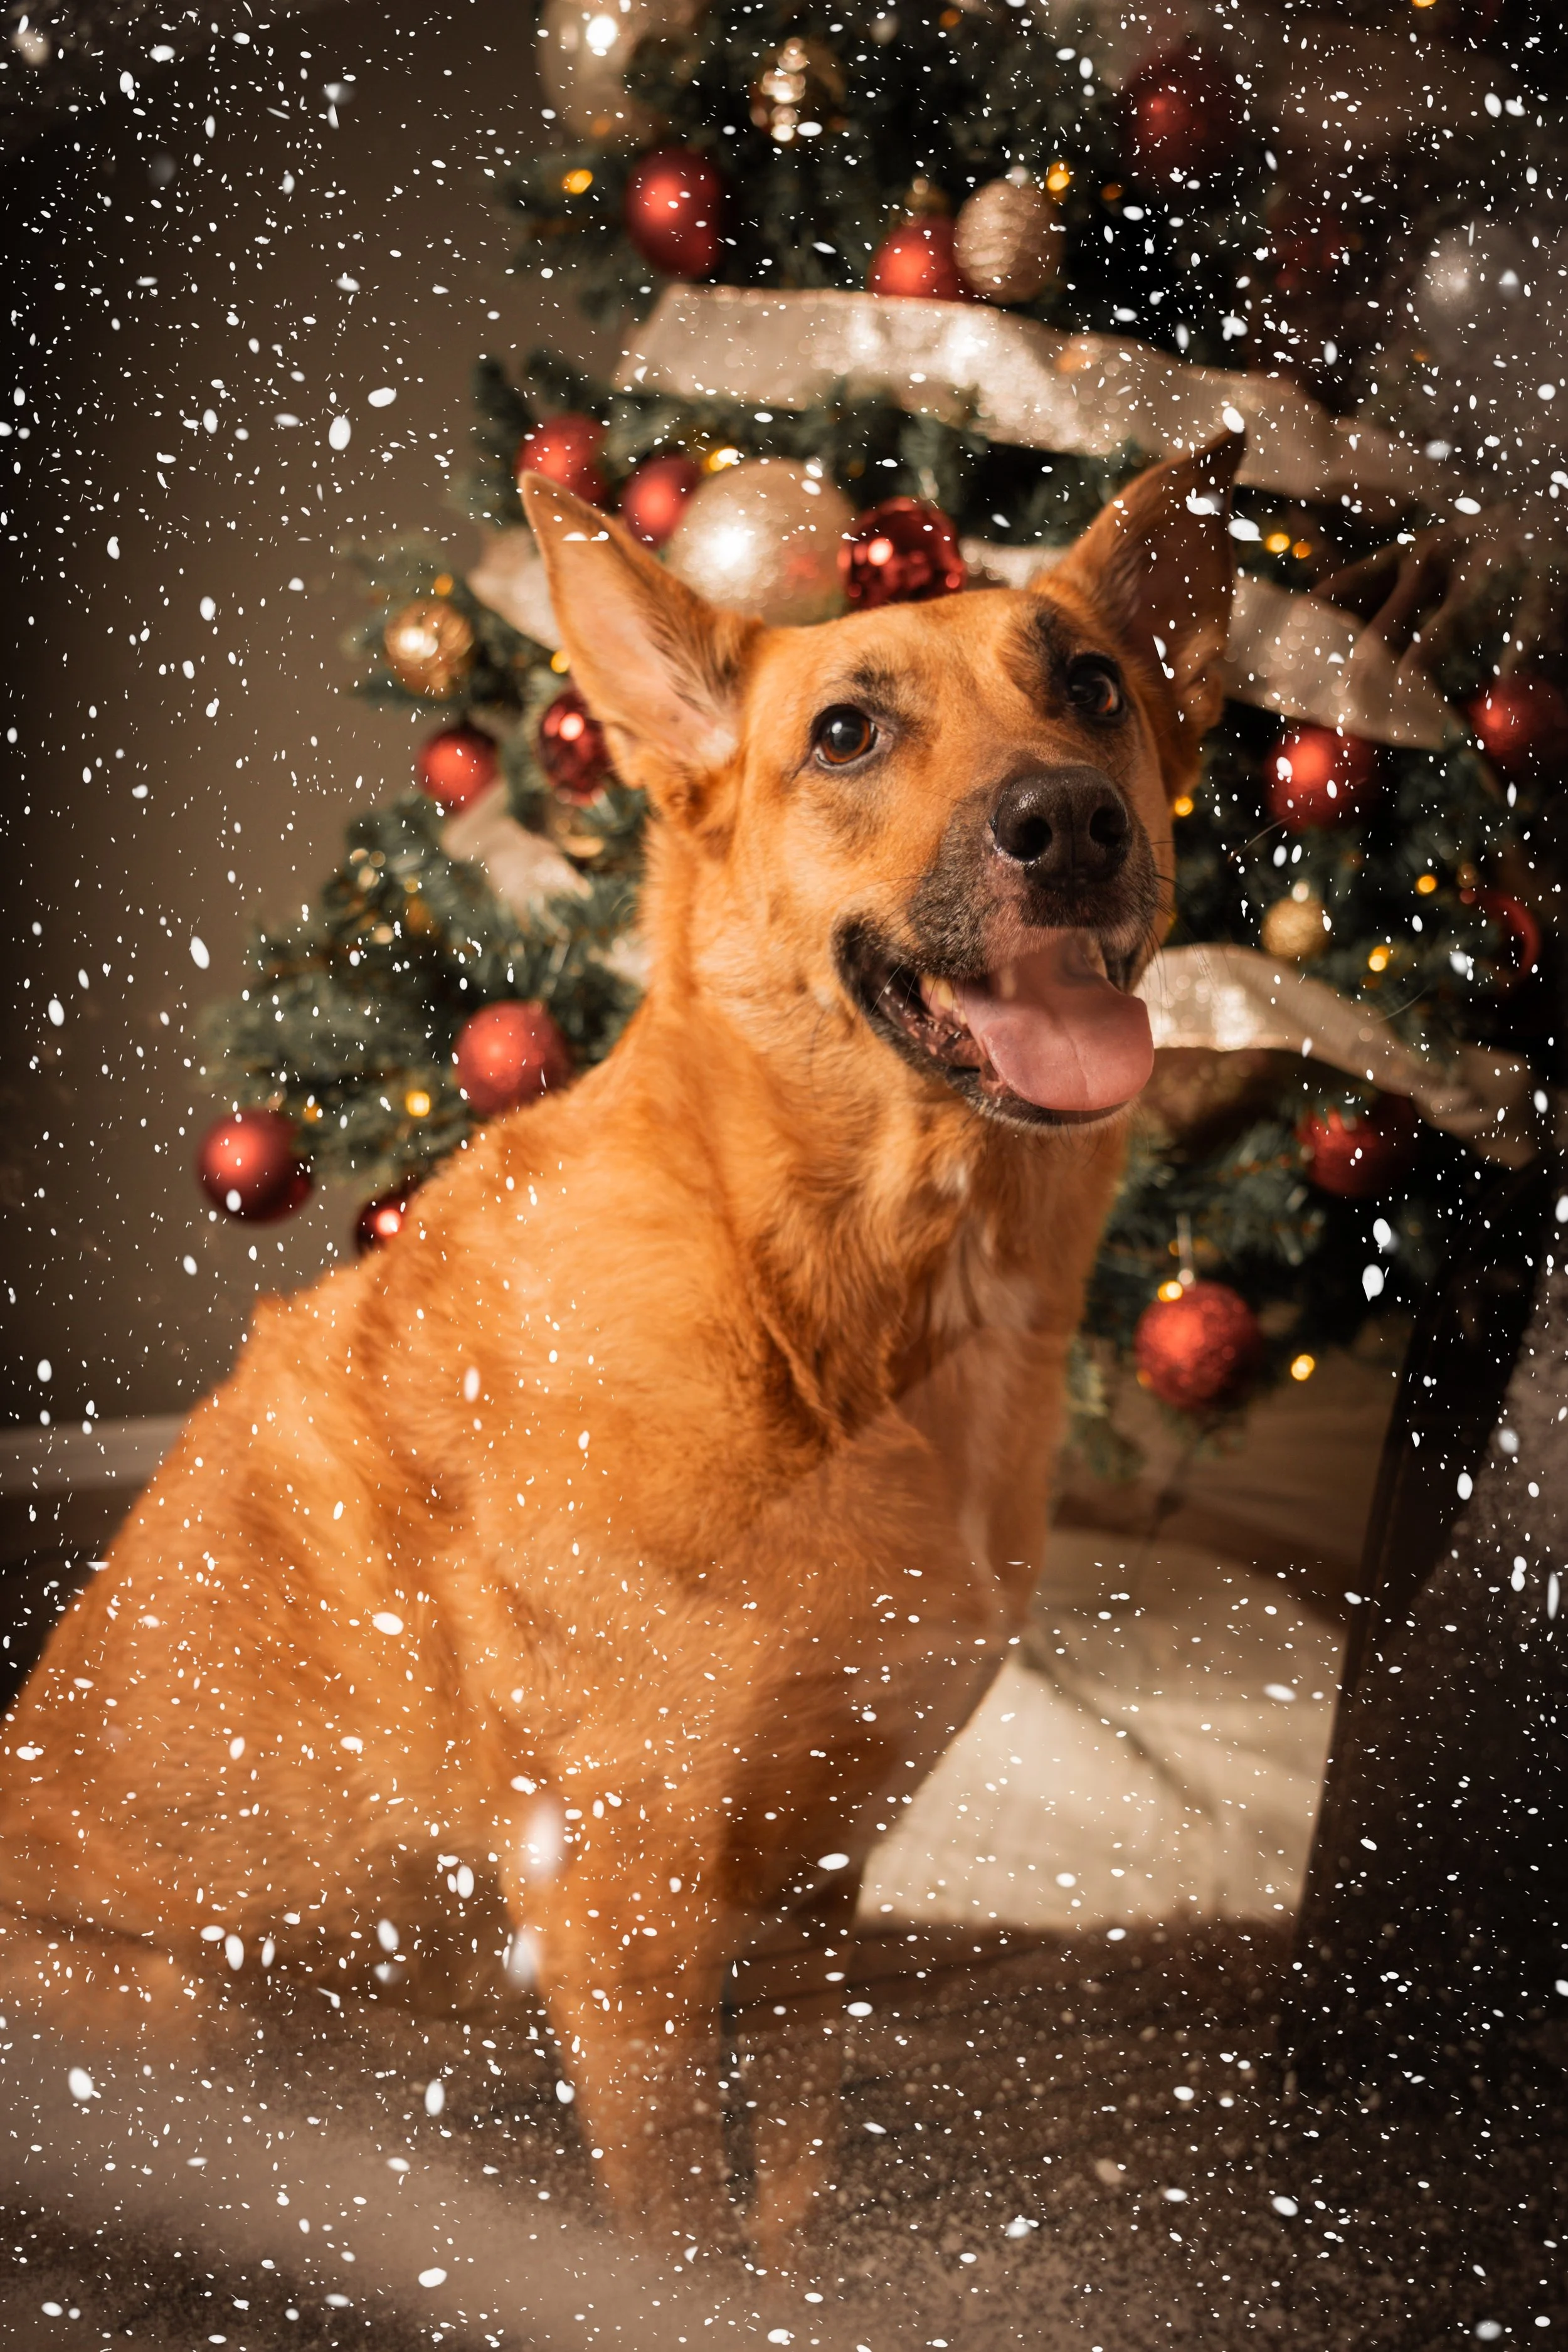
But the new trend that caught my eye—and the one I tried this week—is the “frosty window frame” setup. You’ve probably seen this one: you take a picture frame, frost or snow the glass, and place your pet or family behind it with the Christmas tree glowing in the background. The final image looks like you're peeking at a cozy moment from outside a frosty window.
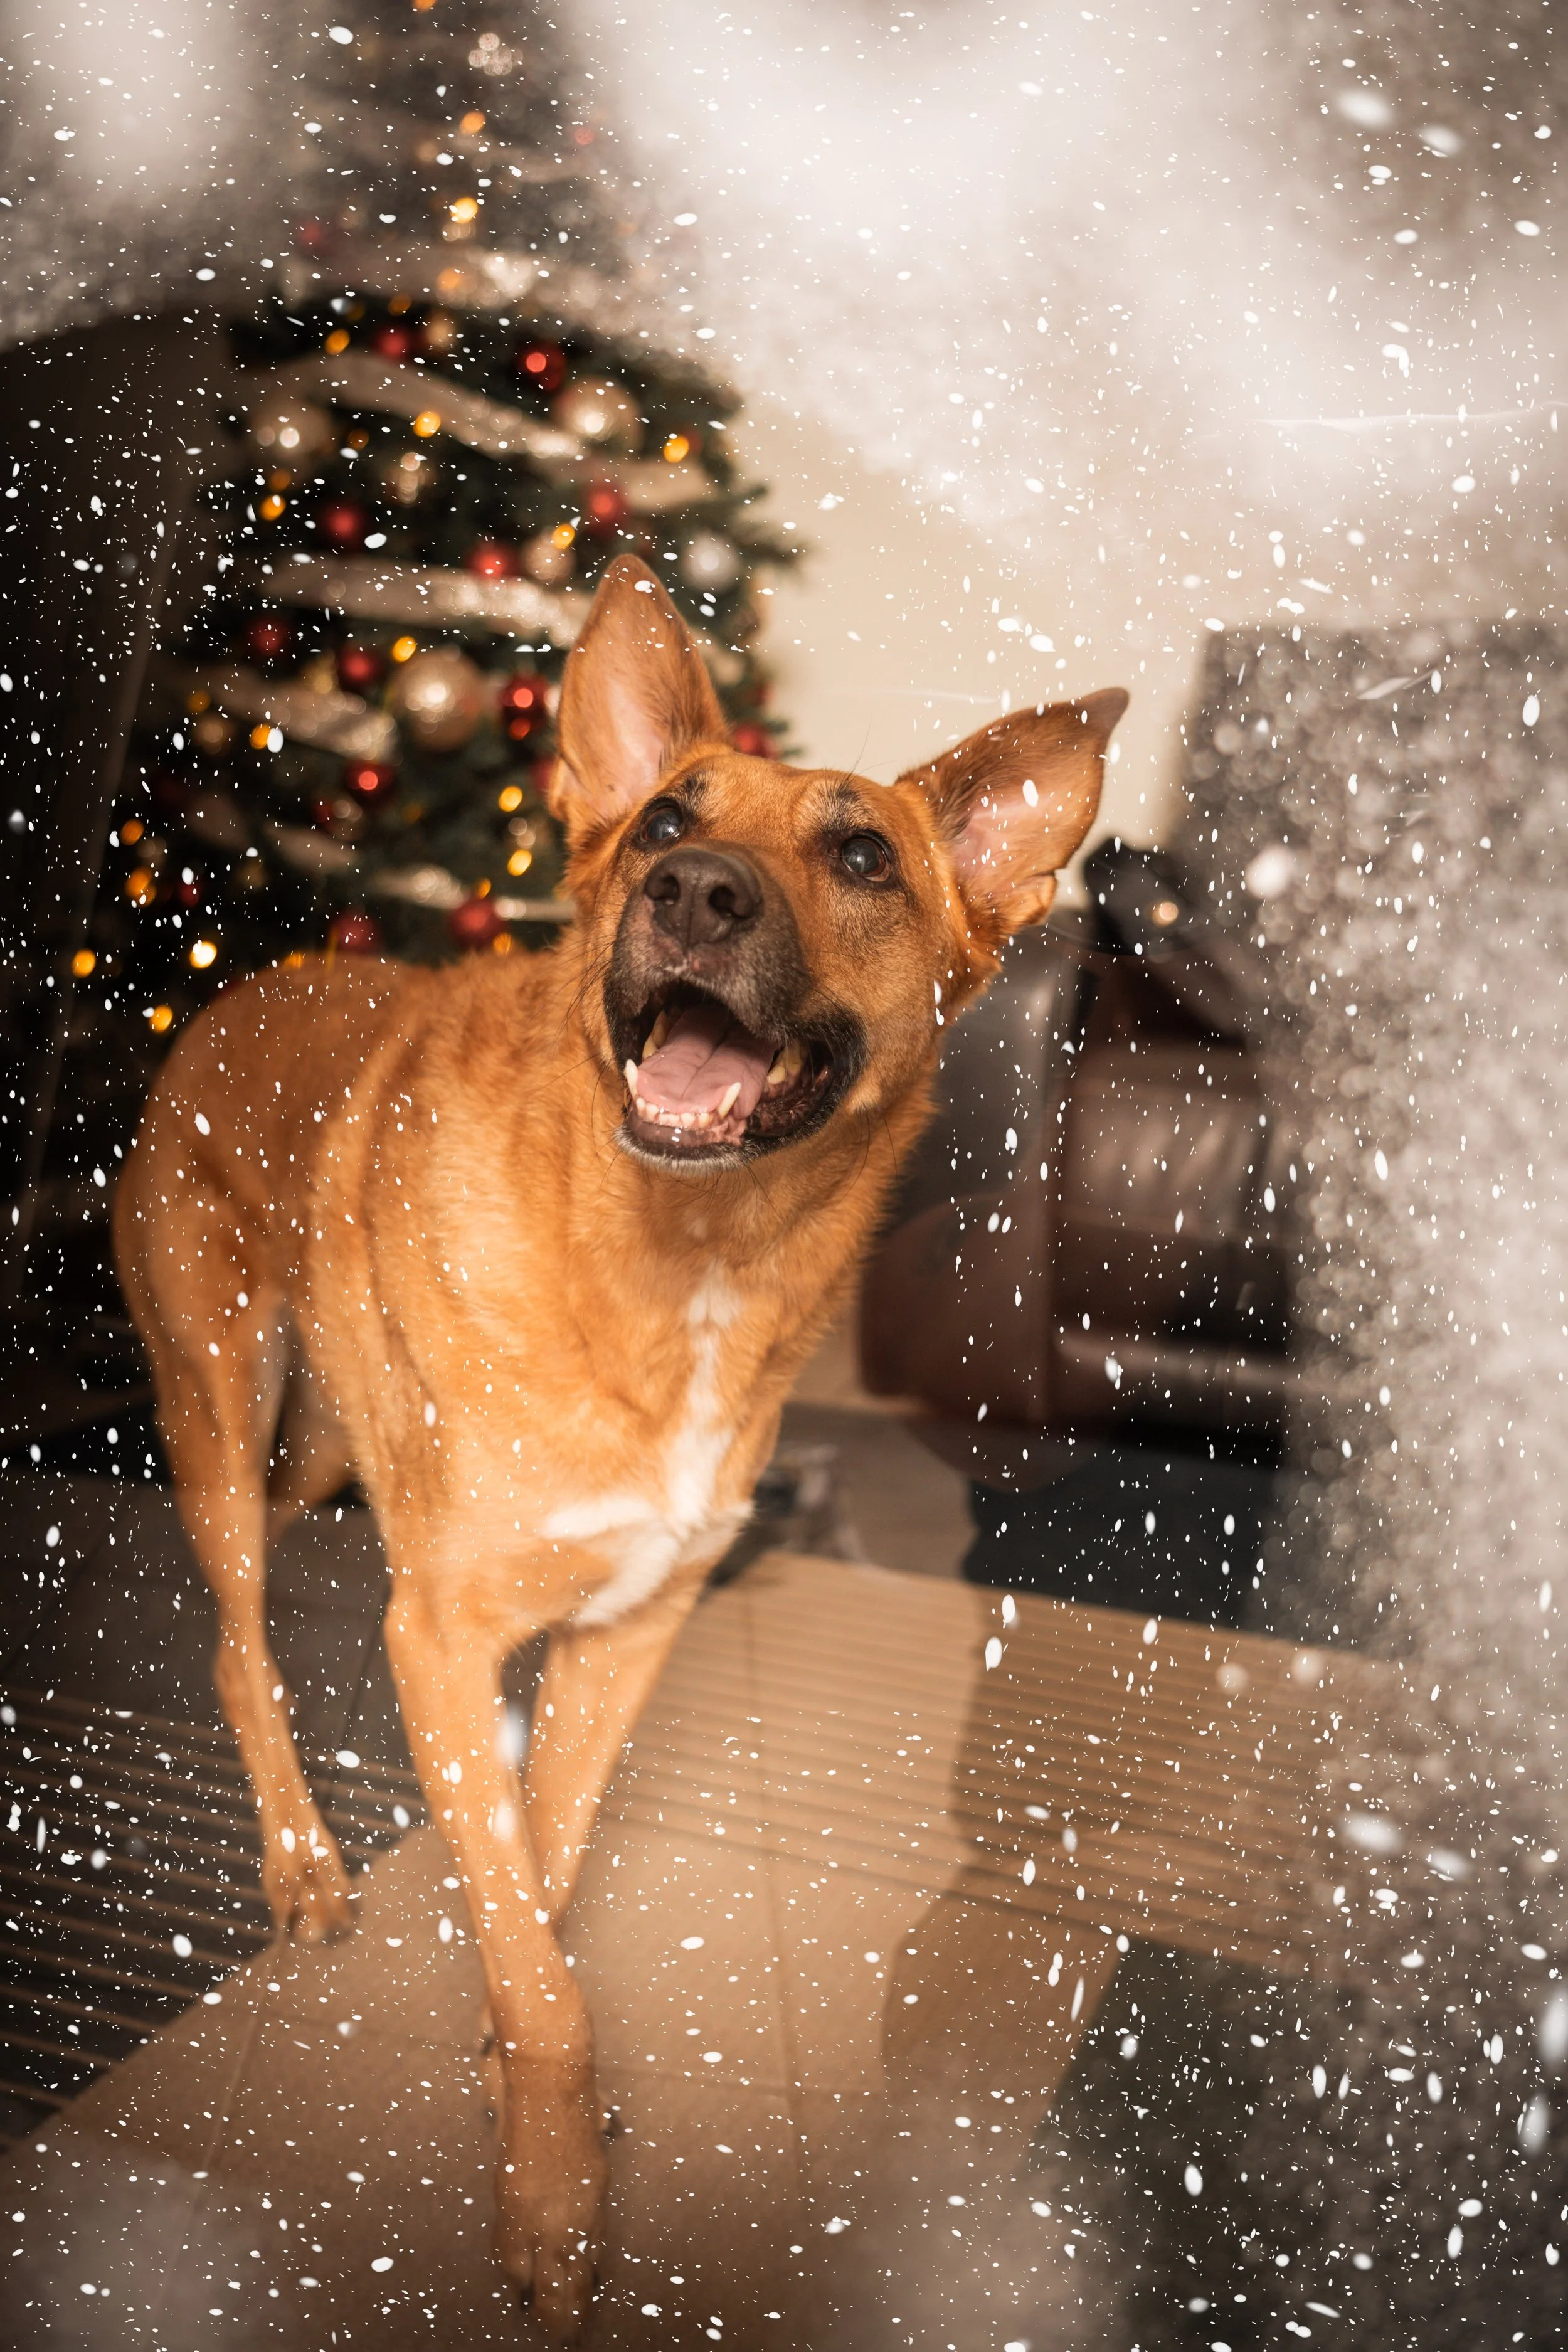
I was excited to give this a shot. I headed to Michaels and picked up a large poster-size frame (it was buy-one-get-one-free, so now I have two to play with). I used a giant pot to help me brush on a ring of fake snow, leaving a clear circle in the middle of the frame. I’ve seen some photographers create a heart shape instead—which is adorable—but I kept mine simple.
Honestly, I expected the setup to be trickier than it ended up being. With the help of my wife and a few treats, we managed to get Lucinda—our half German Shepherd, half cattle dog mix—to pose perfectly. The bigger frame definitely helped; it gave me more room to work with and made it easier to line up the shot.
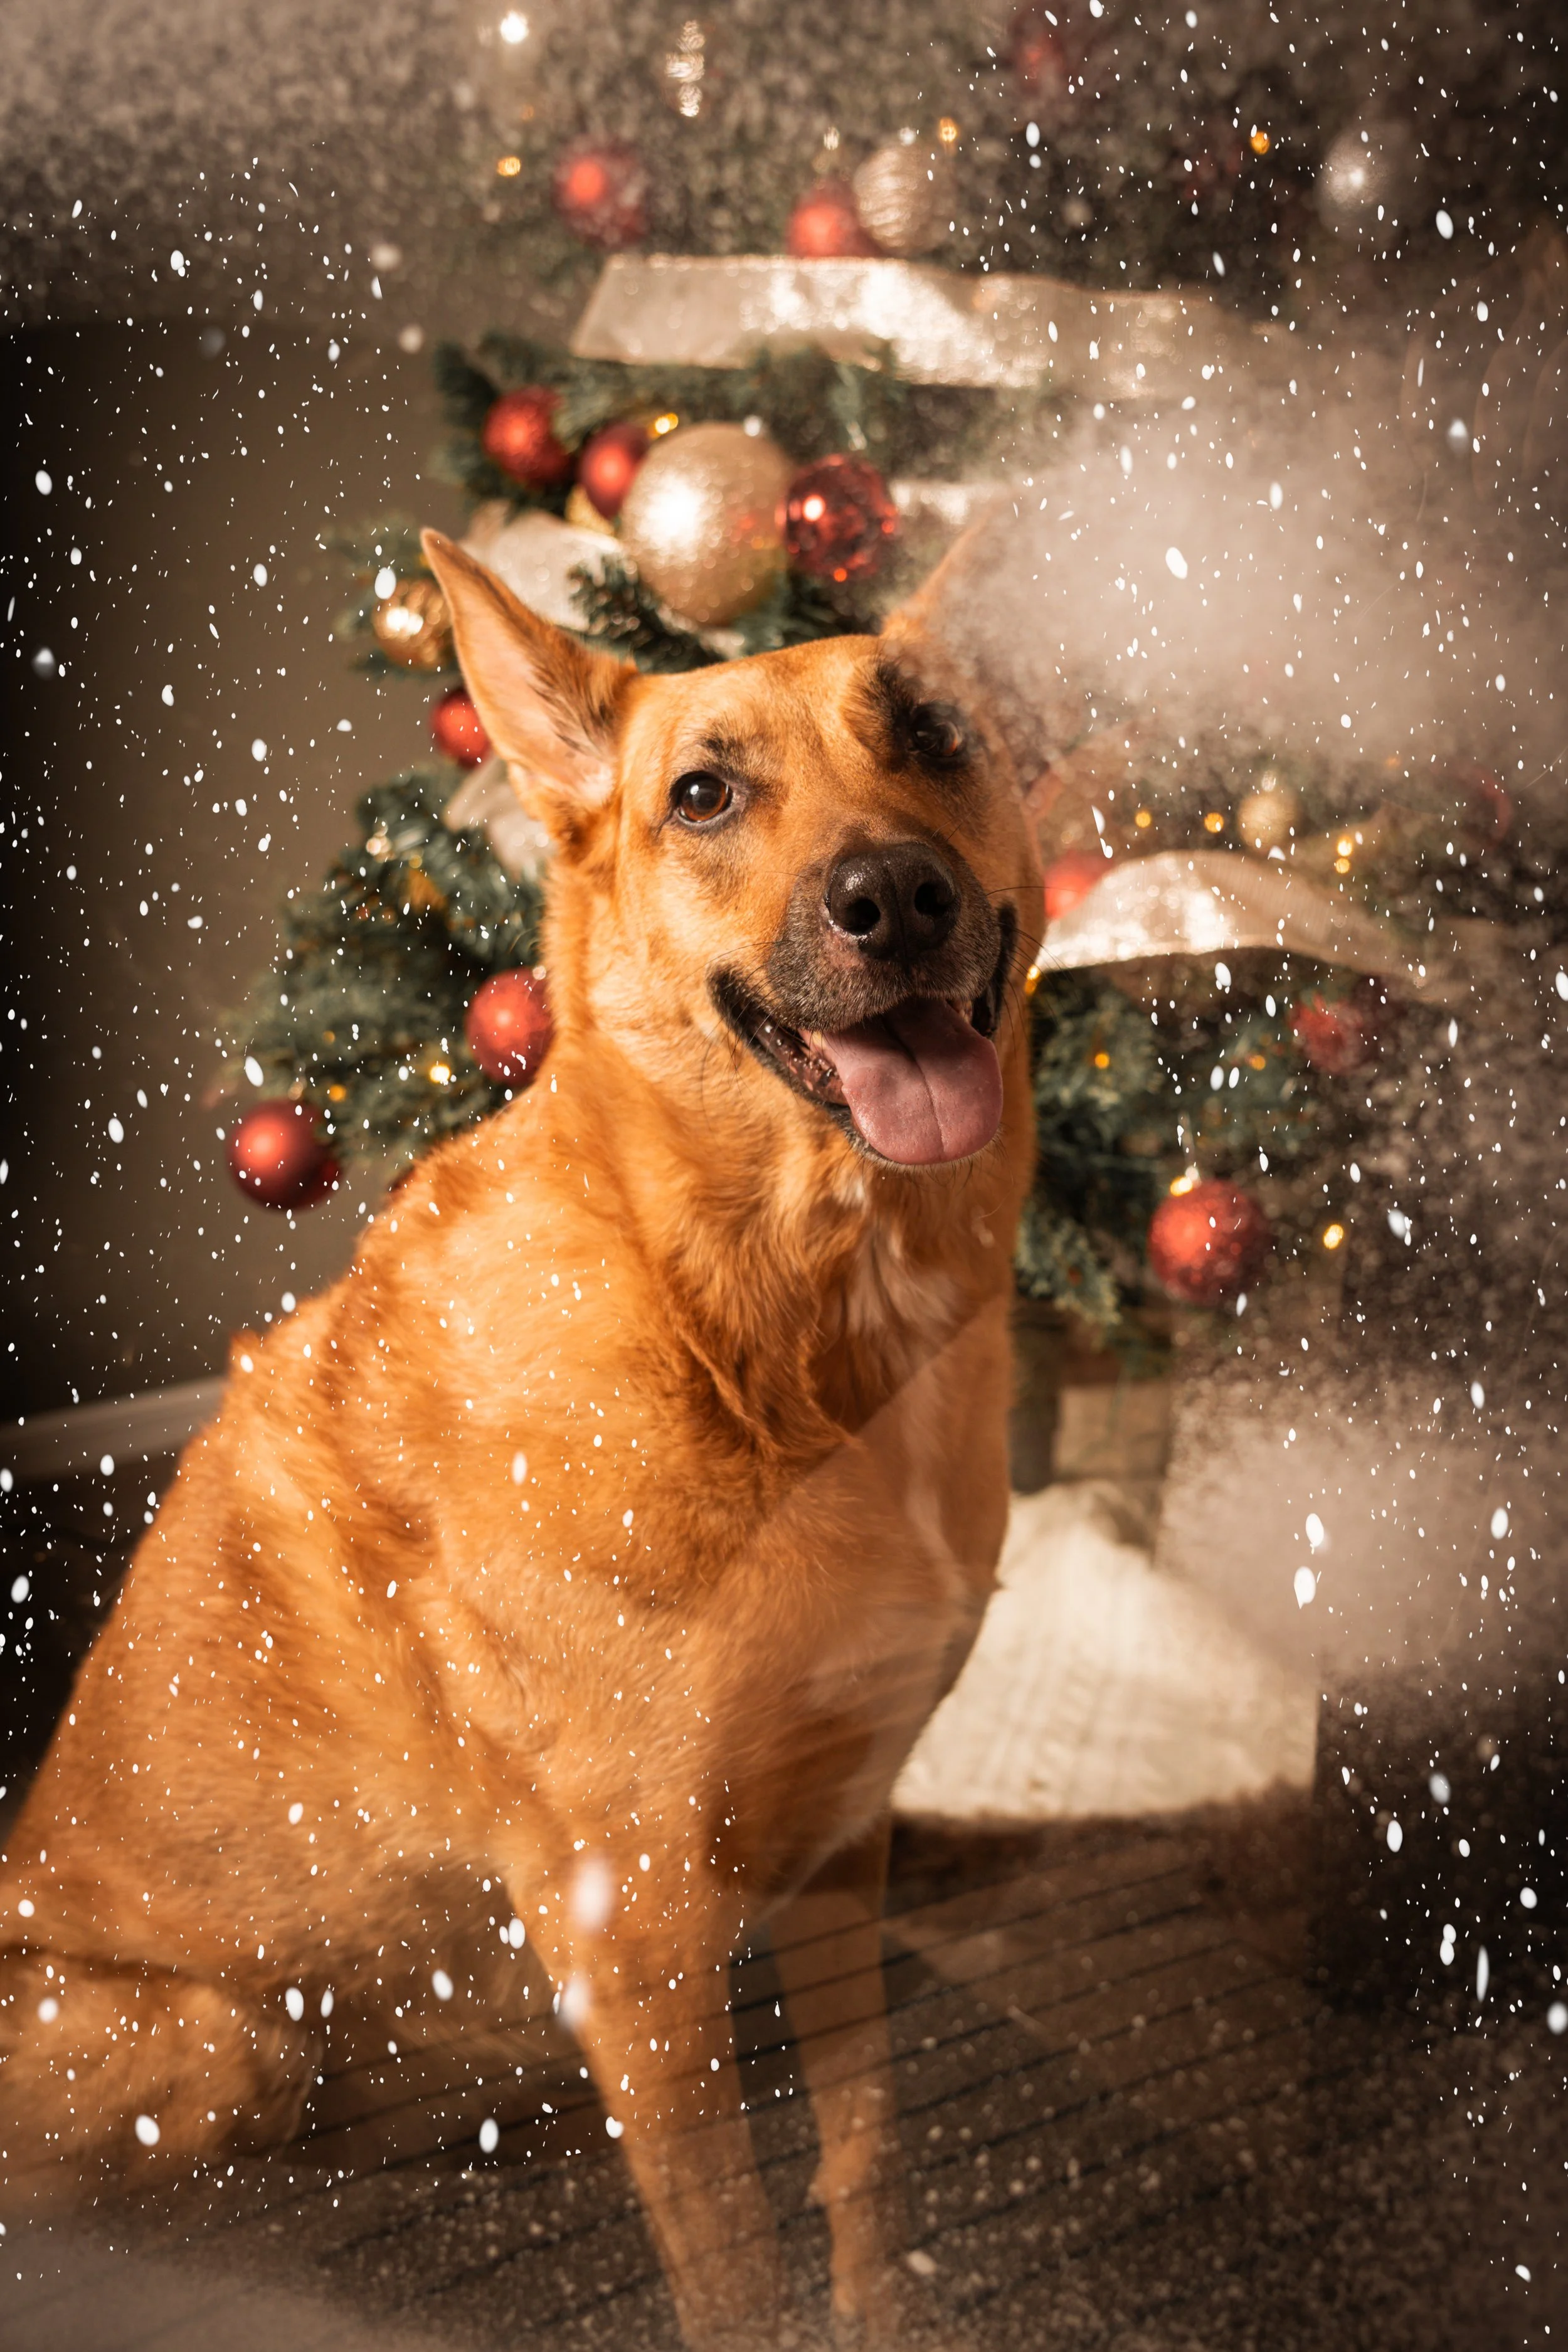
Of course, I relied on my trusty Westcott JF400, which always gives me crisp, clean images—especially of Lucinda. While editing, I realized I probably could’ve added even more fake snow around the edges. The opening I created in the center might’ve been a bit too large. To fix that, I layered in a little extra snow digitally. The combination of practical effects and subtle graphic overlays really helped sell the frosty-window illusion.
All in all, the project cost me about $40, and I’m happy with how it turned out. Next up: seeing if we can convince Rosco, our cat, to cooperate for his own frosty-window portrait. Wish us luck.

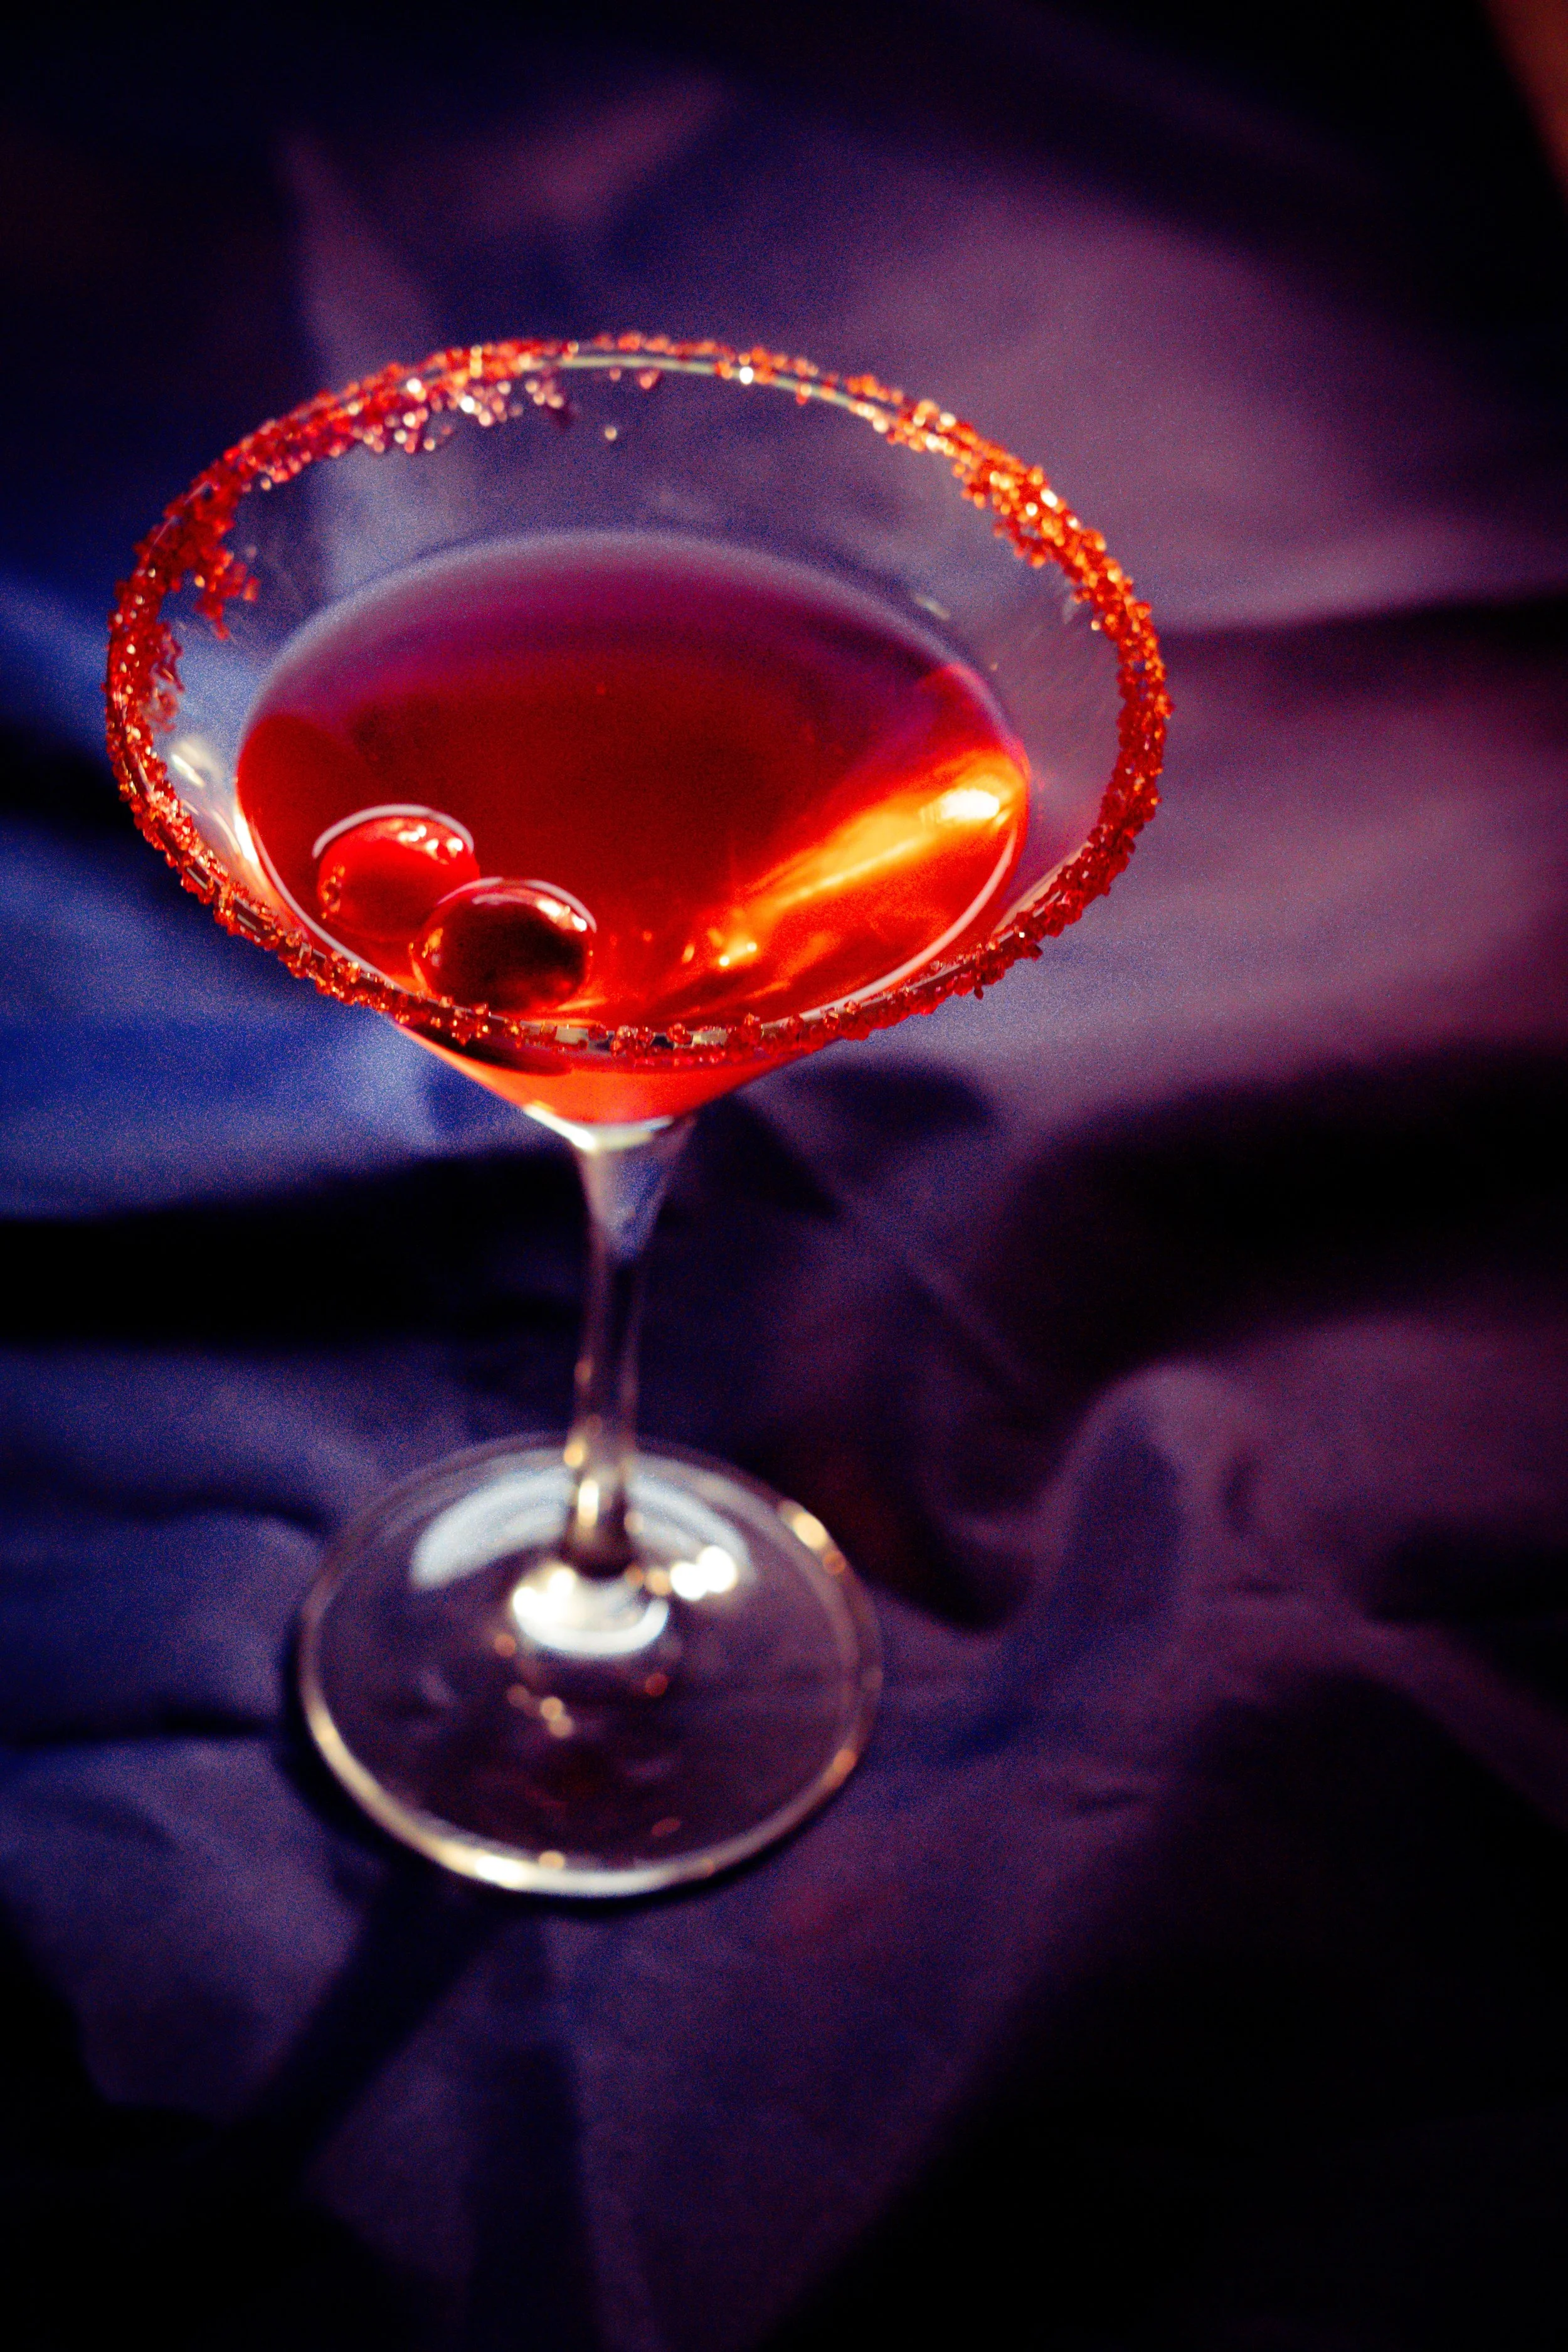
Cocktail Photography with Mom for Thanksgiving!

This past weekend, my mother was in town for Thanksgiving. Ahead of our visit, we decided to try our hand at cocktail photography. We picked up a variety of glasses at Goodwill and used a lighting kit that Mom had purchased to explore product photography in the living room, while my wife Kiley worked on the Thanksgiving meal in the kitchen.
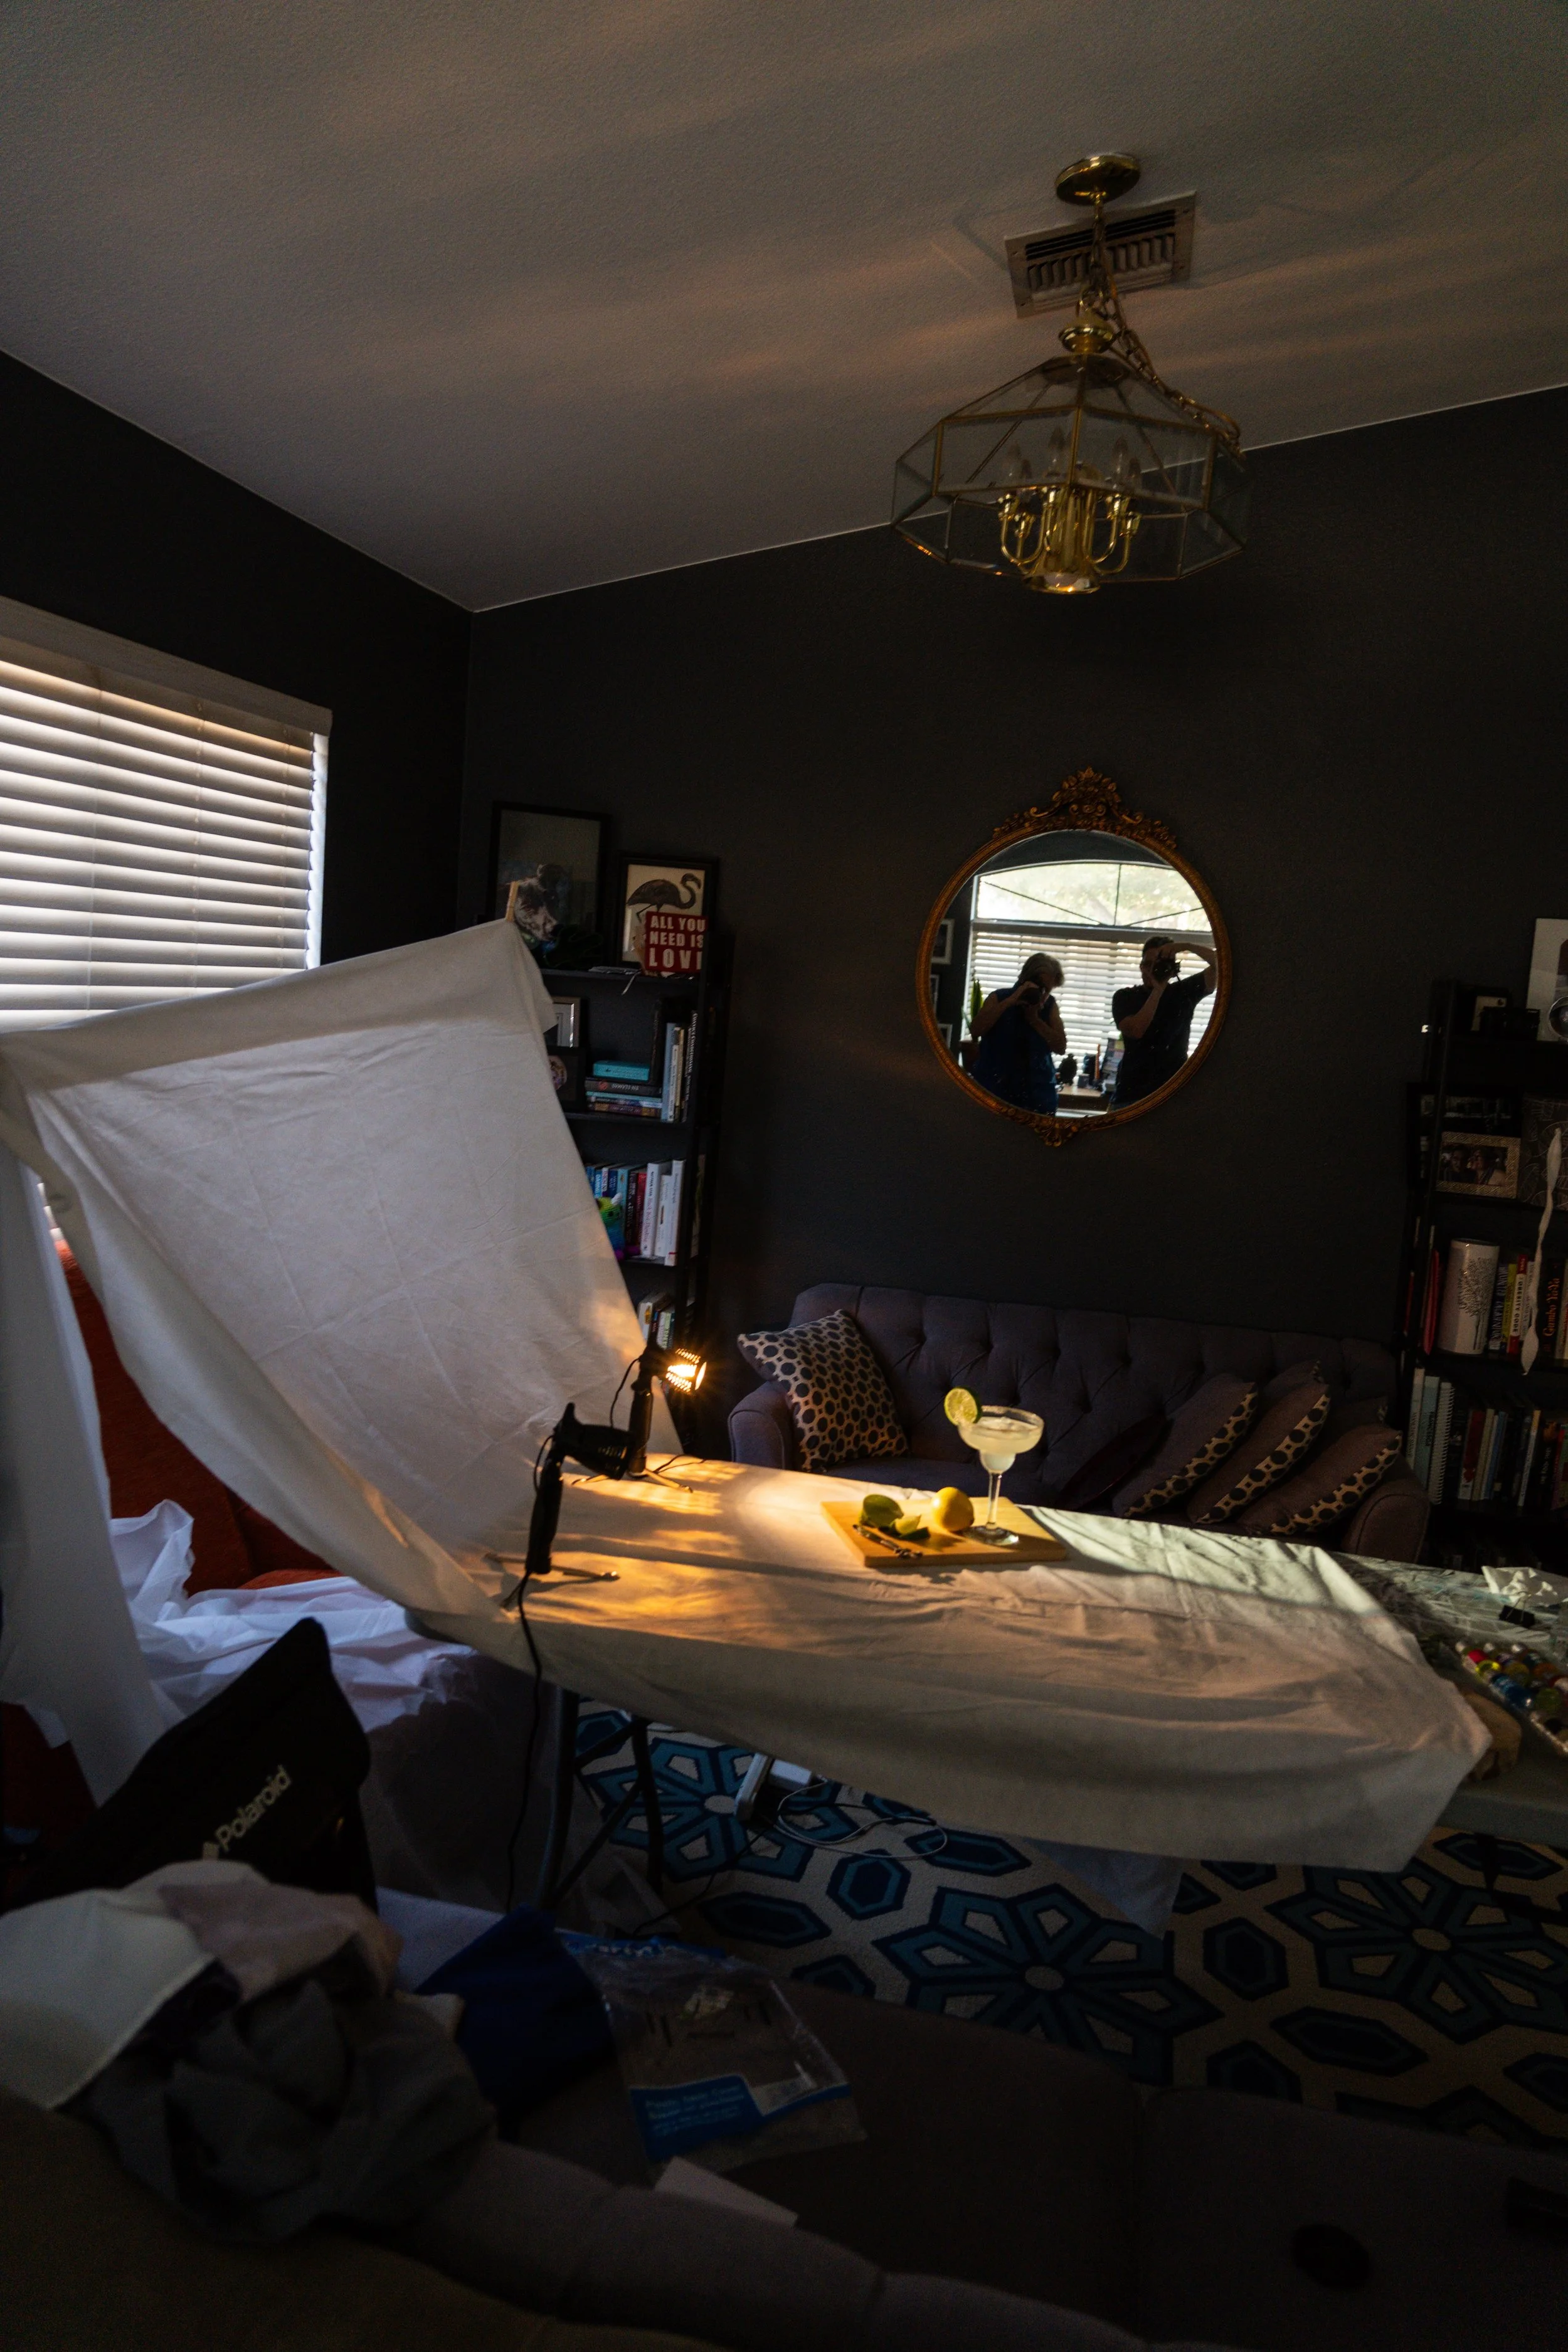
Growing up, my mother worked at Kodak—not as a photographer but as the COO. She has always had a passion for photography, which she certainly passed on to me. Our project concept was to create fun, holiday-themed cocktail photos. Instead of real cocktails, we used single mixers and food dye to achieve the right colors.
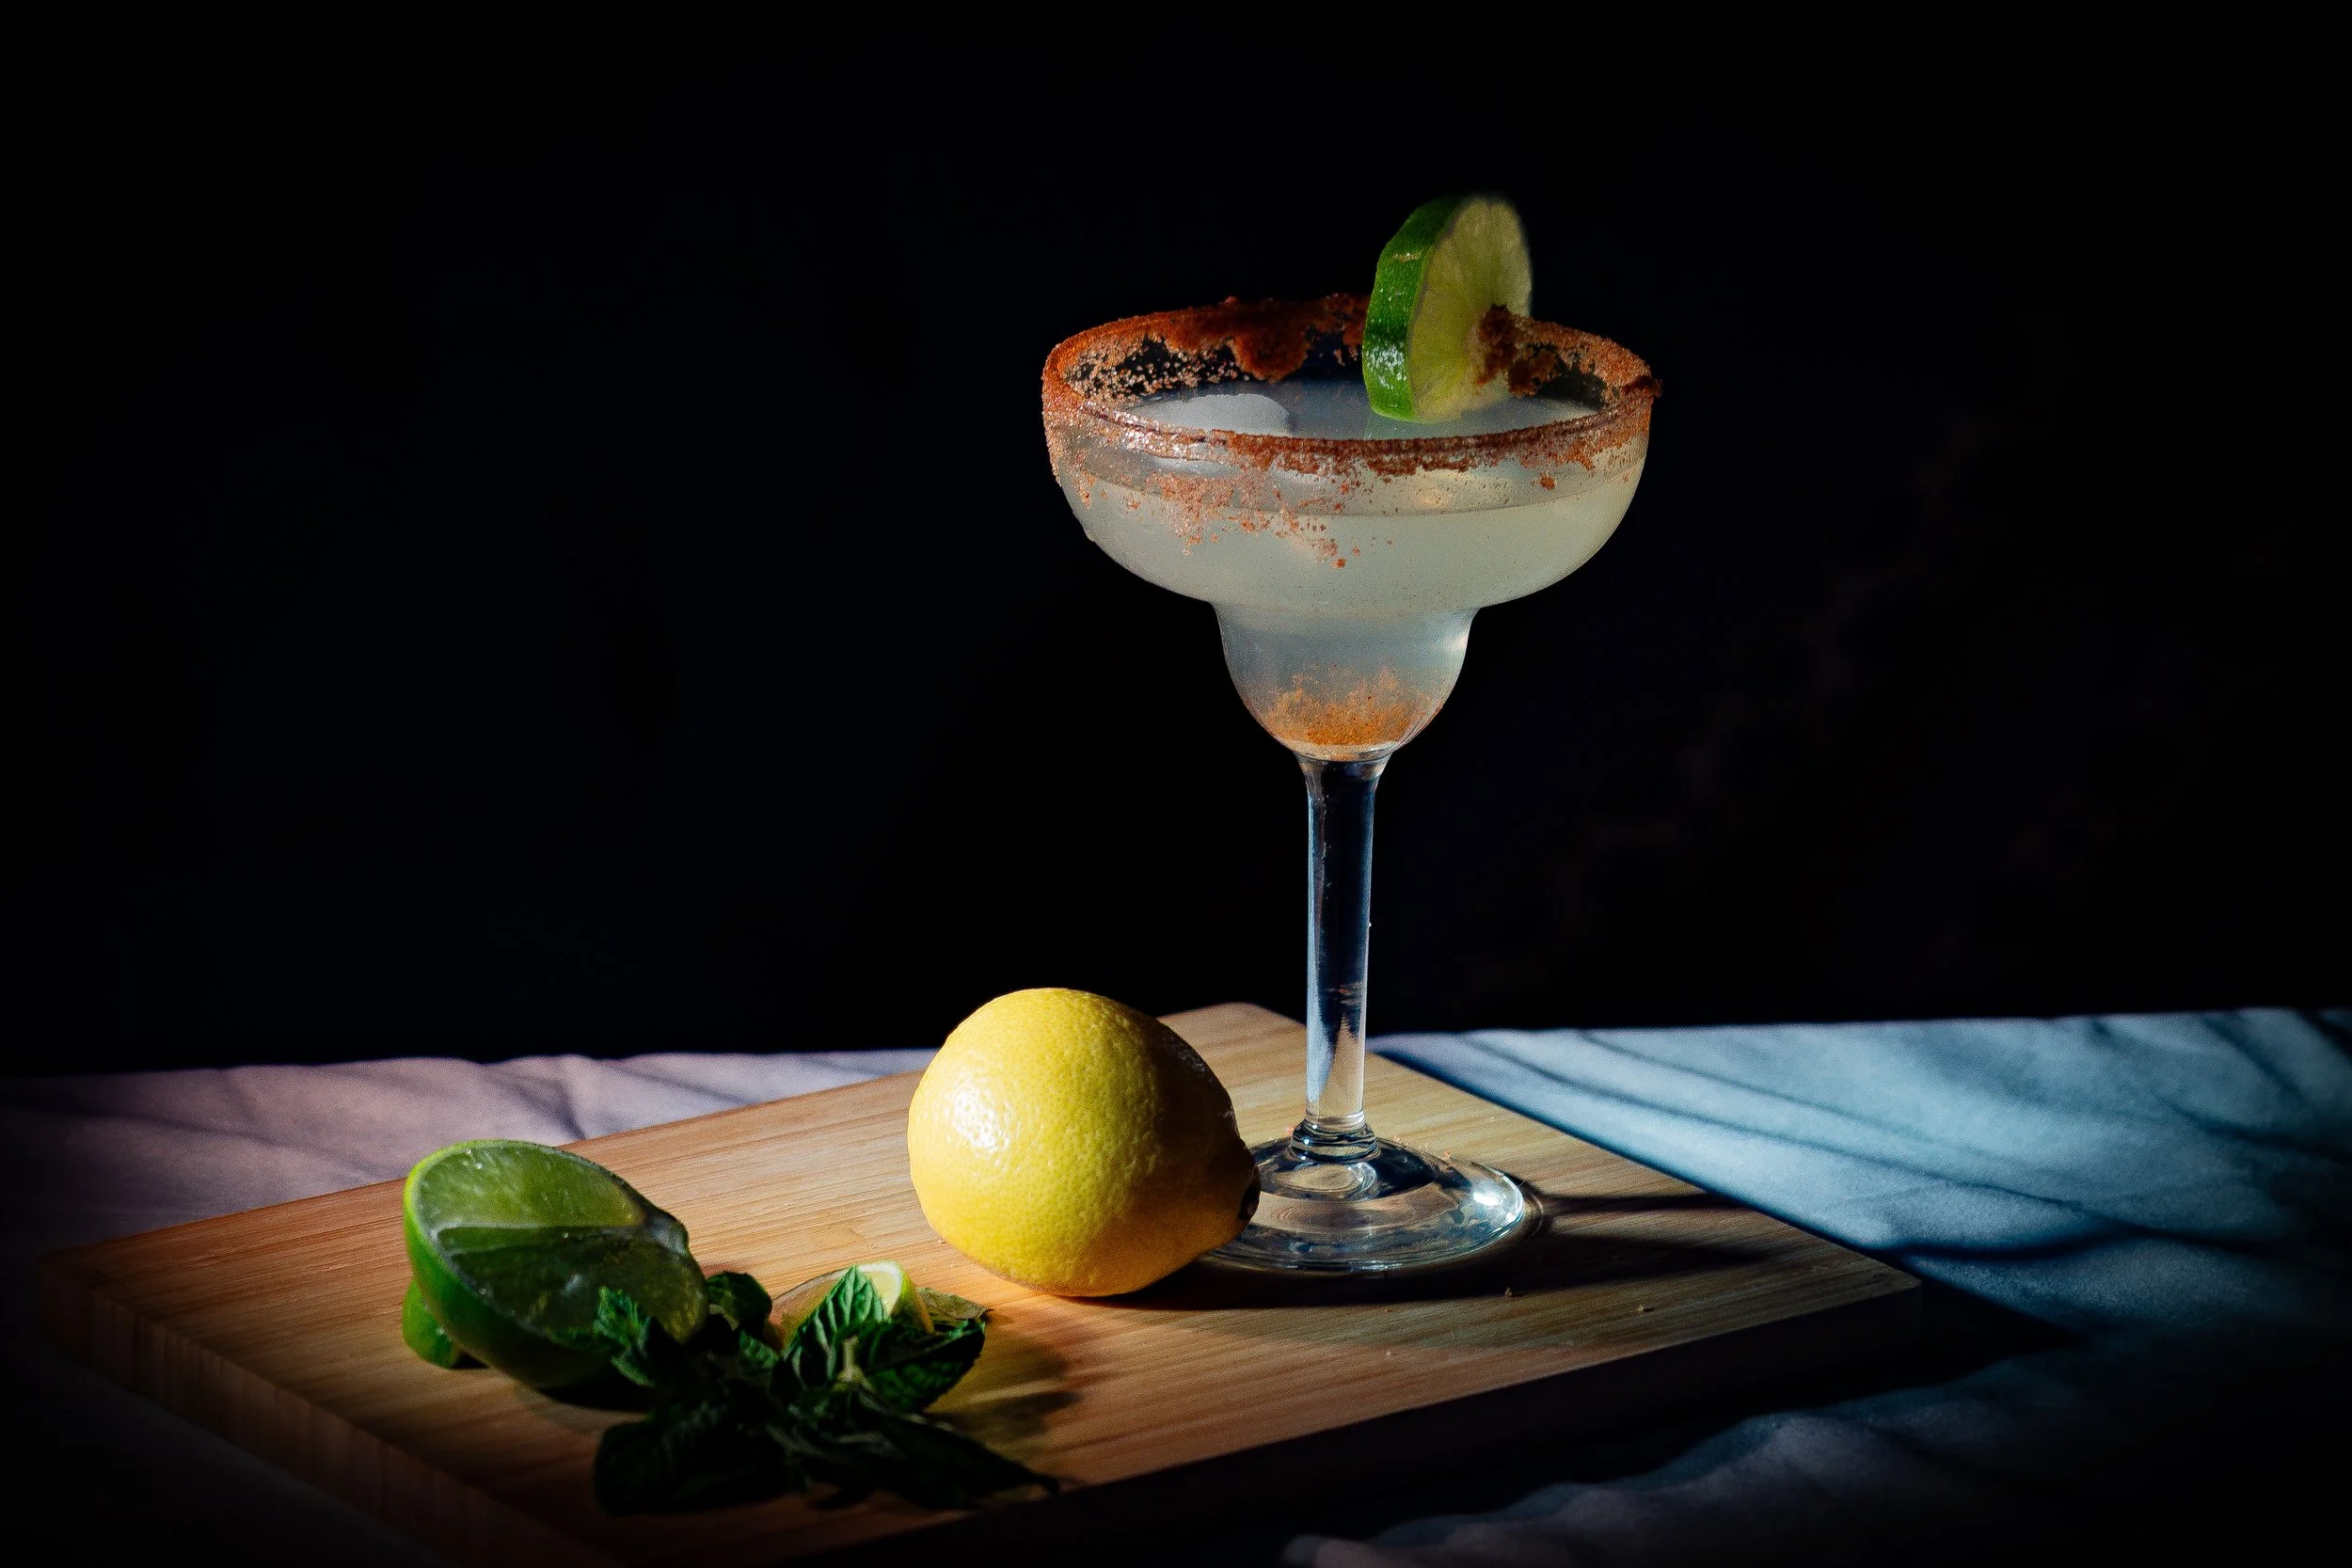
It turned out to be more challenging than we anticipated, but we had a blast. It was a great way for us to bond, and even though I don’t think we’ll be winning any awards with our photography, it was exciting to experiment with a different type of photography.

Working outside of my typical portraiture pushed me to think creatively and learn how this style could influence my broader photography skills.
All in all, it was a fantastic day spent with Mom, filled with laughter and creativity.

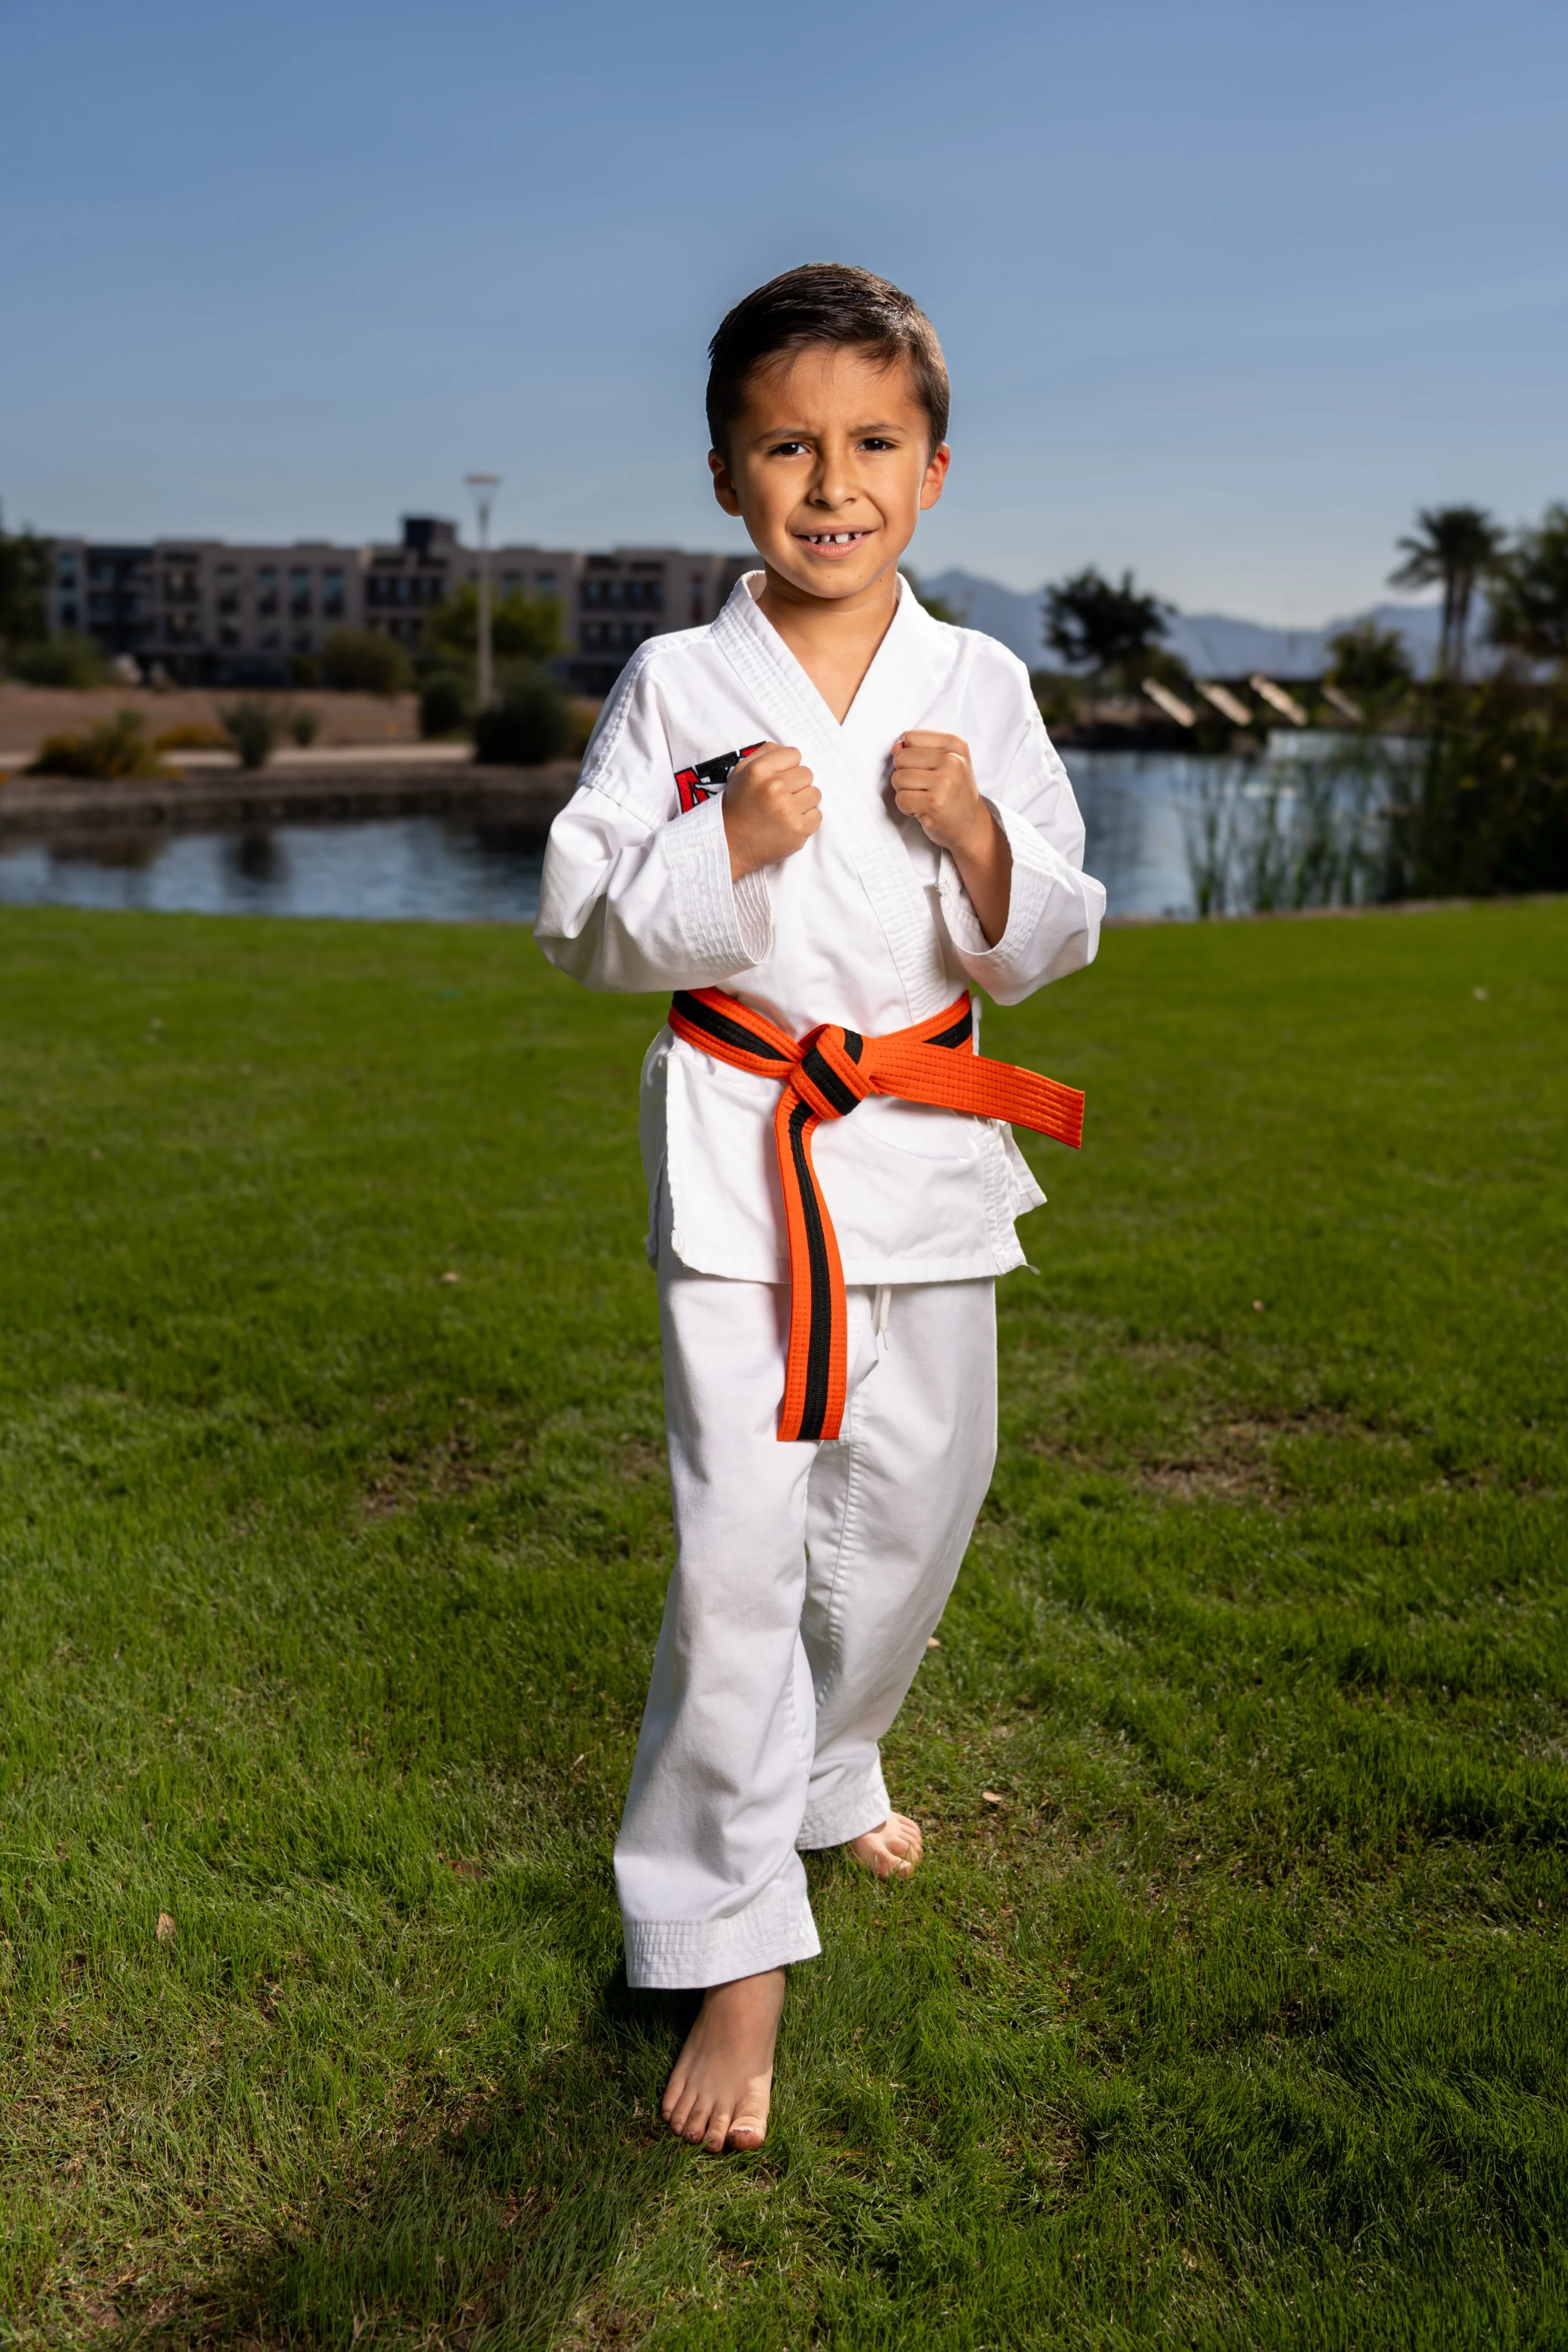
Mini Session Spotlight: Celebrating a New Taekwondo Belt

Every milestone deserves to be celebrated — and this one came with a kick.
Recently, I shot a mini-session for a young Taekwondo student who had just earned a new belt. His mom wanted to mark the moment with photos, and between her busy schedule (and an older sibling’s soccer game happening at the same time), we met outside the Avondale Sports Center to make it happen.
Working with kids is always an adventure. There’s an old Hollywood rule: “Never work with kids or dogs.” Well… I’ve never been great at following rules, and honestly, I love the challenge.
At first, he was nervous — totally normal when a camera is pointed your way. But with a little encouragement and some space to show off his Taekwondo moves, everything changed. The kicks started, the confidence followed, and then came the smile we were waiting for. That’s when the magic happens.
For parents, here’s my go-to advice:
Be gentle, make it fun, and let your kid lead the energy.
With younger children, I always try to shoot at their level — literally. I was kneeling the entire session to be eye-to-eye, though in this case he was still so tiny that even on my knees, I was taller! That’s the joy of working with kids: you never quite know what to expect, but you always come away with something real.
And here’s something I always tell parents:
I’ll work hard to get that perfect smile and pose — but some of the best photos are the silly ones.
Those real-life moments often say more about who your child truly is, and they’re the ones you’ll treasure most as they get older. For me, it’s about the energy, the expression, the cute little baby teeth.

For little ones, a 15-minute mini session is the perfect length. Kids tire out quickly, and short sessions keep things positive and playful.
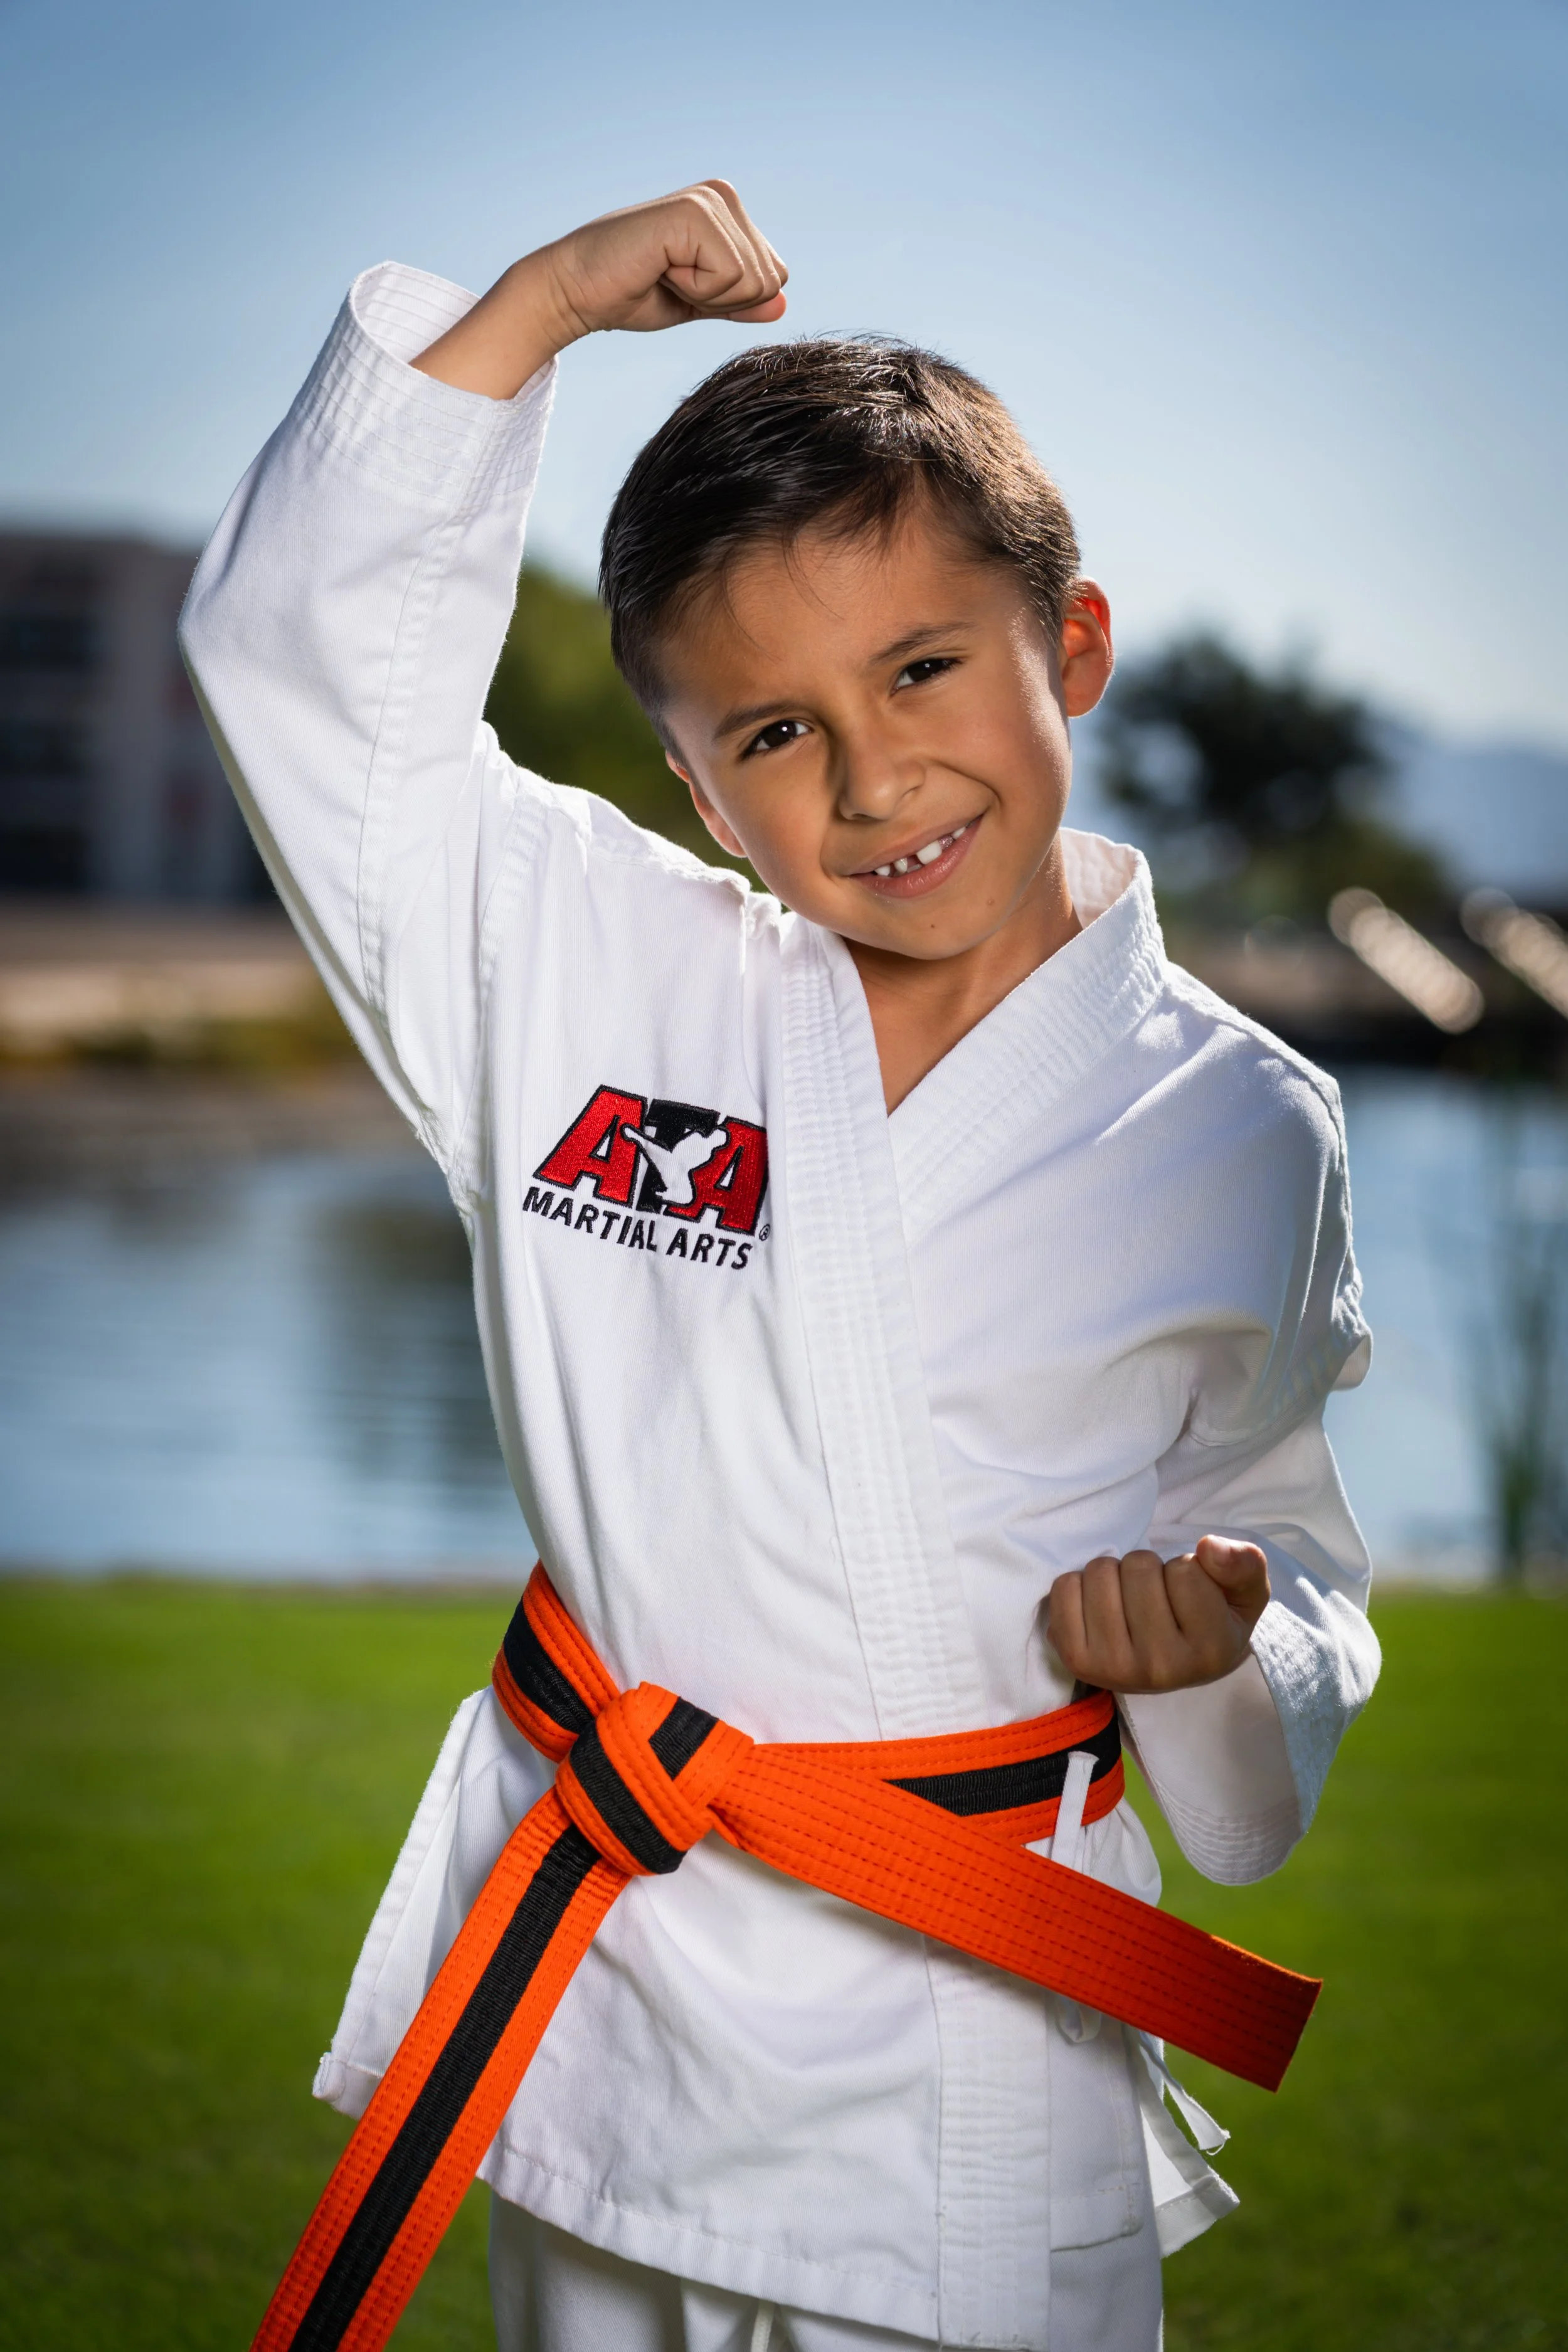
It was a joy photographing this young martial artist, and his mom loved the final images. Moments like this remind me why I love what I do — small victories, big smiles, and memories families can hold onto forever.


Why Lighting Matters in Photography: The Secret Ingredient to Stunning Portraits

f there is one element in photography that separates good images from great ones, it’s lighting. Most people think the camera does the heavy lifting—but in reality, lighting is what shapes your face, tells the story, sets the mood, and creates the depth that makes a photograph compelling.
If you’re not hiring a photographer who truly understands lighting, you’re not getting the full value of your investment.

Photo taken by second shooter, Scott Russomano
So, Why Does Lighting Matter So Much?
1. Lighting Creates Depth
Light isn’t just brightness—it's a sculpting tool. The way light falls across your face and the background determines whether your photo feels flat and lifeless or dimensional and rich. Good lighting defines shape, texture, and emotion.
2. Lighting Helps Tell a Story
Soft, even lighting creates a dreamy, warm, flattering atmosphere. Hard lighting creates drama, contrast, and intensity. A photographer who understands lighting can intentionally choose the mood that fits your personality and your goals.
3. Lighting Makes You Look Your Best
On the most basic level, flattering portraits use soft light. Soft light comes from diffusion—using tools like softboxes to reflect, scatter, or soften the light before it hits your face. This reduces harsh shadows, evens skin tone, and creates a natural glow.
Unless you specifically want that harsh, dramatic look (think movie poster), soft light is almost always the most beautiful.
What About Off-Camera Lighting? Why It Matters Even More
Many photographers rely solely on natural light or an on-camera flash—but off-camera lighting opens up an entire world of creative control.
When I bring my off-camera light, here’s what I’m doing:
1. Controlling Foreground and Background Light Separately
Natural light doesn’t always cooperate. Off-camera lighting lets me expose you perfectly—bright, crisp, and flattering—while darkening the background for a more dramatic, cinematic look. It creates depth and polish that natural light alone simply can't achieve.
2. Creating Foreground–Background Separation
This helps you pop from the background instead of blending into it. Your face becomes the focal point—clean, bright, intentional. Having an off-camera flash allows me to shoot at a low ISO, allows me to shoot wide open, which leads to clear images with those nice bokeh backgrounds people love.
3. Softening the Light for Beautiful Skin Tones
You'll notice I use a softbox on my Westcott FJ400. That softbox is not just a gadget—it's the magic ingredient that diffuses the light into a smooth, gentle glow that flatters every skin type.
So Why Hire a Photographer Who Understands Lighting?

Because lighting isn’t optional—it’s foundational.
It’s what makes the difference between a snapshot and a portrait you want to frame, share, and treasure.
When you hire someone who knows how to use light intentionally—especially off-camera light—you’re hiring someone who can make you look your best in any situation: sunrise, midday sun, sunset, indoors, outdoors, cloudy days, you name it.
Lighting is the language of photography.
And when it’s done well, your photos speak beautifully.

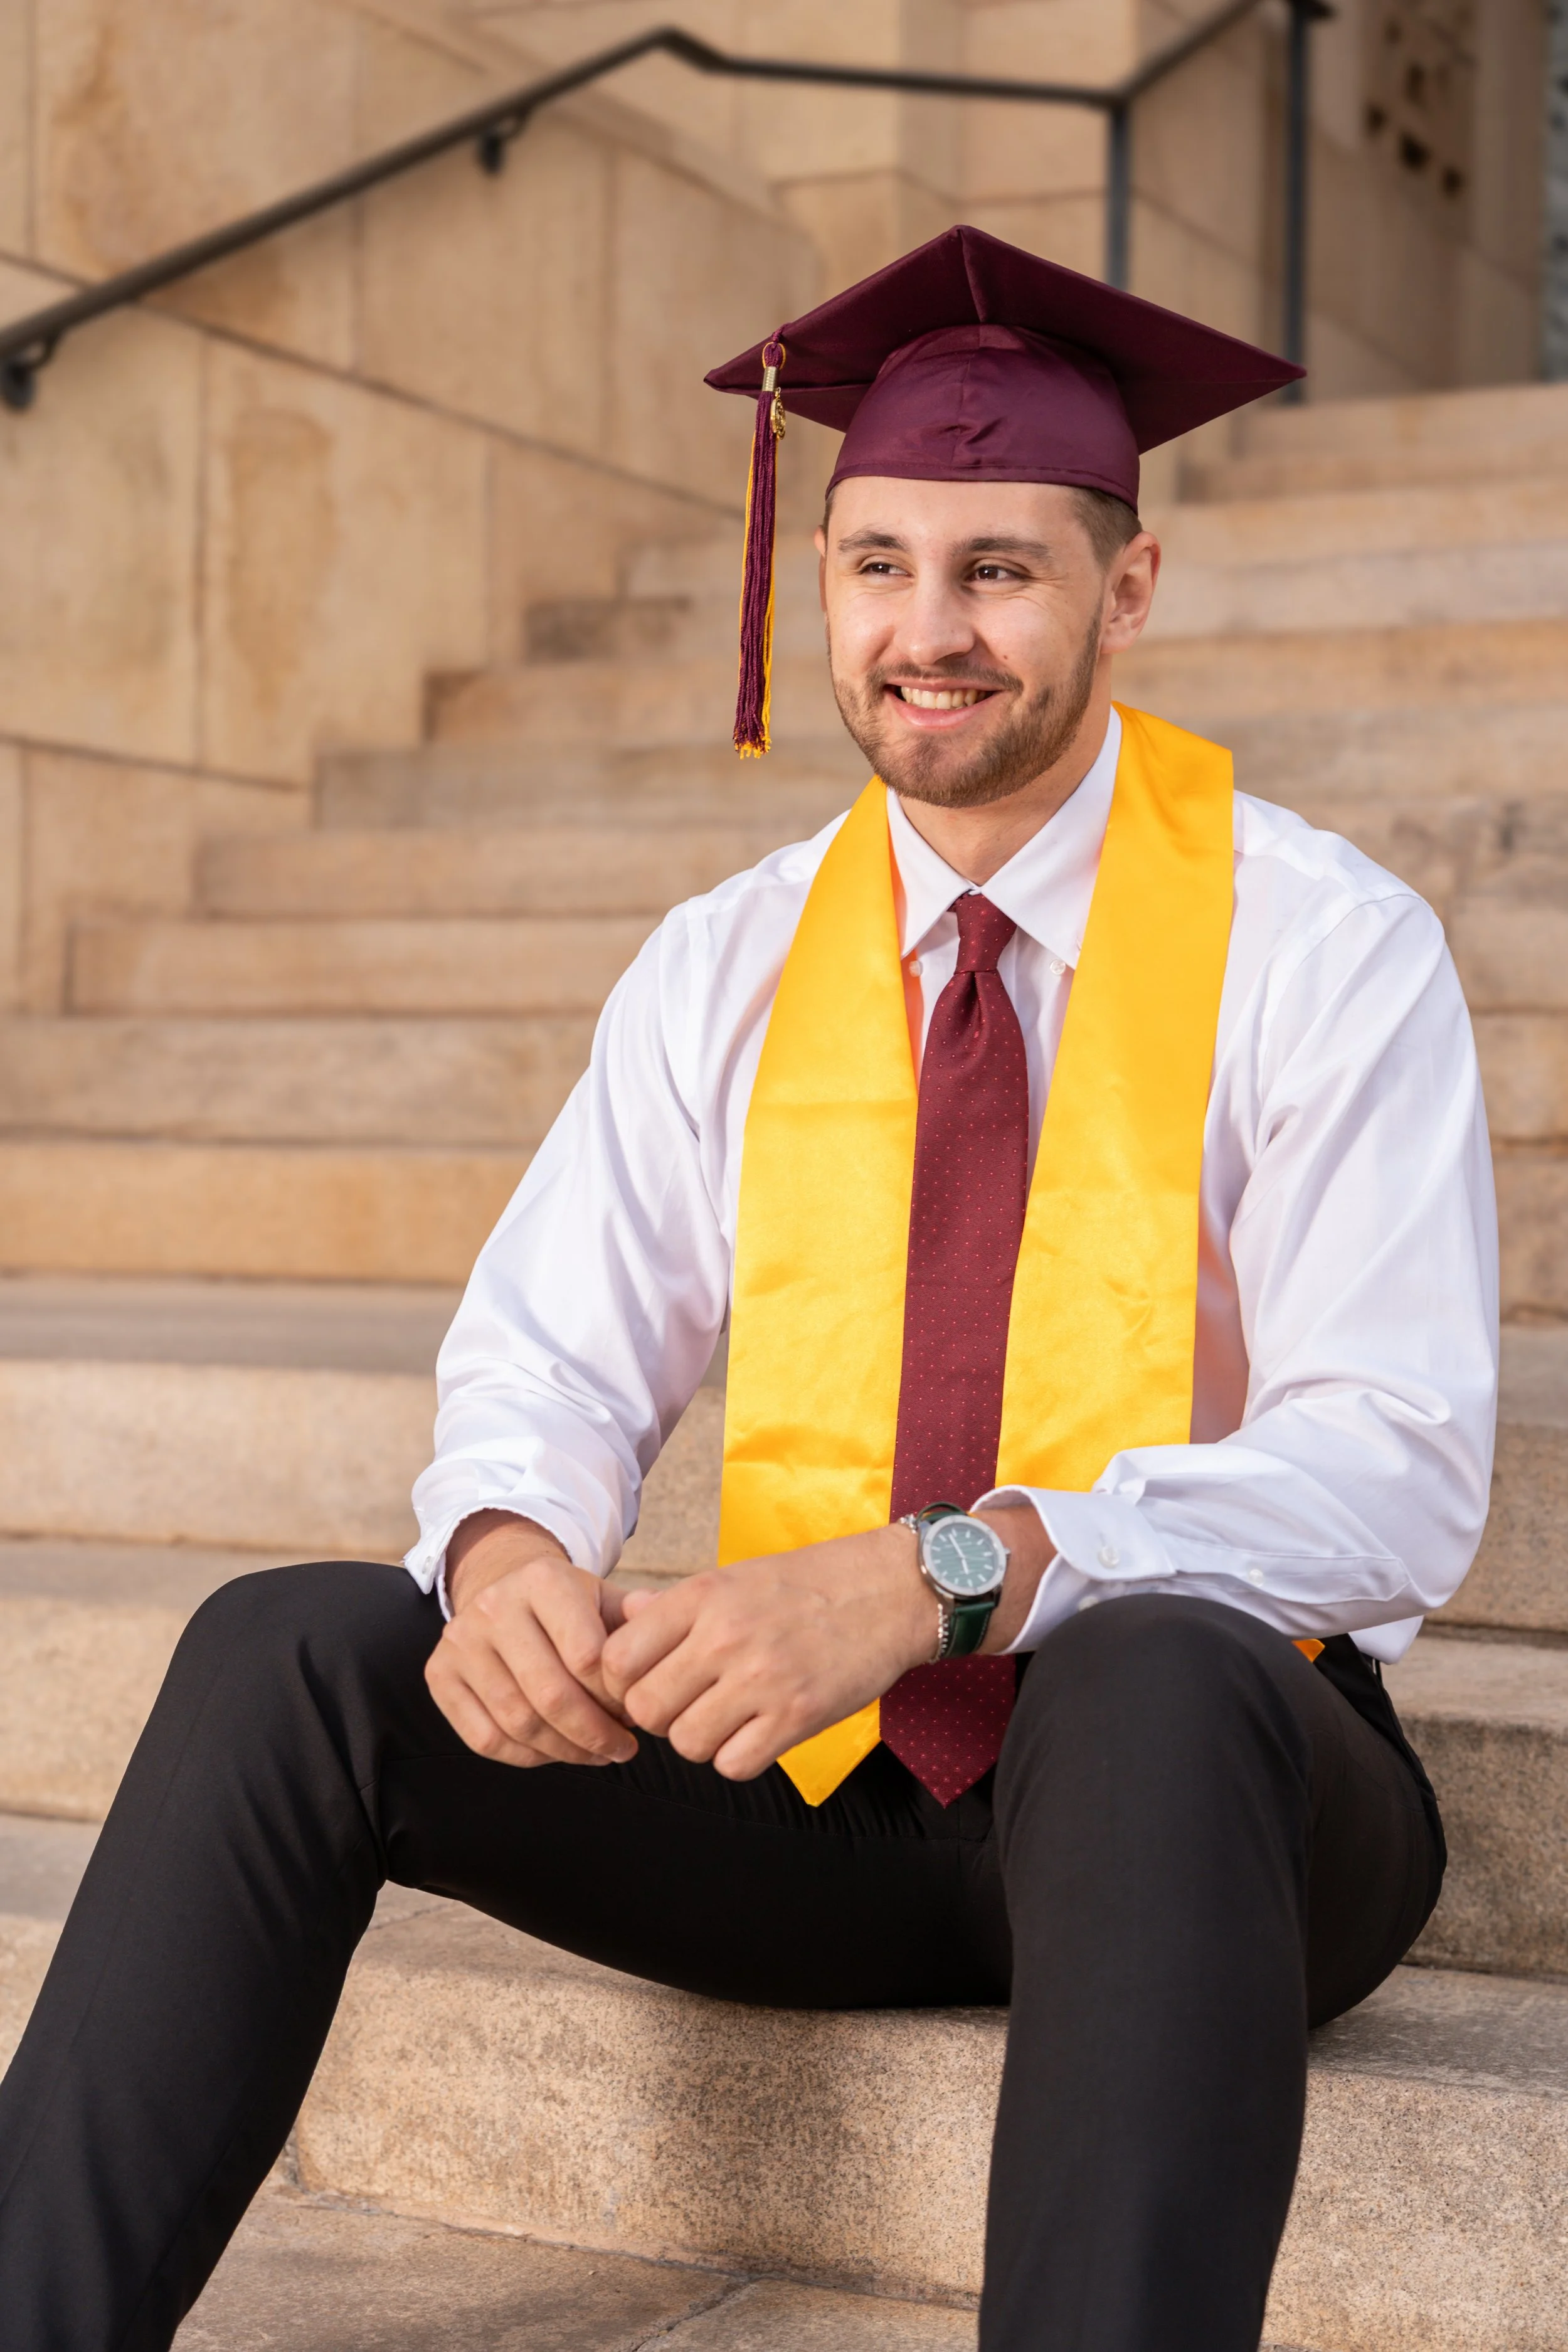
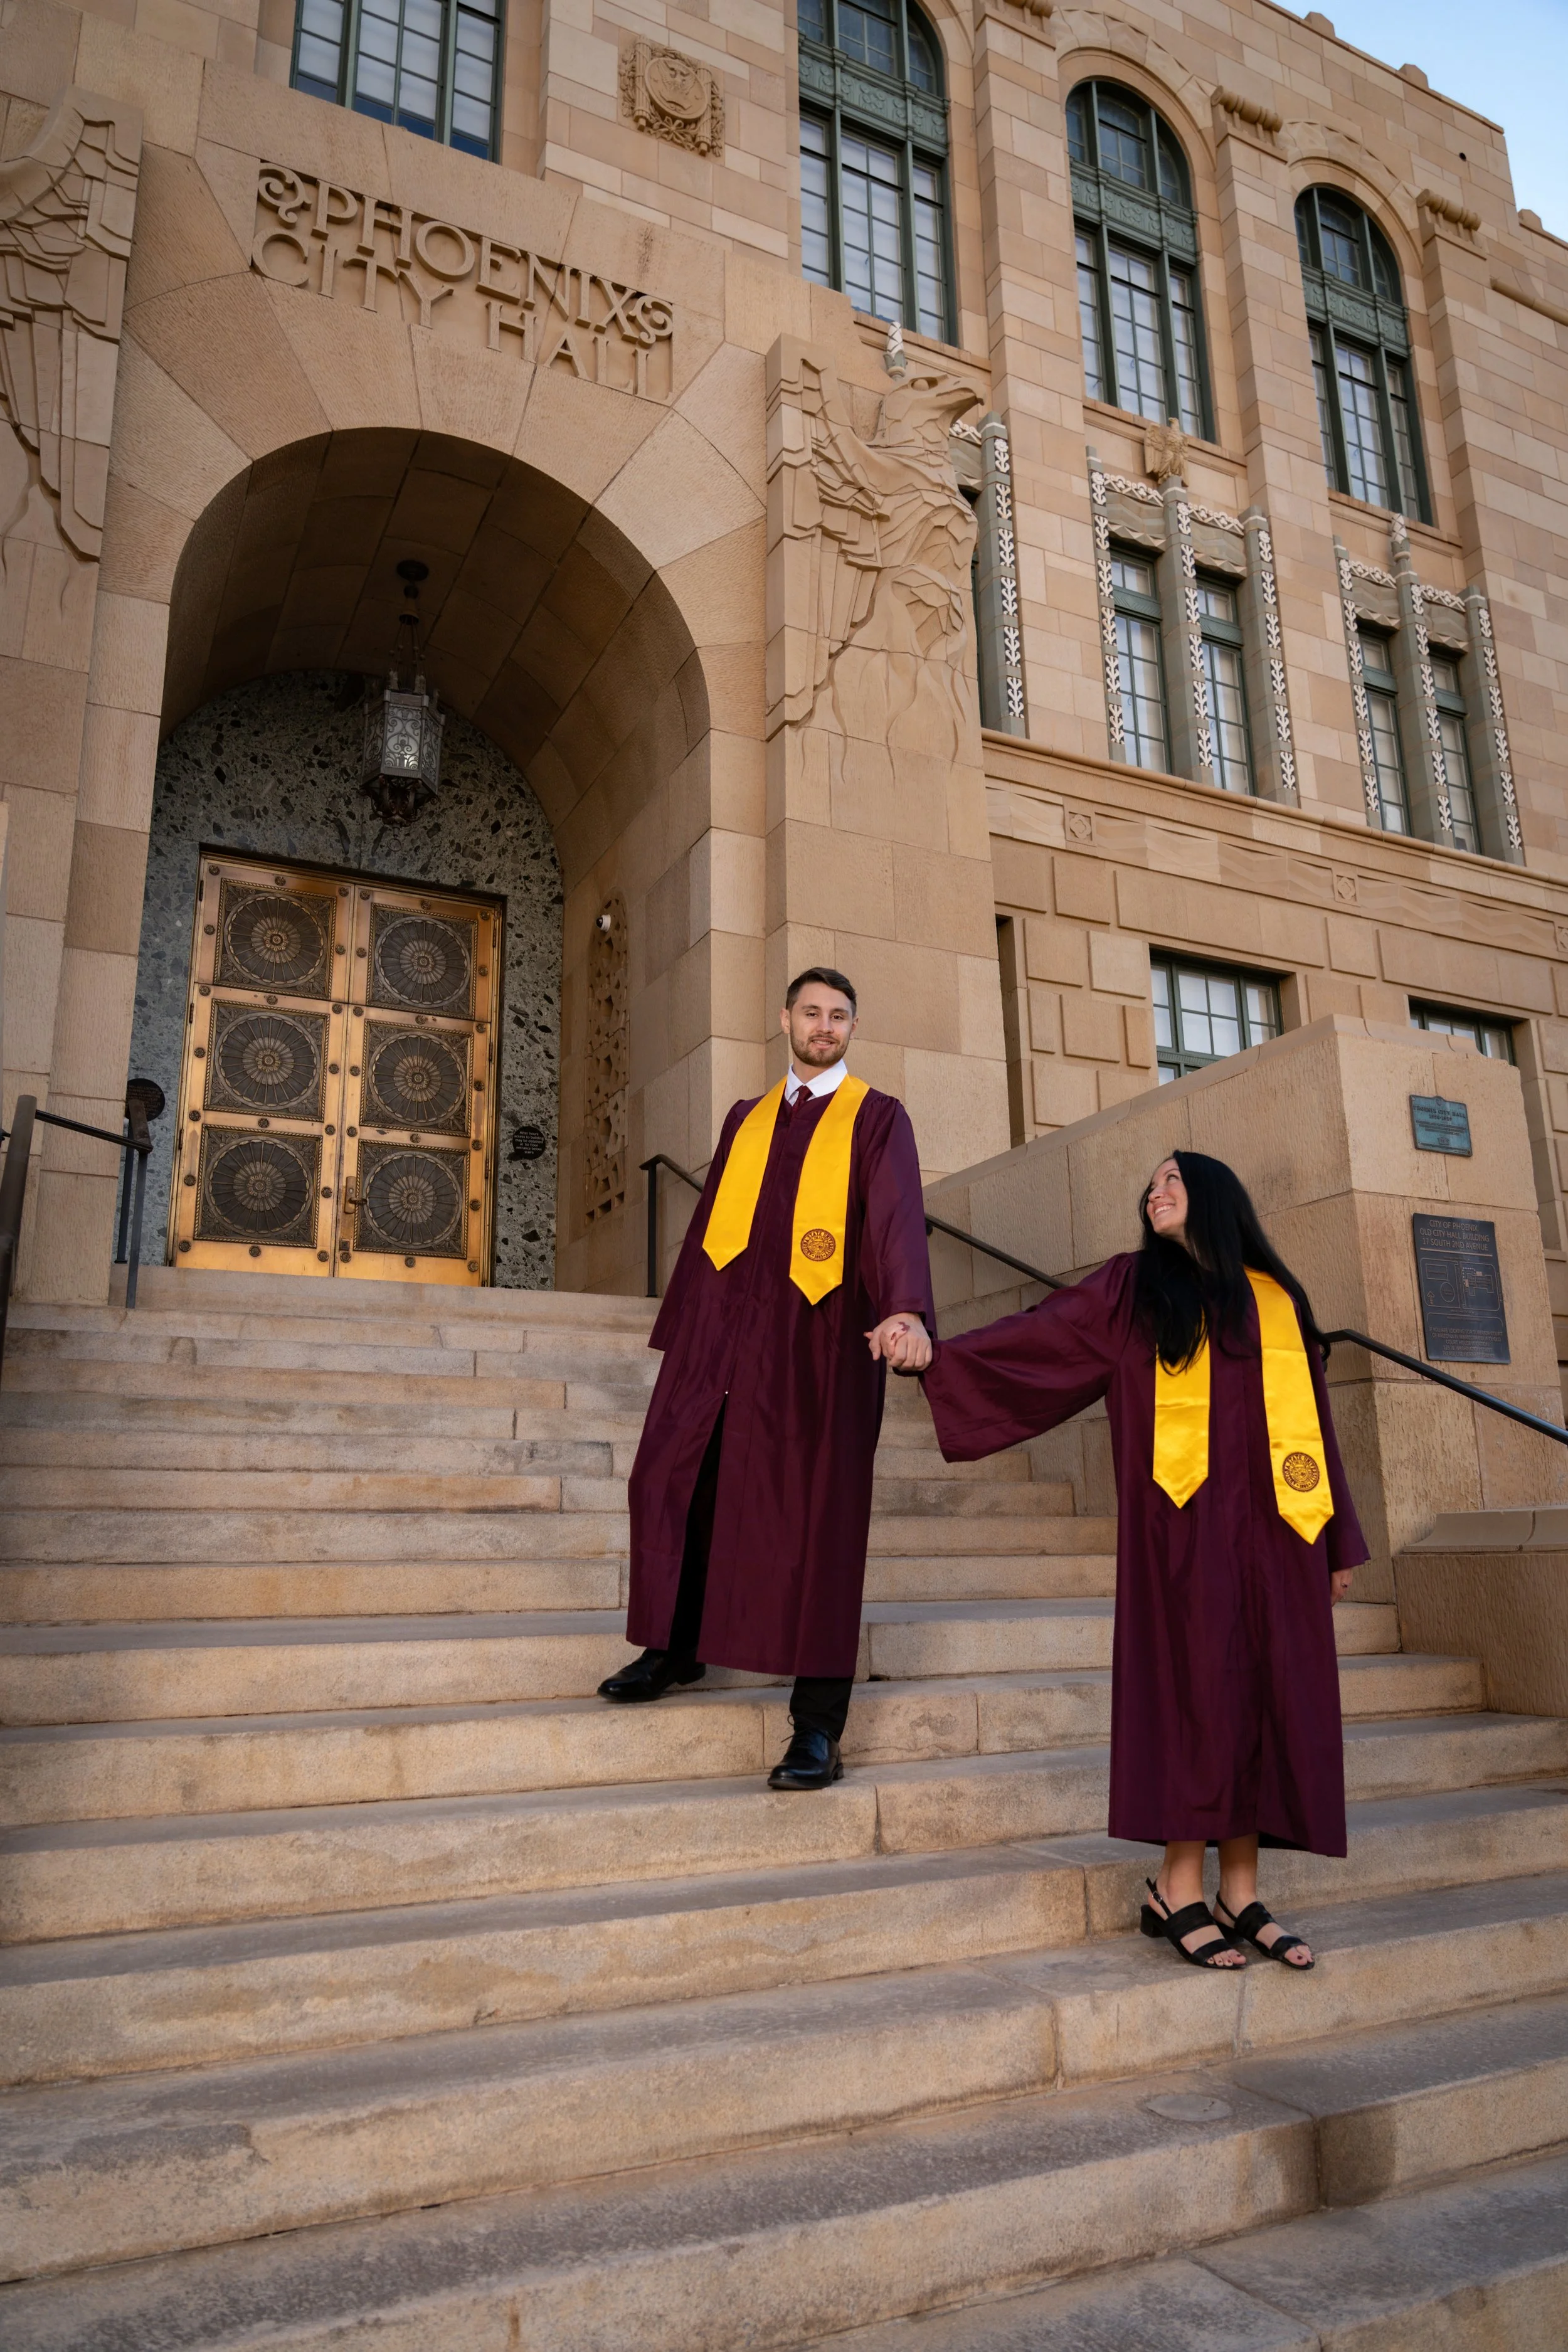
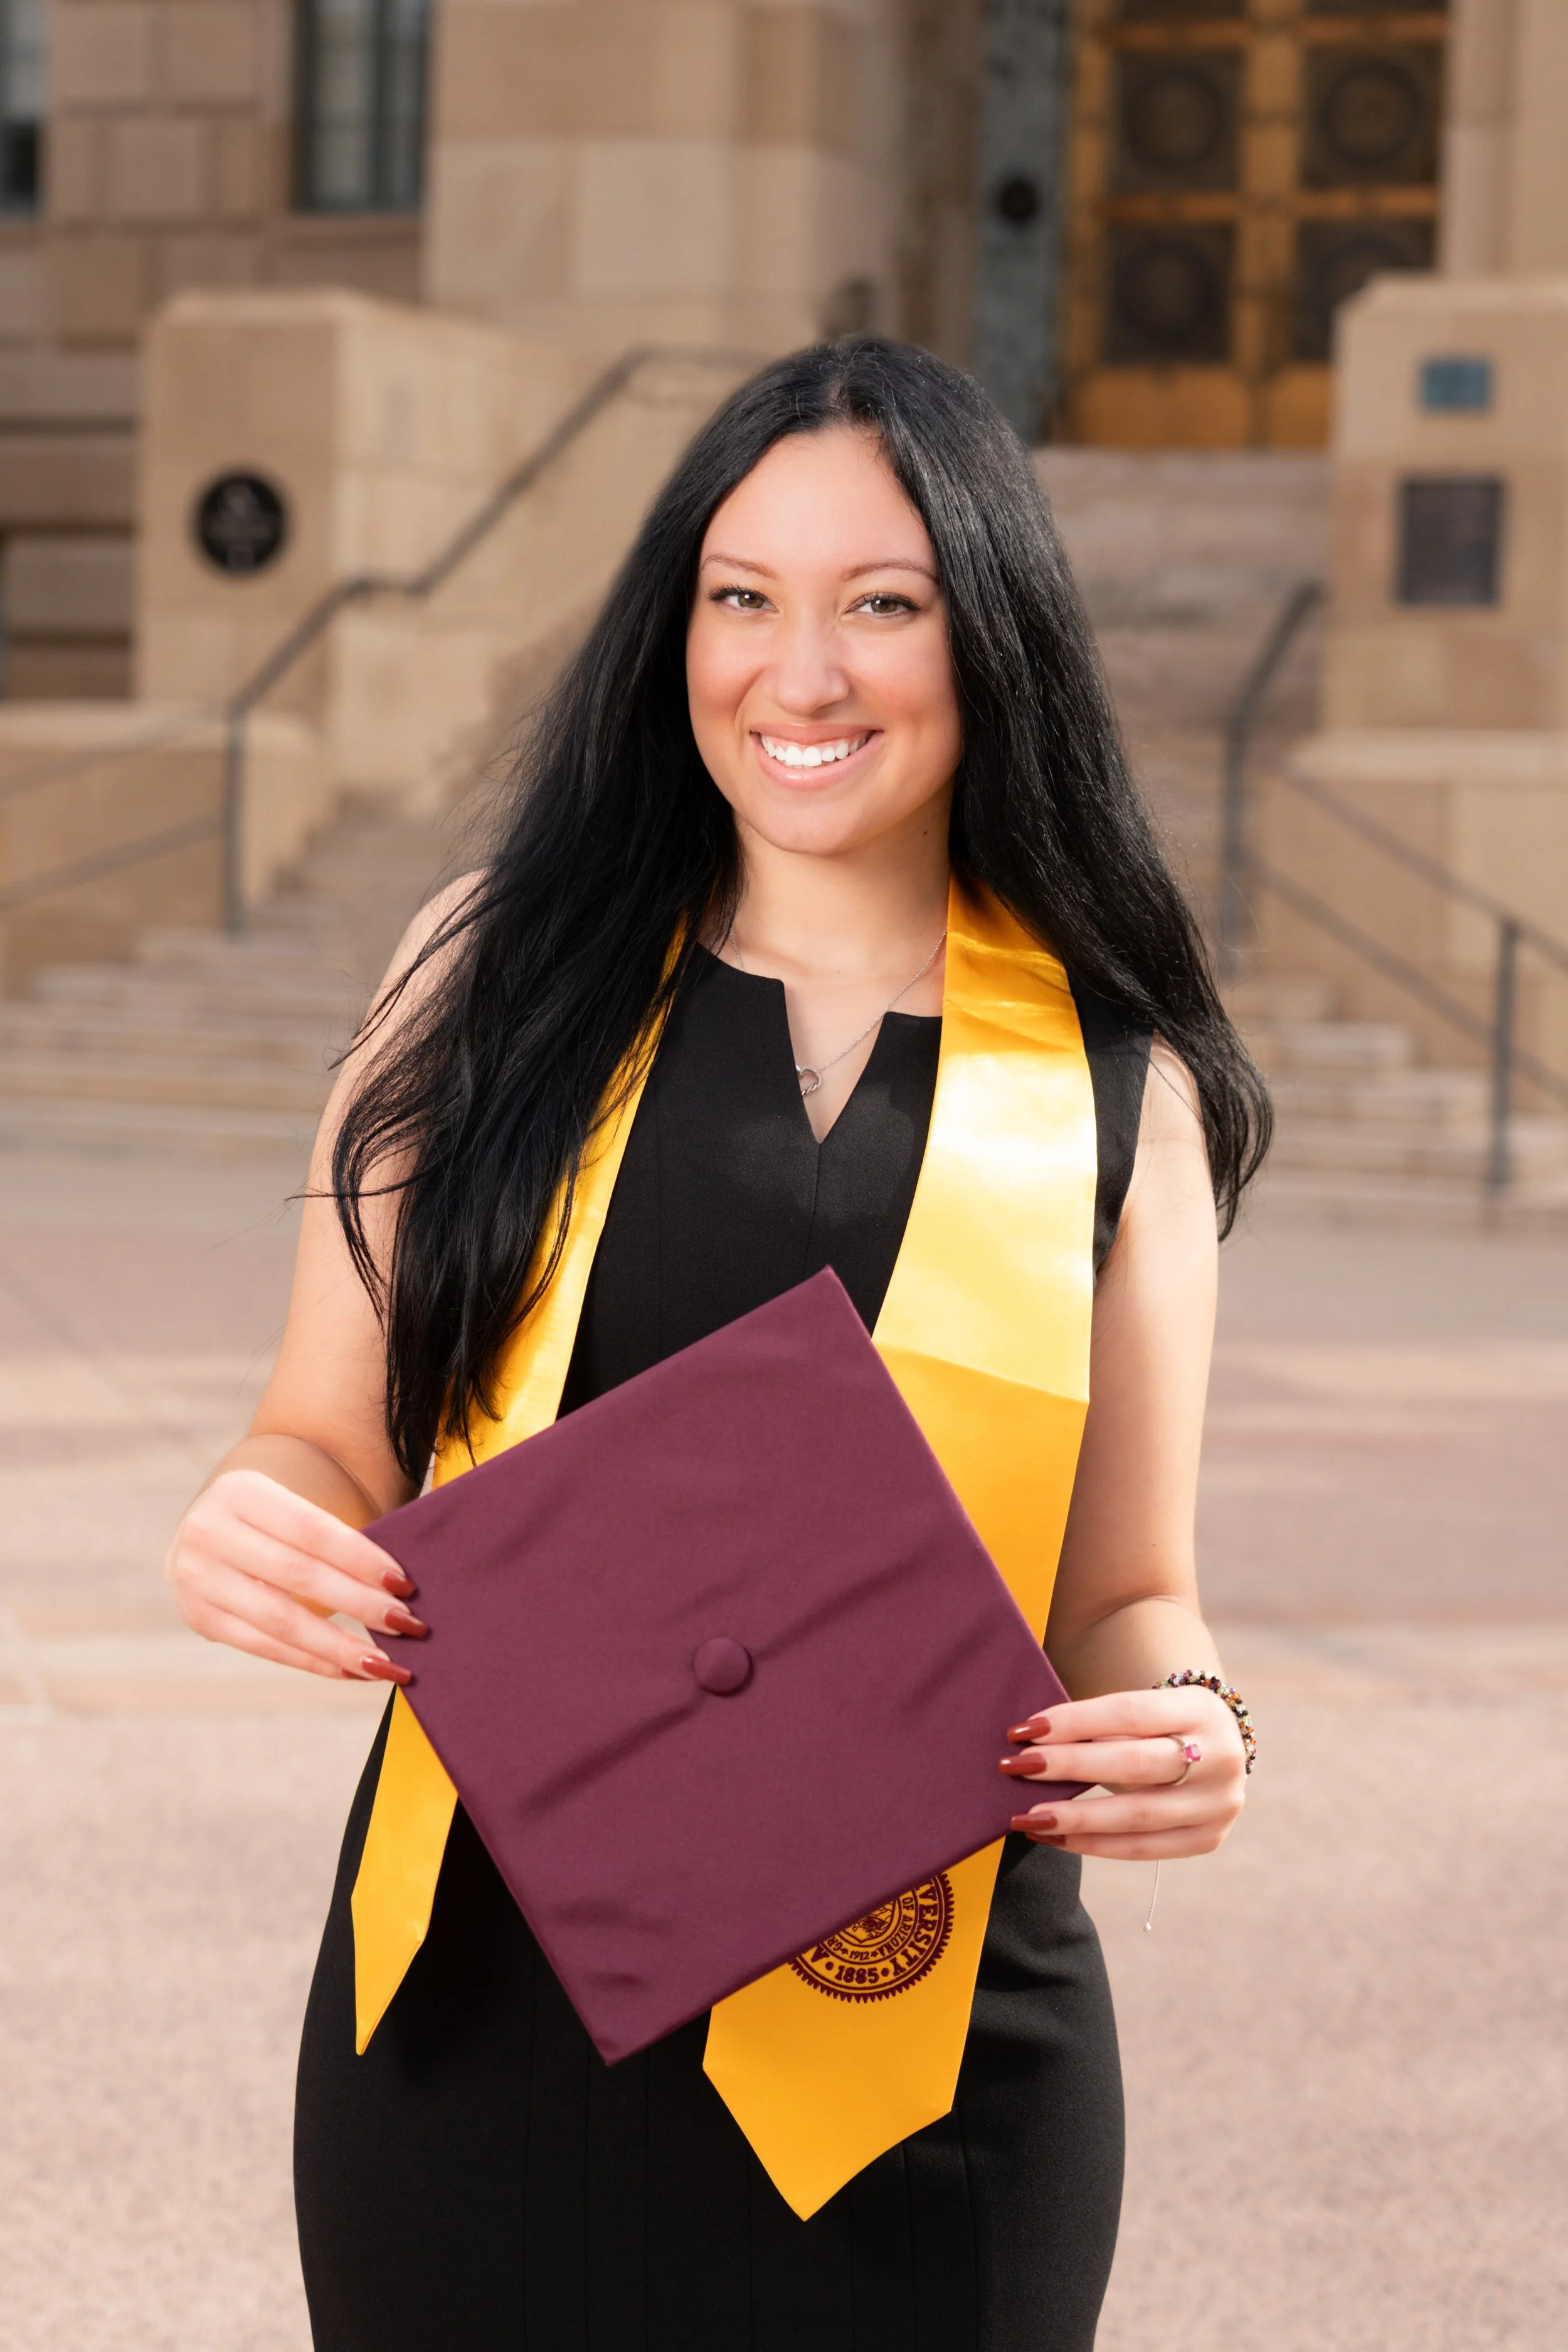
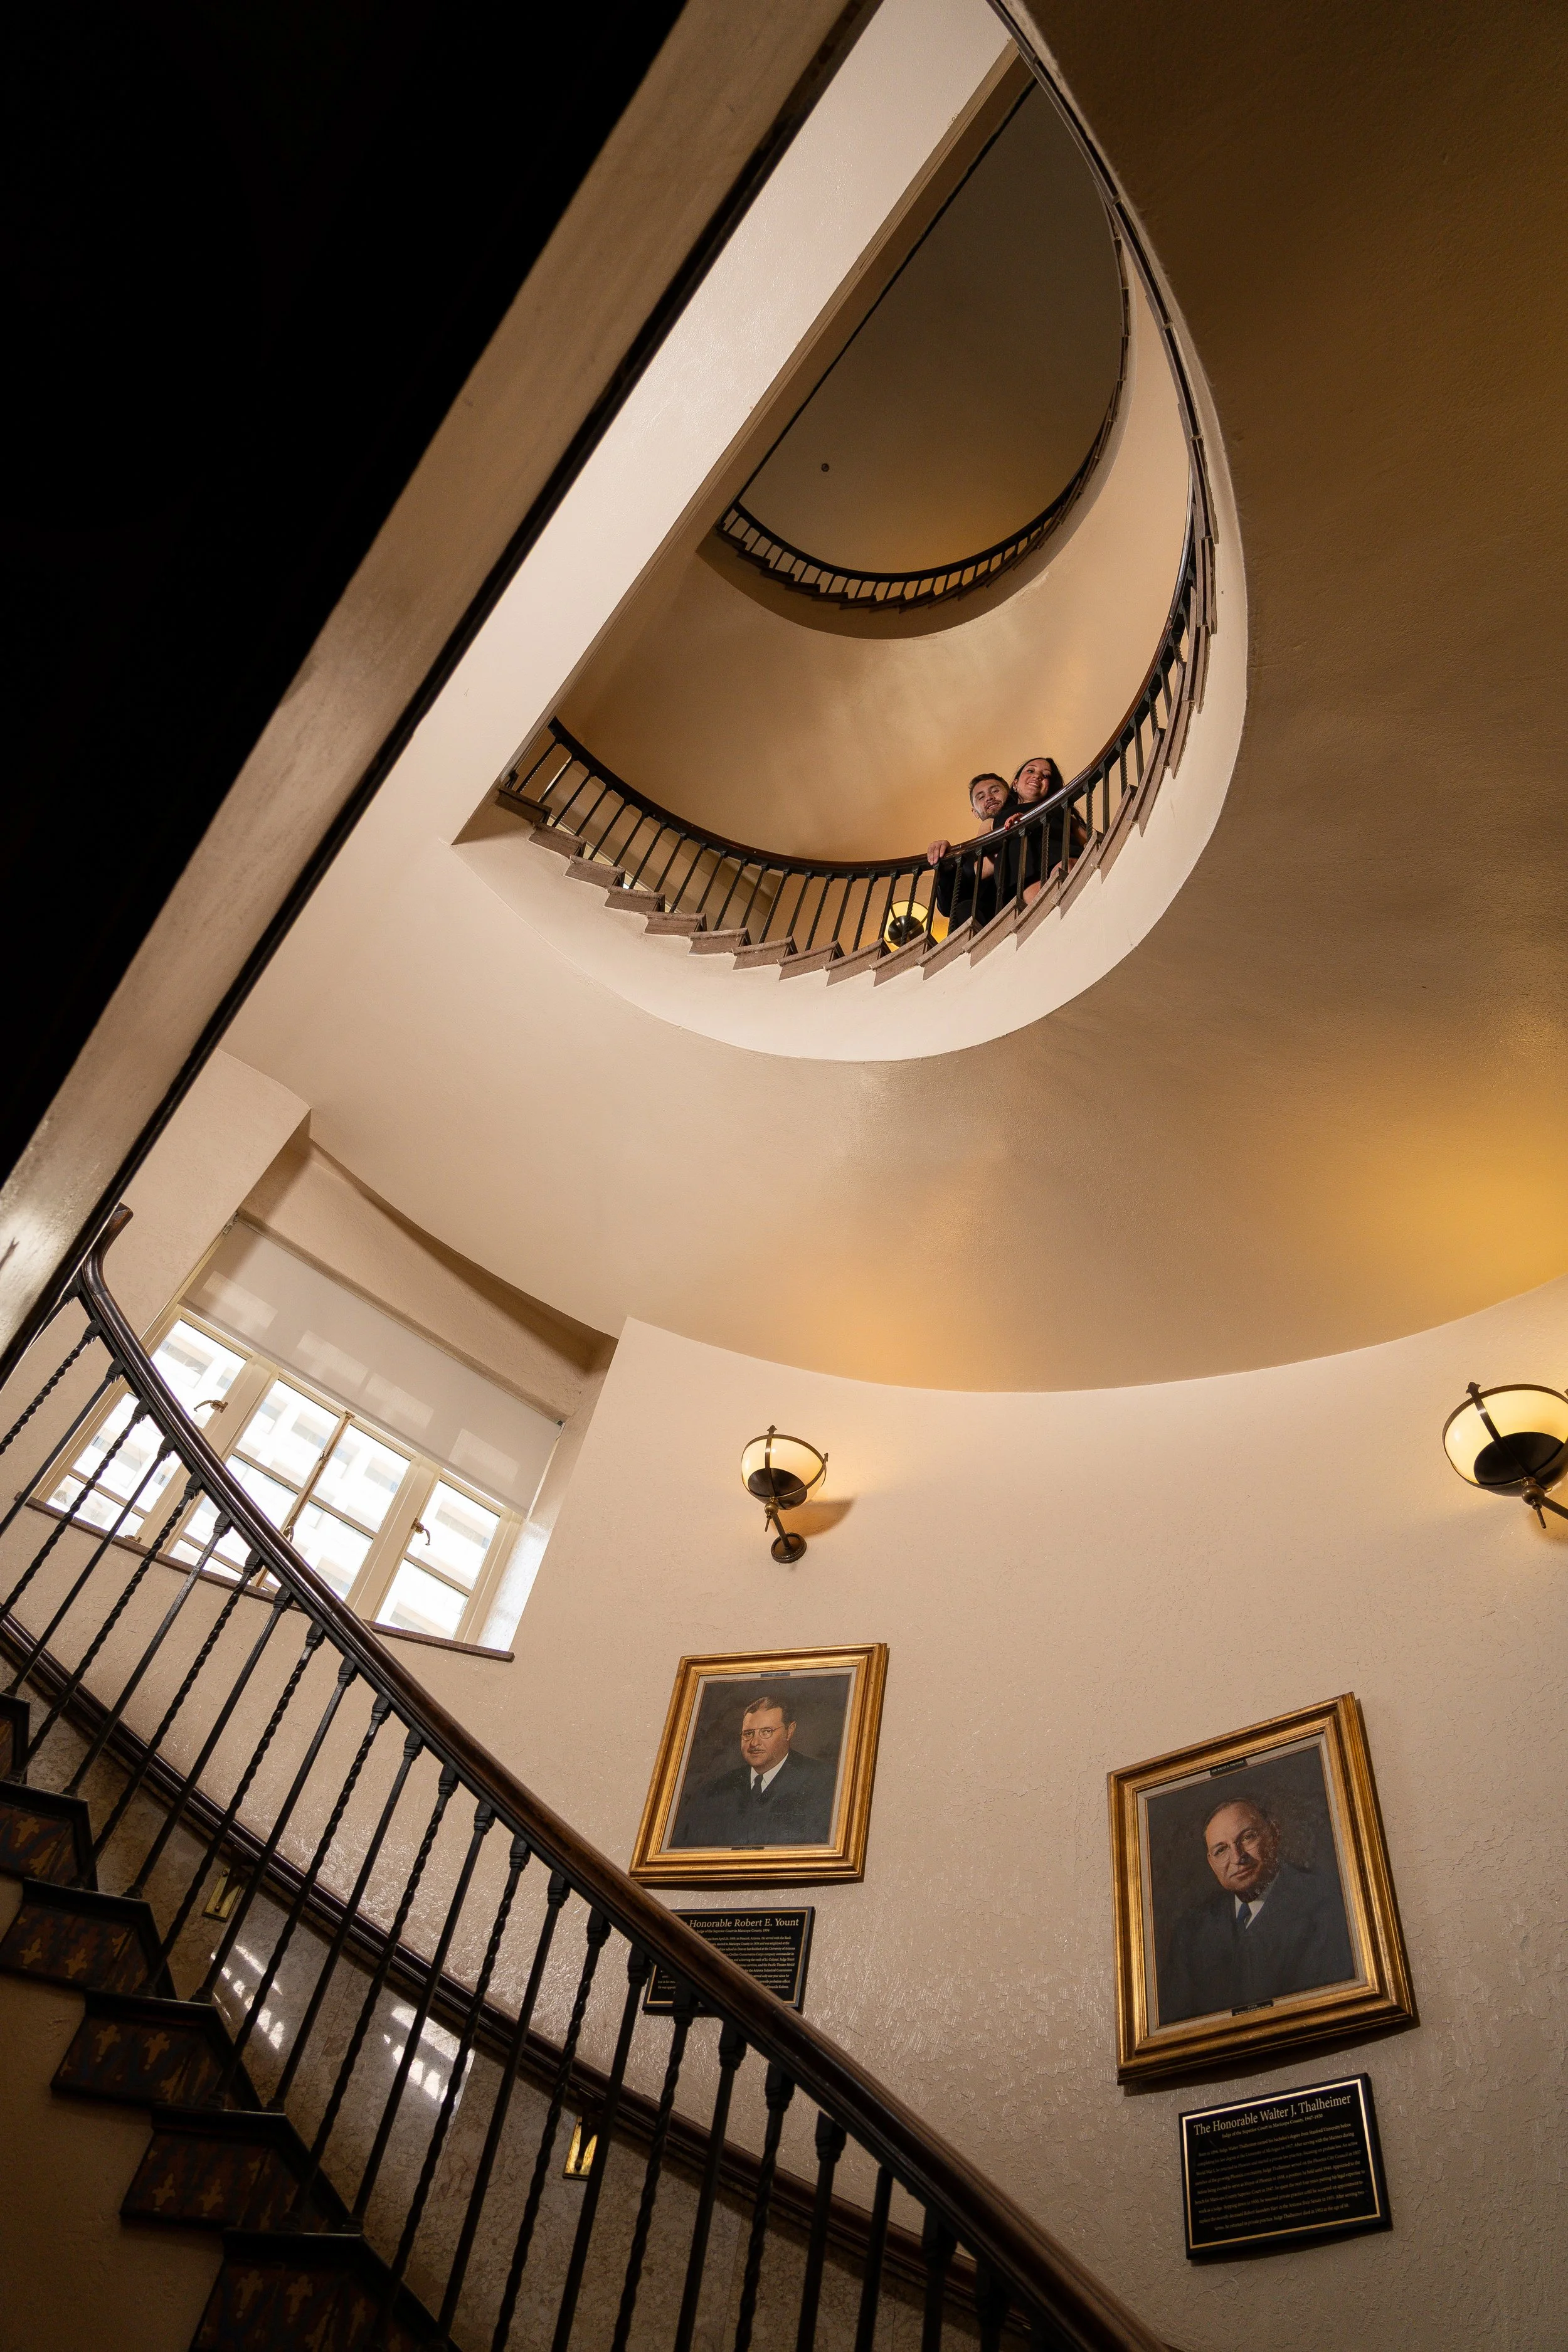
Grad photos at the Old Court House
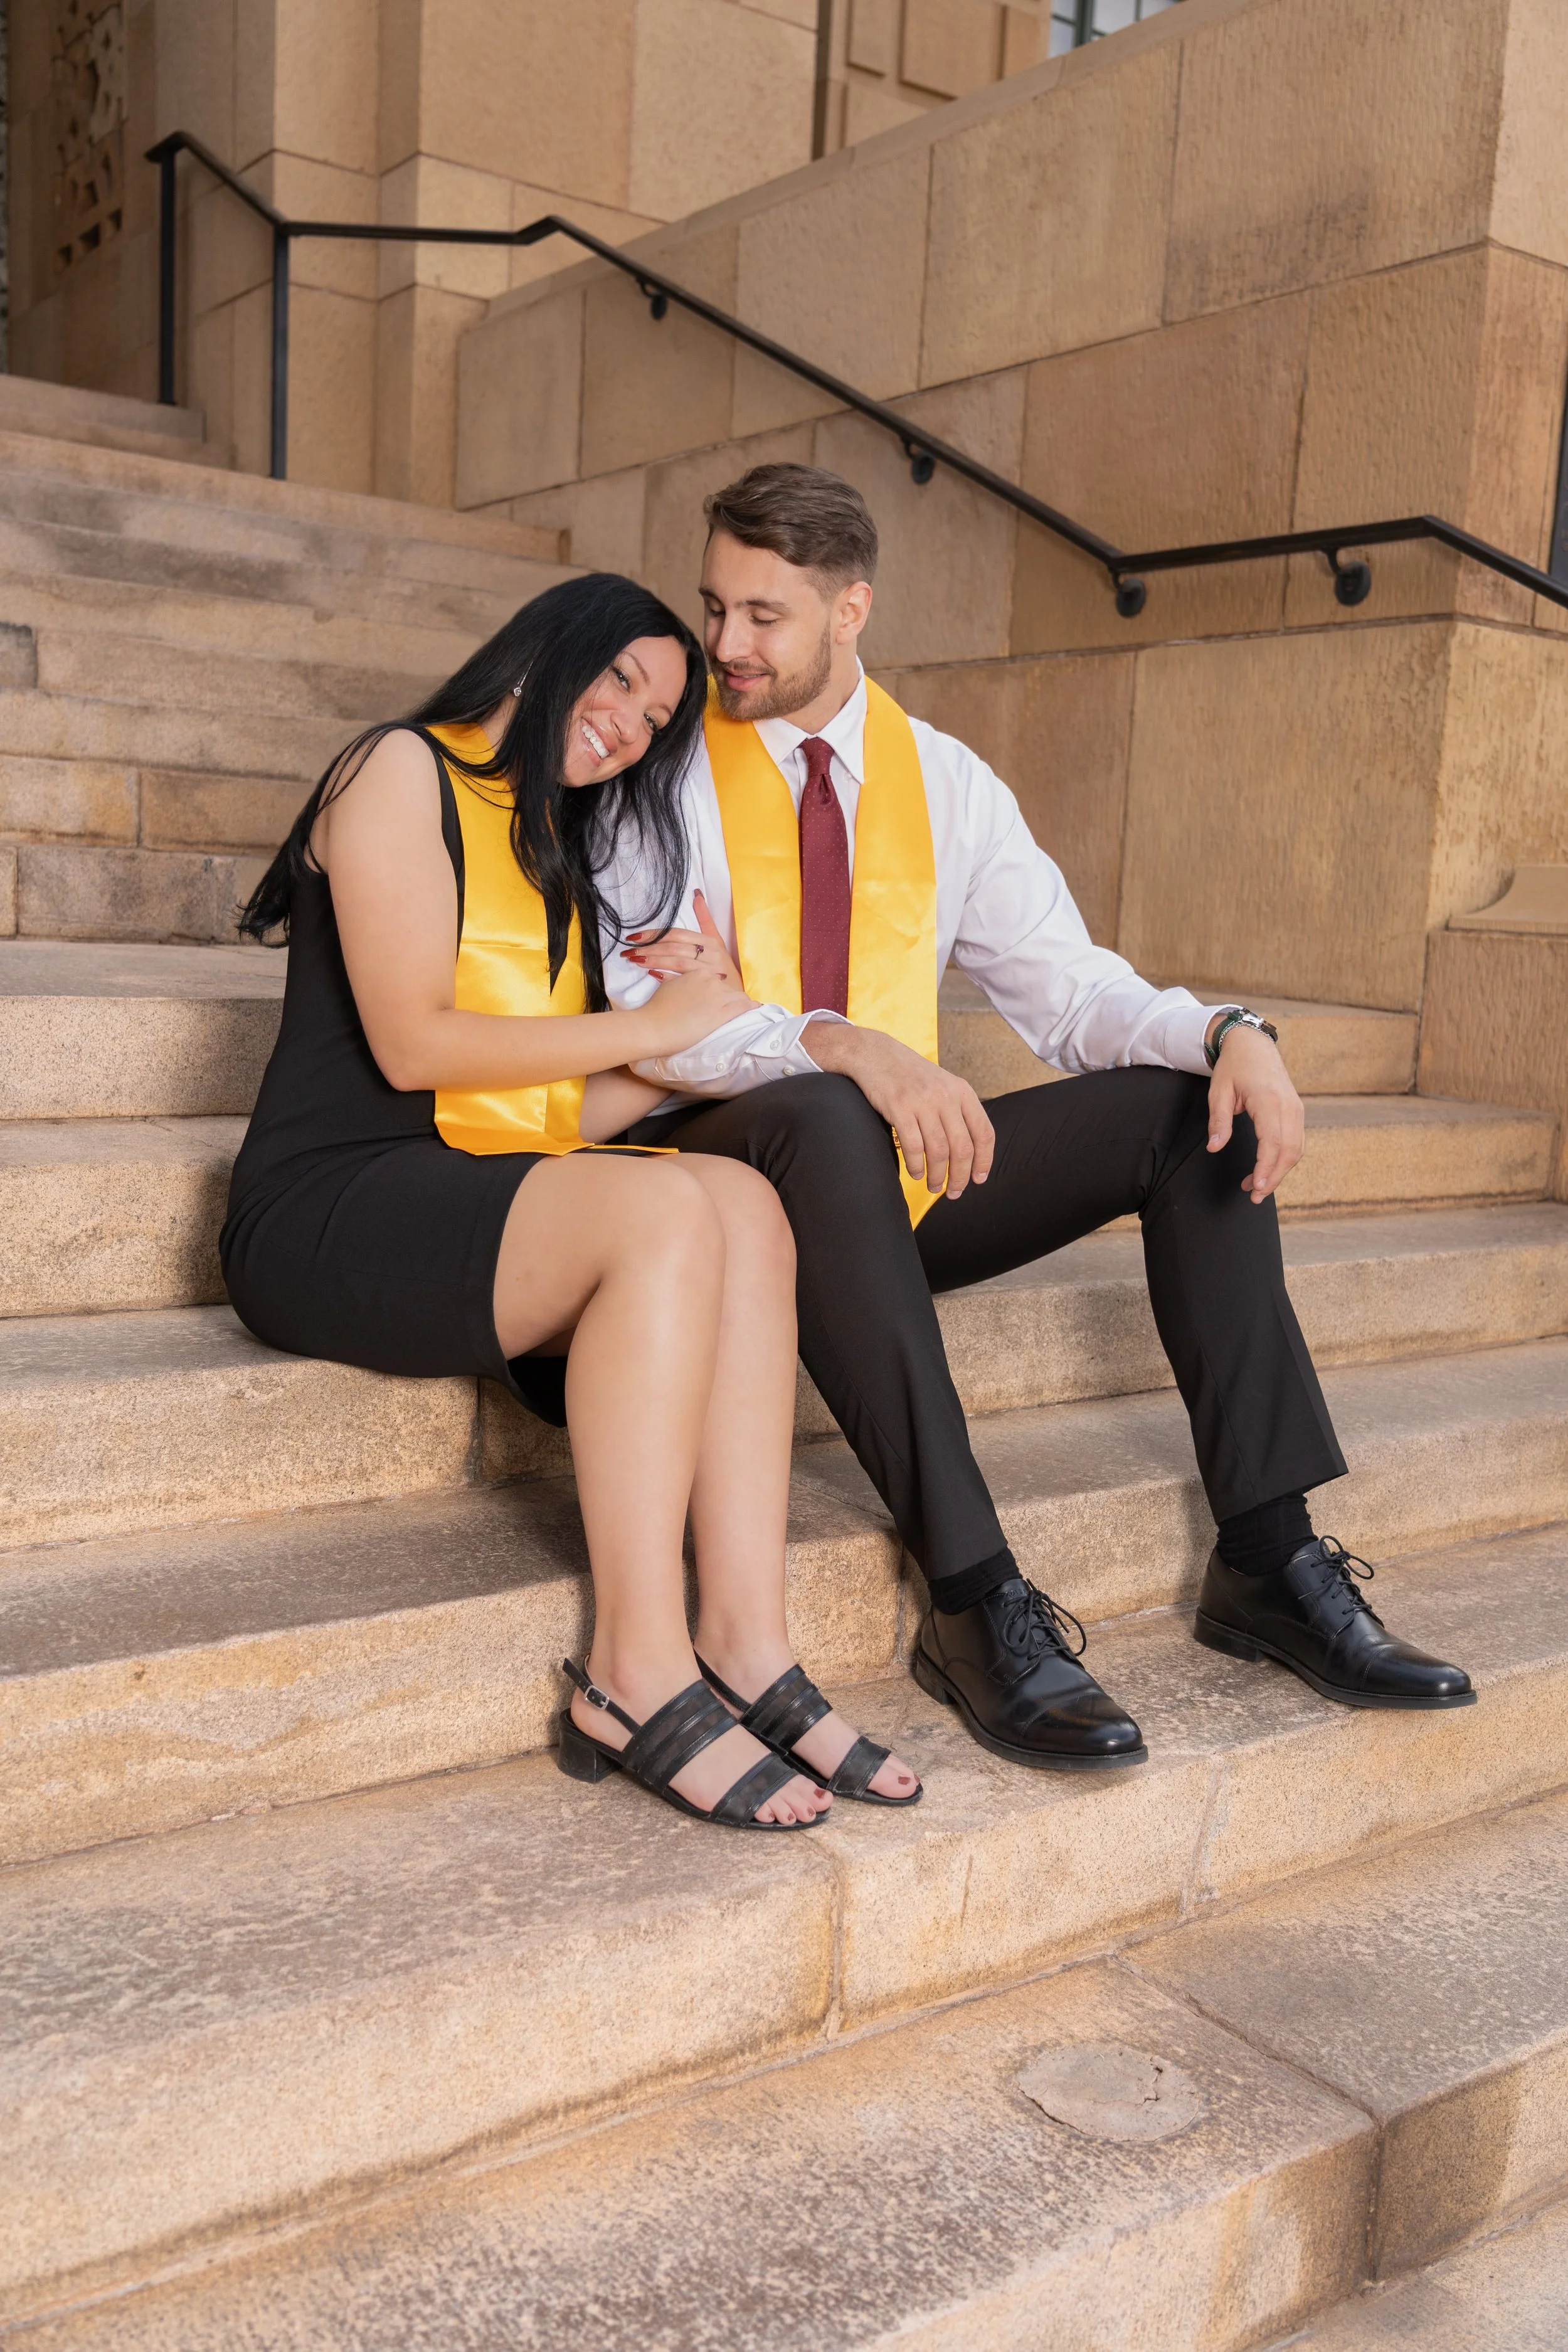
Lauren and Mark at Old Court House
Some photo sessions feel like stepping into the future while honoring the past — and this one was exactly that.
Lauren and Mark graduated from Arizona State University this year and are already making their mark within the Judicial Branch. They’re in love, ambitious, and both working toward careers as attorneys — and one day, judges. When they reached out for graduation photos, they wanted their session to reflect where they’re headed next.
That’s how we ended up at one of the most historic and visually striking buildings in Phoenix: the Old Courthouse.
Why the Old Courthouse Matters
For Lauren and Mark, the Old Courthouse wasn’t merely a scenic backdrop — it symbolized their commitment to the legal field and the future they’re building together. The texture of the brick, the marble accents, the sense of history in every hallway — it all served as the perfect setting for a couple deeply connected to the justice system.
Lighting the Story
On this shoot, I brought my trusty Westcott FJ400, one of my favorite tools in my kit. Using lighting on location lets me keep the subjects evenly lit while still creating a dramatic look where the foreground gently pops against a darker background. It turned a beautiful day into images with depth, shape, and intention.
The weather couldn’t have been better — bright but not harsh, perfect for mixing natural ambience with controlled strobe light.

A Session with Variety and Personality
We captured individual portraits and couple shots, and honestly, Lauren and Mark made it easy. They were fun, expressive, and willing to try different poses and ideas. Couple photos are a fantastic addition to grad sessions — they bring warmth, connection, and a spark you can’t replicate with solo portraits.
We also made sure they walked away with:
Traditional grad photos in full regalia
Professional headshots they can use as they move into the legal field
Casual and more formal portraits in their dress clothes
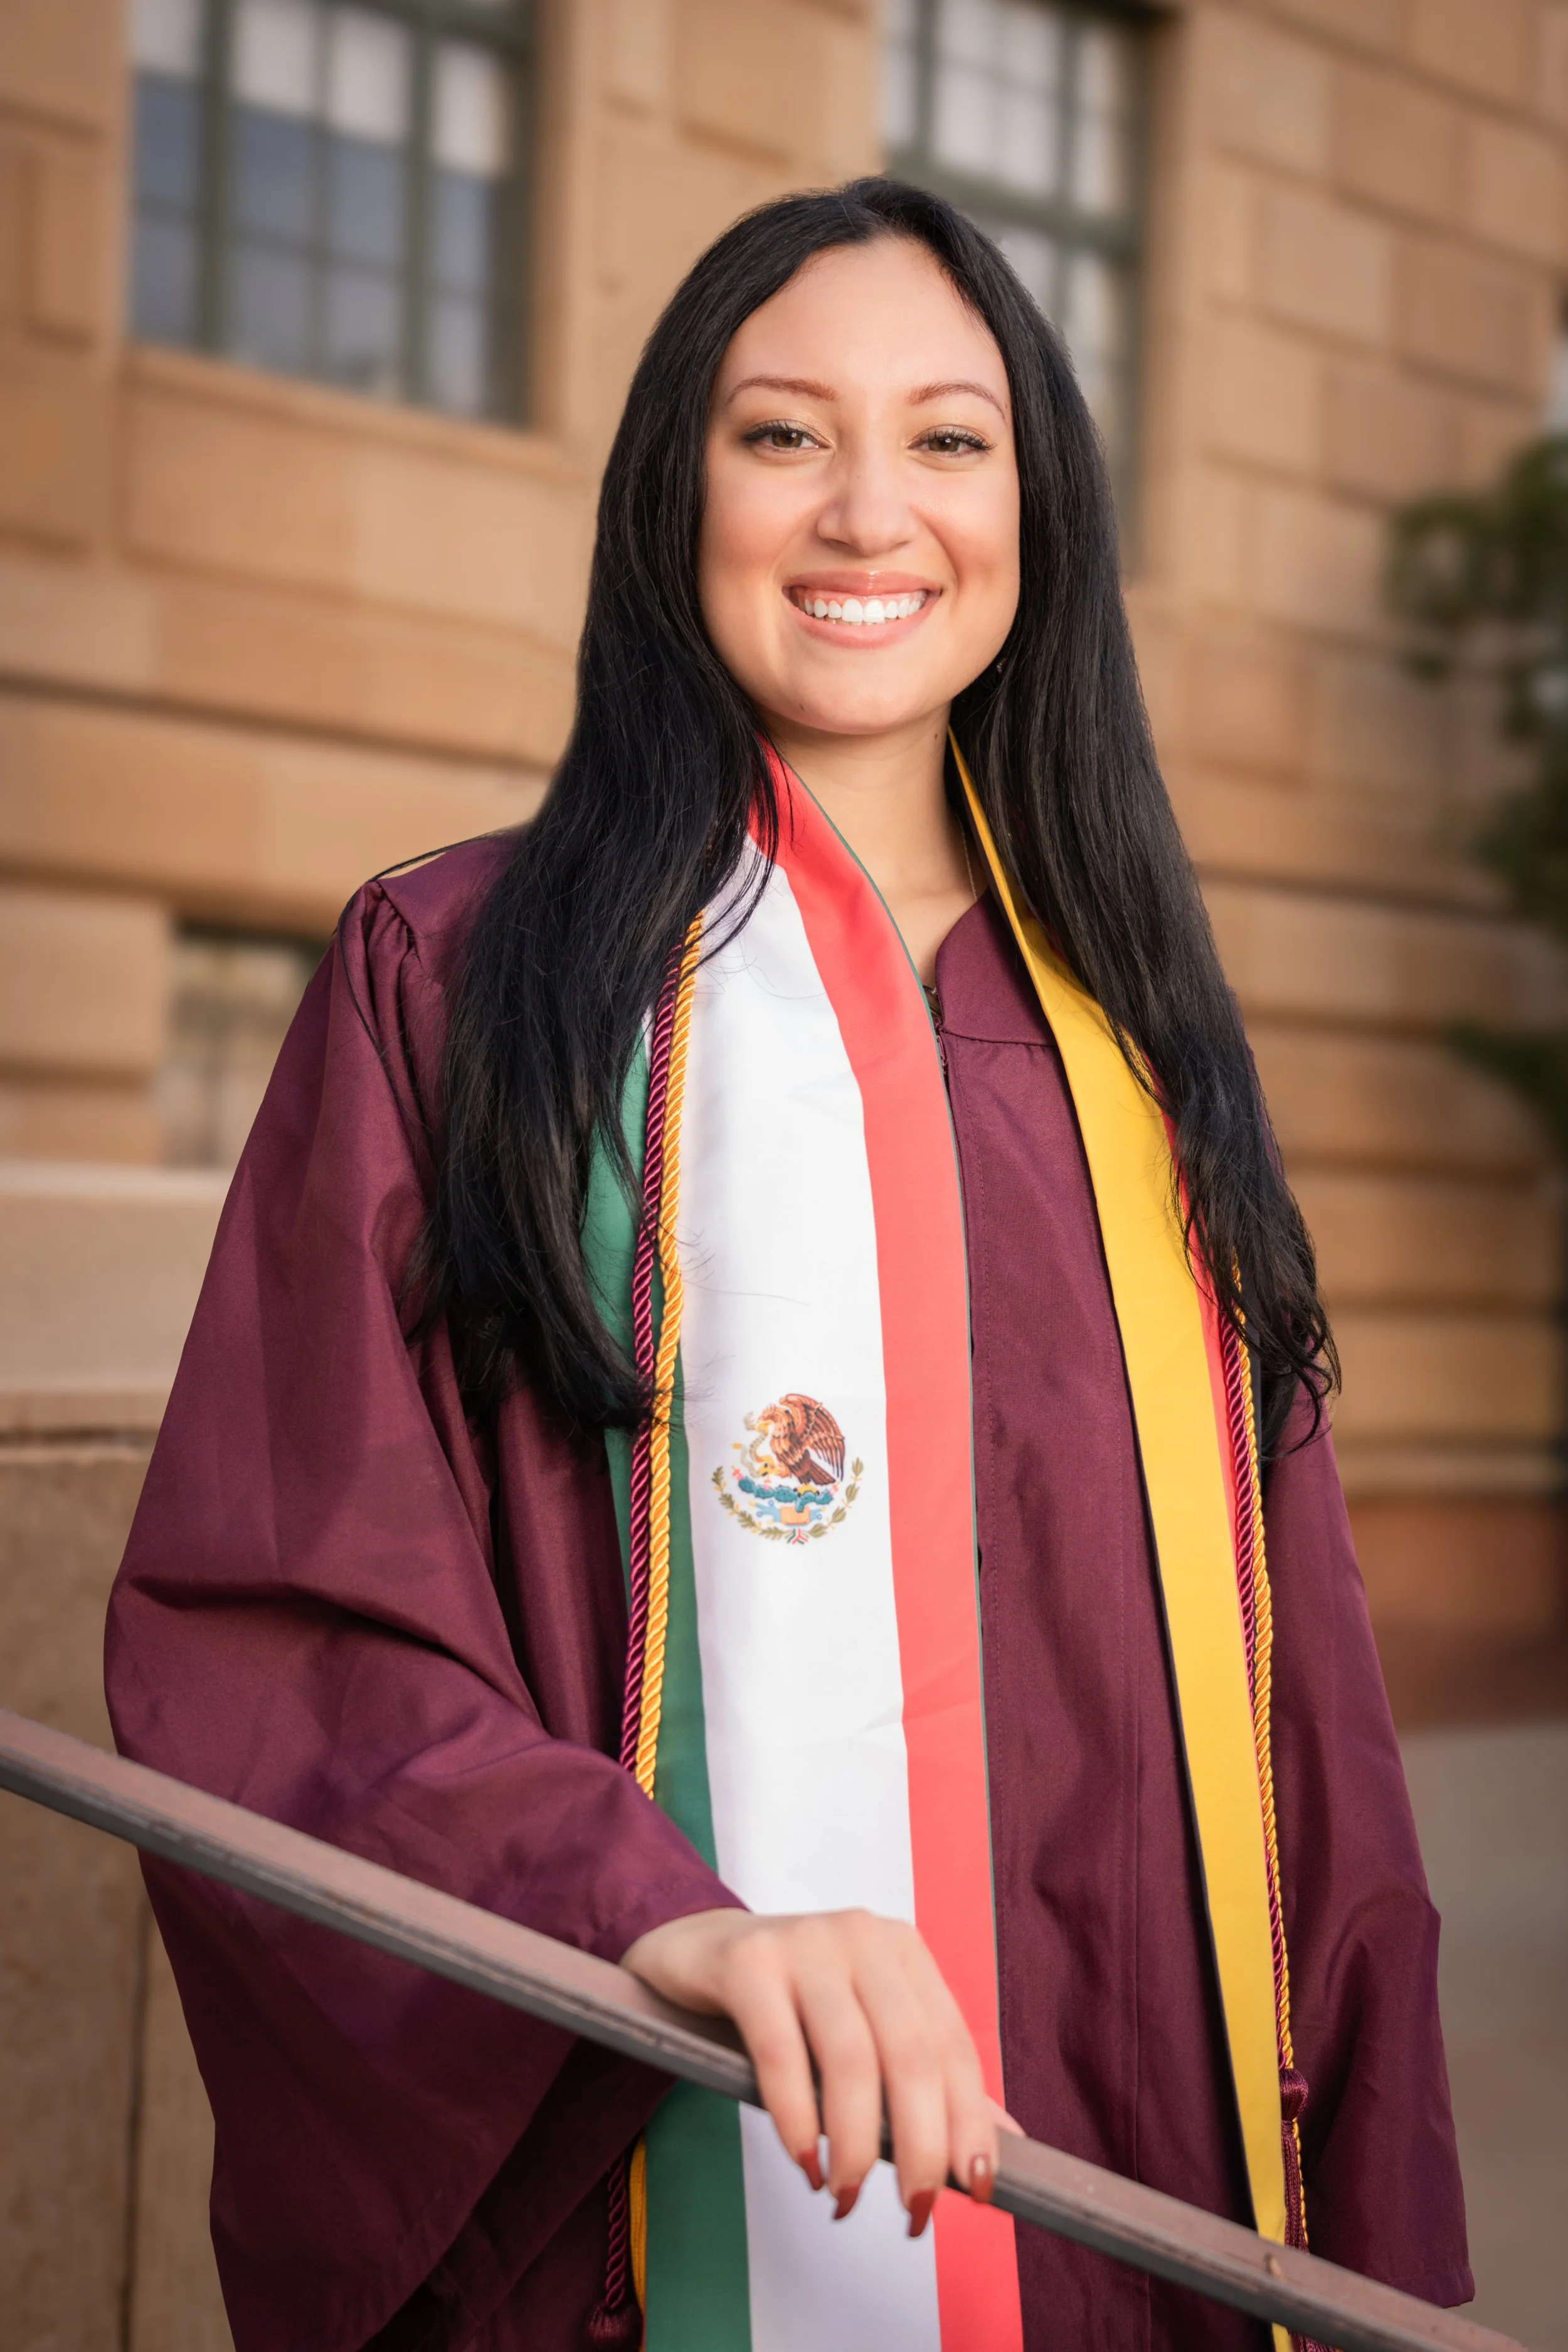
I especially loved featuring Lauren’s custom regalia, which proudly incorporated the Mexican and German flags — a beautiful reflection of identity, heritage, and accomplishment.
Planning the Vision Together
Before the shoot, Lauren sent me several inspiration photos she liked. Not only did that help me understand her aesthetic, but it started a great creative conversation. From those examples, I could tell immediately that the shoot was going to be fun — and it absolutely was.

Inside Access
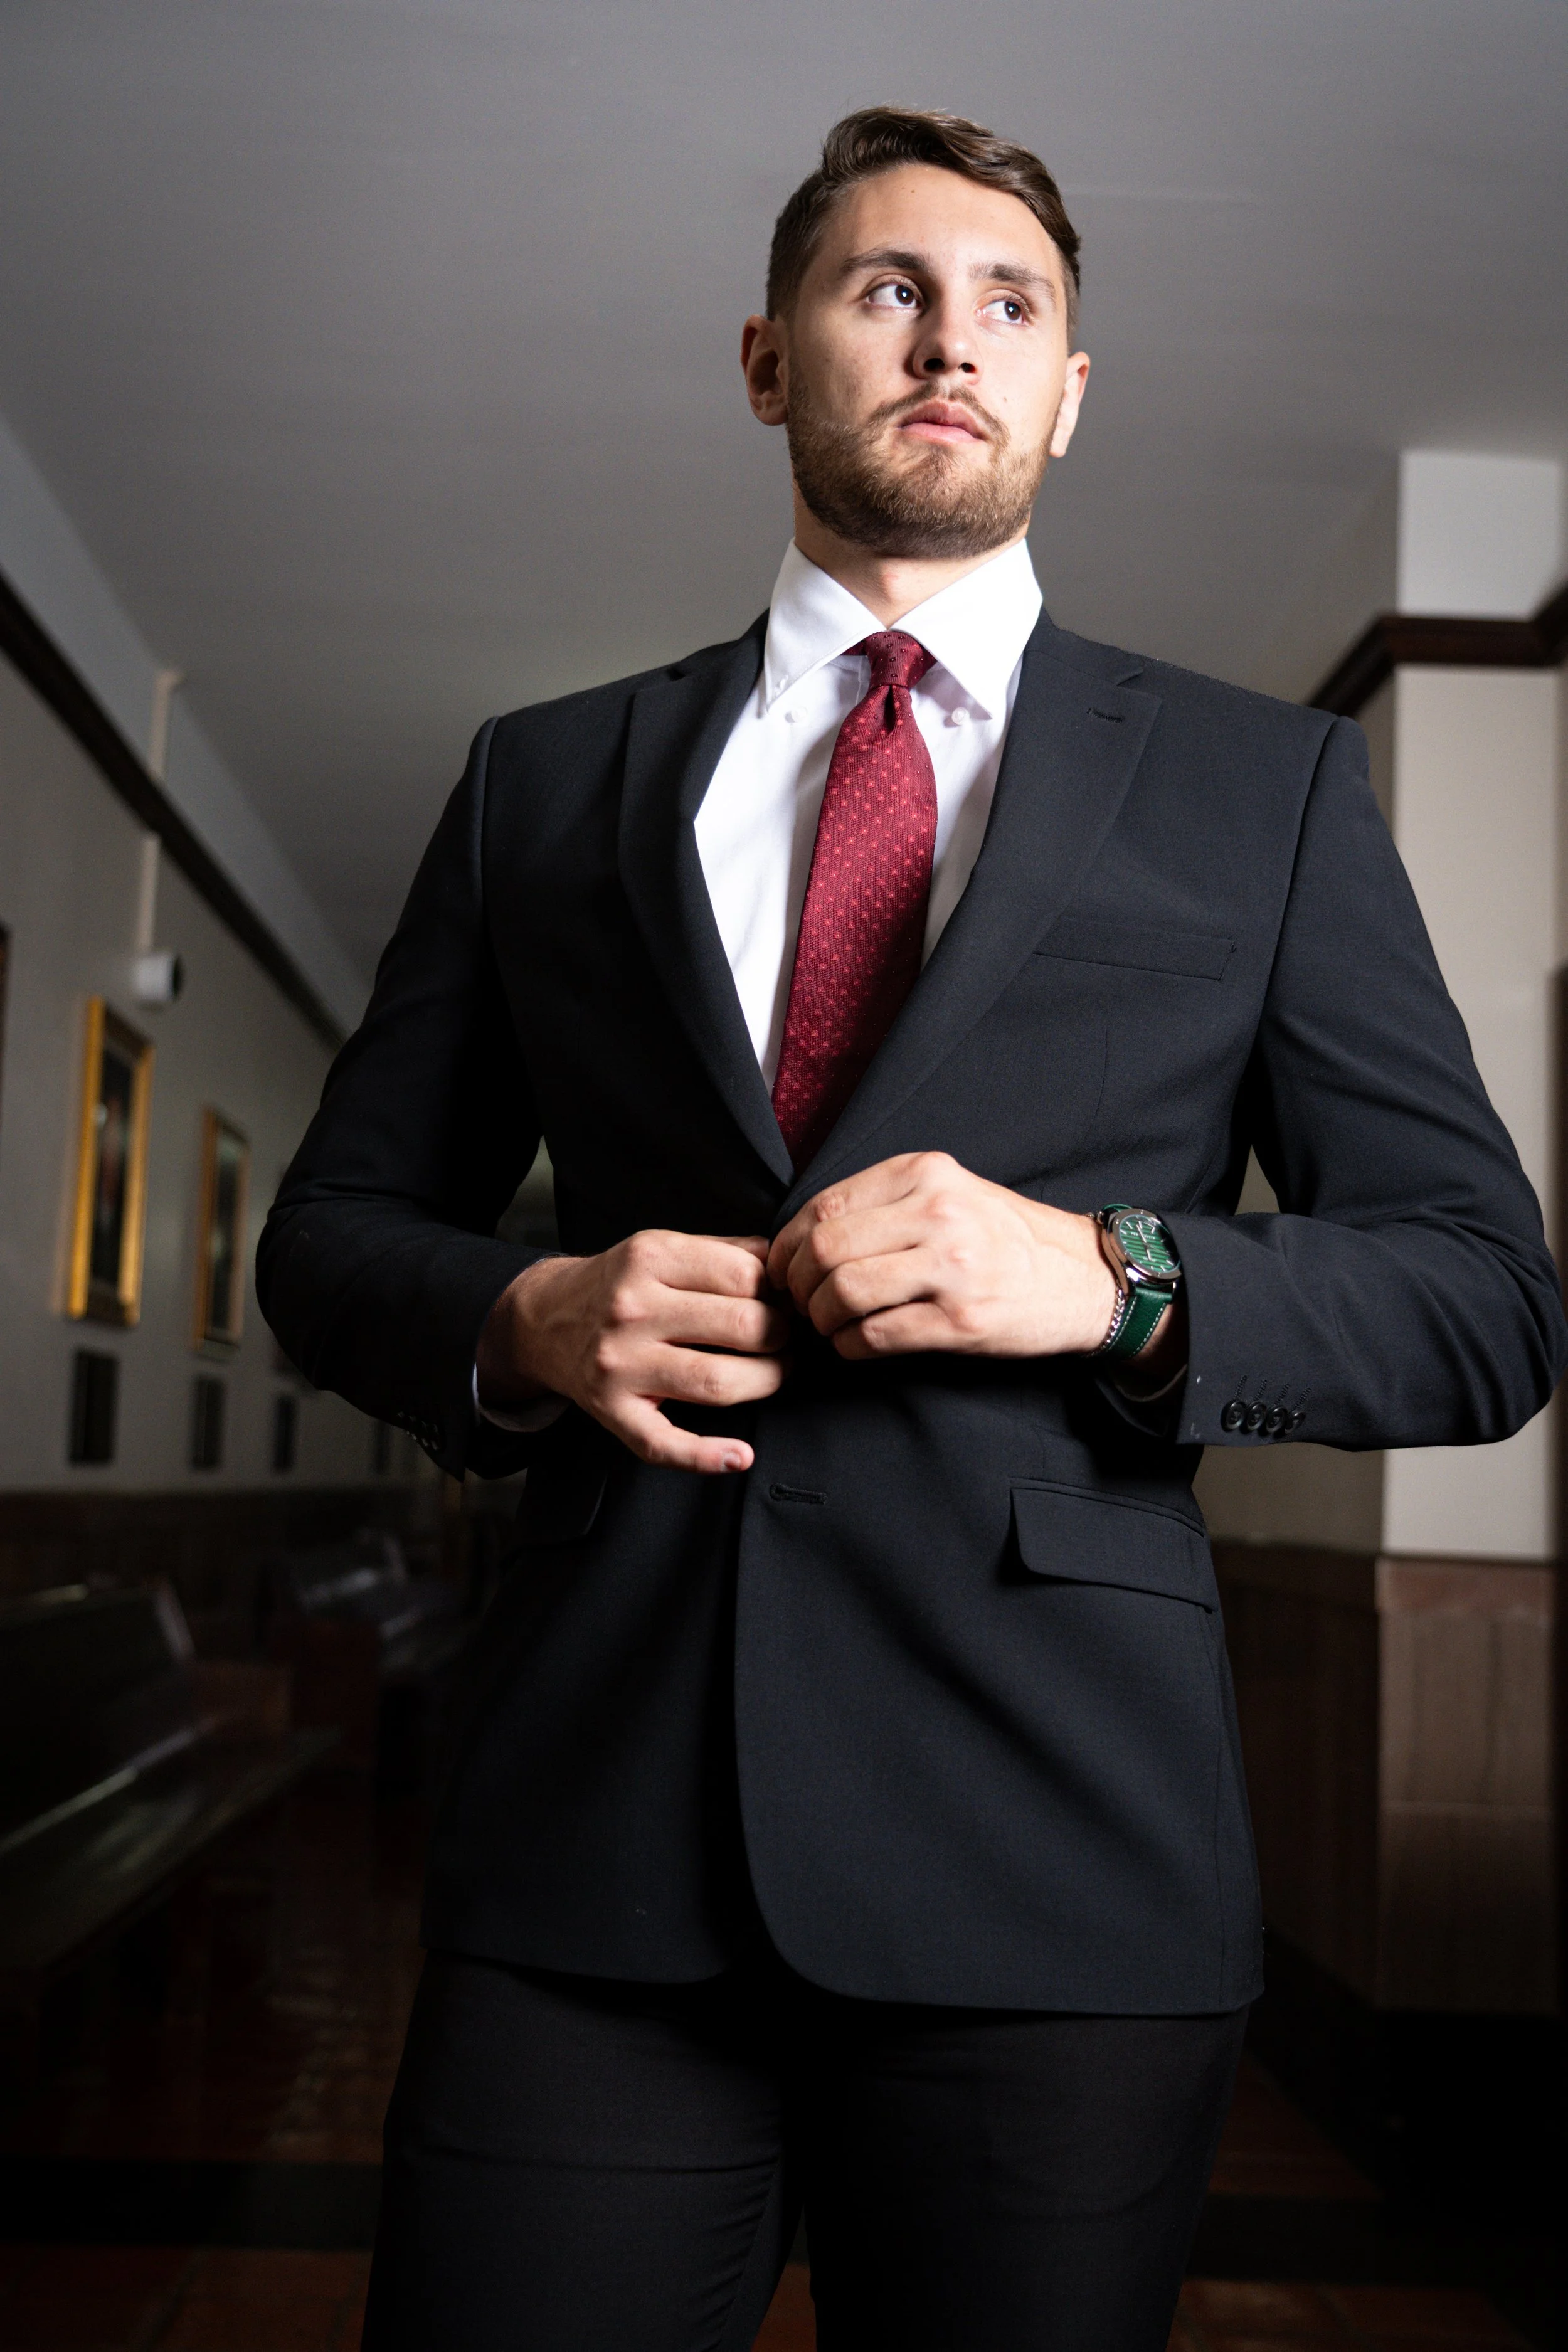
Photo by second shooter, Scott Russomano
We meet graduates on location, wherever your story takes place. For this shoot, we even coordinated with the Judicial Branch to get permission for a few portraits inside the Old Courthouse — a rare and special opportunity that added depth to their collection. We even got a few creative shots using the beautiful staircase.
Looking Ahead
The best part of graduation photography is capturing the excitement of accomplishments completed and paths just beginning. Lauren and Mark have a bright future ahead, both personally and professionally, and it was an honor to document this moment for them.